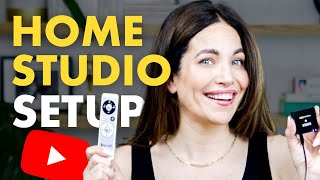
In this solo walkthrough, Alex Cattoni takes viewers through her home recording studio, explaining the gear she uses and why, while offering practical, budget‑friendly advice for anyone wanting to film professional‑looking YouTube videos. She starts by clarifying that her current setup isn’t the only or best option, emphasizing that starting is more important than having perfect equipment. She then details her camera choices (Canon EOS R, affordable alternatives like the Canon Rebel, Sony A6000, or even an iPhone), audio setup (Rode Wireless Go wireless mic, placement tips, and the importance of a carpeted room or sound panels), lighting (natural light, softbox kits, ring light for background, and a DIY diffuser hack), teleprompter (Parrot Text kit with smartphone app, battery tips), and background considerations (solid wall, avoid clutter and mirrors). Alex also shares workflow hacks such as marking tripod and standing positions with tape for consistency, using landscape mode for YouTube, and preparing scripts/outlines. Throughout, she encourages viewers to grab a free equipment guide linked in the description. The video ends with a call‑to‑action to subscribe, watch related content, and consider her “five things to do before publishing your first video” series.
Chapters
Want to see behind the scenes of exactly how I film my YouTube videos? I'm going to take you on a tour of my office, AKA my recording studio. We're going to talk about all my favorite equipment. I'll give you my best tips to help you create your own videos at home. And I even put together a free equipment guide for those of you who stay till the end. So keep watching. Hey. Hey, posse. What's up? It's Alex. Ever since my last YouTube video where I talked about tips for getting started on YouTube, I have had a ton of people asking me about the links and details to my favorite recording equipment. So in this video, that is exactly what we're gonna talk about. But first, if you're new to the crew, welcome. Right here on my channel, you'll find hundreds of videos covering all things from marketing to copywriting to freelancing to social media, entrepreneurship, and everything in between. So be sure to subscribe below and don't forget to ring that bell to be notified when my next video goes live. All right, so before we get into the list of my favorite equipment, I just want to say something. This is what I'm currently using, but that doesn't mean that what I'm using right now is the best or the only options. I've been doing this for about three going on four years now, and I have changed my equipment many times, and I'm sure I'll continue to change and upgrade as I continue to grow and learn more. I am by no means a tech or AV expert, so please don't take this list as the best of this is just what I use and I found to produce really great results. Also, I don't want you to think that you have to have a setup just like mine in order to get started. I certainly didn't have all these fancy lights and equipment at first. What's more important than having the perfect equipment is just starting. So do not let this hold you back. Now, let's get into my studio setup. So let's first talk about the most important thing, audio and video. So first things first. I use a Canon EOS R to record all of my YouTube content. Now, listen, this is kind of an expensive camera, but if you're just getting started, you do not have to spend this much. In fact, I would highly recommend that you splurge on any fancy equipment until you have some progress and momentum. When I first started my channel, I used a Canon Rebel, which is a very basic and more affordable SLR, but a Sony Alpha A6000 is another less expensive option. And there are plenty of more affordable options out there that still create really, really high quality video. And you can find some really great used ones on Facebook Marketplace. And if you absolutely can't afford a professional camera, no worries. You can honestly get started on your iPhone and then transition to a DSL camera later. And if you are using your phone, here are a couple of tips to get even better. So first, use the camera on the back of your phone. The front camera's quality is not as good on most phones. Next, use a phone tripod like this one to get nice and steady video at eye level. Trust me, you do definitely want a tripod. There's nothing worse than shaky footage or dealing with the frustration of a DIY book stack prop gone wrong. I've been there. So record in landscape mode. This will give you footage that looks really good on YouTube. And this is really key. Make sure you step back a little bit so you have some space. This will make it a lot easier so you can crop for vertical short form video. If you're standing too close to the camera, you won't be able to crop it and it just won't look that great. You'll have like huge face in the frame. All right, next up, because no one likes to watch a video where the audio doesn't match up with the speaker. We've all seen videos like this and I am guilty of doing that in the beginning. I take extra precaution to make sure my audio and video are super, super synced. And for this, I connect my SLR camera to the rode wireless go to single channel wireless microphone system. So. So it comes with a transmitter which is plugged into my camera over there and a microphone. Okay, now here's how you set it all up. So again, you want to mount your camera on a tripod. Honestly, any tripod will work as long as it's stable and level. And again, adjust the height of your camera so that it's perfectly eye level to where you'll be sitting or standing. I'm standing right now. And here is a pro tip for you. Once you've got your tripod set up, use masking tape to mark the position of it on the floor so that next time you know exactly where to put it. And then you also want to mark the floor where you sit or stand X and marks the spot. This will make sure that every single one of your videos has a consistent frame and you won't be spending a ton of time trying to recreate the setup every single Time now. One last note on audio. My studio is carpeted, which means I don't have a lot of echo in here, which is really, really great. But if you're in a recording studio that has a lot of hard surfaces like tile or hardwood floors or windows, that I would definitely suggest adding some sound panels to absorb and diffuse the echo. Okay, so now that we have the AV all figured out, it's time to talk about the most important element of great video lighting. Okay, so I'm going to share my lighting setup with you. I truly believe that having great lighting can make or break your video quality. And there are so many affordable options out there that you really should not skip this step. So in my studio, I'm lucky enough to face a large window where I get a lot of natural light. Natural lighting is always better than going artificial because one, it's free. So if you can film in front of a window, do it. But I also use two additional softbox lights that are right here that are angled towards me. And if I'm filming at night, I use an additional light to light the background wall behind me. I just use a ring light. Really, really simple. Now if you don't have a lot of natural lighting, I'd recommend maybe getting two of these lighting kits to really create that nice and even lighting. And the backlighting. Now, while natural lighting is great, it can also be pretty extra and create some harsh shadows. So I like to film in the morning or the evening when the light is the softest, but sometimes you just won't be able to avoid those bright, sunny days. So a hack that you can do is actually hanging a white sheet on over the window. Just use some clips to put it in place, something thin that will diffuse the light and help you avoid overexposure without completely blocking out that light altogether. All right, the next thing in my setup, and this one's really important, is my teleprompter. So I have had so many of you ask me how I remember my YouTube scripts or if I even use a script at all. And the answer is yes, I do use a script, especially for more educational and structured content where I have to make really specific points or stats, and I don't want to make sure I forget or ramble on and on for less structured and more free flowing content. I might not use a word for word script, but I do read off an outline and this just keeps everything tight and helps me stay on track in case I lose my train of thought, which happens a lot. And if you want A video detailing exactly how I write my YouTube scripts, from how I make them compelling to the key elements I include, to how I structure them for format and optimize them for readability. Then comment below and let me know. So, yes, I do use scripts most of the time, and I do read them off a teleprompter, and I use something called the Parrot Text teleprompter kit. It's a lightweight kit, and it fits onto any SLR camera. So it does require the use of a smartphone with a teleprompter app. And you can just copy and paste your script into the app, adjust the speed, and make sure that the remote control is connected via Bluetooth. So your smartphone actually slides into the teleprompter and then mirrors the script back at you. And you'll probably need to practice a few times because you'll really want to find the speed that matches your normal cadence of speaking. That took me a while to figure out. Oh, and pro tip, order extra batteries for this bad boy, because once the batteries start to to die, the remote control really stops working. And if you have a video to record, that can be really, really frustrating. So having extra batteries will really come in handy. All right, so that is the equipment side of things. Now let's talk a little bit about the studio setup on filming day. So everybody's favorite topic, or at least mine, is the background, right? And I don't know why, but this seems to be the number one thing that holds most people back from starting their YouTube channels, myself included. I hummed and hot over what to put in my background for a very long time. Now we stress over having the perfect background, but honestly, just a solid colored wall is totally fine. You don't have to have a perfectly curated shelving unit with special mood lighting or plants or awards like I do. I had none of this in the beginning. I had motivational quotes in frames that I got from the bookstore down the street. Seriously, no one is thinking about your background as much as you are. So as long as you can avoid a messy, cluttered, or distracting background, you'll be just fine. Oh, and one other thing. You definitely do not want a mirror in your background. I know that sounds a bit weird, but you don't want that awkward reflection of yourself in the video frame. I used to have really reflective glass on the framed quotes that I had behind me, and I realized that I could see my setup in the reflection, so I just took the glass out of the frames and that made it so much better. Okay, so here's a quick diagram of how I set up the studio on recording day. I have the tripod with my teleprompter right there in front of the window with two two box lights on either side of me pointed towards me. Now I'm standing in the middle of the room, right? And if needed I'll have additional lighting lighting the background, either one or two lights pointing at the wall behind me. And in my hand I am holding the remote for the teleprompter. And that's it. I push start, I record, and then I send the video to my team to be edited and published. So I hope you found this helpful. If you want links to all the equipment that I talked about today, you can grab a copy of my free Studio setup guide in the description box below. Below. Happy Content Creating I hope you enjoyed this video. Let me know if you want to see more like this one. Until next time, I'm Alex. Ciao for now. All right guys, if you enjoyed that video, make sure to check out the next one from me right here. And you can click right here to get a free gift. So you're thinking about starting a YouTube channel? Awesome. Well, let me tell you the five things you must definitely do before you publish your first video and the things I wish I knew sooner. Keep watching.