34,835 training images downloaded | Replicating Airbnb's Amenity Detection Part 6
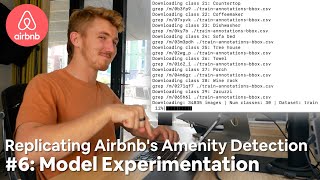
Daniel Bourke downloads 34,835 images across 30 object classes for his Airbnb amenity detection project. After fixing a critical learning-rate bug, he achieves over 50% mean average precision on three classes, then tests seven pre-trained Detectron2 models on a Tesla P100 GPU, logging results to Weights & Biases.
Chapters
If I kick this off, this might take a little while, so might have to time lapse it as it goes. You ready? 3, 2, oh wait, welcome to part 6, downloading all the data and model experimentation. Yeah, that's a good enough title. Let's go. 3, 2, 1. We are getting closer and closer to finishing the current, or my current 42-day/6-week project to replicate Airbnb's amenity detection. In other words, figure out or use machine learning to find things like bed, fridge, bathtub, kitchen table in photos. A lot has happened this week, so let me catch you up. And I've got a little, like, a script here, like a day-by-day playbook of what's sort of going on. So I'm trying a different sort of format. I'll just bounce back and forth off this script probably read it verbatim at some point and then just show things on the screen. So let's start off with day 24 and day 25. I started the week by trying to clean, clean up my preprocessing code because let's be frank, it was a mess. It was slow and making labels took far too long, at least in Google Colab, that is. And so I spent some time researching how to work with CSV files in pure Python instead of Pandas. Which I thought Pandas was a bottleneck. So essentially what happens is the training label that you download, or the training labels file that you download from Open Images, is something like 2 million rows. So like a CSV file with 2 million rows. And if you import it into a Pandas DataFrame, it becomes 2 million rows, which in and of itself is of course not the biggest file or biggest DataFrame going around, but passing that many rows back and forth, just creating a single label file at a time is Not a great idea in terms of data preprocessing. So shout out to the RealPython team for their documentation on working with CSV files in pure Python. I also read about a Pandas plugin called Moden, which essentially parallelizes— I have a real struggle, real hard time saying this— parallelizes. There we go. Put your code in parallel, your Pandas code in parallel, essentially using more processes than just one. And modin helps make your pandas code faster. There we go. That's it. Third time lucky. But in the essence of time, right, because that's, that's what I'm working against. I've got 4, like something like 10, 11, 12 days left of this project. And if I want to fulfill the criteria that I sort of set myself out at the start, I realized I may only need to make the dataset labels one time. So I ended up sticking with what I knew, which was using pandas for preprocessing labels into Detectron2 style format. And remember, Detectron2 takes an image or takes a list of dictionaries as input. So I have a function called get_image_dict, and I know what you just thought of. It's like, wow, Daniel made a function called get dick pics. No, that's dicts as in dictionaries. D-I-C-T-S. Which takes an image folder, an annotations file such as training or validation labels depending on which, what are your target images, are they training or validation images, and then a list of target classes which in my case are the Airbnb subset of target classes that they used. And it turns all of these, like it combines all of these three into Detectron2 style labeling and then automatically saves once, because remember Detectron2 is just a list of dictionaries. So it saves that list of dictionaries to a JSON file in the relative image folder, or in the relevant image folder. Yeah, so if it's a validation file of images, it'll save validation_labels.json to that file. So you can just use that JSON file later on, saving you from having to preprocess the labels every time. Now, since I had the preprocessing functions working with a single class, which was CoffeeMaker, I decided to test them with more than one class. And instead of downloading the whole dataset, which is something like 600 gigabytes or maybe even more— well, I think it's 500 or 600 gigabytes— I downloaded just an extra class. So this meant I had the— I now had the CoffeeMaker class and the bathtub class, because let's be real, who doesn't like coffee and who doesn't like taking long baths? So after ironing out a few bugs of the preprocessing code, namely making sure the labels were only created for the classes that were in my target classes list, because some images that you download from Open Images have more than one object in them, but I was only focused on the same target classes that Airbnb are focused on. I then ran some modeling experiments with the images from the coffee maker and bathtub classes. So now I was just scaling up my model a little bit to run from one class to two classes because my code worked on a single model class. So I wanted to see if it would work for more than one. And for some reason it didn't. I initially thought the way the evaluation metrics were being calculated was off. Since for some reason, even after training a model, my evaluation metrics weren't going up at all. But I was wrong. After much, much, much trial and error— you don't believe how much I actually went through this— I figured out that I forgot to add the scheduler.step in my custom PyTorch training loop. Now, what this meant is that my learning rate never increased. And if you're asking, if you're wondering what's a learning rate, now rather than get into details, I could go on about this for a while. Imagine this: your model is on the top of a hill, and your model's goal to get better is to, to get down to the bottom of the hill. Except the model is blindfolded. Now it doesn't know how to get from the top of the hill down to the bottom of the hill. The optimizer is your friend. Now if you're wondering, because this code here you've got optimizer.step, the optimizer is your friend, could be called Adam, because Adam's a popular optimizer, yelling at you from the bottom of the hill, telling you how to get down the hill. And the loss is the thing you're trying to reduce. The loss is the height of the hill. Remember, the model wants to get down to the bottom of the hill. It wants to reduce the loss. And the learning rate is how big of a step you take each time you move down the hill, or each time the model moves down the hill. So if my model wants to get to the bottom of the hill, but the learning rate, or the size of the step that it's taking to get there, is never getting above zero, in other words, it's going to take no steps at all. So how long is it going to take before it gets to the bottom of the hill? Well, that's a trick question, right? Because it never will. Thus, the model will never learn anything if the learning rate doesn't increase. So after fixing my learning rate issue, surprise, surprise, my model started learning, meaning the evaluation metrics started going up. Now by this stage, I downloaded an extra class for, for good measure, so I had 3 classes running. I had coffee maker, bathtub, treehouse, just to make sure I wasn't fooling myself, right? As I said, you're the easiest person to fool, so you got to make sure you're not fooling yourself. So my first semi-extended experiment, I had 3 classes. So again, just small, small experiments, just slowly building upon slowly testing. And the 1,000-iteration experiment on 3 classes worked well. So I upgraded it to 10,000 iterations, so just steps through the data, and then realized maybe 10,000 steps is overkill after just doing 1,000. So I was like, "Nah, it's a little too much." So I did 3,000 steps instead, and lo and behold, 3,000 somehow turned out to be enough to prove my hypothesis to see if it was working. Because after 3,000 iterations, my model's precision on 3 classes reached over 50, or average precision reached over 50. Now, why is that important? Well, if we recall back to the Airbnb article that the, that this whole project is based on, 50% average precision, which was what my model was achieving on 3 classes after 3,000 iterations, was Airbnb's target metric for their proof of concept to be worth pushing forward. So this is really important at the start of a machine learning project, is to, to set some sort of evaluation goal that you're going to sort of push towards. Now, of course, this can change over time, but it's— in Airbnb's case, they said, okay, for us to continue with this project, we have to be able to achieve at least 50% average precision. Because my model after 3,000 iterations was getting this on 3 classes, it meant We're getting somewhere. So that's exciting, right? A key thing to remember here though is that Airbnb had all of their own internal images and I don't have access to that. So that's one limitation of my model and its current metrics. And I'm not entirely or not 100% sure on how they calculated average precision since there are a few— after doing research on mean average precision, decision. There are a few different ways that, um, that you can figure it out. Long story short, remember, we were getting somewhere, and all of this progress led us to here. Oh baby, what a day! Today is the day we're officially going to download all of the target class images from Open Images to replicate Airbnb's object detection pipeline. And I'm being serious when I mean that, like, that's what I wrote down at the start of today. We've got day 28. Oh baby, what a day. Time to download all the images I need as well as start experimenting with different models. And what I mean by that, I'll talk about later in this video, but we're gonna— at the start of the week, which is— it's week 4 now. I kind of— last week was technically week 4, but with everything that's happening with this virus and whatnot, basically nothing got done last week. So this week is now week 4. And so we're about— it is Thursday, so we're a few days into it. A lot has been done. We'll catch you up in this video. But we're up to this part. We're going to tick off this box: download and convert all images and labels to Detectron 2 style labeling. But before we do that, before we convert the images to Detectron 2 style labeling, we have to download them. I've got functions to create labels, but first I need the images. So let's, let's do that. As a refresher, here's the subset of classes that Airbnb is after. Now this, I got this directly from the article. All I've done is just copied what Airbnb said that their, their target classes were. I've turned this into a list, and then I've just wrote some basic Python code to create this download string. And what you'll see in a second is why I need the classes in this format, because the script I'm using to download them takes the classes that you want, the target classes, as this input. So let's see that in action. I've already tested it with the validation dataset and it worked. We got 859 images from the, the validation dataset. So I'll show you what that command looked like. So here we go, python3 download-oi, so openimages.py dataset validation, and then here's all the classes. So we're basically going to run the exact same code as this. Let me write it out for you. Python3 download oi.py, and we want dataset. This time we want train. Oh, train. And then for classes, we want— I'm just going to copy all of these here. So we'll have toilet, swimming pool, bed, billiard table, sink, fountain, oven, ceiling fan, television, microwave oven, gas stove, refrigerator. I'm not going to read them all out, but they're all there. The 30 that are there. So I'll come here. This is some precision work right now, copying such a long string. Copy that, come back to Terminal, paste it there, and are you ready? If I kick this off, this might take a little while, so might have to time-lapse it as it goes. You ready? 3, 2, oh wait, welcome to part 6, downloading all the data in Model Experimentation. Yeah, that's a good enough title. Let's go. Oh, we're kicking off downloading Class 0 toilet. I've got it to the script to output some verbosity, so we'll see. This could be up to 30,000 images, maybe more, who knows. We'll soon find out. I'm going to fast forward this. And we'll see how many images it is after it's processed all the download commands that it needs to run. We're up to the last class here, I believe Jacuzzi number 29. Remember, it's zero indexed, so 29 is actually 30. Oh, there we go! Downloading 30, almost 35,000 images, so 34,835. Oh, I wonder how long this is going to take. Dataset train. So we've got number of classes is 30. Remember, the reason we're running this script download_oi.py is because Open Images itself has millions of images, so almost 2 million or something like that, of 600 different classes. And we're only focused on the number, the same classes that Airbnb used for for their problem, remember, because we're replicating the article. So here we go. Okay, this might take a little while. 41:30. Hopefully this starts to decrease. I think this is saying 30, 33 hours maybe, or maybe that's 33 minutes. I hope that's 33 minutes. And this might decrease as well. I'm not sure if you can hear, but the fans on my computer are going wild because this script, it's got a subprocess in there, so it uses multiple processors or as many CPUs as your computer can, can handle. That's what it's set up to do by default. So, uh, yeah, I'm gonna probably go take a nap and a walk and read a book while all of these images download. And then I'm going to create the labels and we'll check back in once it's finished. A few download commands and a couple of hours later, I had all of Airbnb's target classes Open Images subset— that was a mouthful— on my local computer. So about 38,000 images or just over between 10 to 12 gigabytes. So realistically, not, not as much as I thought. Remember the open, the entire Open Images dataset is like 600 gigabytes, so I was only working with a 12 gigabyte subset. I figured I would download them, uh, locally so that I can upload them to Google Cloud later. Now, 38,000 images in my case surpasses Airbnb's quoted 32,000 public images but still falls well short of their 75K total images, which included 43,000 internal images. But as I mentioned before, that is one of the big limitations of my project to keep in mind. Uh, that being said, the code is there. So if I did have access to those images, then you— I would need the labels as well, but the code is there so I could plug them into my model and train a model if I had access to Airbnb's internal images, which I don't. But that's all right, we will progress with what we what we do have. Since Colab rocks for GPU processing and not for CPU processing, at least in my experience, I created a local environment and brought down my active Colab notebook, so from Google Cloud, onto my local machine to create the training labels using my preprocessing code on my local machine, which, because my local machine has something like 8 cores and Colab creates like a Linux distro with 2 cores. Might have to correct me if I'm wrong, I'm not entirely sure. But I remember doing some sort of check and at some point it said that Google Colab has 2 cores. Anyway, it doesn't really matter. Well, I found my local computer was much faster than Google Colab at making labels because we were reaching at about 30 labels per second on my machine, and plus I was running a whole bunch of other different things at the same time. So to do 38,000 labels really only took 15 to 20 minutes. But once we've done that, the beautiful thing about the preprocessing function is that it stored the, the list of dictionaries which it created as a JSON file, which I can easily move around later. So I've got that, I've got access to that. It's a few kilobytes, so I can use that really quickly and just import that as a dictionary later on. On day 29, as it turned out, it was my lucky day. Why? Because Google Colab had granted me with a Tesla P100 GPU, a big dog. A big dog GPU. The P100 has like twice the speed of a K80, which is another common GPU that Google Colab offer for free. And a little tidbit is that you can check what GPU you are using with the NVIDIA SMI. I think— I'm not sure what SMI stands for, maybe, um, uh, silent myocardial infraction. Nah, I'm kidding, that's a heart attack. Um, SMI, maybe show me information. NVIDIA, show me information. You can use that little command in Google Colab and it'll show you a little box of information about your GPU. Knowing I had access to this big dog GPU, thank you Google, I decided it was about time to start running some modeling experiments. And here's another important point to remember. I went through the Detectron 2 Model Zoo and picked out which models I wanted to try. Now, I didn't overthink this. This is really important. Don't overthink this. I just read what they wrote. And went, "Yep, that's the kind of model I'd like to use," and ended up with a list of 7 models I'd like to use and saved that in a little dictionary called models_to_try. Now, even before running experiments with these 7 different models, once I picked them out from Model Zoo, I ran another, yet another, yes, you're correct, small experiment with the same model, a single pre-trained model, where I set the random seed to 42, that's 3, Come on, Daniel, far out, 42. The random seed being a way to make the number generated by models deterministic, the numbers generated by models deterministic. In other words, every time you run a model on the same data, the same model with the same random seed, you should, in theory, get the same results. So how did this experiment work? I had one model and I set the random seed to 42 and I ran it twice on a small scale. 3 classes: coffee maker, bathtub, and treehouse, uh, 1,000 iterations each, which meant about 3 minutes of runtime on my P100 Big Dog GPU, and tracking both experiments with Weights and Biases. Now, why did I do this? Well, it was because I wanted to evaluate several different models from the Detectron2 model zoo on my specific problem. I needed to control every variable except for the model because I wanted to see how each model performed differently on the same data. Now, this is where I set the random seed to a certain value and getting the exact same results on the, on the same model running twice. If I did get the same results, that meant if I changed the model and everything else should stay the same, I should be able to get an idea of how each model performs on the same data. Now, if that sounded confusing, just go back and watch it again because it makes sense in my head. Well, the good news is that it worked. That's the takeaway you can have from there. I ran the experiment with random seed equal to 42 and got basically the same results each time. Now I say basically because the Detectron 2 documentation states even setting the seed parameter doesn't guarantee deterministic— fancy word for the same— results, or predictable. You can correct me if you got a better definition of deterministic. And since I'm a cook, not a chemist, close enough was good enough for me. With this being known, it was time to try out several models on on a small scale to see which one performed best. So I wrote the hackiest script of all time to run everything in a Google Colab notebook rather than command line. Your judgment is accepted. And yes, I know it could be improved. If you have any advice, I'd love it. In pseudocode, my experiment went something a little bit like this. Well, it actually went exactly like this. For model in models_to_try, with random seed x, use model, and do 3,000 iterations on classes coffeemaker, bathtub, treehouse, and save the results to Weights and Biases. And so seriously, if you want an idea of the level of hack I used for this, I used a 1 in my training loop instead of an i when I was printing out some verbosity. So that's— if you're a super elite coder, you'll use 1 instead of i. No, I'm joking. Thank God I'm not looking for a job. Anyway, this is where some of the magic happened, right? Because although it's rough to look at, my experiments worked. The P100 ran through each model at about 15 minutes apiece. That's, that's average, right? And since I had linked Weights and Biases, each time a new model was picked from the model zoo I created, it would get downloaded to my Google Colab instance, and all of the training metrics and evaluation results would get logged automatically to Weights and Biases. The only problem I had here was figuring out what to do whilst all of my models were running. So the obvious choice was yoga, right? So I just sat in my bedroom and did, did 20-30 minutes of yoga in between waiting for models to train, went outside and did some pull-ups, got moving. I said, my models are moving, my body should be moving. Deep learning, deep stretches, am I right? I'm here, I'll be here next week, so if you want to stay subscribed, you can. Running through each of the experiments for each model of the 7 models I wanted to try for about 3,000 iterations each took about 2.5 hours to finish on the big dog P100 GPU with all results— this is the important part— all of the results conveniently tracked in Weights and Biases so I can go back and check them later. Now, I hope you're noticing a trend here. This whole project has been a series of small, small, small experiments building up. Now, if you look at it from, from the very first week, if we looked at that article and you go, okay, replicate that article. Well, yeah, okay, could, could seem— since it was so well written, it could seem, okay, this is pretty straightforward to do. But then once you get into it, you start to go, okay, Well, I'm gonna have to actually break this down a little bit and start to figure things out as we go, which is what I've been doing. Getting a model to work with one class, getting a model to work with two classes, getting a model to work with three classes, and then testing several different models. Is my code perfect? Hell no! But it does allow me to do enough to keep moving forward. That's the important part, right? The most important part of this whole video: never let perfection get in the way of of progress. Now with all of this, and now I told you, right, I warned you right at the start that it was a lot. We can now officially tick off, let's come back to week 4. What have we got here? So make preprocessing code faster. Is it faster? I don't think it's, it's faster, but that it'll do for now. So we can just say that it's cleaned up. Make labels savable, importable to JSON. Yes, we can tick that. I might leave this one unticked so we can get back to that later. Export preprocessing functions to a script outside Jupyter Notebooks. I haven't done that. Remember, again, I said my version control in GitHub and Git use needs to get better. I will work on that. But this is the beautiful thing about working on your own projects— you learn where you're weak and where you need to improve. Download and convert all images and labels to Detectron2-style labeling. I have done that. Yes, we can tick that off. Scale up model to work with more than one class. Yes, we can tick that because it works with 3 classes. It'd be interesting to see once I start to train with all 30. Experiment with different— using different pre-trained Detectron2 models. Yes, we can tick that off. And yeah, get GitHub organized. Jesus Christ, this should have been done a while ago. Yeah, I know, I know. Anything, anything you say, I've already— trust me, I've already said worse to me. Phew! What a week! What's next? Well, I know I've got to pick one of the models from my Weights and Biases experiments and scale it up to work with all of the classes, so aka 30, 30 classes, 30,000, 35,000 or so images. And I need to figure off, figure out here, maybe I won't necessarily go for the one that got the best average precision results because that could be a bigger model that takes longer to train. And time is not of the— well, time is of the essence for me. The Airbnb article stated that they used an AWS GPU for 5 days. I don't have 5 days. And they said they used GCP for 3 days. I don't really even have 3 days. So I need to be a bit crafty here with, with how I'm going to pick my model and scale it up. Maybe what I'll do is take one of the best performing models and tune its hyperparameters. Okay, those little knobs like on an oven where you can adjust its settings on 10% of the data, meaning that— meaning all classes and not just the, the 3 that I've been using so far. So 10% of the images from all classes. That makes sense. Will any of this play out? Will my code be version controlled and uploaded to GitHub by the end of next week? Jesus Christ, Daniel, come on. Will my model reach Airbnb's MVP of 50% average precision per class? Class? More importantly, will my upscaled model be a banger? Stay tuned and we will answer all of these questions in next week's episode. In the meantime, keep learning, keep creating, keep dancing. See you soon. Boom!
More from Daniel
Small Language Models (SLMs) Are the Future: Fine-Tuning AI That Runs on Your iPhone

Introducing Sunny - A MedGemma-Powered Skin Health Tracking App (Kaggle Competition Entry)
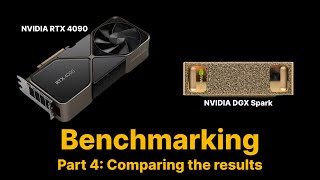
Benchmarking: NVIDIA DGX Spark & NVIDIA RTX 4090 | Part 4 - Comparing the results
Benchmarking: NVIDIA DGX Spark & NVIDIA RTX 4090 | Part 3 - Running LLMs on the RTX 4090
Benchmarking: NVIDIA DGX Spark & NVIDIA RTX 4090 | Part 2 - Formalizing the tests
Benchmarking: NVIDIA DGX Spark & NVIDIA RTX 4090 | Part 1 - Creating a series of tests


Local Multimodal RAG on the NVIDIA DGX Spark | Part 4 - Publishing our demo to Hugging Face


Local Multimodal RAG on the NVIDIA DGX Spark | Part 3 - Putting it all together