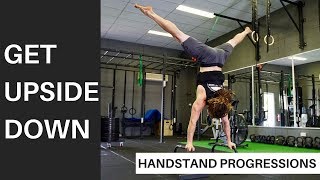
Two coaches break down handstand training from mobility warm-ups through wall-assisted drills. They emphasize boring fundamentals: foam rolling your thoracic spine and wrists, hollow body holds, and short wall holds before you try freestanding. Master these first, they say, and the flashy stuff becomes possible.
Chapters
I can't talk. What are you doing?
Billsy, give them the rundown.
Why you got a barbell on your calf? Is it working? So what's happening here, Billsy?
It's pancaking. Well, it's a term that mobility people use is pancaking your calf, removing all the soft, breaking up all the soft tissue that's in his calf at the moment that's restricting his ankle mobility.
And where'd you learn this? Online. Online? No, where?
Squat University.
What's up guys? We're back at Raw. Today's focus, we're doing, we're gonna practice some handstand progressions. So my boy Jay here was just showing me an awesome exercise to open up, what was it, the top thoracic, you said? Yeah, open up the shoulders, open up the thoracic so you can really lock out when you're holding your body overhead, I guess.
Yeah, so basically just using the roller to just open the spine up. So, you know, starting off with maybe some spinal waves to warm it up, and then you're gonna pop down over onto the roller, getting it just below your shoulder blades.
Take a deep breath in, leaning back, exhaling, Emptying the muscles, full of oxygen, dropping back, letting your arms take over the stretch. Coming back in, deep breathing again, breathing out, and again letting the weight of your arms take over that stretch. You might go for 2 reps and then you might drop down one more.
And drop down one more, you mean drop down a vertebrae? Yeah. So you do a few reps each vertebrae in the spine?
Yeah, so you're gonna really— the important ones you want to do is open up your thoracic, stretch your—
mobilize your triceps so that you can actually get your hands above your head, open your lats up so that they're not restricting and pulling your arms down, and then, uh, Bob's your uncle, you're upside down.
So, Jay, what's Dave doing here?
So he's just, uh, opening the triceps up so that he can get his arms up in line with his ears.
Where are you feeling it, bro? You feeling it through here, like Lats.
Yeah, across the bottom of the tricep.
And actually also in the back here. Yeah, so then again, that's what I'm talking about, that tight thoracic. If you've got a tight thoracic, it's just going to feel like— and so it's all congested in the back of the shoulder. So what you want to do is you'll probably want to open up his triceps, slowly mobilize his thoracic so that that doesn't feel like there's a congestion, traffic jam in the back of his, uh, in the top half of his back.
What's the ideal position when you were just doing it then?
So you want to get your head, head head through the, uh, through your arms.
Hands come into the back of the neck, keeping your elbows in nice and close together so they're not flared out. I'm just going to sit here and just—
and how long would you hold these for?
20, 30 seconds or so, opening up the lats again after the triceps so that, uh, they're not going to pull your triceps down.
So you've got elastic band just attached to a bar And pull it down.
Basically, like, grab it with your left hand, just taking a big step back with your left foot. Lots of tension on the band, letting the band pull you forward, getting your hand in line with your ears. So you're like almost mimicking the handstand position with one arm, opening up the lats. Triceps are already open. So, you know, how long would you hold this for? And again, it's like 20 to 30 seconds. You know, people emphasize too much on like the mobility side of things and they're not actually like focusing on the stability of it. So, you know, chase that mobility, but like don't forget the stability of the movement.
And what's this one, brother?
It's a bit of wrist prep, bro. So yeah, just making sure that all the little muscles around your wrists and your forearms are working and are awake. It's a lot of control. A lot of, uh, the handstand comes from your fingertips to balance. So when you're digging your fingertips in, if you haven't warmed these muscles up a lot It feels like shit.
So, a lot of weight's going on your wrists, so you want to make sure they're nice and warm, nice and ready to go.
Yep, basically. Just make sure nothing's in, like, nothing's pinching. And you really want to make sure that your forearms are working so that you can control the handstand when you're teetering, going back and forth.
And how long will you do this? 20, 30 seconds rotations?
Got a few different movements, so I sort of just like warm it up and I just go for some rotations. It might be like 10 to the left, 10 to the right. I'll flip my hand around, I'll open up my forearms. So I might sit here for, you know, 30 seconds or so. I just want to get in on the side of the wrist, just doing some very light sort of like press-ups almost. Yeah, they're like press-ups. So what we're doing is just strengthening up the side of the wrist too. I found, uh, broken my wrist a few times boxing, so it's pretty jacked up and pretty fucked. I do that and I find that that just really helps the pain, keep the pain at bay.
So now we got, we got the lats, the shoulders, the thoracic, and now the wrists. We're warming up. Yep.
And then the last one would just be like your finger push-ups, so digging the tips into the ground. Just the tip.
Just the tip. Just the tip.
And then you go for 10 or so finger push-ups, go for 2 or 3 rounds, and Bob's your uncle.
Look real good, man. You're famous.
Well, what we gonna do, boys?
Gonna do walk-ins.
Get your chest to the wall. Make sure you don't compensate and arch your back to get your chest to the wall. So keeping yourself in that hollow position.
So this is the first handstand movement we're practicing. Like all the others were sort of warm-ups, build up to this.
Yep. Yeah, so you just want to get yourself, uh, used to being upside down, finding your range of motion that you can with your shoulders.
So, you know, you might start here, creep yourself close to the wall as you can. So what you want to do is make sure everything's nice and straight. What you don't want to do is get here and arch your back and try and get yourself to the wall. You want to keep your body nice and tucked and then come back down, come down to push-up position, and then creep it.
Zama creep.
Keeping it tight. So you want to do that, and then after that you're going to go for like a a little like reverse hollow. So getting your feet on the wall and just getting yourself in that position. So tucking your bum, tucking your ribs.
So you've got your feet, feet against the wall and you just want to hold, hold yourself here in almost like a plank position but with your hands out front.
Yep, similar position to like your hollow hold, keeping your ribs tucked.
So basically teaching you to tighten your core, not use your back when you're in that handstand position.
How long would you expect someone to hold this for? Like if we can set to this 5 seconds, which is just like as you can. Yeah, yeah, just go as long as you can before actually doing a freestand handstand. So this is, this is like the step before doing it without a wall.
Yeah, well, there's a few different steps then, you know. So you might do kick-ups into the heel, like you might do heel kick-ups afterwards, so you practice actually like how much power to give to get your feet up into the wall without kicking over onto your back.
And after a few years of nailing the basics, you can attempt something like this. So we're just wrapping it up. We did today's workout focused on handstands, and we started off with a few progression exercises and then practiced the handstand movement against the wall. So we did the one with the band, and then we did the elbows against the bar.
Okay, yeah, right. Yeah, so we sort of like open your thoracic up with the roller, then we opened up our triceps on the bar with our over-the-head stretch, open up the lats with the band, then we did a bit of wrist prep. And then we stacked the bones and jumped up on the wall. So Daniel today was just doing nose to walls. It's probably one of the more basic sort of movements to get yourself up and comfortable upside down, stacking the bones on top of each other.
Uh, then I got some work to do. My chest is coming too forward, right?
Yeah, tight, tight thoracic. So he's overarching his back and pushing his chest forward to try and get his head through the window.
So I need to practice the nose to wall a lot more, as well as the hollow holds. So what were you saying before? You said something really good about the Do the boring exercises first so you can do the cool exercises.
Yes, like the great Ben Murphy says, do the cool shit now, do the boring shit now so you can do the cool shit later.