End-to-End (small) Vision Language Model Fine-tuning Tutorial | On DGX Spark
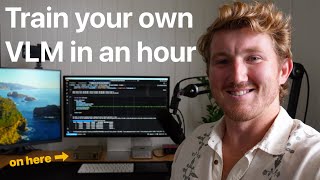
Daniel Bourke fine-tunes SmallVLM-2-500M on a custom Food-Extract-1K dataset of 1,500 food images using DGX Spark. He walks through freezing the vision encoder, training with TRL Trainer at learning rate 1e-4, uploading to Hugging Face Hub, and building a Gradio demo to compare outputs against the base model.
Chapters
Ladies and gentlemen, welcome to the Machine Learning Cooking Show. In today's episode, we are going to fine-tune a small vision language model, or VLM, or MLLM, multimodal language model, multiple modalities, vision and language, locally, specifically on the NVIDIA DGX Spark. You can't see it from your angle, but I do have a, a beautiful little gold box here. I'm going to do all the training on this machine here. And so what we're going to do on the Machine Learning Cooking Show is step by step. If you want to skip to the code, jump down to the timestamps. But this is going to be a brief overview using Keynote, and then we'll get through a walkthrough of the code. And by the way, this is a quick version, so I'm going to go relatively quickly through all the code here. If you want to go through a full walkthrough, I did code this live throughout this week. I'll leave links to those and links to everything else that you need in the description. But let's discuss what we're going to do. We'll first talk about what a VLM is. We'll download a model from Hugging Face, specifically SmallVLM2-500M. Now, I classify a small vision language model as a model that is under 1 billion parameters. These are the type of models that are specifically designed to try and run on edge devices. Yes, you can run larger models on edge devices such as Gemma 3N at 5 billion parameters. However, I'm going to leave the small classification to those models that are under 1 billion parameters, and that may change in the future as hardware gets better and better. We're also going to download a dataset because we can't fine-tune a model without a specific dataset, right? That's going to be Food Extract 1K Vision. I also have a livestream of how I made that dataset if you want a step-by-step, but we'll also see that shortly. We're then going to fine-tune the model using TRL, Transformers Reinforcement Learning, in a supervised fine-tuning way. We'll upload our fine-tuned model to Hugging Face so that we can share it and other people can use it. We'll create a demo for people to interact with because we as programmers, we love to write code and interact with models with code. But a lot of people out there love to just drag an image into our demo and then try it out. It's one of my favorite workflows is data— or sorry, data model demo. And then we're going to discuss extensions to make the model better. So what is a VLM? Without getting into too much depth, I'm going to leave two blog posts here. And there are also some papers in there that you could read if you want to learn more about it. But this is the structure of a VLM and even the structure of the VLM we're going to work on today. You take some images and you take some text and you have a projector which combines the image and text input, and then you have a text decoder. Decoder is what produces those tokens, uh, one by one. And so this is where a lot of modern LLMs are going. They, they have a vision component, a language component, even an audio component, and some now are even doing video components as well. And so you're just putting all the data into one big model, but a lot of the time there'll be a specific image encoder. So in our case, we're going to use SigLIP2. Well, at least that's what SmallVLM 2 uses as the image encoder that reads the images. Then the text gets turned into text embeddings. Then we have a projection layer which merges those two into the same embedding space, and that goes to the text decoder, which is an LLM, in our case SmallLM-2. And then we get our answer. But we'll see this in practice later on. Now, why fine-tune your own model? Number one, of course, is ownership. Own the model. It can run on your own hardware. The data stays local and private. Again, everything that I'm running in this video is going to be, uh, within this room here. It's running on the NVIDIA DGX Spark that's on my desk. It's simple. If your task is simple enough, you have a repetitive task that you want to do over and over again, you can just use a small language model. You don't need the biggest model via the API. Of course, get started via, uh, an API. But if you find that you're doing a repetitive task, you might find that you want to train your own model. Or if you're a business and you need to keep your data private, well then you definitely probably want to look into training your own model for a repetitive use case. Infinite inference. So because we don't need any API calls, this model can be run offline. We could turn the internet off and run it on a phone, for example, in the field. I just had a project with a client where I needed to train a model that had to run computer vision I used an object detection model, not a VLM, but it needed to run in a setting with no internet connection. So that's where infinite inference comes in. You don't need API calls. Batch mode for scale. So you can run this model in batch mode to get faster inference than single API calls. Yes, you can do batch with APIs. However, this of course still requires API usage, which in turn usually costs dollars. And what would you use batch mode for scale? Say we have a specific VLM that's designed to extract, extract structured data, which is what we're going to focus on doing today. We could run that over a large image dataset to extract target images that we're looking for. So filtering a large dataset is one of the best use cases for this. Number 5, make base models much better. So why fine-tune your own model? Oftentimes when a base model gets published, and I'm using the term base model or pre-trained model, they can be used interchangeably. When a model gets published, it usually works fairly well on different benchmarks. But I want to introduce you to the beautiful power of fine-tuning, is oftentimes if a model performs okay on benchmarks, that's a good sign that if you feed it your own custom data, it will definitely improve on your own custom data. So that's something to keep in mind. And here's a, a note. This is a mindset I'd like you to get into for LLMs and VLMs. They are tokens in, where a token is a numerical representation of data, whether that data be text, images, video, audio, you name it. It gets represented as a token. How you tokenize it will of course depend on the model you're using. Luckily with Hugging Face, all the tokenizers load in, but you just need to think data, turns into tokens, tokens and numbers. Computers like to understand numbers and recognize patterns in numbers and then tokens out. So we have our tokens in, in our case is going to be images of food and not food. And we'll see this later on. And then tokens out, which in our case is going to be structured data. So if you have this idea of tokens in, tokens out for LLMs and VLMs, you can create your own specialist model by thinking of your own datasets in a format of tokens in, tokens out. What tokens do you have now? What tokens would you like out? So specific use case, Nutrify. This is an app that my brother and I, uh, build. It's live on the App Store. It's not a fake app, it's a product in production, nutrify.app. So I take a photo of my lunch that I had the other day. Nutrify is designed to recognize whole foods. We don't do barcodes, we just do images. So that got sent off to Gemini, and as you can see there Right. So it took a few seconds to load because that's going from an image to Gemini, which is an API, and then taking a photo. There we go. So it produces JSON and then we get food title: sardines with pecans, dates, and pickles, which is absolutely correct. Sardines, pecans, pickles, dates. I just want to show you, this is a vision language model, right? So on the backend of Nutrifyr, we have image to Gemini and text to Gemini, and then Gemini outputs this. One of my goals for the year is to be able to replicate this workflow with an on-device model. So we actually don't need an API call. This can run locally on device. And so the model we're going to train in this small video, small tutorial, is the first baby version of that. So that's a specific use case. If you want to check out Nutrify for tracking your whole food intake, go to Nutrify.app. Here's another example use case of We take a photo of an ingredients box or ingredients package. And this is Gemma 3N, which is a 5 billion parameter model. This is using Google's AI Edge Gallery. This is running directly on device. I forgot to turn my Wi-Fi off, but this is an example of a VLM running on device. But as you see, the outputs aren't really that perfect. Now, of course, we could probably upgrade this with prompting, But we could also fine-tune— I'll save this for a future video— Gemma3n because it's quite a large, um, VLM in terms of hardware requirements. We might save that for a video where we focus on LoRA/QLoRA, but that's for another topic. If you'd like to see that, leave a comment below. And so we could fine-tune it to specifically extract the ingredients that we want rather than all of this extra information such as the address. Now, the beautiful thing about this is that it was quite quick, right? And we also got to see it happening live. So as a user, that's a great experience. And again, as I said, this is running on device, so I could turn my Wi-Fi off or be in a supermarket with low internet connection and that would still work. So here's another specific use case. If I was running a business called Machine Learning and Muscle, right? We're making all kinds of gains with both our muscles and models. And that was cringe. But anyway, here's the project details we had. There's my consulting services rate total. And then what if we were a business and we get like 1,000 of these invoices a day or emails? We could extract to JSON. So this is what I mean by structured data. This is an image. This is the structure we want. So what would this look like? Of course it would fill this out. And now we could put this into a database that we could easily access, such as an Excel spreadsheet or a Pandas DataFrame or something like that. And in fact, let's try this out. Hey, so if we go to Gemini, let's upload our invoice test images. I just want to show you if we get the invoice, that this is a please extract the invoice details to JSON. Now I'm not— I'm going to use a fast model, which is Gemini-3 Flash. I'm not giving it a structure because I just want this to be quick. We could put this as quick. There we go. Look at that. That's basically exactly what we wanted right now. This is using Gemini, but if we had confidential information that couldn't go to a Gemini model, this is where we could create our own custom VLMs for doing structured data extraction from images. So there's the image, there's the structured data. So if we go back to the keynote, Let's keep going. So here's the ingredients we're going to be cooking with. We have a base model, which is SmallVLM-2 500M, Video Instruct. This is one of the smallest VLMs that you'll find available on Hugging Face. There is an even smaller version. And in fact, that could be an extension for you is to see if this workflow could be used with that. We have a paper that we're going to be drawing information from. And this is the beautiful, beautiful thing about modern machine learning and AI is that all of the latest and greatest stuff often gets published to research. And then, I mean, look at this, this was published March, nearly a year ago, right? But it took a while to trickle down into, like coding libraries and whatnot. And a lot of the innovations around small docling is what we're going to sort of see in practice firsthand in the code coming up. And that's putting together a dataset in a format that you'd like, that's where a lot of the effort goes into. And speaking of datasets, we have a dataset which I've created from scratch, which is Food Extract 1K Vision, and we'll have a look at that shortly. So, oh, actually, let's look at it now while we're on the topic of datasets. So this is our dataset. We have only 1,500 samples, which is quite small in comparison. The small doclang paper— here we go— which fine-tuned, uh, 256 mil There we go. SmallDocling, uh, fine-tune small VLM-256 has millions of samples. So if we go down, they have a dataset spread. Yeah, there we go. So this is how many samples they used in their dataset. So I would say that's about 20 million or so without actually totaling them up. We could pass this to Gemini as a multimodal model and say total up the number of samples. Okay, so they're using way more than us, but we're going to start small with only 1,500 samples. And more specifically, ours are 1,000 images of food from Food 101 and 500 images of not food because we want to train our model. These are called hard negatives in the business, right? We want to train our model to be able to not only detect food and food types, but also, hey, if someone uploads a photo of their computer, we don't want it to be outputting information about what food is there. And so the labels, I were generated— sorry, I generated them synthetically by prompting Quen 3 VL-8B Instruct. So we are essentially distilling a larger model an 8B parameter model, 8 billion parameter model into a 500 million parameter model. And what's that reduction of about 16x? So quite a, quite a large reduction. And the goal here is to get structured data out like this. So if you remember the Nutrify video that we showed before, this is what we could do. Image title, food items, and then we map these to a database. Or we just run this model at scale over a large image database to extract the food images. So let's look at a single sample. So if we go to here, we got a delicious— is that a frozen yogurt? So it's ice cream and a macaron. And this is the JSON output that we're going to get our model to predict. So given this image, we want to fine-tune our model to predict this. And remember, what did I say before? LLMs and VLMs are tokens in, tokens out. So our image is going to get tokenized, turned into a token format, and this is going to get— this is what, uh, sorry, our model is going to predict this output label JSON as tokens. And ideally it's going to be in this exact format so we can easily just load this into some sort of database. And so there's some metadata here about this. I'll let you explore this dataset. It's, uh, available on Hugging Face datasets. I've also got a livestream of how I created this, but if you want to see more dataset creation in the future, please let me know. So we've got a base model, a paper that we're going to follow some instructions from, and a dataset. Tools: we have the TRL library. That's what we're going to be mostly using, which is of course backed by Hugging Face Transformers. I'm going to be running all of this live on an NVIDIA DGX Spark. But you could also run this on Google Colab because we're using quite a small model. You can use, uh, Google Colab. And in fact, the notebook we're going to be working on, the link will be below, has a big button here that if you want to open it in Colab, you can do that there and run this along. So, but as I said, I'm going to be using the NVIDIA DGX Spark. This is my setup right here. That's where I'm coding. This is where all that compute's going to run. And this is my Mac Mini. I'm running code on the Mac Mini or writing code, sorry, and then running it via SSH on the DGX Spark because we get the CUDA ecosystem on, on this. And it's just, yeah, it's a beautiful little machine. So let's discuss dataset format. Really important thing when working with any model is having a dataset. But without going into too much depth, for a VLM, vision language model, you need vision components and text components, language components. So in essence, our dataset is just going to be an image and text, as in we'll feed it a prompt saying extract XYZ from this image. So that's it. Image and text pairs. Nice and simple, right? If you want to read more about that or how to use— create your own datasets, I've got a link here in the notebook for the TRL Vision Datasets format. But this is essentially what you'll see, right? If you want to see how I created the dataset, I used the Hugging Face datasets image dataset format. And then we've got a, a live stream here where I went through and basically built this dataset from scratch. You can see it over here and there. I've just highlighted a little point where we've uploaded it to the Hugging Face hub, and that's exactly what we just saw before. So where can you get a model? You can get a model at one of my favorite— basically my home page huggingface.co/models. So if we go to the front page and if we go to models, and then another way of saying VLM is image text-to-text. So these are all the recent ones. You'll notice the number here is number of billion parameters, or sometimes it'll have million. Again, all of these are quite— except for this one, it's about a billion. My definition of small is under 1 billion. So for example, Google just released MedGemma 1.54B, and that— what's the size of this? Uh, that's close to, let's say, 9 gigabytes, right, to run. You could get it smaller with quantization, but this is designed to extract medical information from medical images. We want to go even smaller, but that's just where you find models. And then this is our task. We have structured data extraction from natural images. This is called food extract vision. We have a food 101 image. The ideal output here will be JSON. We want our model to output exactly this. But I want you to just think in your head, this, this input here, much like our LLM video, can be any image and this output here can be any structure, right? You might want to not— with a small model, you might want to not output, I guess, something that's 20 times as long as this because it might not work as well, but small duckling actually works pretty well and that can output up to 3 pages of text. So hey, give it a shot, why not? But the principle here is we are just having image and text pairs. You might be thinking, Daniel, can you just train a classifier onto this to classify, uh, food and not food images? And you'll be exactly right. We have actually done that in Nutrify. That's what runs live over the camera. It runs at about 300 FPS. It's a fast model. But the beauty of VLMs or LLMs in general is they have the unbounded output because they have the decoder output. You can output any tokens you want as long as you've trained the model to output that format of tokens. So we can get not only classification, but a title and food items and drink items in one shot. And so thank you for Tron Lee for this beautiful photo of Switzerland on Unsplash. And where could we use this model? We could use this model to filter a large dataset of images for food items and drink items such as DataComp-1B. That's 1 billion images, uh, on Hugging Face, or on device as a food drink extraction model. So remember the goal of with Nutrify app, uh, to replace the Gemini dependency with on-device models. So our final outputs of what we're gonna finish up with this tutorial, if you go through the end-to-end, you will have a Food Extract Vision Small VLM 2 model fine-tuned, and you will have a demo, publicly shareable demo, that you can both access right now if you'd like to as well. So without any further ado, let me just show you the demo— or the, sorry, the fine-tuned model. There we go, that's on my Hugging Face profile. And here is the demo. No spoilers, but I'll show you how it works. So if everything goes to plan, the original model— now it takes a few seconds to load because we are running on a free GPU here. Actually, I might have to refresh this. Sorry, I think I rebuilt it. Okay, there we go. We try the demo. There we go. Okay, so the original model, not fine-tuned. We have this input prompt to tell it to extract classify the given image into food or not food, right? We give it this input prompt and the model just outputs this, but our fine-tuned model knows that it's not food, so it gives it a 0. And then we have the fries, all right? This is what I cooked for dinner the other night with some beef tallow on there. Beautiful. So the original model outputs that, so an empty list, not what we want. And then we have the fine-tuned model which has is_food, image_title, french_fries. So very— quite a simple use case, but very useful for my particular task, which is getting structured information from food images. So as I said, if you want the notebook— oh, I haven't said this part yet— you can go to learnhuggingface.com. All the code and write-up will be available there. So we've got that in a book form. You can go through it, scroll through it nice and just read all the information that we have there. I've linked a bunch more resources as well as some shoutouts. So there's some great resources. Where do we have it here? Oh yeah. So there's some great docs on the Hugging Face website. There's also a Google Docs example of fine-tuning a vision model for Gemma 3N. There's a blog post on LoRA, but that's for a future video if you want to see that. Um, please let me know. Now let's get started. The code on GitHub, if you want to run that there, they've got links to all the live streams. But I'm going to now jump in locally to VS Code, and this is just the notebook. I'm going to restart that. I've just got this running on my hardware. Let me just show you this. NVIDIA SMI. This is NVIDIA GB10, Grace Blackwell 10, which is what the DGX Spark is running here. So let's get started. We'll run some code. We have some import dependencies. We actually don't need bits and bytes for this because we're not using LoRa, but in a future one when we train a larger VLM or a larger LLM, we'll definitely be using LoRA, so which is, uh, low-rank adaptation. So let's run this. We have CUDA, we're going to load our dataset, and we're following the motto here of data model demo, data model demo. So if we have a look at one of our example samples from the dataset, we get some fields here. I'm going to zoom quite far in so that way you can see what's going on. Image ID. This is all metadata here. The main things we care about here is the image and the output label JSON. So we want to give our model this image, our base model, and we want to fine-tune it to produce this output. And this output has been produced by Quen3 VL8B as a synthetic data labeler. I trained that— or not trained that, sorry, I produced those labels on the RTX 4090. for another project previously, and I've repurposed them for, this VLM fine-tuning. And so we get some image and text pairs. Let's have a look at an example. Might zoom out by one. So this is our example desired output: is food 1, so 1 or 0 for food or not food. Image title, a simple food, uh, image title, that is. And then we have food items and there's no visible drink items. Again, these are all produced by Quen 3 VL8B. If we wanted to turn this into a production system, we'd probably definitely create our own hand-labeled dataset of about 1,000 images, and then we can test it on those hand-labeled images. So we have some toast, some dipping sauce, herb garnish, and cheese wedges. Okay, now format data for use with a VLM. As I said, there is, uh, some docs Let's go. TRL Vision dataset. This is the format that we need. Vision dataset. There we go. So we need it in something like this content as a message. And so they give an example dataset here, but I'm just going to show you what ours looks like. We're going to give it a system message. So you are an expert food and drink image extractor. In a future video, I would like to train it without these two prompts. So we just go from image to output. But for now, we're using some input prompts as well. So you are an expert food and drink image extractor. You provide structured data to visual inputs, classifying them as edible food or drink or not, as well as titling the image with a simple food drink related caption. Finally, you extract any and all visible food or drink items to list. And then we have a user prompt. So the system prompt is basically getting the model ready. The user prompt is what we would type into, say, a Gemini or ChatGPT interface. So classify the given input image into food or not. And if edible food or drinks items are present, extract those to a list. If no food or drink items are visible, return empty lists. So I don't— if there's no food, I just want empty lists. Only return valid JSON in the following form. And then we've got our JSON structure and then we give it some information about what we would like there. So this is just the code version of that. And then here's where we format our data. So this is just going to take a sample in from our dataset. If we look up here, right, one of these rows, okay, because this contains all the information that we need here. This is just going to take in one of those samples and turn it into a dictionary with the messages key. And then inside the messages, we're going to have our first message there, which is the role of system, system message, which is going to be that prompt up there. And then we're going to have the role of user, which is going to be— this is our image and text pair. We have an image and then we have our text. So there's our text, right? And the image, of course, is— if we go to our example sample— is in the image field. So if you view there, so right now it's in PIL format, so Python Image Library. And then if we scroll back down, we have one final message and that is the model. So this is what our ideal model output would be. Notice that it's an assistant. We've got user and system. We want to train our model to predict this output here. So the sample output label JSON. So given this input, we want our model to predict this output. Now, what would that be in terms of machine learning speak? If you don't know, that's okay. That is a supervised fine-tuning problem. What I mean by that is that this is the ideal output and this is the input. In a supervised fine-tuning, so SFT problem, we give our model examples of inputs and outputs and then it figures out the patterns to bridge them together. So this is our example ideal output. This is our example ideal input. And our model is going to figure out the patterns to bridge those together. We don't tell it how to do it. We just go, hey, here's my inputs, here's my ideal outputs. You predict what's between those two. So if we format our sample into messages format, we get a little bit of a convoluted structure here. But the good news is Hugging Face Transformers and TRL handles this pretty well behind the scenes. And there may be slightly different formats for different models, but this is pretty universal for VLMs with Transformers, is the image and text pairs. Now a little note, I tried map. So usually you can do dataset.map, um, the format_data function that we have up here, this helper function. But for some reason that would get stuck. Now if anyone knows why that might be or you have a fix, please let me know. I'd love to hear. We're going to create a training and validation split. So this is the 80/20 rule. Incent— essentially, we're going to use 80% split for training, so our model is going to use those to train, and then 20% for validation or testing. Our model won't see those during training. That way, when we evaluate our model on the validation dataset, we can get a good idea of how it's performing on unseen data, because that's our ideal use case, right? There we go. Oh, excuse me. Where do we go? Oh, dataset preprocess. I forgot to run this one, didn't I? Getting too excited here. Okay. Training validation split. Beautiful. So here's an example from each. Now these are pretty convoluted because for me, that's personally a little bit hard to read. I could do it if I stepped through it. I also know what the dataset is, but if you want to read through those, there's a bit of a better formatted version on the book version of the course. So if we go load dataset, if we look there, you can start to see the output format there. So let's jump back into the code. Up next, we're going to— one of the first things I like to do is run a sample through a base model. So get as quickly as you can, as quickly as you have a dataset, try out your base model. In our case, our base model is small_vlm2-500ml. Now what do we want to pass our model? We want to pass our model only the image and text pair. We don't want it to see the output. So the assistant role up here, where is that assistant? We don't want it to see that. We only want to pass it in the image and the text because that's what it would see in production, right? Just the image, just the text. This is our ideal output. So we're going to keep that hidden from our model. Unless we are training it. So this is where I just extract the first 2 messages. So we have system and user. Notice that the assistant message is missing now. Now we're going to load our base model. So if you watch all the streams, you don't have to. I'll just tell you now, I tried Gemma 3N. It's actually quite a good model for its 5 billion parameters, probably a little bit too good for our particular task. The reason why we're fine-tuning is we want a small model that isn't that great to make it great by fine-tuning it. So we definitely could improve Gemma 3N with a little bit of fine-tuning. But for now, it's— I'll save that for a future video where we use a technique called LoRA, which works better on larger models. So if we load it in a pipeline now, pipeline from Transformers is a great way to just instantly start inferencing. But as we'll see in a second, we will want to load it as a model using the AutoModel class or one of the AutoModel class. When we want to train it. So pipeline, excellent for inferencing, but for training and fine-tuning, you'll want to use an AutoModel class. So we're loading this pipeline here. Now I have the model downloaded, so it's already cached. If you don't have it downloaded, it will download this model. So it may take a minute or so depending on your internet connection. And we can just pass in the base model, or sorry, our example. So let's remind ourselves of what this looks like. We're just going to pass this into the model, uh, into the pipeline. We're going to tell it generate 256 tokens max, um, new tokens, right? And then we're going to see the output. And the beautiful thing about the pipeline is that it handles all the formatting and preprocessing behind the scenes. So let's do that. Base model. So that's the input there. And then the output, it's not that great, right? So Our desired output is, uh, is food image title cheese plate. We saw that before, so we can safely say that our base model is not that great. Can we make it better with fine-tuning? Well, we're going to have to see. So check our image. Yeah, that doesn't match this. This does match that. So that's our mission. Now we're going to load the model without using pipeline. So I showed you pipeline because that's an easy way to start doing inference. That's probably one of the quickest ways you can start exploring with different models, whether it be on a DGX Spark or Google Colab. Now let's load it with the AutoProcessor and AutoModel for image text-to-text. Remember on Hugging Face, they call VLM image text-to-text. So image and text to text. So let's load it there. We get our model and processor. The processor is what's going to turn our images and text into the format that our model needs. So this is because I've already downloaded this, it's just going to start loading that into memory. And let me just show you, um, files and versions. This is what it downloads. So we've got the model.safe tensors, 2 gigabytes there. We have the preprocessor config, processor config. All the different stuff in there is basically settings for our model. Now, if you'd like to learn more about those, I'd encourage you to just go and click through these, right? This is all available publicly. There's going to be a fair bit of information overwhelm, but with practice you'll start to understand what's— what all of these little components do. And as I said, this is the quick version, so we're not going to discuss every single small thing. But if we expect— inspect our model's architecture, you'll notice a few major things. We've got the overall model, then we have the vision model, then we have the connector, then we have the text model, then we have the LM head. And then in between all of those, we have smaller layers. So if you ever heard of a neural network, it's made of multiple layers. This is made of multiple models, and which is in turn made of multiple layers within those models. So if we go back to our keynote, let me just give a quick overview of where we're at. If we remember this diagram right from the start, which is from one of these blog posts, uh, we have the image encoder— that is, in our case, the vision model. We have the multimodal projector, which is the connector. Remember how we have to connect the text and image, uh, numerical representations? And then we have the text decoder, which is the LM head. So if we jump into back to our code, there we go. Vision model connector, text model, LM head. Wonderful. If you want to read more about those, you can go there. In our case, the vision model uses SigLIP, which is a great vision encoder, but it's also been trained on language. And the text model in our case is smallLM2-360MIL-instruct. The connector. So this is what merges— oftentimes it's an MLP, the vision and text model. And then we have the LM head, which is going to output those tokens that we want. Now, if we wanted to run inference using just the model and processor, we have a few more steps than just running it via pipeline. Those are represented here. So first and foremost, we have to apply the chat template. So that's going to apply some special tokens. And if you want to see what that looks like, we can just go here, info chat template. I like to print out as much as we can when we're getting familiar with different things. And then we'll print a new line. Or maybe we'll go down there. And then we're going to pass it with torch.nograd. So that means we don't want to use gradients. We're going to call model.generate. We're going to pass it in all of the keys from the example chat template. Again, max new tokens is going to be 256. And then we're going to filter it for the generation output. We only want the output that the model has generated. So we index for everything from our input and beyond. So say our input is 400 tokens. We want everything beyond that because we don't want to see— our model is going to take our input and then generate new tokens. So that's what we want as the output. And then we're going to decode because remember, models and machines like numerical representations. And so when I say a token, it's literally going to turn the text into a series of numbers. Could be 125, 1, 6, 3000, etc. We'll see an example of that later on, but then we're going to turn it back into text and that is what decode does. But let's not spend all this time talking about it. And let's see about it. So we've got a few things here. Now, this is our full chat template, right? Chat template. What are the pixel values? So remember, when we have a vision model, that is what's going to encode our image. So that has been encoded into pixel values, into a tensor, a numerical representation. So if we keep going down, there's a lot there. Then we have the attention mask. Which is all ones because we want— if we multiply each of those pixel values by one, it means we want to attend to those. If they were zero, it means we were blocking them out. Then we have input_ids. This is where our text has been turned into tokens. And remember how I said they're going to be a long series of numbers? There's probably a fair few there, right? I'm not going to read them all out, but I'll let you inspect those if you want. And again, they have an attention mask of all ones because we want to attend to all of those. That's the attention mechanism. If it was 0, it would say ignore these. Now this is the raw numerical token input to our model. This is just me filtering on input IDs. So there's our series of tokens. These dot dot dots means that there's many more. Same with these dot dot dots. This is our pixel values. So this gets encoded by our vision model or created by our vision model. And then if we keep going down, this is what's going to go into our model. This is the human formatted version. So notice how we have IM start, which is instant message start, or maybe I don't know exactly what IM stands for, but this is the start, right? We have our image tokens. Now, something to note in VLMs is that these are just placeholders. So this is just going to tell our model, hey, pay attention to the pixel values rather than the image placeholder tokens. But that's getting a bit deep into it. Just think of these as placeholders. Our model is going to look at the pixel values, not these image tokens. And then we go here. This is our text. Again, this is human readable. This is not what our model is going to see. Our model is going to see a big chunk of numbers. And then this is the outputs from the base model. Nothing, right? Because it's not fine-tuned to what we want. So there's a little note here on the image special tokens. So prepare the model for training. Now, without going into the full paper, I just want to show you where I've got this little technique from. And we started this by saying, welcome to the Machine Learning Cooking Show. And that's what I really think machine learning, a lot of it is, is it's like cooking. You have ingredients, you have a method, and then you have an output, right? So in this case, their dataset was their ingredients. And SmallDocLing is a model to extract structured data from text, and they actually use the same architecture that we're using, structured data from documents. So this is what SmallDocling produces, right? Structured data from OCR, optical character recognition. It's going to predict this— sorry, predict this given these inputs. So that's its recipe, right? And the data here is the ingredients. Excuse me. These are the ingredients to SmallDocling, whereas in our case, our ingredients are food images and text outputs. And so what did Gemini come to the count of? Total 27 million samples. Okay, so whether that's right or wrong doesn't really matter. It's probably in the ballpark, but a lot more samples than what we're using. We're only using 1,500. But the important thing is if we come down to this, They used 64 NVIDIA A100 80GB GPUs, uh, for 4 epochs requiring 38 hours. So 4 times 38, what's that, about 160 there? So 152, um, with AdamW optimizer. These are all little tidbits and settings. Like, in the formal way, it's probably called hyperparameters. Well, it is called hyperparameters. Come on, Daniel, use the correct terminology when we want it. But as cooks, we would read this and go, hmm, that's something cool to try. And so that's a lot of what machine learning is, is finding a recipe similar to yours and then tweaking it to your own sort of liking, which is what we've done with food images. They've used a learning rate of 2 10 We'll see that later on for the vision encoder once unfrozen. Now that's a— that's probably the most key point there, right? It's hidden in 4 words. The vision encoder is frozen. We also employed gradient clipping to 1.0. We'll see that later on in the settings, and a warm-up ratio of 0.03. If you want to read through this paper, I'd highly recommend it because it's what we're basing a lot of our practice off, and the smallDockling model works really well. So, um, so as per the smallDockling paper, section 5.1, we're going to freeze the vision model. So freezing means we're not going to update it during training, so we're going to freeze its gradients. So when our model sees examples, right, inputs and outputs, there's an optimizer which is called AdamW is going to go, hey, that output you produce from that input wasn't that good. And then it's going to tweak the model parameters. We have 500 million to play with. The vision ones are going to be frozen because that's the recipe that the small dogling team found to work. And in fact, I tried to train this model without the vision model frozen, and it didn't produce that great of results. And spoiler alert, I followed the paper which said, hey, try this, freeze the vision model, and then it did work pretty well. So one of the things that you don't see with this notebook is all the experiments that I've tried behind the scenes. So there's run 1, run 2, run 3— that's another model— run 5, run 6, run run one, etc., etc., etc. And I can't imagine how many of the same were done for a research paper like this. So just keep that in mind with machine learning and AI in general. It's very experimental. For everything you see that works, there's probably 100 or 1,000 experiments that didn't make it to the published version. So just keep that in your mind. Keep experimenting, keep trying new things. We're going to freeze the vision model, so its, its weights, its patterns aren't going to update during training. Only the rest of the model is. So the language parts of the model. If we had a larger dataset— ours is quite small at 1,000 training samples— we could potentially perform two-stage training, which is what they did in the paper. Number one, they trained with a Frozen Vision encoder to align the LLM proportions to the model, to the LLM portions of the model, to the output, to the output. This is typo here, excuse me, to the output. Now this is our desired format. We want to align the LLM with our desired format because our format is unique, right? That's why we're fine-tuning it. Number 2, we want to train the whole model to— this is stage 1. We do that. And then once we've aligned the LLM, we train the whole model, including the vision model, to align all our features to our target dataset. Now, for now, we're going to keep it simple and focus on stage 1. If you want an extension, you can go to stage 2. I've left some code here. In the notebook that you could try out yourself. So how do we freeze a part of our model? Well, first, let's count the overall parameters and trainable parameters in our model before and after freezing the visual— vision encoder. So remember what our model looks like. Model looks like this. If we want the vision encoder, how can we access that? Well, this is a Python object, right? So we can go model.model.vision_model. There we go. That's our vision model. So it's a small VLM vision transformer. Now we don't need that, but this is going to count the parameters in our model. So we have total parameters, trainable, frozen. Now before freezing, we're going to count. Now we can freeze the vision encoder by going for param in model.model vision_model.parameters. So that's going to access that. Param.require_gradient, we're not going to update its gradients. So this is just a bool, could be true. I think it defaults to true, right? But then we go false. So that means during training, don't update the vision encoder's patterns. We run that. Boom. Look at that. So total pattern parameters, we have 500 million, right? In years gone by, that would be a huge model. But in today's world, it's— I'm classifying that as small. And probably in 3 years, this will also be, um, this will be even smaller. Now params trainable, 420 million, and frozen, 86.5 million. So that's our vision encoder is frozen. The next step towards training— so we've frozen our model, we're following the recipe of the small docling paper— creating a data collator. So what is a data collator? It essentially turns your So machine learning models or NVIDIA GPUs work best on batches of samples. Or so say, for example, we have 128GB of memory on the DGX Spark, which we do. We want to use as much of that memory as possible because GPUs love to operate on when their memory is full. Not too full, right? When you have a good meal, you feel good and satisfied. When you have too much food, what do you do? You feel sick and you lay down. That happens here. But a collation function stacks samples into batches. So when we performed inference before— inference, another word for predicting— we did it one by one. But training is usually best done in batches. So we're not going to make a batch size too large. With vision models in the past, you could have a batch size of 128, and depending on your hardware, you can actually increase that. And I'm just pulling these numbers out of anywhere. You can use whatever batch size you want, but generally they'll be in multiples of 8. There's a funny tweet if you Google friends don't let friends train with batch size of over 32, but that's, that's pretty old now. You can train with a much larger batch size. But because our model is so big, we're not actually going to do that. DataCollider compiles things into batches. So tensors. This helper function, which I borrowed here from the Gemma docs. So thank you very much to the Gemma team. Convert message to list of images. So this is going to go through a list of messages, the format that we created before, and stack the images into a list. And then we're going to have our collate function, which creates empty lists of text and images and then puts them in a batch format through the processor and then returns those in a batch input. And then we also do some masking here. So we're going to mask our image token ID, which is, uh, remember that placeholder before? We don't want our model to recognize that image token ID. We want it to recognize the pixel values, and the pixel values are that tensor we saw before. As I said, that image token, that with the little brackets like that, is a placeholder. That's just saying to our model, hey, an image is coming in here, but we don't want you to focus on it. We want you to focus on the actual pixel values, and then we want you to, based on those pixel values and the token inputs, we want to output the tokens that we've given it. So we're going to run that. So yeah, there's the token ID that SmallVLM2 uses for the image token ID. We mask this token as it is only a placeholder in our sequence of tokens. So up next we have two things. We have sft_config and sft_trainer. Remember how I said we're doing supervised fine-tuning, which is we provide inputs, examples of inputs, examples of outputs. and our model bridges the gap. sft_config is all the settings. So these are hyperparameters. Now, most of these hyperparameters are either the default from the documentation of Hugging Face. This is from TRL, Transformers Reinforcement Learning. I've left links here to the docs. Of course, your extension is to read through all of this. There is many of them. Don't worry if you don't understand them all, but reading them is a very helpful exercise. And the same thing for Trainer, which is built on Transformers Trainer. But this is part of TRL. And so if we go to the small docling paper, this is what I talked about, the learning rate. Let me just go to here. Learning rate, they started off there, 2 10 AdamW optimizer. We can remember 3 things. Let's do it. Gradient clipping 1.0 and warmup ratio of 0.03. We can remember 4 things. So warmup ratio 0.03, grad norm gradient clipping 1.0, learning rate 2 to the power of -4 or 10 to the -4. And then we have the optimizer AdamW Torch Fused. So I'm going to output it to this. I've appended video here, but for the production version or for the demo version that I'm going to link, I didn't have that video tag, but I'm just putting this here so you know that this training was done during this video. Number of training epochs, again, I've only put this at 1. You could put that at 4. I found 4 to work for this particular dataset, but 1 because I'm— I want to make this quite fast. Per device batch size, so I have quite a large GPU memory. If you find you are running into errors, you may have to lower these to 2 or even 1, right? If your GPU is 16 gigabytes, you may only be able to fit 1 on there. But try with 2. If 4 doesn't work, try with 2. And then if 2 doesn't work, try with 1. I'm gonna stay with 4. And then I'll let you read through the rest of these settings here. So we'll run through that. Oh no, we may have run into— I've had some disconnection issues lately. 5, 4, 3, 2, 1. Elephant, elephant, elephant. Unpause. Okay, uh, we had to reset the Spark. I'm not sure if it's a connection issue. I've had that quite a bit today actually. I'm not sure if my internet— because again, we are connected via SSH, so we're doing it via Wi-Fi. I may have to look into a direct connection in the future. But we were up to creating our sft_config. Beautiful. And now we can train the model with fs— sf— this is a mouthful whenever you say it a lot of times— sft_trainer. So these are the settings of how to train our model. This is what our model should train on. Now you'll notice that we have the training dataset here. We could train on all the samples. If we do that, we can go on 1,000 as well. Let's just remind ourselves of len, how many samples do we have, and the validation dataset. There we go. We've got 1,200 training samples, 300 evaluation samples. I've minimized these, uh, 50 and 10 to make things faster. If you— as I said, I've also minimized the number of epochs. The model I have on my Hugging Face. This was trained for 4 epochs on all of the data, so it took about an hour or just over an hour, whereas we're going to run this here on only 50 samples for training and 10 samples for validation. And we're going to pass it in our collation function. Remember, that's just going to go through the train dataset, turn everything into batches. And there's our preprocessor class, uh, which is of course processor. This tells our model how to process things like the image, and it's got a big list of what all the tokens are, but all the special tokens, sorry. But we're not going to go through all that. If you'd like to look through that, please do. So let's train or fine-tune our own VLM together. Now this might take a minute or so to get started, and then should be about a minute or two to train. Remember, this is on a vastly reduced dataset, about 20x less samples than are actually in. So yeah, we've reduced the time. Now in the full training run, this is what I did was epochs 4. And then there's a time. Yeah, about an hour and a half or so. So there we go. We're already about a third of the way through. Should be quite quick. That is one of the things you as a machine learning engineer have to figure out is What should you do during the training time? Personally, I like to do star jumps. Ah, got about 20 or so done, and we are back. Beautiful. So we get some outputs here. Training loss, ideally that would go down. The loss value is how wrong your model is, and the validation loss, ideally that would go down too. Zero means your model is perfectly predicting inputs— oh, sorry, outputs from the inputs. Now, I would always be skeptical if the loss goes down to complete zero. There may be some data leakage somewhere. Number of tokens— this is how much our, uh, or how many samples our model has seen. So remember, our model is going to— or our preprocessor is going to turn all of our inputs into tokens, and our models love looking at tokens. Not images and text. Then mean token accuracy. This is the raw accuracy value. 100 would mean that our model is predicting, um, the output tokens, uh, 100% of the time. And so we can get pretty high mean token accuracy over here, but again, these are just numbers. Ideally, the loss goes down. If that— if it does, that's good. And we can see here in a longer training run, it actually did go down. But where do the best evaluations happen? They happen when you look at actual samples, which we're going to do shortly. So we can save the model to file. And then if we come over here, we should get— there we go, checkpoint. That's our checkpoint that was saved during training. But these are all the files here that we've saved to file with trainer.save. Now, if we have a look, at the files and versions of the original model, right, small_vlm_video_instruct, what do we have here? models.safetensors and then a bunch of config files in JSON. That's exactly what we get here. So of course our model.safetensors has now been uploaded— uploaded, or sorry, updated to our data. And if we have a look at the loss curves, Right. We see that during training the loss goes down. This is exactly what we want. That is the beautiful direction of a loss curve down over time. Now we can upload the fine-tuned model to the Hugging Face Hub. If you're running locally, you'll have to log in via HFAuth login. I've left some links to do that there. If you're running in Google Colab, so if we go to Colab, you will have to— let me just show you here. So SmallVLM 2 Playground. This is where I was testing SmallVLM 2. You'll have to set up your HF token over there. So I'll show you, there's a guide on setup on learnhuggingface.com. You can set up your token for Google Colab. So we go down here, I'm going to remove the checkpoints that are in here. You don't necessarily have to do that. That's optional. Just be careful running rm -rf. And so if we refresh this, we should— yeah, now we've got a clean model file. I'm going to upload this whole directory to Hugging Face. So if we go run this, this is from Hugging Face Hub. We create a repo. The repo ID is going to be this. Notice I've put the video tag there so that you know that this model was created from the video. And then we're going to go API upload folder and it's going to upload this folder here. And then we can see there that will of course depend on your internet speed. But if we go to— this is the one I did in a previous— like all good cooking shows— in a previous example. But that's the one we trained for longer, remember, 4 epochs. So if we see, is this the video version? Yeah, video. There we go. Okay, so that's been uploaded just now, about 2 hours ago. Um, this is still going, so we'll just wait a few seconds to let this upload, and then I'll show you the new version and see if it's, uh, refreshed on Hugging Face. 5, 4, 3, 2, 1. Beautiful! We get a commit URL there. Now let's go back to here. Has this been updated? There we go. Less than a minute ago. And so the beautiful thing about uploading to Hugging Face is that there's a wonderful data layer and that is called ZET, Z-E-T. And it will only actually update things that have changed. So if any files haven't changed locally, so all of these template files actually haven't changed locally. The file that did change was the model.safetensors because we trained it. So that's the beautiful thing about using the Hugging Face Hub is that there's an incredible data layer. So if we updated our data set in the future, right, if we added 1,000 more samples to Food Vision Extract 3K or this particular one, it would only change the samples that actually changed. Or if we went in and edited this one and said, oh, this is actually— this could be a little bit better. We might update these, it will only change that row when you commit it. So that's a real cool feature. Now that's uploaded. Let's delete the model and trainer and we'll empty our cache. We're going to test the fine-tuned model against the base model. Remember metrics, smetrics, always test data or test models on your custom data. So these metrics, they look good, but how does the actual output of our model look? So use the model. So if we wanted to use our training checkpoint model, this one, the video, remember that was only trained for about a minute or so. We could just put training_args.output_dir and I'll just show you what that looks like. Wonderful. But as all good cooking shows, I prepared one earlier, so I'm going to use the one on my profile. And then the base model, of course, is going to be the Hugging Face SmallVLM-2 500M. That's going to be— we're going to compare the base to the fine-tuned version. So we're going to create two pipelines. pt-pipeline, it stands for pre-trained pipeline. That's our base model. We've got the model ID there. The ft-pipeline is going to be the fine-tuned pipeline. So we're going to load the checkpoint, uh, derename there, which is the model on my Hugging Face, which is this one here. So let's load that. It's going to load two pipelines, so two models are going to be put into memory. And up next, we're going to pick a random sample from the validation set. And this is some random code to— or sorry, random selection code from the validation set. And then we're going to inference with both models. So we'll inference with the pre-trained model, and we'll inference with the fine-tuned model, and we'll compare the outputs. So there we go, ladies and gentlemen, we have fine-tuned a VLM. This is the expect example model input. We've got the image. This is the ideal output. So egg drop soup, food items, broth, chicken chopped, mushroom, egg whites, shredded chili flakes. So that's, that's a pretty good label, right? That's from Qwen-3VL8B, which is 16 times larger than our model. This is the pre-trained model. So the base model, we get an empty list as we've seen before. But now generated output text from our fine-tuned model is food: 1. Image title: Soup. Food items: red chili, soft-shell crab, shrimp, daikon radish, shallots. Is it perfect? No. But is it in the exact format that we want? Yes. Is it fairly close to what we want? Yes. Now remember, this is only with 1,000 samples, 1,000 training samples. Real production models are often trained on, as we saw, SmallDocling was on 27 million samples. So that would probably be one of our extensions is to upgrade our dataset. This is a dataset that I made in a couple of hours the other day. So now I know that it works. My next step would be to really scale this up. So I've only used 1,000 food images or thereabouts and 500 not food images. So in my head, I'm starting to think, how can I turn this into 10,000 food images and 2,000 not food images or even more? So we go back. That's the law of scaling. So the good news is our model is working, right? Our fine-tuned VLM. And optional training stage 2, so you can unfreeze the vision encoder. You'll have to create a new, uh, config/trainer because there's some new settings for stage 2, but I'll leave that as an extension. And then you can inference there with the stage 2 pipeline. Because our dataset is so small, um, I tried this out, the improvements aren't that great. If we had a larger dataset, I would assume that the data's— the stage 2 pipeline might actually improve a little bit more. Now, next, of course, you and I can check our model's performance with code. But what if we wanted to share our model with someone else in an easily interactable fashion? That's where we can create a demo with Gradio. We're going to need 3 files: app.py, requirements.txt, and README. So we'll make a directory for our demo. So if we go over here, this will be demos here, food extract vision number 1, and then we can write a file here. This is app.py. So Gradio, the whole premise of Gradio is we're going to define our models here. These are just what we did, original pipeline. So that's the base model pipeline, and then we have the fine-tune pipeline. We have a helper function to create an input format because Gradio is going to take an image. We need to format that into a message and then we can pass that to our model just like we've done before. We're going to give our model a GPU to run on. That's what you can do in Hugging Face Spaces. So let me just go Hugging Face Spaces. So these are all demo apps, but you can also create your own app. You can do it through this an app through the web interface, but because we're programmers, we're going to use, um, their code, code to do this. Uh, you can also use Zero GPU, right? I'm a pro Hugging Face subscriber, so I get a little bit more access to the Zero GPU, but I believe this is also free. Correct me if I'm wrong. And then we could upload some code via that, but we're going to do it through here. So this is just our function that Gradio works off input, function, output. So it's going to pass in the input image, it's going to get the outputs from the original pipeline, and then it's going to get the outputs from the fine-tune pipeline and return both of those. This is some title, uh, and demo description written in Markdown. And then we create our Gradio interface. So here's our function Extract Foods from Image, inputs, title, description, outputs, and then we have some examples as well. So I'm going to write that there to file. That's going to go into there. So we've got demos— oh, excuse me, demos, foodvisionextract, app.py. All right, beautiful. And then we have a README, which is going to write there, say— I'm going to put this here— note, this README was authored in a live tutorial recorded for YouTube. Link coming soon. All right, we'll save that there. That's going to save to README.md over here. There we go, beautiful. And then we have our requirements. So one requirement you might not be familiar with, um, all of these— Transformers, Torch Accelerate, uh, Gradio, Torch Vision— is Num2Words. That's a requirement that I found out was required for SmallVLM too. So excuse me, you might have to install that if you're running Google Colab, but I'm sure you would have found that out by now. Finally, we can upload the demo to the Hugging Face Hub. We can create some details about the parameters. We can also create a space repo here. So the repo type, hf_repo_type is going to be space. We're going to use the Gradio SDK. Then we're going to get the full repo name and then we're going to upload our whole demo folder using this. So uploading foodextractvision demo app.py from YouTube tutorial video. So we'll run that and it's going to, as I said, wrap this folder up. And then if it all worked, we should be able to go to Hugging Face, foodextract. Okay, so it's going to be rebuilding because we just uploaded it and changed it, but we got our files here. There we go. Less than a minute ago. So you know that this is a real live cooking show. And then we go to README. Does it have a little note? Note: This README was authored in a live tutorial recorded for YouTube. Of course, link I don't have yet, but I will have once this video— or once you're watching this video. So we'll wait for the app to rebuild. But that, my friends, is officially fine-tuning a VLM. We did it all locally in about an hour or so. But of course, it took some time to prepare the dataset. And I've got some livestreams if you want to see what's going on there. So food extract vision. This is the prompt we feed our model. Do we have— is this usable? Let's try it. There we go. What about this? So this is going to be one of the things that we need to fix in a future model. If you'd like to see that, please let me know. Our fine-tuned model tends to output repeated— yeah. So that is one of our extensions. How do we fix that? And then if we go here, beautiful French fries. So try it with your own images. The link will be in the description if you want to try this out. You might actually also have your own version. But if we go to the keynote, I have some extensions extracurriculum for those who want to keep going. And actually, these are some things that I would personally try myself. So formalize evaluations. So we've gone from base model, fine-tuned it on a custom dataset to a demo that people can use. And we've noticed that our fine-tuned VLM performs okay, much better than the base model, but not as good as what we'd want. So if we wanted to formalize this and get it towards production, we definitely have to formalize some evaluations. So we could write some evaluation code to take the outputs from our fine-tuned small VLM model and compare them directly to the QuenVLL-8B. So we've kind of vibe-avowed our model as of now. Number 2, we could improve the data sampling both in volume and in diversity. So if we find out that our model makes mistakes, yes, it's already over-generating things. Yes, it doesn't, for some images, doesn't extract the right foods. Et cetera, et cetera. We could improve the input data. So most of this is more samples and more diverse samples. For example, we could introduce 1,000+ real-life photos of food on top of the Food-101. So Food-101 dataset is a public dataset, but the images aren't all that high quality. Whereas if we wanted to optimize our model for extracting foods from plates of food, just like we saw in the Nutrify demo, at the start of the video, we would definitely want to incorporate samples like that. In, what's the terminology? I think it's genshi gumbatsu, which is Toyota's thing. Real testing, real locations. If you want your model to improve, the better or the more real your data is, the better it'll probably be. Remove the input prompt. So right now our model is fine-tuned with text and image pairs. In the future, we could potentially just remove that input prompt and go straight from image to text. That would save us on input tokens. We wouldn't have to input that prompt. So let me show you here what I mean by this. Is this prompt— we have to input this text to our model because that's what it's been fine-tuned on. Now if we wanted to save on some input tokens— what's this token counter? Because why would we want to save on that? The less tokens that we need, that's 160 tokens. Now this is using GPT-5. Tokenizer, but it's going to be about the same for SmallVLM. That means we don't have to infer on those 160 tokens, which is going to potentially improve latency. Finally, so, oh yeah, if we remove the input prompt, we would just go from image to structured output. Number 4, we've already spoken about this, but fix the repetitive generation. I think we'd have to either train it on more data or in supervised fine-tuning, or introduce reinforcement learning for avoiding repetitive generation. And so what I would do for that is have a— it's called RLVR, so reinforcement learning for verified rewards. I would have a reward function for our model to generate the right amount of JSON, so not, not repeating things. That's what the reward function would be. If it, if it generated a non-repetitive output, it would get a +1. If it generated a, a repetitive output, it would get a 0. So that's RL or NRL technique. There's a lot more to it than that. Or we could go a lot deeper than that if we wanted to. Finally, we would try the fine-tune process on another dataset. So right now we've done food extract, but my challenge to you is practice fine-tuning a small model for another structured data task such as extract— extracting details from an invoice like we saw with Gemini. So take an invoice, extract details such as title, date, amount, description, etc. Or you could replicate a feature like Apple's Visual Intelligence to rip an event from a poster. So you would get the date, the event title, and then format that into JSON so you could put that straight into a calendar. That would be a great way to practice fine-tuning a VLM. So I believe the model has likely seen many more of samples like this. So extracting text from images, so it's likely going to be better at that task. Phew. So that's been fine-tuning a VLM. If you have any questions, please leave them below. There's also another video on fine-tuning an LLM. If you want to fine-tune an LLM for text only, go and check that one out. But if you'd like to see anything else in the future, please leave a comment. Otherwise, happy machine learning.
More from Daniel
Small Language Models (SLMs) Are the Future: Fine-Tuning AI That Runs on Your iPhone
Introducing Sunny - A MedGemma-Powered Skin Health Tracking App (Kaggle Competition Entry)
Benchmarking: NVIDIA DGX Spark & NVIDIA RTX 4090 | Part 4 - Comparing the results
Benchmarking: NVIDIA DGX Spark & NVIDIA RTX 4090 | Part 3 - Running LLMs on the RTX 4090
Benchmarking: NVIDIA DGX Spark & NVIDIA RTX 4090 | Part 2 - Formalizing the tests
Benchmarking: NVIDIA DGX Spark & NVIDIA RTX 4090 | Part 1 - Creating a series of tests

Local Multimodal RAG on the NVIDIA DGX Spark | Part 4 - Publishing our demo to Hugging Face


Local Multimodal RAG on the NVIDIA DGX Spark | Part 3 - Putting it all together