How to Deploy a Machine Learning Model to Google Cloud for 20% Software Engineers (CS329s tutorial)
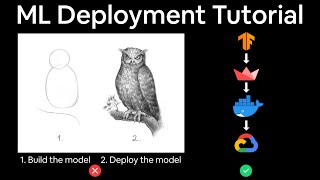
Deploy a TensorFlow model to Google Cloud using Docker, Container Registry, and App Engine. A Makefile builds the image, gcloud app deploy pushes it live, and you monitor costs and clean up resources after.
Chapters
Have you ever deployed a machine learning model? Maybe you have, maybe you haven't. But the exciting thing is, if you watch through this entire tutorial, by the end of it, you'll have done so. You'll have deployed a machine learning model to Google Cloud. You will need access to Google Cloud to do this. You don't necessarily have to use Google Cloud, but that's just what this tutorial is focused on. This is a tutorial that I gave on machine learning deployment. I recorded the whole thing for Stanford's CS329S. Or machine learning system design. But that's all I'm going to say for now because I'm just going to let you get straight into it. All the materials you need will be in the links below. If you have any questions, leave a comment or an issue on the GitHub repo that I link and I'll answer them there. But happy machine learning. This is exciting. You get ready. I've got a little presentation ready to go after we sort of just had that mix-up, but we won't let anyone know that happened. So I could, you're right, I can start, uh, first of all, hello everyone. I'll, uh, I'll start sharing my screen if you want and then we go over here, share. Is that working? I'm still a Zoom novice by the way and we're doing this across time zones. So, uh, this is like 6 time zones. So I'm in the future to everyone watching this, I believe. So, uh, let me know if you can see what's going on. I need to figure out how to get that chat back. We'll figure that out later, maybe. Okay, there we go. Chat. All right, so this is the beginning. Can everyone see this? Is this all good to go? Yeah. All right, beautiful. So let's get started. So this tutorial is going to be on deploying machine learning models, mostly to kind of take away this element of unknowingness of what it's like to deploy a machine learning model. Because oftentimes you'll see step 1 is build the model, which is this beautiful little outline here. And then step 2, of course, you just got to deploy it, right? But as you can see, drawing the owl, there's a few steps to connect these. So this is what we're going to do. We're going to take away the veil and we're going to make deploying machine learning models just like building the actual machine learning model. So I love this tweet from Chip: machine learning engineering is 10, 10% machine learning and 90% engineering. You know it's right because Elon agreed with it. Elon, thank you for taking Doge to the moon and all of us to Mars later on. So I broke this down into a little bar here. You can see ML engineering 90% engineering, ML. But there's something you should know about me is that I'm probably 20% engineering and 80% ML. So I used to be about 10% engineering or maybe 0% engineering and completely ML, but I'm slowly learning these skills. So as much as I'm teaching this deployment lecture now, I'm still learning it as well. So this is a little bit more about me. The video game character I look most like is PS1 Malfoy. So shout out to 2004 Harry Potter. I used to drive Uber to pay for my studies. I had a 4.94 Uber driver rating, so I'm very proud of that. And small apps, small machine learning powered apps, I can help you with. And but large apps, not quite yet. So probably ask me in about 6 months once I've had some actual practice doing all the stuff that we're going to go through in this tutorial. In 2015, I graduated with a food science and nutrition degree. So that's kind of however you want to say my background. But then I decided, you know what, I want to learn to code. So it was actually about the fourth time I decided to learn to code. And when I started to learn the code, it was about 2017, peak ML hype. So that's all I could find on the internet. I decided I want to get involved with this and created my own artificial intelligence master's degree because I thought I'd spent enough time at university in the past decade. So I'm like, I'm just going to learn online. After doing that for about 9 months, I had a machine learning consultancy role at a Brisbane AI startup called Max Kelsen. We worked on a range of different industries from the health sector to retail to insurance, you name it, a whole bunch of machine learning projects. That was kind of like a trial by fire of my machine learning skills. However, a lot of the time we would just work on proof of concepts, so we do the machine learning stuff with their data, but when it came to the deployment phase, that was still a little bit, uh, touchy-feely. So we haven't quite, um, that's what I'm learning at the moment. And my two favorite activities in life are fighting and riding. Writing, of course, words and code. Words are beautiful because it's such an open space. You can write whatever you want. Who knows what's going to come out? But code, typically you write code and the same thing happens every time. Um, so that's why I like writing codes and words. And if you want to see what I'm up to now, you can go to my website, mrdburke.com/now. There's a whole bunch of stuff on there. Um, so that's enough about me. If you want to get all the stuff that we're about to go through in this tutorial, you can go to this link. It will take you to this GitHub. Spoiler alert, the README is still a work in progress. We're going to go through it anyway. So don't worry about the README. The code should work. So fingers crossed. So that's where all the stuff for this tutorial will be. The slides aren't up there yet, but I'll just, I'll add it to it. Yeah, we've got the stuff that we need is there. So if you want to follow along, go to that link and we'll have a fun time there. I don't actually know what slide is next. Oh yeah, there's my disclaimer. The README is still a work in progress. I'll fix it after this tutorial. And so this is what we are working towards. Food Vision. We're building an application. Let's say you were a machine learning practitioner, but you've got a background in food food science and you want to educate the world on food. You can kind of guess where this inspiration came from, but we're going to build an app called Food Vision, and this is our deployment recipe. So this is, this is more, this is like a machine learning deployment tutorial, but it's also like a cooking show. So the ingredients we need: data, 10 food classes from the Food 101 dataset, So if you want to just look it up, Food 101. This is the dataset that we're using, public dataset. It's available on Kaggle. I've just downloaded it and formatted it to the way we need it. But that's Food 101. We're going to build— I spell TensorFlow wrong every single time I type it out. So for some reason, my fingers like to type the N before the S. Who knows why? You need a TensorFlow/PyTorch model. And by the way, actually, I'm going to get to this in a point. We're going to cover a lot of ground, um, in a short amount of time. So if you have any questions, I actually need to get this chat open. So please feel free to ask any questions. How do I see this chat? I want to get this open. Ah, chat more. There we go. Okay, beautiful. Okay, I got it. Thank you very much. So there we go. Okay. Learning on the fly. Oh, spoiler alert. And then we have a bunch of Python scripts. It's really only actually two. And then a Makefile slash a Dockerfile. We'll go through these as we go. Then the utensils we're going to use is Streamlit. So to build our app, we're going to use Streamlit. So Streamlit is an amazing little tool to build. Not a little tool, actually. They've got a whole bunch of— they've got millions of dollars of funding, so they're not little anymore. But yeah, this is a great way to build data apps. Look at this. You can just see the demo. So the app that we're going to build is in pure Streamlit. We're not going to go through this step by step because Streamlit have great tutorials. Essentially, you'll be able to replicate this app that I've built with Streamlit if you just go through their, their 1-hour introduction to Streamlit tutorial. So that's what Streamlit is. We will also be using Google Cloud to handle all of our deployment steps. So tools that you might need or you will need is the gcloud SDK. So that's what you write in terminal, gcloud command, something, something. You will need an existing Google Cloud project and you will need access to Google Storage. So you'll have to turn on all of these APIs in Google Cloud. You need access to Google AI Platform. Docker will be very helpful, Container Registry, App Engine. And I know I'm listing a lot of things you might have never heard of these before, but we're going to, to go through them as we go. And here's the method we're going to, to go through on this cooking show. We're going to get the app working locally. So hopefully I can live up to my promise and saying everything in the GitHub should work. We're going to clone that. We're going to deploy the model to AI Platform. I'll show you how I trained a model in a second. We're going to deploy the app to App Engine. Step 4, who knows? Hopefully it works on App Engine. I mean, this is a live, like, across 6 time zones deploying a machine learning model application. I've never done this before. It worked on the Twitch stream. Hopefully it works on this stream. Number 5, you're going to see I've left all of, or a lot of the errors in on purpose so that we can, we can go through and solve them together. Because when you deploy machine learning models, you're going to, your model's eventually going to fail. What do you do when that happens? So that's a very important point there. And step 6, of course, is profit. So 10 minutes we're going to spend on the ingredients, kind of doing that now. Utensils and method, I think it's going to take about 40 to 50 minutes. If not, this is a cooking show, as I said, so of course I prepared things earlier. We're not actually going to have to wait for things to bake and put in the oven, etc. Outcome. So this is what we should finish with. You can't see the URL there, but that is this app here. So this is my Google Cloud project hosted on appspot.com. Welcome to Food Vision. Identify what's in your food photos. So this is what we're going to end with. This is our If I uploaded an image here, I'm not going to reveal it just yet because I want to save this for when we actually do it. This should read the image, ping Google Cloud with our hosted machine learning model, and then it's going to return back in here what it predicts. And as you might have guessed, it works on a certain number of food classes. Of course, this is just an MVP app, so it's only 10 classes out of the Food 101 dataset. All right. Oh, and of course, the, the end very goal is this little symbol. You're going to come across this a lot, but this is the main objective of building machine learning deployed MVP apps, or in fact, almost any machine learning powered feature or application is to build a data flywheel. And so this is an idea I've stolen from Josh Tobin, who had a talk and he discussed about the data flywheel. and I've kind of put it in this slideshow as well. So full credit to Josh for that concept. But, um, here's your big warning: if you do any of the steps in this deployment tutorial, if you don't have credits on Google Cloud, this will cost you money. So I've spent, I think it's $100 or something, over the last week or so on Google Cloud, but I've been very reckless with my spending. I haven't shut anything down, I've just just been going willy-nilly. Okay, so just beware if you use Google Cloud, it costs money. It's not like Colab. Colab's free. Google Cloud costs money. Questions? So ask questions, please. I've said this before, whenever you feel like it. I've definitely missed a whole bunch of stuff in here. So if something sticks out as confusing or whatever, please, I'll try to monitor watchamacallit, monitor the chat as much as I can. And as I said, we're going to cover a lot of ground fairly quickly. So please be like, Daniel, you're going too fast. Um, your Australian accent, you combine 7 words into 1. Let me know if anything needs clearing up because that'll also help me explain what's going on. All right. Alright, so thank you for that, Chip. But here is our objective. So this is building a data flywheel, the holy grail of ML applications. So we're going to get into the recipe soon, but I just want you to know what we're working towards. And so of course you're going to collect data, verify and process data, model it, train a model, deploy the model, Make predictions with that. Are they good or bad? And the important point here is that your predictions are out in the wild. Now, if they're bad, find more of the bad samples or the hard samples that your model is having trouble with and add them back to your data collection and then repeat the whole process. And ideally, this is going to— the whole idea of flywheel is that it keeps itself spinning. Now, this concept, of course, you could draw these. I mean, there may be more steps here. I've just tried to keep it simple. Simple. But this concept is if you're like me and you learn to build machine learning models in notebooks, right? So this is the notebook that we've trained a few models in. This is on the GitHub. So don't worry about what's going on there. I've kind of assumed that a lot of you have experience building machine learning models. So we're going to kind of breeze over what's in there anyway. But if you learn to code in a notebook, you kind of miss this whole whole step or this whole process. You might have only, um, preprocessed data and then trained a model. Like, this is me, right? So I've only learned these steps, but I'm starting to learn the rest of the piece of the puzzle. Um, in our case as well, the data's already been collected for us. It's Food 101. So we've actually got these 3 steps, but what we're going to do is go deploy model, make predictions good or bad, predictions out in the wild. If they're bad, find more and add to the collection. So very hard to understand this as well when you've got no context. So let me introduce you to Tesla's data flywheel. Now, this is from a talk by Tesla called Autonomy Day. So if you want to go and watch that, actually probably one of my favorite talks on the entire internet on just AI and ML in general. Tesla are probably the, I don't know, how would you say, aside from Apple, Google, Facebook, are probably the like number one company deploying machine learning at scale in actual products. So can I build this? No, I can't. Can I build smaller versions of this? Yes. That's what we're going to work towards in this tutorial. But if you imagine Tesla's data source is their cars, of course, they start collecting data, then they might find a problem. Hey, our cars are doing really bad in tunnels. And what's the signal for that, that they're doing really bad in tunnels? Well, Tesla have a feature called Autopilot, which means that the car drives itself basically. Um, and their signal might be when does Autopilot turn itself off? In other words, it doesn't know what the scenario is. And so that's their signal. Maybe in a tunnel Autopilot shuts off. And so that, that signal goes back to the Tesla engineers and they're like, wow, we found a few scenarios where our Autopilot system is shut off. Let's collect a whole bunch of other scenarios that are very similar to that instance where our model was having trouble with. So in this case, Autopilot is the model, and then they're going to relabel those scenarios. So fix up whatever's going wrong in the tunnel. We've got another 6, 6 problems here in a tunnel. Like, wow, okay, let's, let's fix this up. So maybe there's something wrong with the lighting or the lanes. Who knows? But they fix that, they add it back to their dataset, pass it back through a model, redeploy that model, and hopefully the whole thing just starts to make the data flywheel. So that's a very brief overview. Of course, if you want to see anything more, I'd highly recommend watching, uh, Tesla Autonomy Day. I believe, uh, it's Andrej Karpathy talking about this section. So yeah, anyway, now Now let's bring it into the concept of Food Vision's data flywheel. So this is what we're working towards. So our data source is Food 101. So 10 out of 101 classes. And then we might find, hmm, well, we're using 10 food classes, but our model is predicting sushi for photos of donuts. Now, apologies in advance. Working with food classes typically makes you hungry. I speak out of experience. And so our model is predicting sushi on the donut class. And we're like, well, that's, that's, that's an issue. So what do we do? Well, we add more images of donuts back to our database and then we bring it back in here. So now we've got 11 out of however many classes we want to work with. We added in the donut class and then we retrain our model in our case. When I trained a model, I used EfficientNet-B0. So just transfer learning. And then we redeploy. And then so on and so on and so on until we create Food Vision's data flywheel. So this is what we're working towards. This is the, the holy grail of Food Vision, the holy grail of ML apps. So that's the beginning. If there are any questions, let me know. But we're up to the middle now. I'll see what, here we go. Here's what we're going to do. Deploy a model on cloud. I've stolen this from Chip's slides. So I think this, you went through this in your last lecture, but we're going to just go through this. Train the model. I've used TensorFlow, of course you can use PyTorch or whatever you want. Model.save, model name, export the model. Upload the model. We need to store that. This is Google Storage. A lot of these symbols, you just, this is from Google. So if you get used to using GCP, you're gonna, they like using some cool symbols. Upload a model to Google Storage, and then we're going to deploy that model to AI Platform. So that means we'll be able to, our model will be hosted somewhere on the internet, somewhere on Google servers, and we'll be able to send, we'll be like, hey model, here's this photo of food. What do you think of it? And then it'll be like, send us back a tensor, and then because we've created an app, our app will make that look pretty even though it's just a model finding patterns and numbers. And then we're going to deploy that app to App Engine, which will allow us to access it anywhere in the world. So that's a very quick overview, and here's the main concept I want to drive forward through today is model building. Is like model deployment, sort of. If you imagine you build a neural network architecture, this is a computer vision model, TinyVGG, Lego blocks of layers. But model deployment is, remember when you started learning deep learning, machine learning, all these layer names, what the hell is a convolutional layer? You just, it just made no sense. Well, it's similar with model deployment. It's just, there's a bunch of things out there that do certain things. You just don't know the names of them. But once you start to piece the puzzles together, it's like Lego blocks of tools. So if we, we store our TensorFlow model on Google Storage, the model gets hosted on AI Platform. We built our app with Streamlit, app wrapped up in Docker container. The Docker container is pushed to GCR. GCR equals Google's container registry. GCR hosted container deployed to App Engine, app monitored with Google Monitoring. Again, a lot of names here that we've just sort of thrown out, but it was like the same when you learned machine learning, a whole bunch of layer names. What the hell's going on here? Now we've got self-attention layers, etc., etc. Same with all of the services on GCP. And just as like you can build a model with almost any combination of layers you want, you can do the same with model deployment. This recipe that I've created here is one of, of many. So same as building a model there. And wonderful. So that was a massive ramble of introduction to what we're actually going to go through. How about we do it? So this is where the demo starts. Let's, uh, let's see if we can work it. So what I'm going to do first is get the app working locally. Now, of course, Oops, this Zoom is popping up. I don't want that. I want this tab. So my app is working locally. So Streamlit, I've got this, as I said, professional cooking show here. Um, we've prepared something earlier, but so it's running here on localhost. This is terminal, nothing outlandish here, but what we're going to do is get this, we're going to replicate this but as if you were coming to it from scratch. So if I upload an image here of ice cream, fingers crossed this should work. This is going to ping my model, which is stored on AI Platform. We will have a look at this in a moment. I'm going to click predict, and that's some delicious ice cream. I think that might have been from New York. There we go. Ice cream. Confidence 1.0. The confidence is the prediction probability. I'll show you where this Streamlit app is built. Of course, all the code's in GitHub. I'm not going to step through this step by step, but it is about 100 lines of Streamlit code and it's pretty rough, right? So you could— it's not software engineering level code, but it does the job. And then utils.py is another file that just includes some helper functions. So like this one, predict_json, we're going to see that later. Just a modified version of Google Cloud's demo code. load_andprep_image. This converts images into tensors and then logger. We'll see what that is later. But that's it. 3 functions and about 100 lines of Streamlit code that could probably be reduced to 50 if I was better at coding. Now let's see how we get this running on your machine locally first, and then we will deploy it to AppSpot. So I'm going to come in here. We're going to clone this GitHub repo first. So I've got to— I'm going to deactivate Conda actually, because I don't want Conda. So again, we're going to— this is where we're going to start to— if we haven't already gone fast, we're going to like really just— we're going to hammer in a few different steps here. I'm going to keep referring back to the keynote when I can to sort of discuss what we're doing. We've got some pretty pictures coming up as well. So yeah, just bear with me while we run through this. We're going to git clone and ask questions if you have anything. So actually we need a working directory. So I've kind of jumped the gun there. Let's— I'm going to cd into my code directory. Can be whatever directory you want. Now I've got one called test, which I like to just run tests in there. Clear. So this directory has nothing in it. And now what we're going to do is clone the repo. So hopefully everything in the repo is formatted correctly. It should be. This worked on Twitch yesterday. So now we have, um, cs329s ML deployment tutorial. If you'd like to do this, um, you can do the exact same steps that I'm running now. Um, so we've cloned the repo. That's all we've done. Now we're going to, of course, cd into there. Clear. ls. So we've got a bunch of things here. Not going to go through them all. The README is still a work in progress. food_images, you can probably guess what's in there. images is just images to go along with the presentation. The crux of what we need is inside the Food Vision app. So that's the directory with all the stuff we want. model_training. This is where I trained all the models. So if you're interested in that. It's just an efficient net backbone trained on 10 classes of Food 101. So I've been told you guys are familiar with model training, so I'm kind of glazing over that a little bit here. Now, what are we doing? We're getting this running locally. So we're going to cd into foodvision, clear ls. So there's a little file in here called requirements.txt, which contains all of the packages that we need for these things to run. And so what we have to do is we're going to create a virtualenv because we are tidy software engineers. pip install virtualenv. There are a number of different virtualenvs you can use to make. I'm just using virtualenv. Pick and choose. Oh great, we have an error straight away. That's right. Clear. Now we're going to create an env. You can call this what you want. So you could call it foodvision, virtualenv foodvision, but I'm going to call mine just env. Oh, well, it's actually n now. Clear ls. So my environment is called n, not env. And now we're going to activate n. Should be env. Bin/activate. Right, so now we have n activated. You can call this what you want. I wanted to call mine n, but I got too trigger-happy with the Enter key. And so now we have an environment. So now we can also install pip install -r requirements.txt. So you probably— you might have done this before. I'm pretty sure you would have. But this is just going to install the dependencies that we need. What do we need? We need requests. We need TensorFlow 2.4. Again, you can do the similar steps with PyTorch. I'm just, I'm just most familiar with TensorFlow. And we've got a question here. So this is just installing some stuff. I'll jump to the chat. We've looked at some methods for manual identifying hard types of examples in class, plus the homework. In practice, what's a good way to go from one hard example to a set of hard examples. Um, is this mostly manual qualitative right now? So yes, there are your— this is a great question because this is actually one of the biggest challenges in ML right now. It's how do you identify what your model is not sure of. Um, in Food Vision, we've kind of got a— I'll show you what we're doing. We're kind of using a hacky way. Um, but, um, there are a lot of methods coming out now, such as there was actually What's a recent paper by Google? It's one to estimate the difficulty of— I think it's only during training though. So inference is quite hard. And what's it called? Here we go. TrackIN. So these are the kind of papers I'm actually getting really excited about. It's a whole bunch of different methods to look at this February 5th, 2021. So this is, this is real, recent stuff. A simple method to influence, estimate training data influence. So I'm not going to go quite through that. You can read that on the Google AI blog. But so this is training data influence. So again, it says for training data, but it's the synopsis of it is how do you know which sample is hardest for your model to learn? Now, how do you apply that to what's in the test dataset? I'm not entirely sure. That's one thing that I'm trying to learn myself. There was something out of Berkeley the other day that that was around the test dataset stuff. But yeah, this is real recent research. So that question is still being answered. Where were we? We're in terminal. Okay, beautiful. So we should have all of the dependencies installed. Now what we're going to do is we have an app here which is based in Streamlit, which is just the code here. Again, I'm not going to step through this too much. Streamlit is actually amazingly straightforward in terms of the things you'd like to build. So yeah, we're going to see exactly what's come out here. We should be able to run this streamlit run app.py. All this is saying is, hey, Streamlit, run our app. And again, if you went through Streamlit's introductory tutorial, takes all of an hour. You'll be well across all of this. So this should boot it up on our localhost. It might go to 8502 because I've already got it running on 8501. May take a little while to kick off, um, because of, uh, it's the first time we're running it. It's a great question, Trenton. Thank you for that. Beautiful. Look at that live demo working. So this is going to open automatically. And this is where we're going to run into our first error. I told you I've kept all the errors in on purpose. You might be saying, well, Daniel, you just said that. So when you run into an error, you can just say that we've left it in on purpose. Maybe. So this is the one that we've just cloned exactly what's on the GitHub and we're going to try and upload an image here. I'm going to use ice cream from before. Again, when I showed this to Chip originally, she brought up a good point. Does this go off the file name like so I could just read the file name and then the model just produces whatever class is in the file name? No, it goes off the pixels and you can see that in the in the code. So predict running, making prediction. This should error. There we go. Okay, so this is our first error. All right, this is actually a massive, massive thing when working with any cloud platform for that matter. It's a security issue. So default credentials error, file Daniel Bourke's Playground. So this is my Google Cloud project. We'll have a look at that in a second. But what this is, is This is a key. So this is an authentication key. Now, again, I told you it's kind of a play on words here that this is a major key of working with any platform. And this is also is a key file. So what's— why, why is this an issue? Well, if we come to the GitHub, Food Vision, it doesn't include any.json file. And now I've done that on purpose. Why is that? Well, in the.gitignore file in here, you should be able to see right down the bottom is *.json. Very important here. The next steps we're going to go through. Why is this important? Well, if I uploaded this key file to— where is it? I'm going to get out of this 501 just so we only have one version of it. We're going to fix this error, right? So if I uploaded this to GitHub and you had access to it, you could access— it's got secret details in there. It's like sharing my password online. So if you ever download a key, do not commit it to anywhere that's public. Okay, so add it to your.gitignore, etc., etc. So very important point here. Now let's figure out how we're going to fix this. Where does this occur? I'm going to go into code test. So this is the, this is the original, right? But test is the one I've just cloned. So if I look at my original, there's the key. Not going to touch that because that's private information. But we come into test. This is what you've just cloned from GitHub, okay? No key in here. But, oh sorry, in Food Vision, no key. Now if we open this app.py I still haven't set my default to be Visual Studio Code. What a rookie error. Set up the environment credentials. You'll need to change these. So this is to do with your Google Cloud project. Okay, so mine is looking for— now this environment variable, as I said, this code could probably be improved to put global variables somewhere better, but I just wanted to keep it front and foremost. This is what Google Cloud looks for when you deploy your apps to Google Cloud, right? It wants to know, hey, do you have permission to use the services? And so this, this is basically telling GCP, yes, I do have the permission to use your services. But you're going to need your own version of this, which will be something like your project name, whatever this is,.json. So let's see how we can figure that out. Your project is also probably going to be called different to mine. We'll see how we can do that. But my My project name is Daniel's DL Playground, Daniel's Deep Learning Playground. So this is what we've done. We've taken down this step, get the app working locally. Now to get our key, we need to deploy the model to AI Platform. Now what's the model? Let's go into here. I'm just going to run through this Colab code. I'm not going to wait for a model to train. This is one of the things that I've told you I prepared earlier. We need a model. So the reason why this error is coming up is because when I click the predict button, I've got a function in app_utils.py which predict_json. This is basically just pinging our hosted model on Google Cloud. You'll be able to— we'll be able to look where this sample code came from in a second. But when it pings that model, because the API key doesn't exist, Google's returning an error. Okay, so that's utils.py. I'll probably get out of that because we want to get into the test version of utils.py, but we'll stay here for a second. Now we've got a GPU. Yes, some simple helper functions. We'll run through that. Now here's our model. I said we're using EfficientNet. This is with TensorFlow. You may have had experience with TensorFlow or PyTorch. Um, you can— I'm pretty sure PyTorch has a pre-trained EfficientNet somewhere. Just EfficientNet pre-trained on ImageNet, and then we've just added our own output layer with a certain number of classes. It's going to do that, load in an image. Again, if any of these points you want, you want me to expand on, just please ask a question because I'm going over this quite fast. But the problem we're trying to solve is authenticating our app to GCP. Download some data. So this is just the 10 classes of Food 101. I've stored it on GCP. If you want some info over the data we're using, we have 750 images in each of the training classes, 250 in each of the test classes, yada yada yada. TensorBoard callback, we actually don't need that. This, this, this model code is probably a little overkill for what we're doing, but whatever. So we trained a model. So this takes about, I think, 4 minutes to train on a, on a Colab GPU. Then we can test it out. But the real thing that we did was save and uploading a model to GCP. So again, I've prepared this, something we've prepared earlier. But these are some steps that you can save a model directly from Google Colab to Google Storage. So I'm going to just see. It would actually be cool if we did all this in one hit. Hmm, maybe I'll just show you my existing model. So while this model is training, actually, let's create a bucket on GCP within our project. So we're going to go to the Google Cloud Console. Remember, what error are we trying to solve right now? We're trying to solve the fact that our app is not authenticated to GCP. So we'll come in here, Google Cloud Platform. Now I've already created a project, so this is called Daniel's DL Playground. For you to go through these steps, you're going to need to create your own project, and wherever you see Daniel's DL Playground, Substitute that for your project name. So I'm not going to go through creating a new project. You can just click new project and go from there. But as I said, this is a big warning. You're going to get charged for this stuff. So I've spent $130 in the last week just— but I've been very flamboyant with my Google Cloud usage. So keep that in mind. That's your warning. Now while our model is training. I've got all of these pinned over here. So again, this is— you're probably taking it— if you never use Google Cloud Platform, probably taking in a lot of information at one hit here. I was the exact same. It wasn't until I just actually started using GCP that I realized, wow, there's more services here than I'll probably ever need. So what I've done is I've just pinned the ones I find I use most often and they're going to appear at the top. So I'm going to come into here, into storage. If you don't have it pinned, you can scroll down, you'll find it there. You will need a project, existing project, to be able to enter storage. So I'm going to click on the storage. By the way, that could be one classic data leakage bug. Yes, you're totally right. Leaking your GCP keys. They're actually crawlers that go through, um, that go through GitHub looking for keys. So if you upload it to GitHub, reverse it really quickly. Now, to create a bucket, what's a bucket? So it's just basically a hard drive on Google Cloud. So Google Cloud has done an amazing thing. It's just basically storage and compute. That's what it offers. And a whole bunch of different services in all of those. So we need something to store our model and then we need something to compute our model. So just run our model. So the storage of our model is a Google Cloud bucket. Now, how far is our model off training? Haha, this is exciting. So models training, we're going to create a bucket. I've got one that exists already, as I said, mldeployment-lect-bucket-0. That's our existing bucket. We're going to create a new one and call your bucket whatever you want. So CS329 live bucket creation. You won't be able to take that name anymore because I've stolen it. Um, so continue. Now, where do you want to store your data? This is very important depending on where you're— if you're working in a company, right? I remember when I was working in my company, a lot of the data we, we worked with couldn't leave Australia. Some regulations, I don't know, I didn't make the rules. So this is where whatever project you're working on, if you have data privacy concerns, um, make sure you know where you want to store it. For me, I don't really care where my data is stored, so I'm going to choose multi-region. You can go through the different region types here. I think region is the cheapest. Multi-region. I'm going to store it in the US. That's kind of central. I believe many of you are from the US. It's just going to make it fast. Oh, tidbit: Colab notebooks are hosted in the US. So if you store your data on a Google Cloud Storage bucket in the US, The transfer rates. So when we downloaded this, this data up here are basically zero. So if you want to use Google Storage to store large amounts of data and use Colab to compute, storage is very cheap. Compute is what costs more. Store your models in a US region. Then when you download it into Colab, it's very cheap. Sorry, store your data and whatever in US. Now continue. US. Choose a default storage class. Standard. Don't worry about these other ones for now. If you want to use your data at all, probably just do standard. Continue. How to access these objects. Access control. Fine-grained. It's just Google Cloud loves permissions, right? So everything you do is going to have some sort of permissions tied to it. So if you're in an organization, people are going to have different permissions. So just, I like to just use the default. And then advanced settings, optional create. Look at this, cs329s live bucket creation. This is the name of our bucket. It has nothing in it right now because we've just made it. Okay, so I'm going to copy that, save that to the clipboard, come back. Look at this perfect timing, our model is finished training. So that's just an EfficientNet working on 10 classes of Food 101. It's doing pretty darn well. 90% accuracy across 10 classes. We can even practice it. This is within a Colab notebook. I just downloaded an image. Prepare that image, make predictions. Pizza. So what's that image look like? There's my dad, two thumbs up, eating pizza at one of our favorite cafes. And Food Vision, to just show you that it's not full of crap, is predicting pizza. Okay, now we want to save and upload to GCP. So in TensorFlow, I just do.save, right? That's going to save a model. PyTorch is probably very similar. Um, and then we're going to get a model over here. Oh, Emil, thank you for the tip. Git commits can be permanent on GitHub if you have the SSH. So yeah, very important point. Do whatever you can to not make your Google Cloud keys public at all. So I'm saving a model, right? Look at that. EfficientNet Model 1, 10 classes. Nice and simple. Now I'm going to run this off screen because I believe it. I'm going to authenticate Colab. So this is another place where you're going to have to get a key. I'm just going to make this really small over here. So I'm just going to a link. I'm just basically telling Colab I can access my Google Cloud stuff here. This is pro, pro-level live demo, hiding keys. Look at that. All right, very important point. So what I did, I just ran this cell and basically what's this saying? This is saying, hey Google Colab, authenticate my user account. My user account is the the same one I use for Google Cloud. So that's a little bit of a mix max you might have to line up. But what are we going to do here? I'm going to run this cell. This is just so we can upload directly from Google Colab to Google Cloud Storage, right? Because as we all know, Colab is temporal. This gets deleted when Colab shuts down. And just a reminder, what error are we trying to fix? We're trying to fix this authentication. But to do that, we need a model on Google Cloud. So come back here. I'm going to run this cell. This is all on the GitHub, by the way. A whole bunch of output. Basically, we're just installing the gcloud SDK into Google Colab, and then we're going to initialize it here. There's a tutorial there if you want to install the gcloud SDK. Very helpful. You're basically going to have to do that if you use Google Cloud. Cloud full stop. And then we're going to get asked a bunch of questions. I'll show you them rather than just talk about them. So please enter your numeric choice. What do I want to do? Pick the configuration I want to use. No, I just want to use default settings. I don't want to create my own custom. Choose the account you would like to perform operations in this configuration. Daniel@mrdbourke.com. That's my Google account. And what we're doing right now may seem like a lot of steps, but this is because we're doing it through Colab. If you were to set this up in like your software developer environment, you can automate a whole bunch of this. Number 4 is Daniel's DL Playground. These are the projects I want to use. We come back to console. Remember, this is my project name. Anywhere you see my project name, replace it with yours. So number 4. And then do you want to configure a default compute region and zone? No, I think Google just defaults to whatever your project is set on. Set that to wherever your— US is usually generally good. Okay, now look at this. So we've authenticated Google Cloud, we've got our bucket, nothing in here, remember, nothing in here. Now we can use— to upload anything to a bucket, you will need an existing bucket. That's what we've got. Look at that. How good is that? So here's the one I used previously. Now, what this line is saying is it's going gsutil. Now, gsutil is Google Storage Utility. It's a part of gcloud. So that's why we installed gcloud, Google Cloud SDK. Copy recursively the folder containing my model to this bucket. Now, if you ran this line of code, it wouldn't work for you because you don't have this bucket on yours. And you don't have my user account authenticating your Colab. So that's an important point there. So what do we have to do? We have to replace this. So this is the one I did on Twitch livestream, worked there. So this is why I'm saying hopefully it works here. We have to replace it with our bucket name, right? So this is, this is, this is the Lego blocks coming into action. So we have gsutil copy recursively all of the files in EfficientNet Model 1 10 classes to our Google Storage, the bucket we just created. Remember, Google Cloud offers storage and compute. We need to store our model on there. This is what we're doing. Ready? We're going to do this live, running it together. Haha, look at that. It's going to be very quick, very, very quick because it's all online. Nothing in our bucket. Click refresh. Boom! Look at that, right? So this is our EfficientNet model. So how cool is that? We now have a machine learning model living in a Google Cloud Storage bucket. Now we're on to the next step. So that's our CS329S live bucket creation. And this is my bucket that I created earlier. This is what my app is set up to run with. We've got some more models here, but I'm going to— let's go continue to work with our CS329S live bucket creation. Okay, so we've got a model hosted. Let's come back to the keynote. Get the app working locally, deploy the model to AI platform. Now we could Google this, how to Deploy a model to AI Platform. Um, Google's documentation is very verbose, um, but this is basically the steps we're going through. Look at this: in order to deploy your trained model on AI Platform Prediction, you must upload your saved model to a Cloud Storage bucket. What have we done? We've just done that. Boom. Now create an AI Platform prediction model resource. Okay, let's see how we can do that. And then we've got to create an AI Platform prediction model version resource specifying the Cloud Storage path to your saved model. Let's do those two steps now. How are we going for time, by the way? Because I'm kind of just, uh, burning through this and not really paying attention to time. I've got Okay, sweet. Well, this is, this is probably the longest step of the whole thing. Um, so let's go back. What did it just say? Um, upload your saved model to a Cloud Storage bucket, create an app. We need to do these two. This is what we're doing, create an AI Platform prediction. And we're working with Lego blocks here. I've got too many tabs up. Where did all my pins go? Is this Google Cloud playing with me right now? Did it just— did you just see that? It just removed all my pins. What the hell? Anyway, okay, so a classic live demo. AI Platform, I did have that pinned. It just disappeared. Wow, been using Google Platform for like 2 years and that's never happened. This is AI Platform, right? Again, a lot of this stuff we're covering is, we're doing the clicky around way, okay? So we're clicking around Google Cloud Platform Console. This is like the Lego blocks I was talking about. But again, with the gcloud command line tool, you can do all of this programmatically. I just want to show you the visual, visual way of doing things. So we want, where did it This is really strange. There's usually a permanent sidebar on AI Platform. I might just refresh this. You know, there we go. See, look at this. Google Cloud's gone whack on me. Okay, so you should have this sidebar, but we're just in AI Platform. If you don't have this screen available, you may have to enable the API, which is usually just Yes, I want to use AI platform. It's just a button. Models. So here are the existing models that I have. All right. There's the 3 models. We haven't spoken anything about those just yet, but what we need to do is create new model. Now we're going to go CS329S live model creation, delete later. Very important point, if you don't want to get charged, delete all of this stuff that we're doing later. Again, that's a simple way of just going, pressing delete. US region, US Central, I'm going to keep it there. You can change it depending on what, what you're working on. Again, if you have data privacy rules, think about that, but I don't. Going US Central. I can only contain underscores, Jesus. Live. Model deployment. We'll just keep it at that. Um, US Central description, EfficientNet. You can call it what you want, but that's just what mine is. Do you want to turn on logging? Um, I'm not going to go through that, but you can just imagine what this does. It's going to enable logging, but you can turn this on later. So this is it, right? This is the step 1 in deploying a model. Step 2, sorry. Upload your model to a saved Cloud Storage bucket, tick. Create an AI Platform prediction model resource, what we're doing right now. Create model, create. We'll let that run through. I'm going to come back to the keynote. I actually have a visual way of doing this. Here we go. This is probably a bit more fun. Yeah, how about we look at that? That's way better than looking at some text. Here's where we're up to. Have we done this? Yes, build model MVP style app. The code for that is on GitHub. We've kind of glazed over that. Upload model to Google Storage, we've done that. We are now up to hosting the model on AI Platform. So here we go, CS329S, live model deployment. That's our model. But the guide says create an AI Platform prediction version resource. So the model is like just the overarching thing. The version is versions of your model. As you see here, I've got models here and their versions. This one should really be 001. Actually doesn't matter what you call your version. We'll come in here. Why is this important? Well, let's say you had one model trained on 10 classes using EfficientNet-B0. Your version 1 could be EfficientNet-B0, your version 2 might be EfficientNet-B4, and you want to A/B test those later on. Push B0 to some people, push B4 to other people, see how the results go. Let's create a version. This is where we connect the Lego blocks of Google Storage. So I'm just going to call this V01. Description: EfficientNet V0, 10 classes. Prebuilt container. This is also important. You're usually probably going to use prebuilt container. They include TensorFlow, Scikit, and PyTorch versions. Now, what is a container? That is Docker. We haven't actually talked about Docker, but just imagine Docker is like a service that helps you wrap all your code into like a nice little box, and then you can run that box anywhere that Docker runs, and that's a lot of places. So that's how I imagine containers. So unless you have experience building your own custom containers, I would suggest use one of Google's pre-built ones. They probably satisfy most of your requirements. Pre-built container settings. I want Python 3.7. I want to use TensorFlow. If you need PyTorch, refer to the documentation version. I'm going to use 2.3.1 because I tried 2.4 yesterday and it was busted. You may have a different experience. ML runtime version 2.3. Usually with all of these, it's like the latest unless you're using some really specific version of TensorFlow or PyTorch or Python or whatever. Usually it's, it's the latest. So now we go the model. This is gs— where have we seen this before? We uploaded our model to a bucket before, so we need to link that bucket. So let's go here again. This is just Lego bricks with Google Cloud tools. There we go, cs329s live bucket creation. Select. Boom. Done. Model linked to AI Platform. Now, how do we want our prediction to work? Scaling. Do we want to put it to auto scaling? What does that mean? Well, the beautiful thing about Google Cloud is it's infinitely scalable. And I say infinitely, that's like a star. But that means is, say you started with a small computer and you only needed to serve 1 request per hour while you're testing your app and you're like, okay, that's enough compute. But then all of a sudden you do a live tutorial, um, for 40 or so people and everyone's accessing your app and a small computer is not enough, it's going to automatically upgrade you to however many computers serves all the people. And so that's a very helpful thing. But then even better, once those people stop using your app, it'll go back down. So that's something to keep in mind. I like to choose the smallest by default. Whenever you want the smallest with Google Cloud, it's usually just whatever has the lowest numbers. Um, so N1 standard, it's going to have a machine with 2 CPUs, 7.5 gigs of memory, scale up if it needed. If we want a GPU to run GPU predictions, like if you wanted actually a full-blown application, you can power this AI platform with the GPU. Faster predictions cost a lot more. So just keep that in mind. And you can also, you could have multiple GPUs. So if we wanted to really just turn this right up, we could have 4 P100s powering Food Vision. But how do I turn this off now? Oh well, I can't. Look at this, this is, uh, this is a design flaw from Google. If you select a GPU, you're stuffed. Anyway, I guess ours is running with the GPU now. And then service account, we'll go into that in a second. Anyway, we need to save that. Oh, what is happening here? Of course there's an error. Contain exactly one. Oh, sorry, we need to pass the path to our model. So that's— we need to pass the direct path to the actual model file. That's all we had to do. So this is launching with a GPU. It's going to cost me a whole bunch. That's a very big design flaw on Google Cloud. Once you select GPUs, no changing it. So this is actually going to take a few minutes. So what we'll probably do now is— where are we up to? Come back to the keynote. So this is what our model is doing. It's hosting on AI Platform. Now we need to create a service account to access that model. So we've done these 3 steps. Did someone— was someone telling me that I could have actually changed the GPU? Anyway, we'll just leave that because we've got a fit. We've got a couple more things I want to cover. This is probably the longest part, as I said. That's going to take a few minutes. So how do we create a service account? Well, Google's done the right thing and just removed all my pins. But that's okay. Service account is in IAM and admin service accounts. So you're going to spend a lot of time in here. Usually this is like the role of a DevOps engineer or whatever, but I like to just get familiar with things myself. So this is just IAM and admin. I don't actually know what IAM even stands for. Um, all I know is that you need to go in here to give permissions to certain things. So let's see what that looks like while our model deploys to AI Platform. So I've got a bunch of things here. You can see the key IDs here, but you can't actually do anything with that because that's just an ID. The actual key is a JSON of like thousands of characters. So this is the one I created yesterday for the Twitch livestream. So this is what we're going to do. This is what— this is tying it way back into here, fixing this error. We don't have the right key. So let's, again, all of this can be done from the command line interface, but I'm doing the clicky around version. Create service account, service account name CS329S, live service account creation. What will this do? Able to make predictions using AI platform. Create. Now this is an important point here. The whole reason we need to make this, we need to grant this, uh, service account access to a project. So by default, when you create any service account, they're given the bare minimum permissions. So basically nothing, which is good because you should only give service accounts permissions of what they need to do. So in our case, what do we want to do? Look how many roles there are. This is how many services Google Cloud has, right? All of these. Our account doesn't need to do most of them. All it needs to do is be able to make predictions on ML Engine. Now they haven't— ML Engine Developer. ML Engine is the same as AI Platform. Little tidbit there. Google did a recent rebranding because AI is more hype here than ML to name it AI Platform. But the, the role is still called ML Engine Developer. So if we click that, continue. Now the developer role just means that it can access the, um, the model we just hosted. Um, this is more for if you wanted to give other users in your Google Cloud organization access to this role. I don't, I'm just using it for my personal thing, but you might if you have multiple people. Done. Now this is quite quick. So where is it? CS, there we go. This is our account. We haven't got a key yet. Okay, well that's alright. We can just click here, create key. Now it's going to download in a JSON. I actually need to hide this again because otherwise I have a risk of showing you all my key. Don't show your key. So I'm going to click create and it's going to download. Okay, so that's all it did. Close. All right, so all I did was click create key and then click download, and then it's going to be in my downloads folder. So what do we have to do now? You can probably imagine where do we have to put this key. There's a key I'm going to move this into code, into here, into test. I'm going to put it into my foodvision directory. Done. All right. Now, this is very, very exciting, actually. We may have just— we might just be able to fix our first error. I'm going to copy the path to that key. And let's see, while we're at it, I said that our model takes a while to deploy. Let's go back to AI Platform. Let's see if it's live because then we can really just make sure all of this is, is live deployment. And no, the default version is not ready yet, but that's okay. I've got a few models that I've prepared earlier. This one is just the exact same thing as the live deployment. Let's come back into our app.py. All I'm going to do here is change the path to the key to this key. So I'm just going to copy this. This is the old and I just leave that there. And this is the new key, the brand new key that I just created. Very important point using any gcloud services is having keys. So there we go. New key. I'm going to save that. Now, the beautiful thing about Streamlit is watch this. It refreshes itself. It actually knows when you refreshed it. So localhost, source file change. What did we change? All we did was we updated the key file to be the one that we just created and we put it into the working directory. So let's refresh this. Y'all ready for this live prediction? Ice cream. And we're going to predict. Pings a model. Fingers crossed. Oh yes, look at that, right? So that just pinged our model. Did it ping the one we just hosted? No, it didn't because it's not deployed yet. It's not deployed yet, but it is if we come into here, open. Food Vision. Nope, we want tests. Yes, here, tests. This is one that opened. Food Vision, utils, open. So it opened my— this one here, model name. You're going to have to change that to whatever you want. If we wanted to open our, um, this one, we would change it to the model name there. Okay. Few steps there, we covered a lot. So now we fixed our first error, but guess what? We can deploy our app now, 'cause it's got the right key. So this is the model that my application just used. So I'm gonna come to the keynote. We've just taken care of that step, major step there. Now this is actually quite fast because I've automated it, and I will show you what I did to do that. But I'm gonna go to the chat. Why is the key on Google Cloud cause the app run on local to work. So Bob, that's a great question. We, so what we're doing here is, so this is the environment variable, right? We're setting it up with os.environ, Google, Google application credentials. It's going to read this key, but utils.py, I haven't quite actually explained this. This function here, predict_json. What this essentially does is it creates an ML Engine, like a link, an API. I'll show you what that is in a second. And then it creates an ML Engine resource endpoint, and then it asks our ML resource to predict. And then to get a response, we use the Python request library, which is just like something to go, hey, internet, give me some information back after I've sent you this. We send request.execute. Now, this— because this request is going to Google Cloud, when it hits Google Cloud, Google's going to be like, hey, where's your key? Can you make this prediction? And then because our environment variable is set up to be our key, it's going to go, well, here's my key, please give me that information back. And Google's going to be like, yep, that's a good key. Here's your information. If it's not a good key, it's, it's going to block you out. So that's how I understand it. But if you want to know where this function came from, let's go into models. This might be ready now. Nope, not ready. So that takes a couple of minutes, probably taking a while because I put a GPU on the backend. But if we come in here, this is our version 1 default. This is something I made earlier. This is if you want to test and use, go here. This is how So this is— I'm not going to dive too deep into this, but this is how Google's ML engine wants to see our data as a JSON with instances with— there's a tensor in this list. So that's basically how Google Cloud wants to see our data as a JSON with a key instances. Inside instances is the data we're sending it. And this is a sample prediction request, just this function here. Using Google's API client library. So that's where the, that's where the key part comes from, all of this. But I will let you go through that. We've got a, we've got another step to, um, a fair few steps to cover here, but we're gonna— this is, this is quite quick. Let's do all of these in basically one hit. Are you ready? So terminal. So this is running locally. Um, let's, uh, create a new terminal window. I should really have this tabbed, shouldn't I? But Conda deactivate. Wonderful. Let's cd into code/tests/cs. So ls cd foodvision ls clear. So now in here, I know we need to activate the env. Oh no, it was in foodvision, wasn't it? So this is, this is the, the repo that I cloned earlier. But now see how it has the key in here, but that's not going to save to GitHub because we've got, we've got JSON and.gitignore. Um, what we're going to do here is there's a few files in here, Makefile and Dockerfile. Makefile is like just a— well, let's have a look. Makefile. So we've got a fair few commands in here, or actually only 3. So if we did make run, it would run this command. If we said make run container, it would build our app into a Docker container. If we do gcloud deploy, it's going to deploy our app to App Engine. Now that's because we've set up make. So if we just type in make gcloud deploy. I'm not going to hit enter, but it's just going to run this command here. So that's, that's the helpfulness of a Makefile. If you just Google what is a Makefile, you'll— there's the first resource is probably the best for that. But when it— when we do this, we're actually going to run this and I'll talk you through the steps. So let me just activate the environment. And you might be like, Daniel, we've covered a whole bunch of stuff. Do I really have to do all of this every time I want to deploy a machine learning model? We've gone the very long route, the clicky around version. You can put all of this into a script and just execute that script and it's going to do itself. So before we run make gcloud deploy, all that's going to do is deploy our local app. Right. Where is it? This one. It's going to deploy this. It's going to wrap it up into a Docker container. Remember, just basically saying, hey, take all of the stuff we've got working locally, put it in a box, send that box to Google Cloud, run that on one of your computers exactly how it runs locally, and we should end up with something like this and pumping out errors. Just great, isn't it? All right, so just for in case the deployment doesn't work, this is the end product. Okay, the deployment is going to take a couple minutes, so I'm going to kick that off. You can see it now as it goes back. We've got 5 minutes remaining. Far out. Okay, well, I just need to quickly, um, I'm gonna run this. Make gcloud deploy run. Uh, do I want to continue? Whole bunch of stuff just saying yes, do you want to do that? We need an app.yaml file. Haven't discussed what's in that, but that's basically 2 lines. Just telling App Engine what type of computer we want. Here we go. Beginning deployment of service. You will need App Engine API activated for this. This is going to take a few minutes, so I'm just going to let it kick off, and then I'll wrap up. But I'll show you the— I'll show you some of the errors on the local version of the app. So where are we at? We go to the keynote. We'll pretend we did all of this, but this is wrapping a Docker container. These two steps happen automatically when you call gcloud app deploy. And then if we want to monitor the app, you can monitor it later. Everything works nicely until you deploy your model in the wild. A smart machine learning engineer said that, by the way. Okay, we'll keep checking back in on that. And I'll just finish off these slides. So there's some problems you're going to run into. What do you do when your model fails? When, if not? What shape does your data come in? So for example, JPEG versus PNG for text, you're going to have a whole bunch of other different issues there too. ML Engine has a hard limit of 1.5 megabytes. We'll probably see, we might have time to take care of one of these. What do you do when your user has a class you've never seen? When do you retrain your model? What do you do when a user has a class not even in your scope? So while this is deploying, I'm going to show you probably 2 out of the 5 problems that we've got here just to finish off. But this is building, okay? Takes a little while. You can, again, you can automate all of this so you don't have to wait for it. It'll just do it in the background. And but let's see this. Oh, there's a spoiler. So this is the funnest one. What do you do when your user has a class? So this is problem number 1, everything looks like daddy. So machine learning model is what, probabilistic? So it means it's going to make a decision no matter what you pass it to. So we'll go to our local version. You might have seen over here we've got model 1, model 2, model 3. These are all deployed to Google Cloud. Now model 1 can work on these classes. It's trained on ice cream, so it works on ice cream. What happens if I upload a photo of donuts? It's going to run in that prediction. What's going to happen? Hamburger, right? Because our model is probabilistic. So this is the data flywheel coming into effect. I've got a here, an option. Where this is the equivalent of Tesla's Autopilot disengaging. This could be a user selecting no, this is not correct. What should the label be? Donut. Beautiful. Thank you for that. We'll use your help to make our model better. Of course, this is just a text field. You could put this into a preloaded text field that it only works with certain number of food classes. That's another thing. That's an extension. We come back to our terminal. It's still building and pushing the image. So again, I told you that's going to take a while. But look what happened here. This is our locally running Streamlit version we've got here. Um, oh my gosh. So 8502 and we've got a log here. This is the image tensor that we just passed it. So this is a donut in tensor form in color channels. So the model we used was our EfficientNet Model 1, 10 classes. The pred class was hamburger. The confidence, the prediction probability was 0.54. Was this correct? False, because the user labeled it as false and the user label was donut. So maybe that's something we refeed back into our model. Alright, and then we found people are taking so many photos of donuts, it's not funny. Well then we've got model 2. Look at this. We refresh. We'll use model 2. This is another trained model. What classes is our model trained on? We've got donut there now. Well, let's upload donut. So these are the things you don't really come across when you just train models in notebooks. You need people to interact with your model or you need to test them personally. So what do you think is going to happen now that our model has been trained on donuts? Look at that! Prediction: donut. Is this correct? Yes. Thank you for that. Just go in your feedback, we'll come back to terminal. Another log. So we've got the image there. Of course, this is logging in my local terminal. You would probably want to log this in your, say, Google Cloud Storage or something like that, or BigQuery. So the prediction class is donut. Is the label true? Correct. So you know, you're seeing if your model was to make 100 predictions, you could index on all of these entries, find the ones that are false, and then update them. Finally, What happens if— yeah, you're right, that's so fine. Okay. Thank you. Thank you. I was a little nervous, but I had such a fun time. And of course, it's, it's going over a little bit. However, all of the code and whatnot and all the stuff to go along with this will be on the GitHub. But I will just show you, this is probably the last one. Maybe then That'll be— we can wrap it up, maybe have a question or something. But another problem that you're going to run into, we built Food Vision, and of course it's an image recognition model, but what happens if someone uploads a photo of something that's not food? Oh my gosh, we totally forgot about images that aren't food. What's it going to do? What's our model trained on? It's only trained on 11 different classes here. It's predicting that this truck is a hamburger. That's not a very good user experience, is it? Then our user hopefully goes no. Then what should it be? Truck or not food or something like that. That's what we could prompt the user to put in whatever they want. Then again, that gets logged in terminal. We forgot to hit Enter. Anyway, that'll get logged. We find out that this is another problem with our model. It's food vision, but people can upload photos of whatever they want. So model 3 comes into play. This is another hosted EfficientNet model. And so I created this one. It's got a not food class. So you can probably guess what's going to happen with this image of a truck prediction. We didn't actually do that, but the way Streamlit apps are built is that whenever you change something, it's just going to rerun the whole app. So prediction: not food. Is this correct? Yes. And so what are we creating there? That's our data flywheel. That's the whole objective that we're trying to get to, because you never really know these problems until your model is out in the wild, until you're building something with it. That's the only real time you're going to, to get these sort of issues. And of course, I've done this by training a model on 11 classes of food plus one class of not food. So just random images from ImageNet put into that, just random classes. And so I've just labeled all of them as not food. But you could have something like a model cascade. This is too much to cover in the last 2 minutes of this, but you could go— it goes through one classifier. Is it food? Not food. If it's food, it does this. If it's not food, we tell the user, hey, please upload photo of food. So I'll just wrap up these slides. There's not much left. So problem number 1, everything looks like daddy. Problem number 2, that was everything still looks like daddy because we had to solve for not food. So beautiful timing, we're at the end. Did our model deploy? We'll come back to terminal. Um, oh, it's still building the Docker container. So all of this will be on Google Cloud, uh, on Colab, by the way. So if you want to run through these steps, I'll fix the README today. But finally, oh, That's not the keynote. Let's go into here. We'll wrap up. I've got like 2 more slides left. Google Cloud Services cost, no credits equals money flying away. So make sure you shut everything down. Learn GCP where? You can go to google.quicklabs.com. Great resource. You can learn a whole bunch of the stuff that we just discussed in there. There's some specific machine learning APIs and whatnot that you'll probably want to go through. Extensions, if you really wanted to, and this is where I'm progressing towards. So CI/CD, you'll hear this a lot, continuous integration, continuous deployment. So basically what this means is every time you make a change to your app, you would upload it to GitHub, you'd have a script that notices that change, and then your app that's deployed in the browser, say this one, updates automatically. So that's— you can do that with something like GitHub Actions. Have a look into that. Codefy everything. We did a lot of the clicking around version of Google Cloud, but with the gcloud utility, the gcloud SDK, you can do basically everything we just did with command line arguments, command line commands, and then actually log the data from your app into, say, BigQuery or Google Storage or something like Google Monitoring. That way you can come back to it later. And finally, I think that's it. So yeah, thank you very much. Yeah, we didn't, we didn't quite reach the deployment, but this is going to deploy and it's going to come to that URL that we, uh, that we, um, we sent. But, uh, yeah, go to the GitHub repo, you'll be able to reproduce all of this stuff yourself. Thank you so much. I appreciate it. And well, welcome to the back half of this video. If you watched the previous half, you saw that that was during a tutorial I gave for Stanford's CS329S. However, as usual, I went a Overtime, my video got a bit verbose. So because you're watching this on YouTube, how about we finish it off? We kind of did the last back half of the deployment and whatever in a hurry. We did briefly look at what do you do when your model has a class you've never seen? So you update your model, you retrain it, you add that class. We use our data flywheel as feedback. So we gave the example of our model not working for donuts. Then we added the donut class, trained another model, Again, if you want all of the model code, it'll be in the model training notebook in the GitHub repo. So you can see there. So model 2 is 11 food classes. I'll put here same as model 1, but we've added the donut class. All right. So if we come into here, this is our app running on a localhost. Model 1. I'm just reiterating what we did. Change it to Model 2. Show the classes for Model 2. We have donut now. Let's upload donut and then make a prediction. This is going to ping our model that's hosted on Google Cloud. If I come into my dashboard, AI Platform, I have I have 3 models here. One was the one we did during the tutorial, and the other 3 is one trained on 10 food classes, 11 food classes, and this one's trained on 11 food classes plus one not food class. These are things you have to think about when you start to deploy your machine learning apps. What happens when your model faces something that it hasn't been trained on? And you'll only realize those when you start to put your stuff out into the wild. It's very hard to get that information from, from just working in a notebook. Okay, so let's go back to our app. It predicts donut. Wonderful. And we can get our Datafly wheel going by telling our application that that is correct. So if we come back to terminal, the last place that we left off was running the command make gcloud deploy. But as you see, for some reason, this is, This would have happened in the tutorial if we had time. My model deployment failed. So let me just show you what's in the Makefile because we kind of brushed over that in the tutorial. What happens in the Makefile? So Make is just a collection of little scripts that you can run. And here we go. gcloud deploy. This is what we want to run. When we run make gcloud deploy, it runs gcloud app deploy. App.yaml. And then if we do the same thing with cat app.yaml, this is what's in our YAML file, just 2 lines. So this is telling Google— sorry, Google's App Engine— the app.yaml, if you go into the App Engine documentation, tells App Engine what type of runtime it should use. Runtime is another word for container. So we want it to use our own custom runtime. Which is, remember what I said before, when we run Docker, it's going to containerize our app, or when we run this command, it's actually going to build a Docker container around our app. So this is what Docker does, builds a container around your app, and then it passes that container. So it's a custom container running everything that's running locally. We want to pass that to App Engine. So that's why we have to tell it runtime custom. And then the environment, we want it to be a flexible environment. So again, that's another just a parameter to say that it's, it's flexible. Let us customize it ourselves. You can dig into the documentation for Google's App Engine if you want to find out more about what to include in your app.yaml. Again, you can run all this from the command line or you can do it from within the Google Cloud Console. So let's rerun this. We'll clear this. Let's run make gcloud Deploy. And I just want to show you where all these files come from as well. We'll let this go through. Here's some information. The target project— this is going to be my Google Cloud project. It'll swap out for, for your project from Google Cloud, whatever you've called it. And then if everything works, it's going to end up at this URL, which is currently running. Here. Okay, so if you're watching this video in the future, this URL may or may not work depending if I've turned it off, because remember, Google Cloud costs money. So we're going to leave that run. It's going to take a few minutes while we talk about some other things with our app. And so let's go— or let's have a look at App Engine. Um, gcloud app Deploy. Here we go. What does this need? Does it say YAML? Deploy with a specific app.yaml that will replace the one defined in deployable. So what is app.yaml in App Engine Python? Here we go. App.yaml reference. This is Python 2, I believe. We want Python 3. app.yaml configuration file. There we go. So you configure your App Engine settings in the app.yaml file. The app.yaml file also contains information about your app's code, such as the runtime and the latest version identifier. So there you go, you can read through the documentation there. This is a pretty— this is a longer one here for a Python 3 application. Um, okay, so there we go. We could have included like maybe a bucket in there so that when we upload images to our app using this, it will upload them to a Google Storage bucket. So that's, that's something for an extension. We're not going to cover that in this tutorial. Let's keep going with the deployment. Anything happening here? Not really. So what this is doing is building and pushing an image for service. Uh, an image is an immutable version of a container. So once Docker creates a container of our app, it turns it into an image. So then that image is— you can't change that image. It's just, it's like that. So that's calling Docker in the background. If we go back to our keynote, while we're waiting for our app to be pushed and wrapped up in Docker and pushed to App Engine, what do you do when your model fails? When, not if. So we kind of saw that with these two examples of when our user uploads a class that we've never seen before and when a user has a class not even in our scope. So first was a food that wasn't in our models and then was something not even related to food. So the, the, another scenario could be like a self-driving car and it's driving along a beach but it's only trained on roads. So what does it do there? Does it work there? Who knows? Maybe, maybe not. A human can go from driving on the road to driving on the beach, but can a self-driving car? So what do you do there? That's a very important point. It's going to change no matter what sort of project you're working on, but it's worth thinking about. What shape does your data come in? So this is another one to really think about. So what, what basically is a deep learning a deep neural network. It takes a tensor of some sort of input, it finds patterns in that tensor, and it produces some sort of output. So let me show you an example with our, uh, local app. If we go into app.py, uh, actually better off utils.py, I'm going to change one line of code here. So I'm going to change this to this. That's all I've changed. So what happened there? Well, I went from image equals tensorflow.io.decode_image filename and it has no channels equals 3. This one has channels equals 3. So let's see what happens. We'll save that. We'll refresh. We'll actually refresh here. So we'll use model 2 that just worked before on our donut image. Browse files. We'll upload donuts. What's going to happen here? Let's see. It's going to run same model, same image we used before. All we did was change one line of code in our app. Oh no. What's happened? Well, incompatible shapes. 12244 versus 1113. That doesn't make any sense. So I'll tell you what happened was this donuts image used to originally be a PNG, which has 4 color channels versus a JPEG having 3. So that one line of code, because our model was trained on images with 3 color channels, when we tried to make a prediction using an image with 4 color channels, it errors out. So I'll just go into here. We'll be able to see the shape. So how about we go, um, app.py and we'll print out the image shape. Let's do that. Where does it come here? Make prediction. We'll go print. Actually, it gets changed in here, so we may not be able to print it out, but I'll try to anyway. But this is just to demonstrate. Print image.shape. Okay, we'll rerun, upload the image of the donut, predict. Is it going to come out? I don't know. I don't think so. Maybe because it's only in our preprocessing function. Oh, I'll tell you where we could probably do it. If we go back to the code in here. Make prediction image. There we go. Print image.shape. Save. Rerun. Do the exact same image. So this is— I wanted to include the errors in the original tutorial that I was doing because that's you're going to run into errors all the time. And I just want to highlight some of the things you have to make sure the inputs, input shapes you're giving to your model, the same of the output shapes that you need. Okay, so it's not, it's not printing. All right. Well, it's the wrong shape. So if we come back here to utils.py and we uncomment this and we re-comment that, so now we're fixing to make sure that instead of 4 channels, it has 3 channels. So see here, this image currently has 4 channels. So let's refresh this. Oh, actually, I'll have to save utils.py. Refresh. Browse. Donuts. Upload. Or actually, I'll change to model 2 and then predict. Now this is another thing where your app will break. Actually, if you're doing this on your side is I have 3 models deployed and you can see this in utils.py, model 1, 2, 3. If you only want to run one model, I'd get rid of model 2 and 3 from this dictionary here. And in the Streamlit code, you can also get rid of this logic here that decides you to choose a model. So just delete this and change it to model. Only have option for model 1 rather than model 2 and model 3. So that's just a heads up. If you're running it from your end, you only want to train it on one model. I just made 3 models to exemplify the problems that we're talking about. So there we go. It works. Once we change the shape, there's another thing that I want to show you. It's that if you're using ML Engine, which is AI platform, it has a hard limit of 1.5 megabytes. What does that mean? Well, I found this out when I was building my app. If we come in here, so I've got a little line here. This print didn't work. I've got a line here that says image equals tf.cast tf.expand_dims image tf. So I'm turning my tensor image tensor from a default float32. That's TensorFlow's default data type. To int32. Why am I doing that? Well, if we uncomment this, I just want to show you the error and we'll see what happens. Come back to our local app, we'll refresh that. Uh, how about we choose Model 3 this time? Browse files. You don't have to choose Model 3, you can just run one model if you want, but just remember to change that code I showed you before. Truck.jpg. Make a prediction while that's running. We'll see what's happening here. Beautiful. We'll go back through this code in a second. Whole bunch of jumble stuff. But what's going to happen here? What do you think? I told you ML Engine has a hard limit of 1.5 megabytes. We've just asked our model, Model 3 hosted on AI Platform. You might only have one model. That's okay. To predict on a truck. Oh no, look, this is what we get. So this is the errors that you're going to run into when you start to deploy your machine learning models. It's saying that this image, once we convert it to a tensor and go, hey Google, predict on this tensor, it's over 1— whatever that number is, 1,572,864 bytes. So that's 1.5 megabytes. So how do you fix that? Well, if you have a look at this float32 versus float16, um, no, we need to— half-precision floating point. So in computing, half-precision, sometimes called FP16, is a binary floating point computer number format that copies— occupies 16 bits, 2 bytes in modern computers. in computer memory. So we need to go float32 versus int16, storage. We need to see how much memory each of these take up. Here we go. This might tell us. That's what I want. The higher the precision point. Um, Here we go. I'll zoom in on this. The higher precision point types require more disk space for each stored value. Look at this. Float16 points use 16 bits or 2 bytes per value. Float32 and Float64 use 4 and 8 bytes per value respectively. Int16 and Int32 use 2 and 4 bytes. So that's what we've changed it to. Int16 from float— float32. So it's using half the memory as usual. So instead of TensorFlow's default float32 using 4 bytes per value, we change it to int16 using 2 bytes per value. So if we come in here, this is called, uh, mixed precision or half precision or something along those lines. That's what you'll see. So by changing it from— this is default float32. We changed it using this line to int16. So we're taking up half the space, half the memory. We're compressing the information in our tensor. Still going to have the majority of the same information. It's just been compressed. So we'll save that, come back to our app, rerun. We'll use the same model, model 3. And we'll use the same image of the truck. Upload. And then we'll run predict. Running make prediction. Boom! Not food. Confidence 0.929. So that's the prediction probability output of our EfficientNet neural network with our own custom Dense layer on top. How exciting is that? So there are just a handful of the issues that you're going to run into. What do you do when you— when your model fails? That's when, not if, in your machine learning applications. What shape does your data come in? For example, JPEG versus PNG. It's going to be different depending on what kind of data you're working with. Sometimes you may have a size limitation on how much you can compute. We're using an API to compute. If you were on an embedded device, so say like an iPhone or a mobile, a Raspberry Pi or something, you may have even more size limitations on how you can compute. So you have to start thinking about how big are your tensors and how big are your models. What do you do when your user has a class you've never seen? We saw that we trained a different model, we added a different class. And what do you do when a user has a class not even in your scope? We saw that we also had to adjust for Food Vision is what if someone uploads an image that's not food? Again, these are all problems that you're only starting to think about when you deploy your applications. But let's have a look what's terminal telling us. Okay, we're going to scroll back up here. There's a lot, lot going on, but let's just step through it, right? So it starts off, it needs to build a Docker container. And how does it build a Docker container? Well, let's see. Let's go back to the GitHub. Cs329s. If we go here and if we go into this, all the files that you need are going to be in this GitHub. As of recording, there are some things that I need to still do in this, but by the time you watch this video on YouTube, I'm going to— the README will have all of the steps that we, we talk about in this video. So if we go into the food vision, this is where we're running all of our files from. This is what you get when you clone it. So then if you go to the Makefile, right, we've just run the Makefile. This is the Makefile on GitHub. We've discussed what's going on in there. I'm just going to zoom in there. Okay. If you want to look up what a Makefile is, just search what is a Makefile. There's the first link. I'm pretty sure we'll have a great description. Dockerfile. So here's what's running now. Let's watch this in unison to what's going on over here. Okay, so build. So can you see all that? Yes, you can. Um, we've got step 1 of 8. So we have 1, 2, 3, 4, 5, 6, 7, 8. We have 8 commands in this Dockerfile. A Dockerfile is just a text file of a bunch of different commands to run through sequentially. That's what you have to imagine for Docker. Where can you learn Docker? Docker have a great tutorial. It's very verbose. So I'd probably look up— maybe you can probably get it all in half an hour or just not half an hour, but just the, the crux of it in a half an hour YouTube video by searching how to use Docker for Python. Now, step 1, from Python 3.7, I'm going to close this a little bit so we can How do I— I don't want to make the terminal unreadable. I want to keep it readable so we can look at both of these in unison. Okay, so step 1 of 8 from Python 3.7. That means it's going to create an environment, Python 3.7. Docker have an existing Python 3.7 environment. It's going to create all of these, all of these code, like little weird number, numbery things is what's building that container around your application, starting with Python 3.7 as the foundation. Then we come down here. So I don't even know what's going on with all of these. They're all jumbled up numbers. If you, if you know, you can leave a comment below. Step number 2 is expose port 8080. Where have we seen a port? So our Streamlit application is a web application and you see here it's running on localhost:8502. We can also see that in, um, our Streamlit run. So this is using it on localhost:8502. If we go back to terminal, um, in App Engine we're exposing the default port of 8080. So that means in our App Engine computer— that's what App Engine basically is, it's just like a computer stored on Google Cloud— in App Engine we're exposing port 8080. Okay, that's what that line is in our Dockerfile. Expose the port you want your app on. Now next it's running pip install upgrade pip. So it's just upgrading pip in our, um, in our container so that it's got, it's got the latest version of pip. Requirement already satisfied, wonderful. And then what's it doing next? It's going copy requirements.txt into a folder called app/requirements.txt. So it's standard convention in your Docker container to create, if you're running something on App Engine, to put it in a directory called app. And so that's what we're doing here. We're copying requirements.txt from the main foodvision branch. Alright, so copy this file here into a directory called app. And then it's running, if we go back to the Dockerfile, and then it's running pip install app/requirements.txt. It's getting all of the requirements into our Docker container, just like we did when we git cloned this repo way back in the beginning and we installed requirements.txt in our local environment. It's doing the same thing in the Docker container. So then you'll see a whole bunch of things here— collecting requests, collecting TensorFlow, collecting Streamlit. If we scroll down, it's going to do a— look, this is all just a bunch of installing. Okay, pickle share, pigments decorator, etc., etc., all installing in that container. Because remember, what is Docker doing? It's wrapping up our local app, what's running on our local machine, and saying put this in a box. Then I want to be able to run that box anywhere where Docker is, and App Engine can run Docker. That's the beautiful thing about Docker building wheel, all this sort of stuff, whole bunch of outputs. I think this is Streamlit outputs, Streamlit requirements and whatnot. Now we get up to step 7 of 8. Oh, sorry, it's copying. So this is copy, copy dot. So copy everything in foodvision into the working directory app and then we change into the working directory app. And now entrypoint. Another thing that you might see for entrypoint is CMD. If we go back over to here, this is this. This is just saying this is the command we want to run once our container is ready. So just like before, way back at the start when we ran strip streamlit run app.py, we didn't do this, but this is just telling, this is just extra tags to tell our container what port port to run our Streamlit app on because remember we exposed port 8080. So rather than Streamlit's default of 8501, it's going to run on this server port and the server address is just 0.0.0.0. But this is a Docker convention of how your command should be. It's in a list, strings separated by commas. I'm not entirely sure why it has to be like that, but if you read through the documentation, That's just what it says. Okay. Whew. So that's the command we want to run once our container is built. So look at this. Successfully built this. This is our container ID. Now what's happening is our container, our Docker container. This is all happening in one command, make gcloud deploy. Thanks to our Makefile, our Docker container is now getting uploaded to Google Cloud. So that is beautiful. Specifically GCR. So Google Container Registry. Let's go into here. Container Registry. This is just like Google's cloud hosting for Docker container images. Okay. So our container being wrapped up, our local app saying, hey Google, run this exactly how it is on my local machine. We're gonna push that to where you store your containers. And so when you start up your App Engine, you just have to load that container and run it. Everything should be built in there as we wanted. So then it's going up here. The push refers to the repository. So this is just giving us a list. GCR stands for googlecontainerregistry.io/danielsdlplayground. That's my Google Cloud project. Yada yada ya. Oh! And it is going, we get another error. Hmm, actually not sure what's going on here. Let's have a look. Check logs. Let's see what the logs say. Hey, maybe it's because I've already got something running. Project equals cloud builds. We're seeing this together, but this is what you should see. You should see this app Running here. See how we got the same app? I told you I want to keep the errors in. What's going on? Why is this an error? Starting build, etc. Operation sending. Okay, so the Docker— this is all the stuff that we saw before on our terminal. Yep. This is very strange because this worked. This has worked. I've ran no different codes to what I've built. Okay, it timed out. Maybe it took too long. Retry. See, this is the one I ran the other day. And this worked. So maybe my Docker container now takes too long to build. So that's something you'll have to watch out for too. If we go retry, build log. Hmm, this is strange because my app is running. See, this is on Appspot. So let's try it out. So this is the deployed version of the app. Hopefully you get this, um, or you should if you follow these steps. Now this is— I'm not sure how to fix this one, so it is sad, but we're probably going to leave this on another error that we have to cross, another bridge, is that we're getting this request error status code. But I found if you just sort of play with it for a little while Eventually it starts to work. Oh my goodness. It worked on the second try. Two thumbs up. Haha. Look at that. There's some beautiful pizza. So what should this do? The exact same model that we've got running on our local. We click predict. So this is from the Twitch stream actually. So this is running the app version I got running in the Twitch stream. Hmm. Which is interesting. Ah, okay. Ah, cause I deleted the Twitch stream model. That's, that's okay. Now all the errors are starting to come out. So if I change to model 2, model 2 should exist. Correct is pizza. Boom. Look at that model hosted on appspot.com. Um, prediction pizza. Now I believe the error that I'm currently getting is that my Docker container took too long to build. I think that maybe because I— actually, I don't know. So that would be something that I'm going to have to look into. So let me know how you go if you end up going through this entire tutorial with your app to be built. If I find out exactly what's going wrong, I'm going to include it in the in the GitHub repo, but I ran this exact same code the other day and it ran fine on a Twitch livestream and it built. That's why you can see on the deployed version of the app is that if I choose model 1, it tells me Twitch stream model delete later. I can even change this to model 3 and let's see what happens. Pizza. Wonderful. Okay, so the extension of this tutorial would be to figure out why this Docker container build breaks for this build here. Maybe it's just a matter of going retry. I'm not gonna— this video has already gone far too long, so I'm not going to wait for that to go. But let's just go back to our keynote and remind ourselves of what steps we've gone through. Um, yeah, this will be a good one. So here's what we've done. Another extension for you. We built an app with Streamlit, uh, and a TensorFlow model. You could also do the same with PyTorch. We uploaded our model to Google Storage. We hosted our model on AI Platform. We then created a service account to access the model. Remember, that's a key, very important never to upload that key to anywhere public. We wrapped our app in a Docker container using our Makefile and Dockerfile. Then we pushed— well, we didn't actually do this. The gcloud app deploy command pushed our Docker container to GCR, Google Container Registry. But if that takes too long to build, it won't deploy to App Engine. So just beware of that. So that's what the gcloud app deploy command does. We had to specify a YAML file for that as well. Now the app.yaml file describes what the App Engine settings are. And our app.yaml file was as simple as saying, hey, we want a runtime custom, our Docker container, and the environment can be flexible. So that's it. Our app.yaml file was 2 lines of code, and that's not even really code, that's just, uh, word colon word times 2. Um, Okay, so this one looks like it's going a little bit quicker. So this might actually push, but again, I'm not going to wait because this video has already gone on for too long. Um, if you go to this URL and it's not working, this is my thing. I've turned it off. That's a good reminder. So, ah, that's the final extension. You can also monitor your app with monitoring. I'll just show you what that looks like. If we come into here, um, for some reason Google has rearranged all of my stuff. Where is monitoring? Deployment Manager? No, it looks like a screen monitoring. There we go. So this will be all the information about your Google Cloud services that you've got running. And logging. So I've got one instance of App Engine, I've got 6 Cloud Storage buckets, I've got 3 disks. So if we come into App Engine, What does this look like? There we go. It's running. Response latency, etc. What else do we have? Overview. I'll let you, I'll let you explore this. But yeah, this is how you can tell how your app's doing. And back to the keynote. So there's a fair few steps that we did, but again, the point I'm trying to stress here is that model building is similar to model deployment. It's about putting pieces of the puzzle together. Everything works nicely until you deploy your model into the wild. Remember the problems that you're going to run into. What shape is your data? What data limitations do you have? Problem number 1 that we have is every— we had is everything looks like daddy. Remember, we changed our model from model 1 to work, which didn't work with donuts, to model 2, which did work with donuts, to model 3, which worked with donuts. As well as attend food classes, as well as not food classes. Again, this will be problem specific. I don't want to go to that keynote. I want to go back to here. Problem number 2 is everything still looks like daddy. Remember, because a machine learning model is what? Probabilistic. Okay, so you won't— the reason we emphasize the data flywheel is so you can figure out where your model is going to fail. That's in our case, it was a simple user feedback prompt. To tell us whether our model was right or wrong. We could log that in a database, go back through our database, figure out where our model's most wrong, and improve those scenarios, making a better user, user experience. More people use our app, our model gets better, and it creates a beautiful flywheel. This is the end, the official end. Cloud services cost money. Remember, no credits equals your money is going to fly away, so make sure you go back through This might actually build this time. That's crazy. In the live demo, of course, it doesn't build. Make sure you go back through all of your Google Cloud services. So if you go home, go to AI Platform, delete all the models if you don't want to be charged. As you see here, I've got some billing that I have to pay for. Delete your storage buckets. Delete your App Engine instances, and oftentimes that's just clicking on whatever service you have running, Option, Delete. That way you won't be charged. So we'll come back. Where can you learn Google Cloud Platform? As we've discussed, google.quicklabs.com. I'm also going to include a few little extensions in the GitHub repo, just down the bottom here somewhere. Extensions, uh, or where can you learn all of this stuff. So there's a couple of great blog posts here that have inspired a lot of the work here. So big shout out to Marth— uh, Mark Douthwaite and LJ Miranda. Um, great blog post there. And also google.quicklabs.com, you can go through a lot of different Google Cloud tutorials made by Google themselves. So again, this README will be a bit more tidied up by the time that you, um, you come and have a look at it. And then where were we? Keynote extensions. Again, I mentioned this, but you could try to incorporate continuous integration, continuous deployment, which means if you had your code on GitHub, which we do, you could every time you make a change in Food Vision on the main branch and you could have a service that watches for that change. And then once it's incorporated into the main branch, it gets automatically redeployed as a new app, new version of your app. So say something like this, um, codify everything. Everything we did was throughout the console, and so you can actually make scripts to do that and then actually log the data from your app. So save the logs to BigQuery, Google Storage, or set up monitoring to really understand what's going on. So this has been a machine learning deployment tutorial for Google Cloud for— oh, it's done! What the hell? See, this is what I'm saying. What is this? Did it just rebuild our app on Appspot as well? Okay, I think this is still running the original app, but anyway, the build, the build is now working. I'm pretty sure if I ran gcloud deploy run, our app is going to work. So again, a lot of this stuff is about just troubleshooting, trying something out, and when you get stuck, searching for the answer and then going from there. But as always, happy machine learning. If you have any questions, leave a comment below or add an issue to the GitHub. Of course, my code is not perfect, but that's, that's something that you can improve on. All the best building Food Vision, and thank you so much if you've watched it all the way to here. I really appreciate it. Thank you so much for Stanford, to Stanford and Chip and all of the students from CS329S for having me as a guest lecturer. That was my first time teaching anything live, really, and any time at a university. So, I had a lot of fun and would love to do it in the future. I'm going to make more videos like this. Again, if you have any requests, please leave a comment below. I will see you next time. Peace. Why don't we try one more image for good luck, eh? Um, how about this beautiful photo of coffee? How does that work? Coffee, predict. Chicken curry? Damn it, we're gonna need Model 4.
More from Daniel
Small Language Models (SLMs) Are the Future: Fine-Tuning AI That Runs on Your iPhone

Introducing Sunny - A MedGemma-Powered Skin Health Tracking App (Kaggle Competition Entry)
Benchmarking: NVIDIA DGX Spark & NVIDIA RTX 4090 | Part 4 - Comparing the results
Benchmarking: NVIDIA DGX Spark & NVIDIA RTX 4090 | Part 3 - Running LLMs on the RTX 4090
Benchmarking: NVIDIA DGX Spark & NVIDIA RTX 4090 | Part 2 - Formalizing the tests
Benchmarking: NVIDIA DGX Spark & NVIDIA RTX 4090 | Part 1 - Creating a series of tests
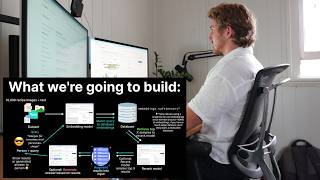

Local Multimodal RAG on the NVIDIA DGX Spark | Part 4 - Publishing our demo to Hugging Face


Local Multimodal RAG on the NVIDIA DGX Spark | Part 3 - Putting it all together