How to make your first pull request (and how I made mine)
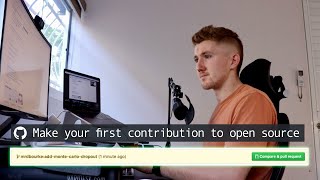
Daniel Bourke walks through making your first GitHub pull request using the fastai library as an example. He covers forking, cloning, creating a branch, editing a file with Vim, and pushing changes. He shows his own PR that added Monte Carlo dropout, including how maintainers reviewed and merged it.
Chapters
How to make a pull request. You know, in the 2 years I've been doing machine learning and data science, I haven't made a single pull request to an open source library. We're going to change that in this video. 3, 2, 1. All right, we on? Yep, we're on. Okay, so As you saw there, there's a beautiful clip of me making my first pull request, so it is in motion, but we're going to let that cook for a bit and, uh, we'll check that in a second. I'm going to break this video up into 3 parts. First will be what, so what is a pull request, because if you're like me, it's one of those things you've heard of, but until recently it was a bit cryptic. Then why, why, why should you make a pull request, and then how, and I'll use the one I made as an example of how you can make your own. So if you want to skip to the the how part, there'll be a timestamp. Future Dan, wherever you are, mate. Yeah, Future Dan, if you can put a timestamp just where the how section is, so that way you can skip straight to that and you can make— figure out how you can make your own pull request. Let's start with what. What is a pull request? Now, I could explain it to you in words, but I prefer to do it with a little diagram, so let's do that. So let's say— what's happening here? Let's, oh my goodness, erase that, back to the pen. Let's say someone has their code over here, alright? And then there's heaps of code and this is on GitHub, right? So there's an open source repo on GitHub and this is you over here and you're smiling because you're using that code, right? You're doing something with that, but then What happens if you find maybe there's an error in here? Alright, or maybe on your version of it, because you've copied it over, you've got the original stuff, but you've added something in. You've got your, you've got your little functionality that you're doing, and it's helping out with your project. And so maybe you're thinking, hmm, I could Maybe I could fix this error, or maybe I could add in this stuff into the original library so other people can use it because I found it really helpful. Alright, well, what you're gonna do is you're gonna go, you're gonna grab your changes here, right, and you're gonna send them back to here. Alright, you're gonna go, yo, I 'Yo, I made some changes.' And the people who make this library, right, they're also really happy because they're seeing your changes. They're going to check it. Now, what this act of you saying, 'Yo, I made some changes,' and submitting the changes to the open source, open source repository. That is a pull request. Now you don't necessarily have to submit changes, right? You don't necessarily have to add functionality. You could fix, maybe there's something, as I said, maybe there's a few errors in the open source repository. Could be something as small as a spelling mistake in a comment or some code that isn't running optimally. You can, as you did at the start, copy that open source to your codebase with the errors. Maybe you've fixed the errors now, so now they're in green, and you've added some of your own functionality, and you send that back and you say, "Yo, I made some changes." This is what your pull request is. Alright, so now we sort of know what a pull request is. Someone's got some code, you've decided that you can fix something in it or that you can add something to it, and you say, hey, I'm going to add these things to your code. And then someone who maintains the original code is going to look at them and go, yeah, that's alright, I'm going to put them in there. And then it goes in there, and then now other people can use your changes or the errors that you found are now fixed. So why would you want to make one? So you probably gathered a little, little bit behind the why, right? Why, why you'd make a pull request. But we'll go, we'll go over it quickly before we get into how of it. So you've got the open source code and you've decided you've fixed some errors or you've added some functionality or something like that. Why is that valuable? Well, number one is because you're helping others, right? You're contributing back to the resource that you use to help you for your project. So now your code or your fixes can help others that choose to use the open source code for future projects. So helping out others, that's, that's the first big reason, right? That's the number one reason. And two, you've now got a story that you could tell someone, potentially a future employer, of what you've done, right? Now you're a contributor to open source. You can go, "Hey, look, this is what I did. I added some functionality to this open source library and now everyone else can use that functionality." Alright, now we've got the what and the why behind a pull request. Let's, let's see how you would actually do one. We've got to go to the computer for this. So we'll need 2 ingredients to make our first pull request, or to make a pull request. All right. Ingredient number 1 is an open source library. I'm going to use fastai as my example and a terminal. So what do we do? Well, first things first, you're going to come to this open source library or whatever, whatever you choose. In my case, fastai. You're going to click this little button fork. And what's that do? Fork your own copy of fastai/fastai to your account. Now I'm not going to click this on the video because I've already clicked it. I've already got a copy. I'm going to show you. So I'm going to go into my repositories, your repositories. Now remember, I've clicked fork, right? You got to click fork. So I've got fastai. Oh, look at that handsome chap. My goodness. All right, well, I've clicked fork and we've got forked from fastai. Now this is in my repository, right? You'll see this in a second. Mrdburke/fastai forked from fastai/fastai. And now we're going to copy, right? We're going to clone our version of the fastai repo onto our local machine. So we can do that by git clone. And then see this address that we copied here? Clone here. We've just copied that. GitHub's done that for us. And now this says git clone github.com that's my GitHub, mrdburke/fastai.git. We hit enter. This is going to take a little while. Perfect time to do some stretching, do a few bending exercises if you want, because sitting down all day, you get a bit tight, especially around the hips. We're going to speed this up, but if If you're doing it on your own machine, you may have to wait a little while for, for the, for this percentage to reach its maximum. All right. So the clone has finished. And don't worry if you're not following all these steps. I'll leave a little bit of a post down below so you can check out the exact commands. And we've got now, if we ls, which means list, we can see that we've got the fastai folder. So we're going to change into the fastai folder. Beautiful. Now we're going to ls again. Alright, so now let's check out this. We got authors.md, authors.md, right? So we've got all the files that are on here. We've now got them on our local computer. So first things first, what we're going to do, we can see in our own repo that this has branch master, right? This, what we just cloned, is branch master, but we don't want to change master just yet. Why? Because master is the ground truth of the open source library. That should always work. Now, what if the changes we wanted to suggest somehow broke master, right? There was an error in our change. We don't want to do that because that's going to cause a lot of problems for everyone. So first we're going to create our own branch by using git checkout. Oh, check it, check it. Checkout/b, and then we're going to call— we're going to give it a name, new branch. So in this case, we're going to be our pull request, right? Now you might want to name this something more conventional to what your pull request pertains to, but just for the example, we're going to call it our pull request. All right, there we go. So you can see down the bottom here, or maybe you can't because my face is in the way. Hold on. Oh no, you still can switch to a new branch, our pull request. Now we'll clear all this because there's too much going on, so clear. But then if we do git status, it should tell us on branch our pull request. Beautiful. And that's the new branch that we just created. So we're going to now make our changes, right? So in our case, I want to change the file in fastai. I want to change this Python script, basic_train.py. So how can we find that? Remember, we can just ls in there. We're going to change into fastai. All right. And we're going to look for basic_train. basic_train is there. And we're going to open up Vim, which is an editor. Vim basic_train. Now you could do this in something like Visual Code Studio or Atom or something like that. But now what we've got is the same file, basic_train.py, basic_train.py. Beautiful, right? And all the code's the same, just that this GitHub version is way prettier, 'cause it's got colors and all that sort of stuff. But Vim, we can still get the job done, right? Maybe we wanna just add one little thing, right? Maybe we go, hmm, something simple. Right, where's the bottom of the learner class? Here, here'll do. There's a little gap there. I'm gonna press I in Vim to make an edit. I'm gonna tap over here and we're gonna go, Make it— we'll just put in a comment. Our super awesome pull— actually, super awesome sounds lame. Our pull request. There we go. Nice and simple. All right, that's it. That's all we're going to do. Now, of course, you might not be doing something as basic as this. You might be fixing an error, you might be writing some new code, some new functionality, and I'll show you my example of where I did that in a second. But now we're going to save it. So in Vim, you do Escape and then colon wq. You know how to exit Vim is one of the most upvoted Stack Overflow questions of all time. But in case you're in Vim, you press Escape, then colon, right? Escape colon wq, because that means write and quit. So write the changes that we just made and quit. Boom. So now we've changed basic_train.py, right? So what, where have we added it in? We've added in— it's not even on here. I wonder why that is. Well, because remember, we've only changed this locally. We haven't pushed them up to GitHub yet. Our change, our pull request, should, should appear somewhere in here. Now that's what we're going to do. So we're going to add our changes. So git add basic_train.py, right? So git add means add that file that we just changed. And then we're going to go git commit, commit our changes. And we're going to go, added a comment about our pull request, right? Because git commit means commit the changes, and this little M tag means message, and this is our message, right? So added a comment about our pull request. Our pull request. Boom, there we go. Now what do we want to do? So we want to push these changes back to our GitHub. How do we do that? So we're going to go git push origin, and now we need our new branch name, our pull request. So what this is going to do is push, push our changes back to the origin, which is this, our repo over here. Right, but it's going to push it to this branch, right? Now this branch doesn't actually exist yet, all right? If we search in here, our pull, it's not there. Let's see what happens when we do this. There we go, our pull request to our pull request, and we got a few changes. There you go, total 4, delta 3, reused, resolving deltas. All right. Now what if we maybe refresh this, see if our branch is here. Let's have a look. There we go. Our pull request. All right. Now, you know, the change that we just made, we don't have to, we don't have to scroll through that and find that. Why? Because if we go back to the fastai master, There we go. Mr. D. Burke, our pull request. This little magic green button appears. Beautiful. So why don't, why don't we see what happens? Compare and pull request. So what have we just done? We've pushed our pull request to our version of the fastai library, the forked version. Then we've gone back to the fastai original version and now it shows it here. So it's like Okay, so the base repository is the fastai/fastai on master, and the head repository, so our version of it, is mrdeburgh/fastai, and it's comparing our pull request that we just made, right? So it's able to merge. And now why don't we— where can we see these changes? Oh wow, we can— oh, there we go. Boom, little green addition. Our Pull request, nice and simple. Remember if we go back into Vim, basic_train.py, find it somewhere, we made it somewhere in there. We're not going to pretend we're going to search for that in Vim, but this is where I could click on here, pull request. It's important to read this 'cause some repos have different styles of doing things, right? So I'm going to pretend that we filled out this. I made a change to add a comment about my pull request. All right, and then if I wanted to make it, I'd click Create Pull Request, but I'm not going to do that because this one, we— they really don't want that in master, right? But I've pre-made another pull request, right, just for this video. Here's something I cooked up earlier. And this one's actually in the process of being done. So we got Add Predict with Monte Carlo Dropout. I'll put some resources below so you can, you can actually check this one out, right? I can just copy the link. So I'll copy that. I'll put that in the description for the YouTube. So in the description for this video, so you can check out what it is. Now I've put in here, I've added some functionality to add Monte Carlo dropout at prediction time. You don't have to worry about that for now. And then I've given some examples, I've given some references, and then what you'll do is Sir Pugger— I mean, no, for some reason I think that says Sir Pugger. I think that's a RuneScape. Someone who's a collaborator from the original library will check out your pull request and go, yep, this is good. In this case, thanks for your PR. I've adjusted— I've just restyled some statements that fit on one line. Yep. So he's essentially saying, I've, I've checked out your code that you've You've added your pull request and I think it looks good. I've fixed it up to make sure it's in line with the fastai style of things. And then he's like, yeah, let me know if anything else feels off. And I said, thanks for the restyle. All looks great to me. So the next step will be that my code changes will be merged from here, Mr. D Burke add Monte Carlo dropout into fastai master. And that is how you make a pull request. Now if you want to see exactly what I did and why I did it, I'll leave links below to the forum post and the actual pull request so you can check it out. But the purpose of this video was why a pull request, what is a pull request, and how to make one. There we go. All the best making your future pull requests and, uh, keep learning as always. I said "as always" far too many times. I'm a bit rusty. Bit rusty on these videos. That's alright. We'll see you next time. I'm going to get back to working out how certain my model is about predictions. What do you want? Testing, testing, testing. How does this work? Woof! We missed a step. Thank you.
More from Daniel
Small Language Models (SLMs) Are the Future: Fine-Tuning AI That Runs on Your iPhone

Introducing Sunny - A MedGemma-Powered Skin Health Tracking App (Kaggle Competition Entry)
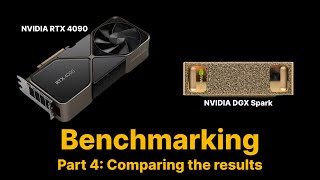
Benchmarking: NVIDIA DGX Spark & NVIDIA RTX 4090 | Part 4 - Comparing the results
Benchmarking: NVIDIA DGX Spark & NVIDIA RTX 4090 | Part 3 - Running LLMs on the RTX 4090
Benchmarking: NVIDIA DGX Spark & NVIDIA RTX 4090 | Part 2 - Formalizing the tests
Benchmarking: NVIDIA DGX Spark & NVIDIA RTX 4090 | Part 1 - Creating a series of tests

Local Multimodal RAG on the NVIDIA DGX Spark | Part 4 - Publishing our demo to Hugging Face


Local Multimodal RAG on the NVIDIA DGX Spark | Part 3 - Putting it all together