NVIDIA DGX Spark Unboxing, Setup and First Impressions - One plug AI.
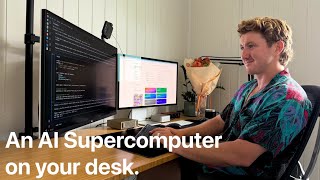
Daniel Bourke unboxes the NVIDIA DGX Spark, a palm-sized AI supercomputer, sets it up with PyTorch and CUDA, and runs a 3-billion-parameter language model. The whole setup takes about 30 minutes, or an hour if you want to code remotely from another machine.
Chapters
Hello everyone, Daniel Bourke here, and I have a wonderful package here from NVIDIA. Now of course I have a little idea of what's inside, but you might not. You might have guessed by the title. So let's have an unboxing experience and see what's inside, and then we'll set it up, and then we'll have some first impressions. Big shout out to Mark from NVIDIA for sending this beautiful package. And we'll see how we can get this open. This has come all the way from, I believe it's Santa Clara in California, to Brisbane, Australia, which is where I live. Woo-hoo-hoo! Aww! That down there. There we go, it is an NVIDIA DGX Spark. How cool is that? Okay, now let's open the actual box. If we go— got some cool pull tabs here. And now, slide for dramatic effect. Slowly. Oh my gosh, that is cool! Josh, look at that. That's drip. Now that is very cool. Okay, I will take it out of the box. Wow, that is a beautiful piece of hardware. So this is my hand. I'm just going to place it in the palm of my hand. How cool is that? So it's probably as wide as a regular book, but then not as tall because it's a square. And we have on the back 4 USB-C ports, HDMI port, Ethernet port, and then 2— I believe they could be PCIe ports, or I'll put the right ports on screen of what they actually are. Video ports maybe, because I know you can stack two of these on top of each other. So we'll get a 360 view. So that is the NVIDIA DGX Spark. So if you're wondering what a NVIDIA DGX Spark is, it's basically an AI supercomputer that you can put on your desk and it fits in the palm of your hand. I mean, it's 1.2 kilos, 2.65 pounds. It's got a petaflop of compute in FP4 precision because it's got the latest Grace Blackwell architecture on there. Grace Blackwell is a combination of CPU CPU and GPU, so it's a system on a chip. And probably my favorite feature, it's got 128GB of unified system memory. So that means you can run extremely large LLMs and other types of different AI models, and it all works by just one single plug. DGX Spark, put it next to the Mac Mini. How does that look? A little bit wider than the Mac Mini, but probably as high. Very cool looking piece of hardware. Okay, so now let's check what else do we get in the box. That's this little platform, put that to the side, and then we have power cable. Nice and simple. We have a dongle of some sort, maybe that's to set up the operating system, not entirely sure. I haven't read almost anything about this, I've just read the launch blog post. And then we have ports. Okay, so those ports are QSFP port, which I actually don't know what that stands for. So we can power it on with the power button, connect it we'll do that in a minute. And here's the power brick. So that's it. Nice and simple. See, I like how simple that is. Now this comes in, I'm gonna call that two parts, 'cause you've got the DGX Spark, which I'll turn around, DGX Spark and a power cable. Whereas my deep learning PC, which is behind the camera now, is quite the tower. And it does have an RTX 4090 in there, which is quite powerful. But that for plug and play deep learning, first impressions, this is outstanding. If this can just sit on my desktop, run next to the Mac Mini. Let's figure out if it can. Let's just try to connect, hey? Beautiful kettle cord. Oh no, we have a problem. See this cord? But of course I live in Australia, so we might have to make a trip to the computer shop. Let me just show you what the problem is here. That is our power adapters in Australia, whereas this is our connection cord. So I'm going to have to go get a power adapter to put this into an Australian plug, and while I'm there, I'll probably get a wired keyboard and mouse that can go to USB-C. Okay, we're at the electronics store. Hello. Hey, excellent. How are you? We need an American to Australia adapter. America to Australia. USA to Australia adapters required. I've got two, one is backup. So let's unbox this. Now we'll get back into the little crawl space. It looks pretty good. Beautiful. And then we'll plug it into the back of the DGX. Oh, USB-C powered, very nice. Actually, I might lower this power brick first. Now we'll do all the connecty stuff. I'll have to set this up properly, but Today we're just doing a rough setup. Okay, and let's— just let me disconnect this— let's power on the DGX-Spark. Maybe I have to hold it in. Okay, so turns out I was doing something wrong, that it is so quiet I didn't even know that it started up. So potentially there was a startup chime, but I didn't hear it. But I connected some peripherals, as you see, BYO keyboard and mouse, old-school style here. And then it turns out that I just turned it to HDMI 1 over there, and we've got welcome to DGX Spark. Let's set up your new personal AI supercomputer. So that, that is actually way easier than I was making it out to be. I tried to power it on twice and didn't think it was working, but it turns out it just runs silently for now. Let's get it set up. Welcome to your new personal AI supercomputer. Let's get started. US English, and I want my time zone to be Australia. There we go, Australia, Queensland. Queenslander. I can't believe how silent and quiet it is. Updating. Okay, so the goal of this will be to get, uh, some PyTorch code running. I think that will be— that's a good goal. Here we go. There we go, Mr. D-Burke. Now what is this running? I believe it might be a version of Ubuntu of some sort. There we go. Accept all. Oh, sweet. Okay, so this is build.nvidia.com/spark. And first time here, try these quick starts. Install VS Code locally. DGX dashboard. Monitor your DGX system and launch JupyterLab. Open web with Ollama. Let's just go— where's the terminal? NVIDIA SMI. Now look at that! What do we got here? NVIDIA GB10, that's Grace Blackwell 10. CUDA version 13, perfect. We might have to update to CUDA 13.1, I believe that might have just come out. Do we have— where's the memory? Do we have— how much memory is available? Conda? We don't have Conda. That's okay. But do we have Python? Or Python 3? Yes, we do. Do we have Torch? Do we have Transformers? I doubt we have Transformers if we don't have Torch. That's okay, we can make an environment. So conda create nai-python=3.12. There we go. Okay, Linux Arch 64. That's cool. Yes. Okay, now we go conda activate ai. Wonderful. And now we should be able to install PyTorch. Beautiful. So this is installing PyTorch with CUDA 13. So this may take a couple of minutes or so, which is fine. But after we've installed PyTorch and we can get access to the GPU, so as long as CUDA is recognized, then we should be pretty, pretty sweet across the entire ecosystem of deep learning. Learning when we want to use the GPU. So we'll check that with PyTorch, and then a bonus will be getting VS Code run— running, and then even a Jupyter Notebook within VS Code. That would be really epic. So right now we're probably about the 20-minute mark from plugging in, downloading some updates, and now PyTorch. So I would say my guess is you can get up and running from a brand new NVIDIA DGX Spark to running PyTorch with CUDA, all that sort of jazz. From the moment you plug it into the wall, you can start going in about 30 minutes. If you didn't have to do those updates, it would probably be 10 minutes or less. So we're at 26 out of 28 installs on the Torch version. There we go. Okay, let's go Torch or Python. And then we go import torch. Can we get torch? torch.cuda is available. True. Beautiful. That's exactly what we wanted. We've got PyTorch available. So what was the device equals torch.device CUDA device. Is CUDA, and then we had torch.cuda.get_device_properties, and then type in device properties, and then we put in the device. Okay, what do we have here? Found GPU 0, NVIDIA GB10, which is of CUDA capability 12.1. Minimum maximum CUDA capability is supported by this, this version of PyTorch is 8 to 12. So that this is the incredibly high, uh, CUDA compatibility. And what do we have here? Total memory, there we go, 122,570 megabytes. So let's do that, we'll go total memory. ChatGPT lied to us. It's total memory. And this is in bytes. So whatever that is in bytes. So 328 gigabytes. Okay. I don't know how to read that number without some serious thought. 100 and was it 1.2 billion? How many is here? 1, 2, 3, 1, 2, 3, 1, 2, 3, 1, 2, 3. So is that 9 123, 123, 123. So that's 128 billion bytes, which is— do some magical math— 128 gigabytes of memory. That is incredibly cool. Now, so we've got Torch active. Let's exit from here. How about we install Transformers? Transformers. Can we get an LLM running here? That would be a cool thing. Okay, so I couldn't get Mamba SSM installed properly, so that's going to be a project for a future video. But for now, let's just try and run smalllm3 3B from Hugging Face. So I'm just going to copy the exact default code there. So I just installed ipywidgets, so hopefully we get some progress bars loading. Yeah, there we go. Okay, that looks much better, doesn't it? And let's watch. Okay, beautiful. Looks like the GPU's been used about 91% there. Memory Wow. Okay. There we go. Think we've got our first LLM output here from SmallLM 3B. SmallLM 3 3B. Gravity is a force that pulls objects with mass towards each other. Think of it like a magnet that attracts metal objects only. Gravity works between any two objects with mass. Imagine throwing a ball into the air. There we go. Simple, right? I wonder if we can turn thinking mode off. So this is how we can do no think. This keyboard and mouse setup is shocking. Okay, let's see how much— how long the non-thinking takes. Our GPU's been used. There we go. Okay, 12 seconds. That's not too bad. Now of course, this DGX Spark is compatible with a lot of different data types. I think we're using full f16— let's go model.dtype. Do we have that? Float32. So we're using float32 here. So there's a lot of different data types that the DGX Spark is available, and I'm going to explore those, uh, in future sessions. So set up VS Code and I can get code running on the NVIDIA DGX Spark, but there's two ways to run it. Of course, you can run it as a standalone system and we can just run through the operating system, it's fully ready to go. You could start training deep learning models right, right away, right now. But there's another way of where we can SSH or connect via NVIDIA Sync from the Mac mini, which is over here, or your daily driver, whatever laptop, desktop you have, and then run compute jobs on the NVIDIA DGX Spark, which is very much my workflow at the moment is I have an RTX 4090 in a deep learning PC over there, I write code on the Mac Mini because I like macOS and all the tooling that comes with that. But for my development system, I like to run it on Linux. So what we're going to do now is see what it's like to set up local network access. So we have some documentation here and the basic idea— yeah, you can— two approaches to connect remotely. You can use NVIDIA Sync, which is recommended. I believe that's an app. I haven't used it before. Or manual SSH. So that's what I currently use. I use SSH to my other deep learning PC, and so we'll see what happens when we try out NVIDIA Sync. So NVIDIA Sync is a desktop app that connects your computer to your DGX Spark over the local network. It gives you a single interface to manage SSH access and launch development tools on your DGX Spark. Download and install NVIDIA Sync on your computer to get started. Okay, so I think I might have to do that on the Mac, so we'll give that a shot in a second. So I'm on the Mac now. I'm going to go to build.nvidia.com/spark. Here we go, configure now, and I want to connect with NVIDIA Sync, so I'm going to download Put the NVIDIA Sync application into Applications, and let's open it up and see what's there. I'm going to allow access to VS Code. So this is the device we'd like to connect to. I'm going to call it NVIDIA DGX Spark. Uh, the hostname or IP, let's find that out over here. Okay, so I can find the details of my DGX Spark. In the dashboard settings. So this is— oh, this is cool. DGX dashboard. Okay, so this is the hostname. So that's what I need. Okay, so let's try this again. Name There we go, setup successful. How cool is that? And then we get this up here. Here, can I open this in VS Code right now? Oh, that is cool. No way. Open code test. So this is now running on the DGX Spark. There we go. Transformers. So that's running now. We got Transformers. Can we do terminal? And then we go watch n1-nvidia-smi. Wow, that's really cool. As simple as that. So that's probably how I would connect it. So the TL;DR of this is that it's actually quite simple if you just read the docs like I didn't do. I didn't go to step 2, I just tried to do it by myself. But so, 2 ways to run it. You can run it as a standalone device, or you can run it whatever computer you have existing, and that's your main operating system that you run on. You can run compute jobs on here, which is probably how I'm going to do it. So I can, uh, just have these 2 monitors connected to the Mac Mini, and then whenever I need to run compute jobs, I can now go to NVIDIA Sync connect via VS Code, write some code in here, and have them run on the DGX Spark. So that is really cool. So overall setup with local network access and VS Code, probably an hour. You can get set up and running from unboxing to your entire developer setup, whether it's running on the Spark or via SSH/NVIDIA Sync, you can get that entire thing up and running in an hour, and that is incredible.
More from Daniel
Small Language Models (SLMs) Are the Future: Fine-Tuning AI That Runs on Your iPhone

Introducing Sunny - A MedGemma-Powered Skin Health Tracking App (Kaggle Competition Entry)
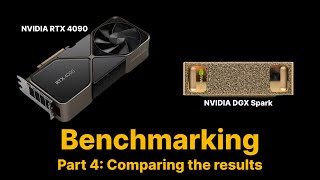
Benchmarking: NVIDIA DGX Spark & NVIDIA RTX 4090 | Part 4 - Comparing the results
Benchmarking: NVIDIA DGX Spark & NVIDIA RTX 4090 | Part 3 - Running LLMs on the RTX 4090
Benchmarking: NVIDIA DGX Spark & NVIDIA RTX 4090 | Part 2 - Formalizing the tests
Benchmarking: NVIDIA DGX Spark & NVIDIA RTX 4090 | Part 1 - Creating a series of tests
Local Multimodal RAG on the NVIDIA DGX Spark | Part 4 - Publishing our demo to Hugging Face
Local Multimodal RAG on the NVIDIA DGX Spark | Part 3 - Putting it all together