Replicating Airbnb's Machine Learning Powered Amenity Detection Project | Code Walkthrough (live)
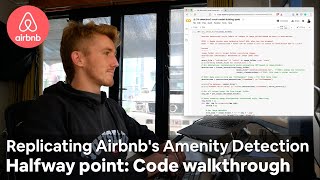
Daniel Bourke walks through replicating Airbnb's amenity detection system using Detectron2 and Open Images data. He covers the full pipeline: preprocessing annotations into COCO format, registering datasets, training with custom loops, and tracking experiments in Weights & Biases. A major bottleneck is slow preprocessing that takes hours on the full 30k-image set.
Chapters
And we're going live. And we are live. Yes. So first things first, if you are here, welcome. What we're going to do in this live stream is go through basically a step-by-step of the current project that I'm working on, which is Airbnb's— or replicating Airbnb's object detection pipeline. And because I've had a few other videos of this. There's a bunch of questions I'd like to answer. So if you do have any questions of your own, please feel free to ask them. But what I thought we'd do in this video or in this livestream is stick around for a couple of hours, basically go through what I'm doing with the project so far, and then we might even do some, some coding. Why don't we do that? Hello, Sandeep. How are you, my friend? So I've got my Colab notebook here. Here. And I thought alongside the notes, I'm going to do a little bit of a step-by-step of going through the code that I've got so far, where we are up to in terms of the 6-week project. Um, we've just crossed the halfway point. So if you're new here, let me give you a little bit of an explanation. This livestream is dedicated towards my current Airbnb project or machine learning project, which is to 2025 Airbnb's object detection pipeline. So if we look at this article, basically I read this article and figured out, hey, this is pretty cool. I'd like to practice my machine learning skills and, and build something like this and just either improve Airbnb's results in this article or at least try and replicate them on my own. So what that involves is creating a dataset, building an object detection model, and then making it deployable in, in some manner. Let me just show you some of my criteria here. So I've got criteria. What defines success for this project? Okay, it should be accessible to someone on their mobile device. For example, you can take a photo of your room and upload it to my model deployed, and it finds the amenities in that photo. It should beat or at least equal Airbnb's MVP, minimal viable product. It should fix the pain point of not being able to download the AutoML model Airbnb used. So they list some of their, their pain points in this article. I'll let you read that. There's a link in the description. So basically what I'm doing is I'm building a machine learning model so you can take a photo on your device of your room like I've got here, and it will automatically find the amenities that you have in your room using something like this. So without any further ado, let's get into my code. I've got some refactoring to do. That's where I'm up to. Here we go. Yeah, as welcome to everyone who's joining in so far. Again, if you've got any questions, I'm probably not going to be able to get to the chat because I'm just going to be talking and going through the code. I actually don't know how this is going to plan out. So if you have any advice for me while we're going through, please let me know. I haven't done that many coding live streams, so I'm a little bit nervous, but we will figure something out anyway. How's the video? And how's the audio? If I could get a thumb up in the chat if we've got good audio and good video, we'll, we'll push forward even further. So where's my Notion document? Where are we up to? And so Today is actually, let's say it's day 21 or I think it's actually day 22. So I haven't, I haven't actually been on this project since last Friday, which is sad to me because I, um, I had a few things come up. Like, see, today it's Wednesday, 11th of March. So I had a few things I had to take care of on Monday and Tuesday, but we are back ready for where we're up to. So if we're going to go table of contents, if you want to link to this Notion document so you can follow along, it's in the description. Week 3, this is where we left off. Um, so I wanted to download and convert all images and labels to Detectron2 style labeling. Haven't done that. In my last video, you saw that I set up, uh, track experiments with Weights and Biases. Thank you so much, by the way, to everyone who's, who's given the thumbs up. I really appreciate it. Um, scale up model to work with more than one class, clean up my crummy Detectron2 code. So that's what I mean in terms of code refactoring. If we look through this notebook, we have a lot of to-dos. So basically all of these to-dos is to make my code faster. So if we zoom in, how's that? Can you see that? And my face getting in the way? Hopefully not too much. Let me know if my face gets in the way of the code and I'll, I'll move it. We might not even need my face. I'll just talk throughout it. And so let's go back. This is my external brain right now. So what I'm going to do, I'm going to plan out week 4 because that's what week we're in, week 4 of 6. And I've had a question from Seven to ask. Can you explain this project with respect to the 6 steps of my ML course? Yes, good idea. Sure can. So week 4, we're going to be code refactoring basically all of this again. Code refactoring, make data preprocessing faster, download all data, scale up model, track experiments. I'm gonna write here Week 4 is going to be basically the same as Week 3, except we're actually going to do these things. Okay, now what do we have to do? Download and convert. Let's just copy this up here. And then we'll get this up here. So I don't even know, I actually don't know what day it is in terms of the 42-day project. I'm just gonna say it's day 22. What do we want? Yeah, day 22, code refactoring, having fun. In the livestream. And then obviously a little emoji to fix that up. So this is how I begin my weeks, right? Like if I'm working on a project, I plan it out. I treat this as like a diary to myself. Today I want to make my preprocessing code faster and start to download all of the Open Images data. That's, that's about as much as I want to do. That's, that's probably what this notebook will be— this video will be about is we'll go step by step through the code and then we'll try and make it a bit faster. So let's go into the code. What do I need to do? So At the moment it's a bit janky what I'm doing because let me see if this overlaps with the code. My face, does that get in the way? Maybe I'll move my head up over to the right. That probably makes a little bit more sense. There we go. Okay, um, so this is some basic dependencies. I want to actually show you my workflow so far. So cd Desktop, maybe make this a bit bigger so you can see. It is in Airbnb object detection. ls. So I've got, I got 5 notebooks or 6 notebooks maybe now. And so it's like a crummy version of version control. So basically each one of these notebooks builds off each other. This is the current one we're working with, Detectron 2 experiment tracking. Um, got a question from Dash. Which open source library do you use for AI project? Uh, I use a lot. So I'm— for this one I'm using Detectron 2, Weights and Biases, I'm using PyTorch, as you can see here, um, a few others, Torchvision. So where were we? Back in terminal. And so there's a script here as well. Let's just get into a JupyterLab and have a look at what's going on. Command not found, Jupyter. Oh, I need to activate my environment. I got a new computer, so all of my environments are are buckled at the moment. ls anaconda activate env jupyterlab. Abort. Wow, here we go. You know what I might have to do is recreate an environment because I, I got a new computer and this was installed— this env was installed from um, from the cloud, so it's probably buckled. I was about to say the F word. Um, conda deactivate ls rm rf. Don't, don't run rm rf env in your own code, that's dangerous. But time is of the essence here. Someone did ask in the— leave a comment on a previous video is, um, Hey Daniel, do you think you could have gotten further with this project if you weren't making vlogs and videos about it? Yeah, of course. But, um, my goal isn't to sort of make it really far with this project. It's just to, um, just to explore and have fun really. Like, I just wanted to work on my own project for a little while and see where it ended up. And so we go conda create prefix we want. I want just a basic environment. So what my workflow is currently, I spoke about this in a previous video, is do all of like the data preprocessing code locally and on Colab. And then if I need to, you saw in a previous video, if you have been following the series, if not, I'll try and explain as much as I can. I used a Google Deep Learning VM that costs money. So basically I'm doing everything for free as much as I can. And that's what we're doing here. So Jupyter, Pandas, just a really basic data science, data analysis environment right here. Kind of create— that should be enough. We'll let that create in the background. Yes. Over here. Um, so someone asked before, can I go through my 6 steps? Yes, I can. If we go right back to the start, I actually did this on day 1, I believe. Day 1, research and planning. Um, so there's my whiteboard, personal assistant, that's over there. We're still going with that. Um, so If we have a look, what is my 6-step machine learning project? Let's open Finder. We come to ML course images. So we might even just dump this in Notion so you know what's happening. All right, so this is how I started out with my own project. This is right back on day 1, okay? So we base this off the article. You can read the article, it's, uh, it's here. Oh no, there's a link in the description for this article anyway, but you can just search Airbnb amenity detection and you'll find that. So I read through that article and then started off writing out this in Notion. And so this is the framework. I— it's part of my machine learning course. There's a link for that in the description too. But this is how I got started. So problem definition, aka what problem am I trying to solve in one line? Automatically label and upload an image with what amenities it has in it. So remember, we want to be able to take a photo, something like this, and detect what, what amenities are in it. So that was our problem. Data. What data do we have? In one line, 75 total, 75K total images. And again, if you're wondering where this information came from, it came from the Airbnb article. Actually, I like having Notion on the other side because of this little drag-out window. So read through the article, found out that they had an image dataset Where are they? There. So combining the labeled 43K internal images, this is where I might run into a problem. I only have access to 32K public images. And yeah, our strategy was to get started with something lightweight and then to iterate fast. Be an entrepreneur, never be shy to kick off the ball. That's what I should be doing. I've been— write that down. So that's the data. So that was step 2. Step 3, what's the evaluation? What defines success for us? So if I come down, I actually think I have my evaluation at the top of the notebook. So we'll skip that for the time being. We'll go into modeling. Modeling 1.9. Airbnb ended up using— where is it? Google AutoML here. So they ended up using Google's AutoML Vision, right? So there we go. Use Google's AutoML Vision Object Detection API and achieve 68% mean average precision after 3 days of training, and then deployed it through a REST API. Again, this is just from— I copied this verbatim from here. Model evaluation: we chose to use the model trained by AutoML. The model achieved a mean average precision of 68%. There we go. These are the classes that Airbnb used. So AKA, you want to take a— I got in trouble for using AKA in the last video, so I need to stop using AKA apparently. No, it's all good. I appreciate those comments. But yeah, so they want toilet, swimming pool, bed, billiard table, etc. So I just took my notes here. They used this amount of compute resources. So I'm trying to beat that. At the moment I've spent like nothing because I've used Colab, but then again I've only built a really small model. I just copied this into here. And then additions and loans. So basically that's me just going through. And again, it doesn't have to be— when you follow something like this little guide, right, data modeling, You don't have to— these steps are just a rough outline. It's not like you have to, to go deep into each one. It's just like to get your brain thinking, okay, I see this article, how would I go about building it myself? And so this is what this, this sort of workflow helps with. But we go right back up to the top. We've got the criteria. So this is all my project notes. Look how many there are. And again, it's just like a diary. This is public so you can see it. There's a link down below. Right back up the top. Yes, I wrote all this. Look at this. There's a table of contents. There you go. Okay. What is my criteria? Here we go. I want to fix some of their pain points. So if you read here, they can't download. There you go. A big downside of AutoML, though, was that you could not download the original model you created. Right. So this is one of the pain points that I thought I could fix. My model, once I build it, will be downloadable. There we go. Have some sort of way to find the images classes which your model is uncertain about. So this is another way of what I want to do, exploring things like active learning. But at the moment, we're going through PyTorch, Detectron2, Weights and Biases. Streamlit is another one I want to use, another tool. So this is my criteria. What— how cost effective is running the model, right? So if we do end up building something like this, how much does inference actually cost? These are the things that I'm thinking about. Without any further ado, our Conda environment should be— have— should have been created. Let's, uh, let's go fix that up, then we can actually look at some code. Conda activate. Again, my head is in the way. Conda activate.env. We want a JupyterLab. Let's see if this works. Hopefully. Hello everyone, welcome. Hey Daniel, from where you have done your ML? From which uni? No university. I created my own AI master's degree. So you can see that at deburke.link/aimastersdegree. I made my own, basically just got a— found a bunch of courses online. And there you go. If you just go to this website, you'll be able to find my self-created artificial intelligence master's degree. And that's basically how I built my foundation. I'm still not an expert, right? I'm learning as I go. This is why, like, this is me doing this video is gonna help me learn. That's one of the reasons I do a lot of videos, right? 'Cause it helps me understand what I'm building. And so we'll get out of this. We don't need that. JupyterLab not found. Great. Jupyter Notebook. Hopefully. I just created this environment. Hey Chandra, how are you? What do we got here? Please check the video resolution. Don't worry about that. Okay, so this is where I started, Open Images data manipulation. So what I'm doing is actually we might keep that Airbnb article up. Airbnb amenity detection, and we'll get up Open Images. There we go. So if we look in here, Open Images, we found that Open Image Dataset v4. So they're using Open Image Dataset v4, offered a vast amount of image data. It included about 9 million images that have been annotated and bounding boxes, 600 object classes. So that's where I found OpenImages. It's up to v6 now. So this article— look, this is how fast the world moves— this article was only written in July 2019, so we're already up to OpenImages v6. And so basically, because I chose to use— wow, I actually realized how much code I'm gonna have to step through, but this is, this is all right. We'll catch everyone up. So if you go to Detectron 2, this is the model I'm using. So the biggest part of any machine learning project, as you probably know, is getting your data ready. And it turns out that although Airbnb said they used Open Images, which is like an open source image dataset. It's not— even if I was to download images from Open Images, they're not fully ready to be used with the machine learning model I want to use, which is Detectron2. Why Detectron2? Well, because that's just a new object detection model that I really wanted to play at— play, play with. No better reason than that. So this is Detectron2's GitHub. Basically, it allows you to do things like this. And that's, that's what I'm after. So what, what I'm doing is just organizing a dataset, then manipulating it into a way to be able to use with Detectron 2 to replicate what Airbnb did and hopefully improve their results because they ended up using Google's AutoML. But remember, my criteria is I want to I want someone to be able to access this model on their phone. Will I be able to do it? Who knows? I've got 6 weeks. I've got 3 weeks left, um, to finish up modeling and deploy it and go from there. But we are getting— let me know if we're on the right path here because I'm not sure what the things you want to know. So I'm just going to kind of start stepping through the code, um, as I see fit really and see what's going on. So the way I started was I figured, okay, I need a way to use Open Images. And so I did some, some research of the Detectron2 documentation. I went through the tutorial. So this is one of the, the best things to get started, right, is just go through installation or go through the Detectron2 Colab notebook. And this is This goes for any project, right? Find somewhere or someone who is— who has done something like what you want to do, or similar to what you want to do, and just go through it. Remember, if in doubt, run the code. So if we come here, my first step was just going through this, just figuring out how Detectron2 works. And so I found out, okay, if I come into the documentation I need to use a custom dataset. So if you want to use a custom dataset while also reusing Detectron2's data loaders, you will need to: 1, register your data, i.e., tell Detectron2 how to obtain your dataset, and 2, optionally register metadata for your class. And so this is how Detectron2, if you read through this documentation, it says here standard dataset dicts which is short for dictionary. Detectron 2 was pre-trained on COCO, which is another object detection dataset. There we go. So if we look at this, this is the object detection dataset that Detectron 2 was pre-trained on. So in order for me to, to use Open Images, which is this I needed to convert Open Images into COCO object detection style data. All right, so that is where I found out this Detectron2 example data looks like this. You've got annotations, which is a bounding box. Let me just give you an example, um, explore of what a bounding box looks like. Let's have a look at some dogs. Search. Wow, that doesn't really work. This is segmentation. Anyway, I can explain it with this image. So there's a dog. We want to focus on the dog. So that's a little dog image. Actually, where's a bigger dog? There's a dog, right? See that dog? So the annotations there would be— if there was a square box around this dog, that would just be the pixel coordinates in that image of where that dog is. And then it's got category ID, which is basically just saying, hey, if you had 10 categories— one's dog, one's cat, one's mouse, one's fish— dog might be category ID number 0. Aka dog is 0. Segmentation is another style of— I'm only doing bounding box because that's what, for now, because that's what Airbnb did. So I'm just, I'm making a box like this around all of my images. Where were we? Getting lost already. Segmentation is just like a bounding box, but more well-drawn. So it's like those pixels around the outside. So I'm not worried about that. Filename is where the image is stored in your hard drive or something like that. Height is just the height of the image. Width is just the width of the image. And the image ID is like, if this image had a name like image 505, it would just be that. All right, so I figured out I had to get my Open Images data the data that Airbnb used into the Detectron2 style. And so that's what basically my first 3 notebooks were all about. So Open Images data manipulation, Open Images data manipulation, blah, blah, blah. And so the first one, let's have a look at this, is just a whole bunch of preprocessing code to hopefully end up with— there we go. So something like this. Now I'm going to breeze over the first editions of the notebooks because I figured it's, it's more valuable for me to go through the one where I'm most up to date. If you want to have a look at these older ones, they're available on GitHub. So essentially, this is, this is me in the first notebook, is just playing around with a whole bunch of poorly written code trying to figure out how to get Open Images labels into Detectron2 style labels. And so I did 3 iterations of that, um, which eventually brought me to my 5th notebook. And so this is probably the one we're going to spend the most time stepping through. Here we go. We've got some questions. It happens so, but even I was working on Detectron 2 for build— building object detection model, but one of the main challenges I had to face with the data itself, I had to download and manually label a lot of them, 300 precisely. I'm trying to build a DCGAN to generate more significant synthetic data for the dataset. Um, I have no experience generating synthetic data. But, uh, that could be, that could be an option. I'm not sure what exact— why exactly you're generating synthetic data when you need to label it. Couldn't you just label more data? Um, is that an Oura Ring? Yes, it is. Okay, so let's— because I want to refactor some code, we might as well do the same thing. We want to refactor the code in this notebook, and we want to explain it at the same time. Remember, if you have any questions, let's, uh, let's let me know and I'll try and figure them out. So I need to restart runtime. Yes. See, at the moment, this is one of the drawbacks of Colab. I kind of have to install my dependencies every time I want to use it, whereas if I was working on my own server I could just, uh, install them and have them permanently installed, and then every time I would just load my dependencies as required. Um, we should be restarted. Yes, wonderful. Comment out all those installations. We will do this. Not going to log into Weights and Biases for now. Oh, I need to mount my Google Drive. Oh, I should probably show you this script that I'm using. github.com to download images, Airbnb object detection. So this is pretty badly kept GitHub repo, as you can see. Work in progress. Uh, again, hasn't been updated for 2 weeks. That's my poor GitHub habits. I need to get better at GitHub. So if you have any resources on getting better at GitHub, let me know. But this is one of the reasons why I work on these projects, is so that I can figure out what I'm terrible at and improve at it. So I've got this download io.py. Now remember, this is originally made by Sunita Nayak from Big Vision LLC. So let's go here, learn OpenCV download OpenImages. So if we come back to OpenImages, there's something like 19 million images on here and I don't need all them. That's like 600 gigabytes. So basically I was just looking for a script to download. If we come back to the Airbnb amenity detection article, they said that they only used these classes. So basically, I only want the images with these classes in them. So that's where this script came in helpful. Um, where is it? Download oi.py. If we go learnopencb GitHub something like— this is a pretty big repo, by the way, great repo— download Open Images. This is where I took it from. Hopefully I credited it correctly in the GitHub repo, but if not, this is, this is where I got it from. And so basically I've just modified it a little to become my own version. So a few things are different down here, like I've commented out this line. So this original script would download specific images. You would enter, say for example, you only wanted the classes with, um, toilet, bathtub, and oven. You would write python3 downloadoi.py classes bathtub oven and swimming pool. I forgot the 3 classes that I wanted. And if you wanted them from the training or validation dataset, you'd say training or validation. And so basically this, this original script used to download images and labels. I've changed it to only download images. We're slowly getting through where I'm up to. I forgot how much I've actually done so far. I need to mount my Google Drive, so I'm going to take this over here and enter the API key. I'm not going to record that on the stream, come on. Ah. Are we coming back? Please tell me we're coming back. Oh, finally! OBS quit on me. Are we back? Oh man. If anything could go wrong, it's gonna go wrong while it's live, innit? OBS died on me. Now we're back. Okay, I need to get rid of some tabs because I'm confusing myself. Hehe. You're right, we can keep this one in here. So where were we? We're getting our notebook set up. And get out of this and get out of this. We can get out of this. Okay, so what I've done is I've downloaded the Coffee Maker images, and you might be thinking, what is this? Well, let's go have a look at Drive, My Drive. I've downloaded Um, not in data, we want Airbnb. There we go. So to begin modeling or begin working on a small subset of the problem, I've downloaded a small subset of the data. So basically just all of the images with coffee makers in them. Wow, that's a bit zoomed in. Can you see that? So that's a coffee maker. You're gonna have to trust me. And so that would have been something like the little line of— once I had the Python download.io script, it would have been something like Python, Python 3, and where is it? Yeah, downloadoi.py. And then classes flag would have been coffee maker. And then I think the original— I changed it to be a flag like dataset, um, train validation. So something like that. That's what would have got me these images. And once again, that is just from modifying this, this script from download from OpenCV, learn OpenCV. All right, so we'll get rid of that. So you're just going to have to trust me that I have a folder of coffee makers, both training and validation labels. Now there's a few pieces of metadata that you have to download for Open Images to be able to manipulate the labels. And this is, if we go back to where Open Images is. Where did Open Images go? Well, we will get this right eventually. No, that's not Open Images. Open Images v6. We might actually end up writing some code in this stream. Um, download. So yeah, these are all the labels here. Right, so it's, um, download the required metafiles for v5. So Open Images v5. So if I go into here, so if I was to just download the training and validation boxes, I would use something like this. So wget is just a command that's just like, hey, get this from the web, this file, and this is going to download it into my Colab workspace. Again, I could probably import these to Drive, but I found it's actually faster to just download these straight to Colab every time rather than importing them from Drive, because, um, for some reason importing from Drive to Colab is a bit slow for me. Maybe because Colab is probably on some US server, whereas my Drive is hosted maybe in Sydney because I live in Australia. But let's get these labels in here. How's everyone's day going? What are you working on at the moment? Just while we get some downloading code. It's pretty cool if OBS crashes. I know I can, um, I can just re-kick off the stream and we come back. All right, so we've got all the auxiliary files that we need. Oh, I don't want to I want to comment out all that. So downloading all that, I get these. So we've got test annotations, training annotations, validation annotations, and class descriptions. So this is the, the class of amenities Airbnb mostly cares about. So again, just the 30 subset of classes of the 600 that are in Open Images: toilet, swimming pool, bed, billiard table, sink, etc. Okay, now we get into my auxiliary functions. Here we go. This is where if you do notice something that could be improved, I would greatly appreciate it because— let me move my head over here— because that way, uh, we can help each other. You know, my code could be better. And so what this does is it returns a list of all image IDs. So if I pass it, uh, a folder, an image folder, it's going to give me back all of the unique image IDs in that folder. So if we come into here, drive, my drive, Airbnb, because remember, what are we doing first? Data preprocessing, train. So this is an image here. So if I pass it, let's have a look, let's have a demo of this function. So get_image_ids— oh, we might make it train_image_ids equals get_image_ids, uh, image_folder equals train_path, train_image_ids. There we go. So that's just returning all of the image IDs from, from this folder. Alrighty, we don't need that cell anymore. And remember, I've established my training path and validation path up here. So we come in here. Now we want to format annotations. So make a function which formats a specific annotation CSV based on what we're dealing with. This is where we start getting into the meat of, of our data preprocessing. So first of all, we call the function we just wrote before, get_all_image_ids_from_target_directory. We want to set up an annotation file and class names. So this is where I think I can start to improve my code. I'm going to put a to-do here. To-do, um, improve this. Is pandas required? I don't think it is. I think pandas is what's slowing this down. I want to just read straight from a CSV, you know. So the first thing it does is it reads something like this annotation file, image folder. Um, let's see where this is being called. And what it does is it formats Yeah, so if we look at this, let's have a look at, um, let's first look at one of these files so you know what's going on. So we've got class descriptions. So the way Open Images gives you data is quite convoluted. Class desk equals pd.read_csv, but I can see where it's— I can see where it comes into play. So let's copy that path. Boom. And then we want class script. Um, so basically this is just like a little mapper of a class unique ID to what it actually is. So class M0120DH is actually a sea turtle, and you see there's 600 of these. We don't want all 600 of those. So we got 600 boxable object classes. We only want the, the 30 or so that Airbnb care about, which is these. So that's part of our preprocessing step, is formatting it down to be only these 30 or so classes. And let's— where were we up to here? So we get the classes, we get the label name, class name. We create class name on annotations which converts labels, label codes to string labels. So that's basically, um, let me show you about what the validation annotations look like. It was pd.read_csv and let's copy this in. So here we go. If we were to download again the validation boxes from Open Images, we would get something that— well, we would get this. So we've got a bunch of— see, there's the different image IDs, uh, label name, and this is where the bounding box occurs. But however, these are in relative pixel values. So let's, let's go bounding box image. This will do. So this data that we have here Where is this? There we go. So it's relative. So it's basically saying if this label was this image ID, the xmin, aka the bottom left corner, would be at 0.022673 pixels across. So probably somewhere like down here. But the xmax is 0.96, so somewhere like over here. So the box would be there. So it's a ratio, right? So if you take the— say the height and the width of this image is 100 by 100. So we got a height equals 100, width equals 100. xmin would be 0.022 673 times the width, um, and then we want xmin. So that's how many pixels across xmin would be, and that's how Detectron2 takes in, uh, bounding box labels. How do you figure that out? We go into here, um, this is the Detectron2 datasets, standard dataset dicts. We have annotations, we list, um, bbox list of float, list of 4 numbers representing the bounding box instance. And then the bbox mode is like a class, currently supports bbox box mode, x, y, x, y, absolute. So if you were to dive deeper into the documentation, you'd see the format that your bounding boxes have to be in, and we will see that in a second. So basically what this little preprocessing function does is it converts— it takes this class description, and these label names aren't very helpful to me, so it adds a column on the right here. So let's see how we would do that. Um, I believe this line of code does it. You ready to watch some magic? Let's move this one up here. class_descript.head. We only want to see the top 5 rows. Oh, maybe, yeah, maybe we need to import this with a couple of column names. Names and label name, class name. Yeah, that makes sense. Label name, class name. There we go, we got some, some titles. And so let's use this line of code to just show you what, what it does. So it's going to be— oh, let's just change this to classes. How do I select more than one line of code in Google Colab? Can I hold Ctrl? Like Ctrl, you know, in an IDE, hey, have Command, Command, you can do— don't, don't worry. Valid and nots. There, yeah, see how it selects both? I want to know how I can select them both. Let me know if you, if you know how to do that. Valid or not. There we go. Valid or not. This should work. So what we should see on the end of valid or not— notice there's no label name here, like it's just this gibberish code. Or actually, class name, that's what we're appending. Let's see what happens. Um, I want to go command+mb valid_or_not.head. There we go. So class name, that's all that does. That line of code, simple, adds a little class name on the end so we can interpret our dataset. Let me delete these lines of code. And then we make sure we only get the classes images we're concerned about. This is where I need to fix— yeah, I'm going to put it to do here, fix this, because we're using— do we use a global variable here? Target classes. Oh, we do pass it to it. See how I've got target classes? So what I'm trying to do is, is make sure my functions don't use target— I mean, global global variables. So let's, um, where were we? And this is where, so the next function we go to, so basically this is just a little bit of, um, preprocessing of the labels file. Then we come here, rel_to_absolute. So this does what it says, converts bounding box dimensions from relative to absolute pixel values to Detectron2 style. So remember when we download things from Open Images in Valenauts— maybe we keep that here, should still be in memory— um, they come in relative pixel values. So in order to get that to work with Detectron2, I needed to convert these into absolute pixel values. So that's what this little helper function does. We can probably delete this, um, and this little piece of janky code because they start out in NumPy. Like, these are NumPy format because they're in a DataFrame. I needed to convert them to objects to export them to JSON later because JSON gets angry when you use NumPy. All right, so let's, uh, that's another little helper function. And so what I want to move towards in terms of code refactoring is right now all of these helper functions that I've, I've put together live in the same notebook. So what would be a better style is if I exported these out into some sort of like modular format into, into like helper_functions.py or something like that, and then imported them so that I wouldn't have to rerun all of these cells as, as I'm going through the notebook. But that's all right because the first, first code that we're using is going to be, um, like, it's always going to be messy. You don't want to be held back by writing perfect code all the time when you're exploring. Uh, are you posting a highlight of this as a video? No, this is going to be, um, a standalone live stream. So let me know if there's anything you want to see because this will be— this will live on my channel for a while, for a long time. We go here, but otherwise if you have any questions, remember, leave them, leave them in the comments. I'll get to them and we will potentially, if I don't do it in this video, I'll do it in another video. So now we're up to the bee's knees, the big dog function. This is the one I really need to improve. Because it is slow. That's Captain Slow we want here. Get image dir, image folder. And so basically this— I say basically too much. Pull me up if I say anything nonsense, because, because a lot of this isn't, isn't really basic, right? It took a while to figure this out. But now it seems pretty basic, probably because I'm, I'm like a level 1 coder right here. Level 1 coder. And it returns Detectron2 style labels of images in image folder based on data in annotations. Okay, that's pretty big. So all of these functions beforehand are getting the labels ready. Now this kind of merges the actual images with the labels into Detectron2 style, which is what we had a look at before, wherever that is. So let me get this up here. This is what we want to end up with. We need for every image that we have in our images folder We need one dictionary for it. So this is what this function does, get_image_dict. So it's going to create actually a list of dictionaries, because if we come back to the documentation, we want— where the hell is the Detectron2 documentation? There we go. It is a list. Of dictionaries, right? So by the time we preprocess our data, we're going to have a list of all of these different dictionaries with all of our images in our training and validation files. So if we come here, Airbnb, boom, train. So that means for each image in this training folder, we're going to have a dictionary with its bounding box its category ID, its file name, aka this, this file path, height, the height of the image, the image ID, which would be something like this, and the width. Right, nice and simple. So that's— but I say nice and simple, yet this function is terribly slow. I'll show you in a second. So this is where we really need to fix things up. So let me run this, and it uses global variables, which is disgusting. Look at this. There we go. Now you might be wondering why it can only take one parameter, and that comes from the detection2 Registering a custom dataset. If we come down here somewhere— register dataset, register dataset— here we go. Um, for some reason, the Tektron 2's dataset catalog can only take a lambda function, um, so that's why it needs one parameter as input. So we need to, we need to figure out how we can improve our code here. Our preprocessing pipeline. Because without the data, without preprocessing the data, we cannot build a model. But let me just give you an example of how long this takes to run. Time train image dicts. So you want to create— the way Detectron2 works is you create an image, uh, a list of dictionaries of annotations for each dataset that you have. So if you have a training dataset, if you have a validation dataset and you have a testing dataset, you're going to end up with 3 dictionaries. Now let me just show you what they look like, and we'll see how long this function takes to run. See, I've even tried to, to save them to JSONs in the past because that's just way faster than, than running this function all the time. So what I might do is upload— and I know this code is yuck— upload the JSONs I have living on my desktop. Yes, I know they'll get deleted when Colab crushes me. So how can we improve this? Pretty long. Create some verbosity here. What if annotations equals none? Can we create call to annotation CV in one hit? Hmm. And that file because we pass an image folder as a string. So the target folder containing images. And so there's a string there, right? This is what we do, get_image_dict. We pass the file path to our training path. So let's go train_path, valid_path. See, this has still been running. So this is too long. This is only for 323 images. See that little output here. So we need a way to make this quicker, because if I want to end up using the same images as Airbnb, it's gonna take hours. They use 30,000, so let's times that by 2 orders of magnitude, whatever time this comes out. We're still sitting here. You're staying safe from coronavirus. It's going crazy. Do you think it's panic or do you think it's legit? You know, I used to be, um, a skeptic of it until about 4:00 PM yesterday and I realized if there is a good time to panic, it's nice and early. So you do, you, you kind of overreact, and then you, you make sure you take measures to prevent it, and then you just get rid of it once and for all. I can't believe this is still running. What GPU are we running with? No, I'd like to— I think I can read this. I think pandas might be slowing me down here. I'd like to read it maybe just from a CSV. Um, and this is one example of, of how to read from CSVs. I'm not— I don't have much hands-on experience with reading directly from CSVs in Python, but we can figure that out. I want to go to my own GitHub. Um, bom bom bom. One commit, lol. 14 commits, there we go. downloadio.py, this is mine. Oh, I still running. Colab is still going. There we go. Far out. See, that took 4 minutes for 323 images. So we times that by 100. So 4 times 100, that's 400 minutes divided by 60, 6.5 hours. So right now, if we were to download 30,000 images from Open Images and format them using our current way of formatting things, it would take 6 hours. That's if it scales linearly, of course, but who knows. So this is the, the path to my training and validation images, which is what my get_image_dict function takes. Now the bottleneck is somewhere in here. Let's figure out how to make it faster. So format annotations. Now I need to figure out a way, because if I could only pass an image folder to get image digs, maybe I do need to use global variables. Hmm, let's go back to the Detection2 documentation. Um, Do you want me to— do you want me to spend some time, we figure out how to reformat this code, or do you want me to keep going and talk about how Tektron 2 starts to train a model? Are you happy to just sit here for like, I don't know, however long it takes us to reformat some code? What would you prefer? Let me know because I'm pretty I can explain the rest of this notebook to you, but, um, my current roadblock is my data preprocessing, so I'd like to speed that up. All right, what we might do is, because this is a code walkthrough, I'll stick to the promise. I'll reformat, I'll reformat this code in, in my own time, but we'll keep going through and I'll show you my training loop for Detectron2. So we come here. A lot of this is, is drawn from inspiration from the Detectron2 example notebook. So as I said, always, always, always look for an example and then mesh it to your own style. Colab notebook. Here we go. Yeah, Detectron 2 beginner tutorial. So a lot of these are drawn from here. Okay. And so once I had a way to preprocess my data, even though it was slow, I had a small model working largely from using code that you're about to see. And before scaling it up to like build a larger model, so something with all of the data, I I would— I wanted a way to be able to track experiments, so that's what I set up next. So if we go here and set up logger Detectron 2, so this is, uh, this is the start of my custom training loop. So what I did is I— if you come into plain_train.net— I mean, sorry, plain_train_net.py This is Detectron2's example training split with a plain training script with a plain training loop. So we come down here, we've got— it sets up an evaluator. So this is a function to evaluate how well your model is doing. It's going to output something like this. And, and then it has a test. So this is like a function to test your model. And then this is train, so it has a function to train your model. And then this is setting up, so getting things set up. And this is the main function which will basically kick off this entire script. However, I wanted this to work in my notebook so I could use a GPU for free on, on Google Colab. So what I did was to understand it, I basically wrote it out. Oh, I actually did write it out completely verbatim. So I just took all of the code from here and wrote it into my notebook and then made it work. So let's go through that. So these are some imports that you'll need. That's me initializing Weights and Biases to track my experiments. Again, if you want to see Weights and Biases, this is how you can— Weights and Biases— Weights and Biases is a way to track your deep learning experiments. So let me log in here. Hopefully this— ah, there we go, it doesn't show any passwords. Beautiful. Airbnb object detection. So we want to go here. These are the experiments I've run so far, and none of them are great because, as I said, they're still experiments. I need to improve upon these. But as you can see, this gives you a great way to track which model or which experiment is performing the best. So, so far so good. Average precision, Summer Salad model has the best performance. Accuracy, Summer Salad as well. So that's the most recent experiment that I did. Now we'll come back, we'll see how we did that. So initialize Weights and Biases, you do that. I won't do that because I have to log into Weights and devices. But if we come down here, um, this is where we start to register a dataset. So we leverage our preprocessing function get_image_dict in this little loop here, uh, and use the dataset_catalog.register, and we pass it our dataset. So what this does is Detectron 2, the way it's styled, is you have to tell it what data you're going to use. And because it's pre-trained on, on the COCO dataset, You're going to— you need to, as we said before, format whatever data you want to use in that style. So that's what my get_image_dict does. It goes, hey, I want to register this dataset with Open Images and this is how you're going to format that dataset. Run this function. Then a metadata catalog is we set the classes names that we're using. So we only have one class. CoffeeMaker. As you can see, to do, this could be more robust than just hardcoded. And then we return the metadata CoffeeMaker validation. So to do, I need to make this better. Then we call register datasets. And now this is how we can check. Let's, uh, let's just run this code. Yep, registered. Here we go. Now This is all of the datasets that are pre-registered with Detectron 2. As you'll see, mine is here, Coffee Maker Train and Validation. These are all other datasets that you can access through Detectron 2, but we only care about the ones that I'm using. Um, there's some ways to visualize it. Let me just show you what it looks like. I'll just uncomment all that. Oop, what am I doing? There we go. So this will just randomly visualize one of the images with the bounding box. So there you go, there's one of my images. It's located at content drive, Airbnb coffee maker. There's the image ID. Oh, this is the dataset dictionary that comes out from using If we go here, val image_dict 0, there we go. So there's an example of one of my own preprocessed images, um, using this function right up here, get_image_dict. There we go. So then we come back down here. That's what an image looks like when you format the data. Coffee maker. You like coffee? I like coffee. Now, training. So this took me a while to figure out, but I— because I wasn't quite sure. I'd never seen this sort of style before, and it's actually really good. That, that they're using. So what Detectron 2 does is it creates a configuration file, so which is basically just like a text file which has a bunch of different parameters about your model. I'll show you what mine looks like in a second. And, and then you can change them like this. So you can go config equals get_config. That'll give you a default config file, which is like a text file or a YAML file. And then you can update it with different information about the, the model training that you want to to do. So for example, you tell it that you've got datasets_train, you give it the name of your training dataset, you give it the name of your testing dataset, you tell the data loaders how many workers you want, you tell it what model you want it to use from their Model Zoo. So if we go here, the reason why I'm using Detectron 2— if we go Detectron 2 Model Zoo— is that there's a lot of pre-trained models there. So basically I'm taking Far out. Still saying basically, Daniel, I'm taking a pre-trained Detectron 2 model on the COCO dataset and applying it to my own dataset. Now this is where someone asked in a previous video, why don't you just code it from scratch? Now it's the same sort of analogy as like, what, would I build a car every time I needed to go for a drive? So No, because I'm not good at building, building a state-of-the-art car, or in fact, building any type of car because I've never built a car. I have built neural networks before, but these are state-of-the-art networks built to work and they're pre-trained. So that's why I'm using them, made by people a lot smarter than me. So I can leverage their work and bring it into my own. So this is where you can come into Detectron 2's Model Zoo. Um, you can copy something like this. I want to use, say, the R101C4. If you want to know what these stand for, just read what's going on in here in Detectron 2's Model Zoo. Um, and then that'll give you something like this, a link to the model. And so, for example, if we wanted to go modelzoo.getcheckpointurl That's what exactly we pass here. That's— this is something that, that's going to return. So model_zoo.get_checkpoint_url, we pass it the YAML file we want to use, and it's going to return this. Now that is a hosted model by Facebook with all of the weights and patterns in a model— in that a model has previously learned. So that's what we can use for our own model. Then we come in here and then we set a bunch of other things like the learning rate the images per batch, the max iteration, and the batch image size. So the default is 512. But again, they leave— this is, this is straight from the Detectron2 example. They say use 128. It's a bit faster. Number of classes. We only have one class. Remember, it's coffee maker. But eventually this is going to have to be 30 classes. So we come here. This is an evaluator. So I only need the COCO evaluator because what I've done is converted my Open Images data into COCO data. So Detectron2 already has an evaluator function built in for data in the format of the COCO dataset style. So if we come here, we run this function. So what that means is Uh, you'll have some ground truth labels, so the labels that come with your downloaded dataset. Um, and then Detectron2 will make its— will try and learn those labels, and then it'll make predictions on a validation set. And then this evaluation function will go, hey, how closely aligned are these predictions from Detectron2 to the actual labels? Then we create a test function. So this is where we do some Weights and Biases logging. Um, or do we? Yeah, down here. So this is going to return our results in the form of a dictionary. I'll show you what that looks like in a second. But we save that to Weights and Biases. This may break because I haven't logged into Weights and Biases. What I might do is log in so you can see what that looks like. Where is it? Here we go. I'm just going to come over here because I don't want to put the API key on Import Weights and Biases. Wow. Wow, are we back? OBS keeps crashing. I really need to make these live streams better. I'm so sorry. Are we back? This is like a failed livestream. I'm so sorry, but we're going to keep pushing forward until I can show you that we had a— what we're doing, we're training a Detectron 2 model, walking through the code. Remember, if you have any questions, I'd love to answer them, so let me know. So this is okay. This is where we create our results. Yeah, I know it keeps crashing. I'm so sorry, Nitesh. Thank you if you're still here. Thank you so much. Look, we'll do more of these. I'll fix it. I'll fix OBS and we'll figure out how to do a proper stream. All right, I feel like this is a little bit subpar, but that's all right. We'll keep pushing forward, you know. Here we go. So results is going to be an ordered dictionary. So we want to, we wanted to test what almost as important as building a machine learning model is evaluating how it's going, right? So this is going to get our evaluator. It's going to make inference on the dataset. So inference_on_dataset is a function built into Textron2, and it's going to take a model, it's going to take a data DataLoader, in our case BuildDetectionTestLoader, which takes a config file. This is where I said it's important for the config file, which is actually really cool, which is just like a text-based file. Let me, let me actually show you what a config file looks like. So we want default config equals get config default config. There we go. So, and if we go default config datasets, this is something what it's going to look like. So you got train, test. So this is when you— when I save it to something like here, we want— let's— let me give you an example of uploading it. So we want of updating it, sorry. Dataset, datasets.train equals, now you need to pass it as a tuple, my training data. There we go. So train my training data. Oh, you're kidding me that the max resolution is only 1080p. More info, 480p. How the hell do I upgrade this? No, maybe I zoom in. This is an absolute travesty, this livestream. How's that? That's pretty zoomed in. And so what happens when you— whenever you train a model with Detectron 2, you're gonna have a config file to go with it. And then you can use that config file to track your experiments. So, you know, okay, I used this model and I used these parameters, and then I, I trained this model, whatever the model is. And so that way, when you're going forward, if you want to figure out which model performed the best and which one you can improve and whatnot, you can go back and figure out, okay, this one, this one did this, this one did that. That one did this, etc. And so what I did was I merged that way of tracking things, config, the config file, with Weights and Biases. So if we have a look in here, I'll show you this code in a minute, but this is something you should look into as well, is you can— I can go in here and go into Weights and Biases. We see here, uh, Mr. D Burke, Airbnb object detection. It tells me what GPU I was using. Which is amazing. And then it also tells me a whole bunch of different things about what, what my model was doing. So the test dataset was coffee maker validation, the training dataset was coffee maker train, and then we have a whole bunch of different information here about our— of what happened. And so here we can find out our different metrics. So we've got the loss, we've got the, the BBox, uh, average precision, We've got the accuracy. So this is, this is so beautiful because that way in, in the next step when we scale up our models, we can come back to Weights and Biases and have a look at all of the different experiments that we ran and then figure out, okay, well, model 5 did the best, better than all of the other models, so let's continue using model 5. Now we come back here, we're up to our testing function. Um, and so this is, this is how easy you can incorporate Weights and Biases with just one line of code. So say you've got some results, we can log it with weights_and_biases.log, and then it's going to return the results. So let's do that. Wonderful. Now we have a training function, so we've got a way to evaluate our model We've got a way to, to track our experiments. Now we need a way to train our model. So here we go. do_train takes the config file. Remember that config file, which is basically like an instruction manual of the model we're using. It's going to take a model and resume equals true or false. So resume is for if you've already started training a model and you want to improve it, like, so continue training that. You can set that to true. Um, and if you set it to false, it's just going to basically start from whatever iteration it can find. So maybe it's going to start from 0 or whatever the pre-trained model weights it finds, and I'll show you what that means in a second. So we set the model— because we're using PyTorch, we set the model to training mode. We'll go model.train. We create an optimizer from the config file. So this returns a torch.nn optimizer. And this build optimizer is a function built into Detectron2. So what it does, it goes build optimizer, it reads the config file, and then it takes in the model, builds and optimizes specific for that model that we're using. Um, create a scheduler for the learning rate. So this returns a torch optimizer, um, learning rate scheduler. So does it— does your learning rate decrease over time? The scheduler builds a learning rate scheduler again based off the config file. Now this is As I said, I'd never experienced this before, but this is where it's so cool, um, to see how Facebook sort of coded up Detectron2 to just use a config file, aka a text-based file with just all the information about whatever experiments you want to run about for your model. Really cool way of doing things. Um, this CheckPointer is going to create a checkpoint for every so often, so, and it'll save it to an output directory. In our case, the default output directory is just going to be a folder here that says output. The start iteration, it's going to reference the CheckPointer. So, remember when I said before that it's going to start, if you set resume equals true or resume equals false, it's going to either start from the first, very first iteration from, or continue on from wherever your previous iteration from. So let's say, for example, you trained a model for 100 epochs. Remember, one epoch is a pass through all of your data, and you wanted to resume from epoch 100. You could put in resume=True, and it'll start from epoch 100 and just keep training from there. Or if you don't resume, it's going to just start back at all the way back at 0. The max number of iterations is how many epochs you want to run as a maximum. So say for example you wanted your model to just train for 5,000 iterations, you can set that with the config. Again, this config file is, it's such an important thing to remember. I want you to, if you want to use Detectron 2, you really need to, to read up on the config file. So this is worth just just showing you API documentation config package. So go into the documentation of Detectron 2 and just read through the config package. Seriously, here you go, config references. So this is going to just tell you all of the information about the config. There we go, we'll zoom right in so you can see that. Hopefully, apparently this, this livestream is subpar quality. Very sorry for that. We'll fix it in the next one, hopefully. So there we go, a whole bunch of different parameters about our model. We come in here. Uh, Nitesh, yeah, it works like a for loop. So the training, the training loop, the training loop is, is basically a for loop. Yeah. So we come here, we've got create riders. So the riders are again some more Detectron2 helper functions which are basically to track all of your metrics. So the Common Metric Printer, we're going to see that in a moment. It's going to output some metrics as your model is training. The JSON Writer is going to save all of the different metrics about your model to the output directory. Again, we're going to end up, once we've trained a model with an output directory here, it's going to have a whole bunch of cool little tidbits about our model. TensorBoard X writer is going to write— if you've ever seen TensorBoard before, even though, uh, Detection 1.2 is in PyTorch, it can log things to TensorBoard, which is kind of like a TensorFlow extension that saves, saves different training, training metrics about your model. So if we see here, this is just different information about how your model was training. This is possible with Detectron 2 as well. And the beautiful thing is Weights and Biases hooks straight into TensorBoard, so all of this information will be tracked in Weights and Biases as well. And so we come down here. Now we want to load our training data. So this is just a build detection train loader. Again, it's going to reference the config file to be like, hey, what training dataset should we use in the config or tell it there. And Logger, this is another little class from Detectron2, which is just going to start logging information about what's happening. And then StoreEvents, again, this is— this is— I'm still figuring out what a lot of these are as well. But EventStorage, the way I understand it, is just another way of storing what's going on with your Detectron2 model. And this is where we start to loop through our data. So Nitesh, you're exactly right. Nitesh, sorry if I'm pronouncing your name correctly. We go for data iteration in, we create a zip of our data loader, which we've just made up here. And in the range start iteration to max iteration. So if our start iteration is 0 and our max iteration is 100, it's going to go through all of those, all of the data 100 times. So this is what this little line is doing. It's going to increase iteration by 1. It's going to update the storage with step. This is what I've done. This is something that I do to sort of help myself understand what's going on. I leave little links here and there. So I know what's going on. We create a loss dictionary by trying to model data. So the— what that means is the loss is how wrong is your model. So if you have an image of, let's say, a bed in a photo and your model predicts that the bounding box is, is around that bed, how, how wrong is that? Now that's— no, that's probably not a great example actually, because loss is slightly different. And well, it's kind of similar to that. So you want to minimize loss. That's basically what you can think of that. And if you have a better definition, let me know. And then we, we, because there's going to be multiple losses because we have multiple sets of data or multiple pieces of data, we, to figure out the total loss, we're going to sum it up. So that's where we add it to this. So losses equals sum of the loss_dict.values. Now The thing is, because we wanted to reduce loss, so let's say we start at 100, our goal is to get it to 0. We create this little assert here that figures out, okay, is the loss infinity? In that case, something is wrong. So we want our code to break if the loss goes to infinity, as in like our model is so wrong that the there's just— it's not learning anything. It's getting all of its guesses incorrect in such a bad way that it's just broken. As you see here, to-do, not quite sure what's happening here, but my guess is because— remember, remember, I, I copied this code straight from the plain_train_net.py and wanted it— my goal was to just get it working with my own code and to dive into it and figure it out step by step later on. So this is what we're doing here. But my guess is that it's— it reduces— let's see what that— let's just see what this says. Do we have a docstring here? Reduce the values in the dictionary from all processes so that the process with rank— I think it just squishes the loss into a single value and then it records it as losses reduced. And then we put the scalars, we save the loss, the losses reduced to storage. So again, tracking, tracking our model's performance. And then we start doing some PyTorch things. So this is where we zero grab the optimizer. Again, I'm not too familiar with PyTorch, but this is one of the, one of the reasons why I wanted to start this project is to get, get familiar with PyTorch. So here, tools and techniques I'd like to cover/explore. So PyTorch, so this is zeroing out the optimizer, this is doing backpropagation, and this is stepping the optimizer. So again, I need to— my personal knowledge, I need to dive deeper into what these things are actually doing. If you have any good resources, I'd love to find out. But basically my style of figuring these things out is writing code and then going back and and going, hey, I don't actually know what goes on in this step. Let me, let me figure it out. So that's what I'm in the process of doing. Add learning rate to the storage information. So this is, this is what I think storage is doing. It saves different parameters of how your model is going. And then we have here, do we want to perform evaluation? So you can add into your config, hey, once when the model is training, I want to evaluate it every X amount of steps. Drav, how are you, my friend? Good to see you. What we're doing is a very, a very shaky livestream stepping through my Detectron 2 code at the moment, which has crashed twice and it's probably very subpar. We could do better in the next one, I think. But hey, we're here, we're trying to practice it, you know, I'm having a good time. So then we call— if, if we want to do a test every so often, we call our test function. And then we want to log different metrics with our writers every X amount of iterations. So this is just basically what this line says. It says, if, if our iterations are a certain number, so if the number of steps we want to take, say we want to take 100 steps, we want to do 100 passes of the training dataset. If it's step 5, give us some information about how the model is going. So let's do that. Now we've got a setup function. So the setup function is going to create a config file, and then it's going to merge from file, uh, args.config file. So this is where we input some kind of yap-model.yaml file. Now this is This is up here. This is in the Model Zoo, and I'll show you. I think this is it. Yeah, so this is, this is what a base config file begins like. So it tells us we want to use a base RCNN FPM.yaml. We want to use these weights. Do we want to use the mask on? I'm not actually sure what that is. And we want our depth of our ResNet to be 50. So let's come back here. So we create our config file. Mostly what the setup function— mostly what the setup function does is it prepares the config file based on a bunch of arguments that we give it. So like up here, if we wanted to set up our config file and say, hey, use this learning rate, use this max iteration, and use this batch size per image. That's what the setup function does, is sets up our config file. Again, that set of instructions to train our model. Which is my favorite deep learning framework? And I'm, I'm pretty— I love both. I love TensorFlow and PyTorch, but I'm kind of at the moment leaning towards PyTorch. I'd like to do a fair few more projects in PyTorch, but, um, This is what this current 6-week project is. We'll see what the, what the next one could be. It might be, um, it might be— I'd actually like to build something on a mobile device, like an app that works on a mobile phone. So maybe I could do that with PyTorch, maybe not. So we'll see. That'll probably be the next 6-week project. And, and then what it does here is freezes our config file. So it's like, hey, now we've got our config, we've set up our set of instructions, I want to stop those set of instructions from changing because we're about to train a model. And if those set of instructions change while our model is training, well then we're going to get confused later on trying to figure out which model was trained with which set of instructions. Default setup is a function built into Detectron 2 to set up, um, a config file with some arguments in the sort of the default style of Detectron 2. We want to load the config YAML as a dictionary. So this is going to enable us to start tracking our config with Weights and Biases. As you see here, weightsandbiases. Config.update can take a dictionary as, as an update. And so that way, what this does is it turns our set of instructions for our machine learning model in Detectron2 style into a simple Python dictionary. And then we can save those set of instructions to Weights and Biases. So we can come up here and check, okay, our model that got 2.688 average precision, which is— I think that metric is actually incorrect, but don't worry too much about that. We can figure out after we've done— after we built, say, 10 models, we can go back and go, okay, Weights and Biases, show me the best model that we've built so far. And then we can have a look at the config information of what led to build that model. So that's, that's what the last video was about, part 5, tracking experiments. And so if we enter that and we run some code here, um, Weights and Biases init. So this is going to connect to our Airbnb project up here and just to basically say, hey, Weights and Biases, we're about to run an experiment, can you please start tracking what's going on? Then we create a main function this is going to set up our model, it's going to build a model, it's going to set up the config file, it's going to log some stuff. Um, now we don't actually— I think we do call main down below, but because we're, we're running like a Python script in a Jupyter Notebook, so, um, this isn't perfect code, as I said, but my goal was to just get something working over the past couple of weeks, and I've I've sort of done that. So now my next step is once we finish stepping through the code is to refactor it in a way that works better with the problem that I'm working on. So that's, and that's what I want to stress to you guys as well is when you're working on your own projects, don't let perfection hold back progress. So start out, get something working and refine it after that. Drav, I am absolutely amazing. How are you, my friend? I'm staying inside. Staying safe from coronavirus and enjoying, enjoying this beautiful day, enjoying revising the code that I've written over the past few weeks, looking forward to improving it. How are you? And Ashish says, which book am I reading currently? I'm reading a few books actually. I just got a new one today. I got here. This is one I'm currently reading. It's Notes from Underground by Fyodor Dostoevsky. Dostoevsky. Dostoevsky. There you go. And I just got this one, which is Food Fix by Mark Hyman, which is how to save our health, our economy, our communities, and our planet one bite at a time. So, I'm really interested in food. I love— I want to start a farm one day. So that's, that's why I got that book. Now, that's our main function. We're getting so close to running our first— well, running a model live on stream. Now we go here. These are the models I want to try. I set up a dictionary. So what I did was I went back to the Detectron2 Model Zoo. Oh, not, not defined. What? Should be defined up here, right up here actually. Far out. There we go. So what I did was I went to the Model Zoo, I read through and I did my research. These are the models that work on for object detection, and because that's what I want to do, I just got out the ones that I wanted to try from here. If you want to figure out why I did that, I just, as I said, I read through here and figured out which ones are most suited for my problem. And so these are the ones I worked out. So there's how many? 1, 2, 3, 4, 5, 6, 7. 7 different models I would like to try with all of my data once I download it. So if we come down here, write down, these are the models I'd like to try. Now it says a dictionary, so it's nice and easy to use. This is the YAML file belonging to this model. So R50, which stands for ResNet 50 FPM. I don't actually know what FPN stands for. I think it's Feature Pyramid Network. Might have to correct me on that. And this is an example of some of the code of what Model Zoo, the Model Zoo package does. Get checkpoint URL. So this is again the pre-trained model that I'm using for transfer learning. And this is the config file, so the defig default config file that's going to download from Detectron2's GitHub. And then, so let's use a max iter of 30. So because I want to, I keep my experiments quick, I started out using a max iteration of 30. But what we might do is, because this is special, I'm going to set this up for the live stream solver. Max iteration, we'll do 500 iterations. How about we do that? And then this is again because I'm running a Python script in a, like, a Colab notebook. I've got some real janky code to set up, to set up args. So I create an argument parser, basically just pass an argument like you would on the command line to, to this, to the parser. So this just says, hey, use this config file here and use these pre-trained model weights here, which is there. Um, this is the training dataset, this is my testing dataset. I would like to use number of workers 2, uh, images per batch I would like to only use 2. Solver, the max iterations is 500, and the number of classes I have is 1. So if I run this it's going to give me this arg pass file here. There we go. And then I can just go if name equals main and pass it the args. So that is just my very basic example of how to run a Python script in a notebook. Uh, this is something I need to improve upon for the code refactoring, which will probably be over the next 2 days. So let's run this. You ready? We'll be able to see what a def— what a config file looks like. Who's ready to train a model? Put your hand up. I am ready to train a model. Let's do it. Shift and Enter. So this, I've got it to print out a whole bunch of crap before it starts. We got here— whoa, see, I told you, a lot. So there we go. It tells us a little bit about what our platform is, what we're using, environment info. We're using a Tesla T4 this time, so not as powerful GPU as we used last time. So this is our PyTorch version. We can see here that we're using— this is our baseline config file. Um, it's, it's pre-trained, so our pre-trained model, it's going to get the model from the Detectron 2 model zoo configs Coco detection faster RCNN R50 FPM 1x.yaml. That is a mouthful, aka the model that lives up here, R50 FPM. This is the model. So if we were to just go, um, open link in new tab, there you go. It's going to ask us, do we want to save this model? We don't because we've already just Imported it, and then we come here. Running with full config. So here we go. So this is, this is the big config file that comes out when we, when we set it up. So we've got like the set of instructions. So this is again just a text-based file of all the instructions to go, hey Detectron2, train our model like this. And I'll say it till I go hoarse, so that if we needed to come back later and figure out which model was trained with which instructions, we could. So this is CUDA, CUDA benchmark, DataLoader, datasets, global input model, whole bunch of different parameters about our model. I'll be straight up, I don't know, I don't understand a lot of these, but again, when you're first getting started, remember what your, your use case is. Are you trying to fully understand all of these, or are you trying to build some sort of working project? I'm trying to build a working project. If I need to understand these later on because I can't get my project to work, then I'll go back through and figure it out. Um, here's the weights that we're using, which is basically all the pre-trained patterns in our model. This is the output directory, so all of the output files, so like our trained model our results and all that sort of stuff is going to go in the output folder. There we go, it's created there. How cool is that? And so this is all built into Detectron 2. It's just, uh, it's up to you to figure out how to use it. So then we've got datasets. So there we go, we can see my train and test dataset. I've got Coffee Maker validation because remember the small model that I'm starting to build or have started to build is just on one particular dataset, the CoffeeMaker validation. We've got CoffeeMaker train, that's our training dataset. I think we've already been through that actually. And then we come right down here. This is our solver, aka our model. Base learning rate is going to start with a learning rate of 0.02. Now these are some of the functions that are parameters, hyperparameters that I'm going to be experimenting with and I'm going to be tracking in Weights and Biases. Now let me show you some of the magic that's happening right now. Is because we've initialized Weights and Biases, we're actually tracking our model MagicButterfly9. This is live, so this is happening in Weights and Biases. How cool is this? So you can see the loss is going down after 16 steps, and this is how many steps we've taken. So we've taken 320. This is the number of epochs. Let's get back to our, our training model here. This is the model that it's going to output, the full text of the model. So we've got a convolution layer, convolution layer, convolution layer, and that keeps going. That's a, uh, a faster RCNN model. Look at that. That's, that's a pretty big model, right? So why would I try to build that from scratch when someone else has already done that? That's, that's my thinking. And so here we go. We've got detectron2.utils.events. This is where I understand storage events. Is tracking what's happening with the model in real time. So iteration 20, iteration 20, 40, 40, 60, 60. This is the loss declining, and these are the values that we're seeing being tracked in Weights and Biases. So the total loss is going down. So that's beautiful. That's what we're after, right? We want the loss to go down. Remember, loss is how wrong your model is. The higher it is, the more wrong your model is. So we come— remember we set this up for 500 iterations. So there we go, saving checkpoint. So model final has been saved to output. And then it's going to automatically, because we've set it up in our training loop to evaluate our, um, evaluate our model as it goes, it's going to use the validation dataset to go, hey, I've trained this model, and then now let's see how, how well we can evaluate. Um, we come here. So this is— Detectron 2 outputs, uh, a whole bunch of communication, which is very good, but I could probably update this so it doesn't actually output as much. It's not as verbose. As you can see, I need to fix something here because it's outputting, uh, everything twice. I'm not sure why that is, but that's all right. Here we go, AP. So again, this is— I need to figure out what's going on here because it seems like the, the average precision metrics, they— I believe average precision should be between 0 and 1. So for some reason it's getting some sort of wrong or very high metric, like 26 is not between 0 and 1. So that's my next task is to figure out, work out the bugs. But the good thing is, is that we can start to get a trained model. We have a script that is going to be able to train a model. The next thing is to, first of all, as we come back to our Notion document, uh, I hope you're happy actually because we just trained a model using Detectron2 live on stream. That's pretty cool, um, using all of this code. Although the code up here is pretty janky, as in could be improved. Let's, uh, Let's, um, let's forget about that for the time being and just remember that we've got a working model. So, see, success. Model trained with a custom training loop. Now to figure out how to track experience. We've already done that. See up here? This is the, this is the run we just ran. Eric, go to sleep, brah. Why? It's 3 AM. It's 4:20 in here, man. Um, so this is the run we just ran. Look at that, March 11th, 2020 at 4:17 PM. So we started that about 6 minutes ago. This is all of the information about that, that model training loop that we just ran. This is why I'm so stoked to be able to use Weights and Biases because Now we have all of this, our, our training runs in one single place. If we come back to runs, these are all of the experiments we've run so far, and it gives it these, these funny little, um, funny little names, uh, just to make sure you can decipher which run was which. But what you could imagine is after we've done about 10 or so experiments, we, we're going to have or maybe more. We've already done almost 10. Imagine if we've done like 100. We could have these graphs here and we could figure out, okay, which one had the highest average precision, which one had the best accuracy, which one had the best loss. Did all of them use as much GPU as possible? So you see Magic Butterfly, the most recent one, used 96% of the GPU, which is phenomenal, right? Now we'll come back to Notion. Let's think about what's our next steps. So I've basically— what I've done is— ah, stop saying basically, man. What I've done is I've, I've kind of really quickly blazed over all of the code I've done so far, which is download images from Open Images, preprocess them, and using, uh, some custom preprocessing functions. Let's actually— let's step back through the notebook. So I downloaded a subset of the images that I wanted to work with and save them to my Google Drive. So this is only one class of images. So out of all the 15 million images on, uh, Open Images, I downloaded about 300 because that's how you start out. You build a small working model and then you scale it up from there and you see which one works the best. And I saved my training and validation images to Google Drive. I formatted the images by combining the annotation labels from Open Images in my own preprocessing function. So I get the image IDs, which is the file name of the image IDs, I then have a format annotations which creates a pandas DataFrame of labels. So as you can see here, something that looks like this. I then have a function to rel_to_abs, so these are relative pixel values. I convert these to absolute pixel values. So instead of being 0.22, 0.022, it's going to be something like 37 605, uh, 29, and 704. So that's what it does, it just gets the height and width of an image and converts the relative pixels, so the ratio, to the actual pixel value of where the bounding box appears in an image. I then format my data from OpenImages style. So this is the OpenImages label style. I format it into Detectron2 style, which is a list of dictionaries. So each image that you use has a dictionary containing different values about that particular image. So if we come up here— where is it? We want this one. This is what it looks like. I format all of my OpenImages into something like this. And then that is what you can pass Detectron to. So we come down here. Right now my current roadblock is, uh, my preprocessing functions take too long. So we said that at the start of video, I want to refactor all of my code to work faster. That is where I'm up to this week, is scaling up the model tracking experiments and refactoring code to be faster, because I know I have a working model and I got to just figure out where I'm, where I'm heading and figure out what are my current roadblocks holding me back from that. And then this is where we start to write our own training loop. Again, I've just— we read— oh, important step here is registering a data a dataset to Detectron2. If you want to use your own custom image with custom images with Detectron2, you have to register them with Detectron2, which basically says, hey Detectron2, I want to use these images, here's how you format them, which is where I use my get_image_dict function to go, yep, here's my images in this training folder, here's them in the validation folder, use get_image_dict to create the labels of those images and register them to your registrar, whatever that is. And then if we have a look at here, Detectron 2's dataset catalog gets registered. There's my two datasets, Coffee Maker Train, Coffee Maker Validation. We've got a function that can visualize from our datasets. This is really important when you're building machine learning models, is, uh, become— step one in any neural network is become one with the data. Look at that. This is how we can check our datasets to make sure that the bounding box is, or that the data is correct. And so what I mean by height, see here how height is— I mean, sorry, bounding box. So this is the, the bottom left corner. So bottom left corner is 362. That means that the bottom left corner of this box is 362 pixels across from on the x-axis. So that's where my converting from relative to absolute function comes in. Um, this is a bunch of training code copied from the original Detectron2 example notebook, but what I've done is I've created my own training loop because I wanted to use Weights and Biases with it. And that's where Weights and Biases fits in. If you read the Weights and Biases PyTorch document— PyTorch documentation It, uh, it tells you you can substitute Weights and Biases in the, uh, in the PyTorch training loop. So here, a function to get an evaluator. So this is how you evaluate your Detectron2 model. Uh, a function to test your Detectron2 model, which calls on your evaluation function. And this is basically just going to track your results. And because we want to track them in Weights and Biases, we use Weights and Biases to .log. We have a training function which is just a training loop that's going to say, hey, here's our model, here's how long we want to train it for, do that. And then we have a setup function which creates a config file. Remember, for Detectron 2, a config file is a set of instructions of how we want our model to be built. Uh, then we can save that config file so we know exactly how each model was trained. Really important. And then this is a main function, which is, uh, like how you start, how you kick off a Python script. And again, because we're running a Python script, we're running the Detectron2, um, plain train.py. If we come to demo, I think, or maybe Detectron2, and where is it? We want Detectron2 plane train. There we go. So if you're wondering how I built my training loop, I copied verbatim what Detectron2's example plane training loop does and then adjusted it to my own use case. So that's what we've done here. And then this is how we run our custom training loop and we get a whole bunch of outputs from Detectron 2 in terms of just text output saying what we're doing. And if we look in the output folder, we've now got config, we've got our model final, we've got inference. So this is going to be on our validation dataset. So this is, this is the results of our model saved here. This is the beautiful thing about Detectron 2 is that all of this comes built in. Oh, audio is low. Sorry. Hey Daniel, do you upload this livestream on YouTube? Yep, I'm good. This is gonna, this is gonna live on YouTube forever. So let me know if you are watching this, or if you are watching this at a later time and you think there's any way I can do better. I'd really like to, to get your advice on future coding livestreams. I know we didn't write much code in this, but I think I did promise some people that I would do a code walkthrough and this is kind of that. So please, please, please let me know if there's any way you'd like to see these improved in a future video. Um, I think the learning rate 0.2 is high. Yeah, I think it's pretty high too. So that's what I'm going to try and fix next time. That'll be one of my experiments. And then, so yeah, running our training loop and running our uh, Detectron 2 model automatically generates these outputs here. So this is what we can use for later. I believe that is the majority of what I've done so far. Download data, preprocess data, get a small model working, track those results. That's what I've done so far. As I said, my next step for week 4 is where we're up to after this video finishes up. Is I'm going to download and convert all of the images to Detectron2 style labeling, but I'll probably clean up my code first. So I'm going to clean up my crummy— can you see that? Hopefully you can see that. I had someone tell me that it's blurry. So I'm going to clean up my, my poor code and make my preprocessing code run faster. I'll probably want to save all of my labels to a JSON because that's really easy portable. And then I can, if I want to share that, once I share this project, uh, all the code and whatnot, I make it just available online, um, through GitHub and open source and whatever. Um, I can, you can easily just download a JSON file and pick up where off all the code I've done so you don't have to download anything. Make preprocessing code faster. Yes. Oh, wow. I already had that one there. So I can just delete that. That's the first step, actually. And export preprocessing functions to a script outside Jupyter Notebooks. Yep. That's so I don't have to just run all the preprocessing functions in notebook first. And then scale up model to work with more than one class. And then we want to experiment with using different pre-trained Detectron2 models. Wonderful. So I think that is about enough for this live stream. Do you have any questions before I'm going? Are you planning to use TensorFlow Object Detection API? No, I'm using Tektron 2 object detection models. Success. So if you've joined into this livestream, or if you're watching this at a later date, really thank you for watching. Again, you've seen— you've just— we've gone through some of my next steps. I'd really Really like to know if you'd like to know of, or if you have any burning questions that you'd like me to answer in a future video. Do you want me to do more of these livestream style videos, or do you prefer the sort of the 10-minute sort of highlight reels that I've been doing lately as a part of the series? So, can you share your to-do slash schedule? Justin, yep, you've got it here. This is my to-do. Week 4, day 22, code refactoring, have fun in the livestream. That's where we're up to. This is my to-do for this week. And what I— oh, if you want to see the entire project, I'd go Daniel Bourke, 42 days. Oh, this is the style I'm running with. 42 days, Daniel Bourke. Boom. This is the— this is what I'm using for this project. This is exactly it. So I'm taking 6 weeks. I'm up to day 22 of the 42 days. And so at the start of each week, I create something like this. Of what I have to do. Like, this is 4 or 5 steps of what I have to do. And then basically each day is just working through these 4 or 5 major steps. So I'll start the week with a— with like, I have at the start of a 6-week project, you can see, maybe you can see over on the whiteboard, maybe not really because it's a bit glary, but I'll write it all down on the whiteboard, and that's kind of just getting an idea of where I want to go in my head. Then I'll put it in here, and at the start of each week, I'll create something like this. And then each day, I will try and work through something like this. And look, this is just a rough outline. I don't know how it's going to turn out. Something might come up that might change it, but that's the beautiful thing about working on your own projects is that you decide where it goes. So that's where I'm up to. I'm deciding that I need to do these in terms of fulfilling where I want to end up. So we'll see how it figures out. But otherwise, yeah, check out the blog post here. So this is on my website, www.mrdeburgh.com/42days. This is the sort of style I'm doing. I'm up to week 3. This is just an example template, but at the moment— oh, sorry, I'm up to week 4 of this project, day 22. But yeah, otherwise, thank you everyone for tuning in. I've had a bunch of fun. I'm not sure when the next video will be, but it will probably be maybe within the next few days once I've made some progress. Once I've made some progress on fixing up my code and scaling up a model. I'll— I'm really excited actually to use Weights and Biases to track all my experiments because I'll be able to share, share all this with you. And by the way, everything I've built in this, everything I, I share in these videos, all the code and documentation will be available public for free once this 6-week project wraps up. So don't worry about that. It'll all be— I'll make it all available. All right. But yeah, have a great afternoon. Tell your loved ones that you love them because I love you all. And yeah, I'm going to go for a— it's a beautiful day outside and I've spent too much time inside today, so I'm going to go for a walk. Peace out, everyone.
More from Daniel
Small Language Models (SLMs) Are the Future: Fine-Tuning AI That Runs on Your iPhone

Introducing Sunny - A MedGemma-Powered Skin Health Tracking App (Kaggle Competition Entry)
Benchmarking: NVIDIA DGX Spark & NVIDIA RTX 4090 | Part 4 - Comparing the results
Benchmarking: NVIDIA DGX Spark & NVIDIA RTX 4090 | Part 3 - Running LLMs on the RTX 4090
Benchmarking: NVIDIA DGX Spark & NVIDIA RTX 4090 | Part 2 - Formalizing the tests
Benchmarking: NVIDIA DGX Spark & NVIDIA RTX 4090 | Part 1 - Creating a series of tests
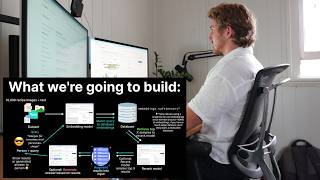

Local Multimodal RAG on the NVIDIA DGX Spark | Part 4 - Publishing our demo to Hugging Face


Local Multimodal RAG on the NVIDIA DGX Spark | Part 3 - Putting it all together