Setup Mac for Machine Learning with PyTorch in 11 minutes (works for all M1, M2)
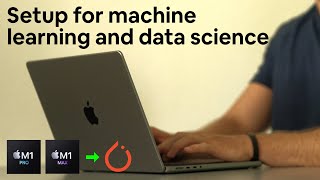
Daniel Bourke sets up an M1 or M2 Mac for machine learning with PyTorch and GPU acceleration. He installs Homebrew, Miniforge 3, and PyTorch's nightly build with Metal Performance Shaders, then adds Jupyter, NumPy, Pandas, and scikit-learn. A quick test confirms the GPU can run tensor operations.
Chapters
Hello, I've got a brand new M1 MacBook Pro here, 14-inch. You can see it's got that little clippy MagSafe charger, and I've just literally set it up, taken it out of the box. And in today's video, we're going to set it up for data science and machine learning with a PyTorch flavor, because very excitingly, PyTorch just released accelerated training on Apple Silicon. And mind you, at the time of recording, this is May 22nd, 2022. PyTorch for Apple Silicon is in beta. So we are going to be installing beta software, but the good news is that it will improve over time. What we're going to do in this video is set up a base environment for data science and machine learning with PyTorch, of course, but we're going to have libraries such as Jupyter, NumPy, Pandas, Matplotlib, and tqdm, I think. Just, just a handful of helpful data science libraries. So without any further ado, I'm going to open up Terminal and I've got these steps all on GitHub. So I'm just going to zoom in here, put that over to the left, one there. I'm going to open up Safari and I'm going to go to the website. The link will be in the description, by the way, mrdburke/pytorch-apple-python. Silicon. And so we've got some steps here. Here we go. The requirements are you need an Apple Silicon Mac. So this should work on any Apple Silicon Mac M1, M1 Pro. This— I've got, uh, an M1 Pro here, but you can see that I'm running macOS Monterey version 12.4. For PyTorch to work on Apple Silicon, you do need macOS 12.3+. Otherwise you won't get accelerated PyTorch training. So what we're gonna finish up with here is an environment ready to code with various data science and machine learning packages, including a version of PyTorch. This is very exciting. That is able to use our Mac's GPU for hopefully faster computing. But just keep in mind, it is in beta at the moment. It will be, uh, improved later on. Uh, I'm just gonna hide the dock as well. So, We get a bit of full screen action here. There we go. I like to use that setting on my Macs anyway. So the first step we're going to do is download and install Homebrew from brew.sh. This isn't really specific to what we're doing, but Homebrew is a package manager, which is a package manager helps you install other software. Um, it just gives you a bunch of access to a whole heap of things that should have come with your Mac, but didn't. So I'm just going to copy that link from brew.sh. And by the way, all the steps here you can follow along. Just going to enter that in the terminal and I'm going to enter my password here. Oh, got it wrong. Hopefully I remember it. I just said it. Third time's a charm. There we go. Okay, I'm going to hit enter. This is going to download a whole bunch of software from the internet and I'm just going to fast forward the video and let this run because it may take about 5 minutes or so. So I'll see you once this is finished downloading. All right, so that took about 5 minutes or so on my internet connection to download and install. So there's a few steps that we have to run here to fully complete it, and this is run these two commands in your terminal to add Homebrew to your PATH. That just means we'll be able to use the command brew. So something like this: brew install wget. So I'm just going to copy these commands here and I'm just going to paste them in the terminal, hit enter, and write clear so we have some white space. Beautiful, that's step 1 done. We've installed Brew, that's going to be very helpful. Now we're going to download Miniforge 3, which is a Conda installer. This is going to help us create our environment. So I'm just going to click allow, it's going to download here, Miniforge macOS. If we look at what that is, miniforge3, if we go there on GitHub. So this repository holds a minimal installer for Conda, specifically to Conda Forge. So Miniforge is really helpful. Does it have Apple? Yeah, Apple M1. So it's got an emphasis on supporting Conda for Apple M1, which is exactly what we're after. So that's in my downloads folder now. Which is also over here, Downloads. And I've got a little helpful command here to help us install that. So now we've got it in our Downloads, we're going to run these 3 commands here: chmod to change the permissions on the file so we can execute it, which is what this x stands for. Then we have sh, it's going to allow us to run the sh file. And then we're going to activate Miniforge. So I'm going to copy all 3 of these, paste them in the terminal, Hit enter. Terminal would like to access the Downloads folder. Yes, because that's where this little file lives. And enter. Do we agree? Enter, enter, enter. This is just saying, do we agree to all of the terms and conditions? I'm not actually sure what's actually written here, but it's pretty, pretty trustworthy open source software. Do we accept the license? Yes. It will be added to— this is where Miniforge 3 is going to live. So users, this is my user account, Daniel Bourke, Miniforge3. It will live there. Okay. And now it's going to install all of these helpful packages and namely most helpful will be the conda command, which is what we're after so we can create an environment. Do we want to initialize conda? Yes, we do. So you'll notice a little change in my terminal path here. Beautiful. Thank you for installing Miniforge3. So now I have a base environment. So I've got base in front of my name here. And then if I go conda env list, this is going to tell us all of the software environments that we have. Beautiful. There's base. So I'm going to clear that again. Now what we're going to do is create a— oh, missed this step. So we need to restart terminal just to make sure all of those changes came into effect. I'll quit terminal, open it back up. Zoom back in. So we've restarted terminal. Now we've got base there. So that means we've got access to Conda. I'm going to create a directory to set up PyTorch. You can name this whatever you want. I'm just creating one called pytorch_test. Pytorch test there. Clear. ls. There's nothing in this directory. So let's change that. We're going to create a Conda environment here. Now Python 3.8 is the most stable version of Python I found to work. I know Python's up to about 3.10 at the time of this video, but I'm just going to stick with 3.8. If you need a different version of Python, feel free to change it there. All we're doing is we're creating an environment inside this PyTorch test directory. Going to hit yes. It's going to install Python for us and a few bunch of other things. There's pip, setup tools. I'll let this run. Wonderful. So to activate that environment, we could use this full command, but I've already done that using conda activate.env. If I clear the screen here again, then if I go ls, we've got a file in here called env, which is short for environment. That's just how I like to create my environments. One environment per project. I'm going to clear this again. So we've just done that step. Now we're going to install the PyTorch nightly version for Mac. Now this is something to note. At the time of recording this video, we are installing the nightly version. However, that is because PyTorch for Mac only just came out. However, it will probably be in the stable version going forward. So just beware, this command here I may change in the future on this website. So don't pay too much attention to the exact command here, but just know we're currently installing the nightly version of PyTorch. If you want to find out the most stable version, you can go start locally. I'm just going to maximize this. We have PyTorch build. We're currently using the nightly build. And we're using pip. However, in the future, after PyTorch 1.12, you should be able to use the stable version. Install on Mac, pip, Python CPU, then this command here should work. But right now, as of May 22, we are using the nightly version. So just keep that in mind. Beautiful. We're installing PyTorch here. I will update this command on the GitHub page here. When the, the non-nightly version comes out. Wonderful. So there we go. We've got a whole bunch of things installed with that. We have urllib3, we have Pillow, which is an image library, we have NumPy, we have Torch, exactly what we wanted, the requests library for downloading things, Torchvision, and TorchAudio. All of the nice things that we want. Now we're going to install some common data science packages. This is going to be really helpful for when we want to work on data science projects. PyTorch is more machine learning focused. So let's install these. We've got Jupyter, Pandas, NumPy, Matplotlib, scikit-learn, and tqdm. tqdm is not really data science related, it's just helpful for progress bars in Python. So I'm going to hit yes, I'm going to let this run. May take a minute or so depending how fast your indi— internet connection is. Beautiful, look at all those packages installed thanks to Conda. But now, if everything went right, we should be able to start a Jupyter server. So we'll just run the command Jupyter notebook. This should launch a Jupyter notebook server in our browser. It may take a little while to run the first time you've ever run these commands, by the way. Excellent. So we're going to start a new Python 3 notebook. I'll zoom in here so you can see. And then I've got some test code here. So this is going to import PyTorch, NumPy, Pandas, scikit-learn, matplotlib, and just make sure we've got access to all of them and check a few other things, which I'll show you as it runs. So we've got a little, uh, check here to see if PyTorch has access to MPS. Now MPS stands for Metal Performance Shader, which is Apple's GPU architecture. So if you're using Apple Silicon here, um, which I've got the M1 Pro chip, this is what we want access to. We want to enable PyTorch to be able to use the GPU on our Mac. Beautiful. Look at that. And we've got PyTorch access. You see here, we've got the dev version, uh, that kind of means we've got access to the nightly mode. Just remember in the future, uh, there may be a stable version or there probably will be a stable version of PyTorch that you can use rather than the nightly version. So just keep that in mind going forward. Now, do we have access to Metal Performance Shader? True. Do we have it available? So does PyTorch have access to it? Yes, it does. And what device are we using? MPS, which stands for Metal Performance Shader, instead of the CPU. And finally, one last test. We can go here. Now, the last time I ran this, this is just to check if we can send a tensor. So a tensor of data to the target device MPS. We'll run this code here. Yeah, there we go. The last time I ran this, I got an error. Just keep in mind that because we're using a nightly version, there may be a few errors going forward, but Just wait for the stable version if you don't want to see these errors. But because we're using beta software, we get some errors. So check out the description for the links. If you have any issues, leave a comment and happy machine learning.
More from Daniel
Small Language Models (SLMs) Are the Future: Fine-Tuning AI That Runs on Your iPhone

Introducing Sunny - A MedGemma-Powered Skin Health Tracking App (Kaggle Competition Entry)
Benchmarking: NVIDIA DGX Spark & NVIDIA RTX 4090 | Part 4 - Comparing the results
Benchmarking: NVIDIA DGX Spark & NVIDIA RTX 4090 | Part 3 - Running LLMs on the RTX 4090
Benchmarking: NVIDIA DGX Spark & NVIDIA RTX 4090 | Part 2 - Formalizing the tests
Benchmarking: NVIDIA DGX Spark & NVIDIA RTX 4090 | Part 1 - Creating a series of tests
Local Multimodal RAG on the NVIDIA DGX Spark | Part 4 - Publishing our demo to Hugging Face
Local Multimodal RAG on the NVIDIA DGX Spark | Part 3 - Putting it all together