What could be improved? Machine Learning Project Retrospective | Airbnb Amenity Detection Part 9
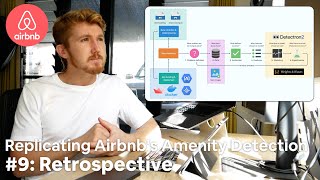
A developer spent 42 days replicating Airbnb's amenity detection system and hit 43.3% accuracy instead of the 50% target. He ran 80 experiments, discovered inference would cost over $40k for Airbnb's 500 million images, and learned he needed more data and better hyperparameter tuning to succeed.
Chapters
Let's wrap up this project, shall we? If you're new here, first of all, welcome. If you're not new here, I'll just explain what's going on. Over the past few weeks, 6 weeks to be exact, 42 days, give or take a few days, I've been working on replicating Airbnb's amenity detection. In other words, using computer vision to find amenities in a room. Now think about an amenity as something useful that's in a room, such as a microwave or a fridge or a bed, for example. Now, why did I want to replicate this project? Well, I read an article and I found it read like a recipe. And I want the time I spend at my computer building things to feel like— I want to get the feeling that I get sitting at my computer that I get when I'm cooking. And so that's why I wanted to replicate the article, use it as a recipe for a machine learning project at the same time as adding in my own little flavor. So this video is kind of like a retrospective. I think it's very valuable at the end of a project to kind of reflect on it and go, okay, this worked well, this could be improved, and just really see if you want to keep pursuing with it. Long story short, I'm not pursuing with this. I'm just wrapping this one up. This was more of just a fun 42-day project. First of all, we're going to go through the criteria, answer a few questions like how much did it cost and all that sort of stuff. And then, uh, oh, by the way, there's a full-blown companion article to go with this. So I'll leave a I'll show you it here and then I'll leave a link below so you can read that to go along with this. It'll have all the information in a, in a narrative format. Anyway, welcome to replicating Airbnb's amenity detection part 9: retrospective. When I started this 42-day project, I set myself up with a little, with a few criteria, and now these are pretty loose. Criteria: What defines success for this project? Now, when you're first starting your project, you might not know this. I just thought of these on the fly. They don't have to be concrete, and they of course may change over time. Mine didn't really change because I kind of knew the direction I wanted to go, and because it was only 6 weeks, I kind of roughly guessed, estimated, used my pow, my whiteboard over there to help me troubleshoot things and navigate. But let's go through those and see how what I built weighed up to my initial criteria. Did I pass? Did I fail? The model should be accessible to someone on their mobile device. For example, take upload a photo of a room and my deployed model find the amenities in the photo. Well, that one gets a tick because you can access, at the time of recording this video, you can access my deployed model in the Streamlit app. At Airbnb, no, yeah, Airbnb-AmenityDetection. I'll leave the link on screen. I don't know it off by heart. It's on Google's App Engine. It is a bit janky, so there are errors, but I have seen it work and there is video evidence in one of the past videos of it working. So that gets a big fat tick. Yes. Beat or at least equal Airbnb's MVP, minimum viable product metric, 50% mean average precision. Now I took that from their article, the original recipe that I based this whole project off, They said for— in order for their project, their proof of concept to be worth pursuing, it had to get over 50% mean average precision, which is a metric for measuring how good your object detection algorithm is. And you can just imagine it, the higher the better. And so mine did not beat this. So I get a big fat fail for that. I— and the reason being, I'm not going to give any excuses. Mine got 43.297, I believe. Now, no excuses, but I think it would have improved probably a few percentage points if I could do— if I spent more time on hyperparameter tuning, but not so dramatically that it might cross the 50% threshold. Hyperparameter tuning might only add, my guess is, 1 to 5% or something like that. But the main issue here, I believe, was that I used about half the data that Airbnb used. Now in the article they mentioned they used 32,000 public images and 43,000 internal images. Of course, only having access to public data, I could only model the public data. So I had— I missed out on the 43,000 internal images. I would have really liked to have seen how my model went because they ended up using Google's AutoML against Google's AutoML. If I had access to the entire dataset. So that's a fail. That's all right. That's something that we could work towards. I'm pretty happy with 43.297 with about half the data. Fix the pain point of not being able to download the AutoML model Airbnb used. Well, I fixed that. They wrote in the article that they used Google's AutoML Computer Vision for object detection. But the caveat there was that to make predictions with that model, it had to ping Google's API, so they couldn't— or I had to go to Google server to make those predictions. Now they couldn't access the model file itself. Now my model file is available on Google Storage. You can download it in the example Colab notebook that I made to go along with this. Oh, by the way, there's a— if you want to try out the, the code that I wrote, you can check out the— first of all, the Colab notebook, the example, that's going to run from end to end. And second of all, it's all in GitHub. So that kind of fixes that pain point. Um, all of my code is available if you want to replicate your own, uh, project with Detectron2, a computer vision project, and use Open Images. You can preprocess all your images to be Detectron2 style, or at least you'll have a basis if my functions don't work for you. Now, have some sort of way to find the images/classes a model is most uncertain about. This may incorporate active learning, confident learning, or something similar. Now, I didn't get to— I didn't really get to explore this as much as I'd like. That's probably one of the improvements that I would do going forward, is to have more ways to explore the data. But we'll touch on that in a minute. So that gets a big fat fail. So what do we now? We've got pass, fail, pass, fail. 2 and 2, beautiful. Business use case: how cost-effective is running the model? For example, if a model runs inference on 10 images per listing and Airbnb has 100,000+ listings, how much does it cost? I mean, how much does modeling cost? How much did my engineering time cost? And how much does hosting cost? So we'll be going through all of those, but I don't know if this is a pass/fail. I did calculate— it's really hard for me to say whether because I don't work for Airbnb, so I don't know what's cost-effective and what's not. But I did make some calculations on how much inference would cost on all of Airbnb's images using my model and the GPU that I used. So let's go to Google Sheets. So we've got some very rough calculations here. Now, this is a GPU cost per hour. So this is the model, the, the GP— the main GPU that I used outside of Google Colab. Because if you remember in a previous video, if not that's okay. I started this project doing everything as cost-effective as possible until I needed to host or train a full model. Then I rented a GPU off Google Cloud, um, so I could train it for longer than Google Colab's timeout out, which is timeout, uh, restrictions, which is I think 8 to 12 hours. I'm not entirely sure. I could have done it probably smarter by using checkpoints and etc., but I just decided to pay for a GPU because when I pay for things, I take them more seriously. So it's $1.46 per hour. So this is a cost per second is $0.0004 of a cent. I figured out that my model, my fully trained model, takes about 0.02 seconds to make inference per image. That means it can do about 50 images per second. So while editing this video, I kind of realized that I made a fairly large error with making these back-of-the-envelope type calculations here to figure out the Airbnb's, or the, the business use case cost. And that was with the inference time per image. Now I went back through my notes to find, just to find some information, find some clips, and I found out the inference time is actually not 0.02 seconds per image. The inference time is 0 point— now you ready for this? It's actually 0.2. So I got it wrong by an order of magnitude. Now you would know what's going to happen here is that all of these numbers are going to go up by about 10x. So you ready? Boom! So the total number of images that Airbnb have is still 500 million, but now our images per second in terms of inference lowers from 50 images per second to 5 images per second. So the total inference time is going to be 100 million seconds, or 27,777 hours, or 1,157 days, and a total cost at Google Cloud's P100 GPU price per hour of $40,555. Now, I don't work for Airbnb, but I'm gonna say that this project is not going forward unless we could figure out a way to reduce the inference time. So if this number was to go down to somewhere in the realm of below $5,000, then maybe it would be something that we could try across the whole dataset. But before we did that, we'd probably do a fair few more experiments to figure out, okay, if we do run it on, say, a subset of 10,000 images that the model hasn't seen and did some sort of workflow, like have a sample image, detect the amenities, and see how that affected the amenities list. If we did that and then were able to, again, get at least an order of magnitude reduction in this inference per image, maybe it would go lower if we had multiple GPUs and local GPUs. So that would also decrease the cost. And what I mean by that is if you had a local machine with GPUs built in it like Facebook's Big Basin that has 8 big dog GPUs instead of having to rent one off a cloud server. Of course, that costs a lot of capital setup, but over the long term, it's probably well and truly worth it. So just a little boo-boo there, quite a big boo-boo, order of magnitude boo-boo. But I'm gonna, at the present state, judging from these calculations, at the present state of of where my model is at, I'm going to say that it's at this cost, at this inference speed, it is not viable for the business. So that is a fail for criteria 5. Now we're going in for the rest of this video, we'll go what went well. Now we've looked at the criteria, we'll go what went well, what would I have done differently, and then some actual costs of what it cost me to do. So if we look here, first things first, what went well? I think it went well in comparison to the 6-step machine learning framework. Now I wrote a blog post about this and I kind of just created this fun little graphic to remind me of, of what to do in, in terms of approaching machine learning projects. But this is how mine played out. We started off with data collection and preprocessing using 2 scripts. They were the main things for that. So downloadoai.py, preprocessing.py. So downloadoai helps us download images from Open Images. Preprocessing.py helps us preprocess those images. And then we went into data modeling. The data that we have was Open Images, again, just a big open source dataset. We defined some evaluation criteria right at the start, we went through that. And then we went into modeling with Detectron2 and we tried a bunch of different experiments. I think it was the final number was about 80+ modeling experiments, all tracked within Weights and Biases. So actually Weights and Biases turned out to be one of the most paramount features of this whole product, uh, whole project, because I was able to see how different experiments, different modeling experiments compared against each other. And I was able to quickly iterate on top of those to go, okay, this one did better than that, I'm going to the next one, this one better than that, I'm going to the next one. So that's a really valuable tool. I'm going to probably use that for every machine learning project I have from here going out. And the same thing is with deployment. I really like to start just every machine learning model I, I train is deployed in some way because a model doesn't end its life in a Jupyter Notebook. Let's be real. Now app building and deployment was done with Streamlit, Docker, Google's container, Cloud Container Registry, and it's now hosted on Google's App Engine. So that's a kind of Just a brief synopsis of the entire project. I think it went— in terms of looking at this little colorful graphic, not only is this aesthetically pleasing, but it's, um, I think the project went well in terms of comparing to, to these steps. Of course, if you were to start a fresh project, you might not have downloadoi.py, preprocessing.py, and all these other things in the colorful squares, but the foundation of the, the framework may give you an idea of, of where to get started and what steps to take. I've already mentioned this in the video, but another thing that went well and I'm really proud of is that not only can you access an example of the model working in an app at a URL, you can also access all the code on GitHub. So Airbnb's article didn't come with any code or example notebooks, so it was just a story, but you can see how mine was done in GitHub. You can also access, I said, the example Colab notebook, which will run from top to bottom. Fingers crossed. And if you want to read every single note that I took on the project, it's available in Notion. 42 days worth. I don't know why you'd want to read that, but it's, it's there if you want. What would I have done differently? Now, this was a tough one because I think I had so much fun with this project, but a lot of— I ran into a lot of trouble using Detectron 2 or getting things ready with Detectron 2. It was kind of like a lot of the project was dedicated towards just fitting my images into Detectron2, but once that was sort of done, it, um, it kind of ran smoothly after that. But if I wanted to dig a bit deeper into how Detectron2 was working, that would require a little bit more unpacking of the Detectron2 framework. And now something that popped up in the last few days was a new object detection style model called EfficientDet. DET, efficient DET, as in efficient detection. And I would have liked to have tried that, but since that, I'll have to save that for the next project. But that's probably what I want to do going forward, is rather than always jumping into using like a framework or massive tool or something like that, Detectron2 sort of style, maybe it's better to start from scratch, as in build my own model and then just have it really introspectable and then go from there. Build, add, complete. Basically Add complexity when required. And you see, even though Detection2 is relatively easy to get started with, I think if you want to, the more and more you want to customize it, the more you kind of have to unpack what's already there. So that's something to go forward in, in the next project is maybe instead of learning the framework, I learned the language. I think that's a good sort of metaphor for programming in general. Don't learn the framework, learn the language. Now someone asked, um, in a previous video, would I have been able to make more progress if I wasn't documenting it all, like making videos and writing all these notes and blog posts and whatnot? And yes, the answer is of course yes, because frankly, making videos takes time like this. But I have fun doing this, so it kind of added to the entire project, right? And also writing my notes down and thoughts down in Notion, kind of like a daily diary, really kept me on top because I was on a limited time schedule. I really had to think about, okay, What's, what's the essence here? What am I really working towards? If I had to cut everything out and I just wanted one thing at the end, what's that? And writing the thoughts down really helps me to think about what, what were the 1 to 3 things I could work on each day. Now the final thing that I would have done differently is, I said this before, is more interactive functions. So how can I explore the data more? I would like to have a function that could have shown me, show me any image from a certain class or make a prediction on all the images and then show me all the ones that have a very low confidence threshold so that if I had that information, then if I wanted to add more images to the, to the dataset, then I wanted to retrain a model, I could think about, I could figure out really quickly which ones weren't performing as well, why they weren't performing as well. So that's just another thing to take is you can never be too familiar with your data. Always inspect Inspect, inspect. What were the costs involved? Now, if we go on, let's go time first. I spent about 3 hours a day on average, some days more, some days less, for 42 days, for 6 weeks, taking the weekends off here and there, but I kind of worked it out to be about 127 hours. Maybe you could go between 120 and 150 hours. So, what is that in engineering time? If I get paid $50 an hour, times, let's go 20, 120, that's about $6,000 in engineering time on the lower end. And if we do times 150, it's about $7,500. So of course that's going to vary depending on how much you pay yourself, how much you dedicate, or how much your time is valued. But I just said $50 an hour. You could do $100 an hour. Depends how good you are, you know. Now I worked out how much the modeling was and it was about $176 US total, but that was from a few fails. So when I was using Google's, Google Cloud GPU renting off there, and I, as I said, I could have probably done it smarter and just done checkpoints on Google Colab or Kaggle or something like that using a free GPU. But As I said, I take things more seriously when I'm invested in them. And so, whenever I'm working on my own projects, I don't mind investing some cash into learning new things. And now, as for hosting, I really need to fix that because right now that's costing me about $14 a day. So, that's a problem. So, after this video is done, I'm going to go and fix that hosting cost issue. So, if the model doesn't exist on on that link that I've been talking about, you probably know why. Now, I've probably spoken enough here. It's time for me to get on to the next project. If you'd like to read all about this, again, I did write a companion blog article that's in a sort of a narrative format that kind of puts together the past 8 videos, past 6 weeks, all in just a story format. So, you can check that out and it has all these details that we've spoken about. My final question to you is, what project are you working on? Leave a comment below if you do have any more questions on, on my 42-day project to replicate Airbnb's amenity detection. I had a bunch of fun, learned a bunch about Detectron2, learned a bunch about Weights and Biases, learned a bunch about Streamlit, learned a bunch about deploying machine learning apps. Overall, had a great time. So yeah, leave a question if you've got anything. I'll answer it. If I didn't answer it in this video, I'll answer it in the comments. But as always, Keep learning, keep creating, and I'll, I'll see you in the next project. I've got to think of one. Hmm, I think I've already got one, but I'm going to keep that a secret. I'll see you next time. 2020ify Airbnb's object detection pipeline. The worst case that happens if we take up all 42 days and it doesn't work out, it's only 42 days. Anyway, let's come over to the whiteboard. I think that's enough. To begin with, that's for sure. We'll keep it, we'll keep it simple. Let me, let me walk you through this. Let me— I get Detectron 2 running. What am I doing? Becoming one with the data. I will dance though once Detectron 2 starts to run. Hold me to that. You remember the most important point? I'm getting attacked by puppets! While my models are moving, I've got to be moving. No way. Tell me this is going to work.
More from Daniel
Small Language Models (SLMs) Are the Future: Fine-Tuning AI That Runs on Your iPhone

Introducing Sunny - A MedGemma-Powered Skin Health Tracking App (Kaggle Competition Entry)
Benchmarking: NVIDIA DGX Spark & NVIDIA RTX 4090 | Part 4 - Comparing the results
Benchmarking: NVIDIA DGX Spark & NVIDIA RTX 4090 | Part 3 - Running LLMs on the RTX 4090
Benchmarking: NVIDIA DGX Spark & NVIDIA RTX 4090 | Part 2 - Formalizing the tests
Benchmarking: NVIDIA DGX Spark & NVIDIA RTX 4090 | Part 1 - Creating a series of tests

Local Multimodal RAG on the NVIDIA DGX Spark | Part 4 - Publishing our demo to Hugging Face


Local Multimodal RAG on the NVIDIA DGX Spark | Part 3 - Putting it all together