Patient Positioning for the NCLEX® (Every Position You Need to Know!!)
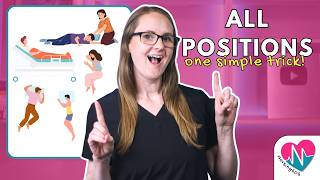
Nursing educator Christina Rafano covers 12 patient positions for the NCLEX, from Fowler's to Trendelenburg, with bed angles and clinical uses. She teaches a core principle: "gravity is your guide" to pick the right position for aspiration prevention, respiratory support, or shock management. The video includes memory tricks and a free study checklist.
Chapters
Patient positioning is one of those topics that looks so simple on the surface, but when you're sitting in front of a nursing school exam or even on the NCLEX, suddenly there are a gazillion positions that you've got to know, and they all sound the same, they all get jumbled together, and you can't remember which one goes with which patient and what you got to do. But by the end of this video, you're gonna know every major patient position and exactly what to use each one for, and most importantly, how to to get those tricky exam questions right every single time. Hey there, my friend. My name is Christina Rafano from nursingsos.com, and I have helped thousands of nursing students go from overwhelmed and stressed out and second-guessing themselves on every single answer to finally walking into their exams with confidence. I know this topic, patient positioning, can feel like a ton to remember, so I've got memory tricks woven throughout this video to really help it stick. So stick around until the end, and I'm gonna put it all together for you with really one major positioning principle that's going to show up again and again and again on the NCLEX to help you get those questions right. It's going to be so, so helpful for you, so you don't want to miss that. Let's dive in. Let's start with semi-Fowler's position. In this position, the patient lies on their back with the head of the bed elevated to 15 degrees to about 45 degrees, typically around 30 degrees. Here's your memory trick for this one: think semi means sort of sitting up. So it's sort of sitting, not fully sitting. Semi-fowlers is like when you're lounging on your couch watching a movie or watching Netflix. You're kind of sitting up, but not all the way. Now here are the key clinical applications that the NCLEX loves to test you on. First is feeding and feeding tubes and preventing aspiration with the head of the bed between 30 and 45 degrees. So This is huge for the NCLEX. Semi-Fowler's is ideal for patients who have difficulty swallowing, which we call dysphagia, or they're at risk for regurgitation of stomach contents. This semi-upright position uses gravity to help prevent food or fluids from entering the airway. And a critical thinking point for you here: that gravity is your friend when it comes to preventing aspiration for your clients. The second is respiratory support. We use this for patients with dyspnea, which means shortness of breath, because this promotes lung expansion, although to a lesser degree than Fowler's or high Fowler's, which we'll talk about in a minute. It's also beneficial for patients who are receiving mechanical ventilation because it can improve oxygenation and it can help reduce the risk of ventilator-associated pneumonia, or VAP. And third is comfort. This can be a comfortable resting position for many of our patients, allowing them to participate in activities, things like reading a book or watching TV in bed, more easily than laying flat or sup— in their supine position, flat on their back. And then let's talk Fowler's position. So in Fowler's position, here the patient remains on their back, but the head of the bed is elevated to 45 degrees to 60 degrees. So think of this as sitting up for business. So this is more upright than that semi-Fowler's position. So here are some key times that you would use a Fowler's position. So it's frequently used during procedures such as the insertion of a nasogastric tube or an NG tube or suctioning, because it helps align everything, and it helps to facilitate access. And then enhanced respiratory expansion— so this promotes better chest expansion and ventilation compared to that semi-Fowler's position. So this makes it better for clients with more significant respiratory distress. And then post-abdominal surgery— so this assists with drainage after abdominal surgeries by really allowing gravity to help fluid accumulate in the lower abdomen. So again, gravity is your friend here. And then we have general comfort and activity. So this position allows clients to sit up more fully, making it easier to have a conversation, to eat their food, especially for clients without any significant aspiration risk. And it helps them to engage in other activities as well. And then we have a high Fowler's position. So in a high Fowler's position, the client is again on their back,, but now we have the head of the bed elevated from 60 degrees to 90 degrees. So this is like sitting straight up in a chair. Here's a memory trick for you: high Fowler's equals high up. So it's 90 degrees, sitting straight up like you're in a high chair. The clinical applications for high Fowler's can be things like severe dyspnea or respiratory distress. So this is a huge one. This is the primary use for this position and a huge NCLEX point for you. High Fowler's really maximizes that lung expansion. By lowering the diaphragm, it creates more space in the chest cavity and significantly helps our clients, uh, who are experiencing severe shortness of breath or respiratory failure. It can also help with eating meals, especially for clients who can sit up independently to eat because it provides the most upright position to reduce aspiration risk during meals. And it can help with cardiac conditions. It might be used for clients with certain cardiac issues to help reduce venous return to the heart and to help ease their breathing. And then we have supine or dorsal recumbent position. In this position, the client lies flat on their back. The head and their shoulders are supported by a pillow, and their forearms rest on pillows or at the— their sides. The foot— a foot support is used to prevent foot drop and maintain proper alignment. Now, the key is to ensure that the body is in a straight line without excessive bending of the head or the neck. Here's a memory trick for you here: supine equals spine on the bed, lying on your back with your spine flat. Now, here's a critical thinking point for you for this one. There are common issues that you need to watch out for in this position, and the NCLEX could definitely test you on these complications. So these can include things like the head flat on the mattress, shoulders not being supported and internally rotated, elbows extended, the thumb not pointing upward, unsupported heels, and unprotected pressure points at the back of the head or the tailbone or the elbows or the heels. The clinical applications for the supine position could be things like rest and sleep. So a common position for comfortable rest and sleep for many of our patients is this one, particularly those without respiratory or any aspiration risks or concerns. And then it can be used for spinal procedures or injuries. It's often used after certain spinal surgeries to help maintain spinal alignment, provided though that there are no contraindications related to their airway or airway management or pressure. So that's a key thing to remember. And then it can be frequently used for general physical exams. And then we have post-anesthesia recovery. So this one can be a starting position in post-anesthesia care units once the airway is stable. And next up we have prone position. So in prone position, the client lies flat on their abdomen and their chest with their head turned to one side for proper alignment. A pillow can be placed under the lower legs to allow for slight knee flexion and relaxation of the ankles. Here's a memory trick for you for this one: think prone equals phone down. When you put your phone face down on the table, that's like prone position for your phone, face down. So prone, phone. Now here's a big critical thinking point for you. This position helps to prevent contractures of hip flexion, following a lower extremity amputation. While it promotes drainage from the mouth and the throat, it limits chest expansion though, and it's generally used for short periods of time. But here's where it gets really interesting, and this is huge for the NCLEX. The prone position is often considered a last resort for critically ill clients, especially those with severe acute respiratory distress syndrome, or ARDS, such as patients with COVID-19. It helps to optimize ventilation and perfusion to different lung regions, and studies suggest it can actually improve oxygenation and reduce mortality. However, it can be uncomfortable for many people, especially our older adult clients, and you'll want to watch out for these potential issues in the prone position. Excessive bending of the neck. We want to watch out for hyperextension of the lower back, restricted lung expansion— that's a big one— and unprotected pressure points at the chin, the elbows, female breasts, hips, knees, and toes. So the key clinical applications for this one are acute respiratory distress syndrome, or ARDS. This is probably the most significant clinical application. It's a big NCLEX point for you. For critically ill clients with ARDS, especially those related to conditions like COVID-19. The prone position can actually increase oxygenation, and it can also help to reduce mortality because it helps redistribute lung perfusion and ventilation to less damaged areas of the lungs. And then we have post-amputation care. It can be used to prevent hip flexion contractures after lower extremity amputations and short-term airway drainage. So it can be occasionally used for very brief periods of time to help facilitate drainage from the mouth and the throat, although its impact on chest expansion though is what limits the long-term use of it for that reason. And then pressure injury management— it can be used to help relieve pressure on the back and the buttocks, but careful monitoring for new pressure points where we're putting more pressure on the front of the body That's going to be really important for that reason. And then we have side lying, or the lateral position. In this position, the client lies on one side, distributing most of their body weight onto the hip and the shoulder of that dependent side. The head needs to be aligned with the spine, and the head and knees should be supported to help prevent excessive bending or rotation. Now here's a key NCLEX point for you: a 30-degree lateral position is particularly effective for preventing pressure injuries in at-risk clients. So remember that number, 30 degrees. You'll want to watch out though for these common issues. We've got excessive bending of the neck, the spinal curves not properly aligned, and then shoulder and hip joints internally rotated, adducted, or unsupported, and a lack of foot support and a lack of protection for those pressure points at the ear and the shoulder and the outer hip bone, the groin, and the ankles. And here's a key critical thinking point for you: if a patient has large hips and a pillow is not placed under their waist, the spine can be excessively bent. The clinical applications for this one are pressure injury prevention. So this is huge for the NCLEX, my friend. A 30-degree lateral position is highly effective in preventing these pressure injuries on the back, on the buttocks, and the heels by helping to shift the weight to one side of the body. Regular repositioning to alternate sides though is really key. Then it can be used for comfort and sleep. It's a common sleep position for many clients to rest, to help them sleep, especially if they prefer not to lie flat on their back. And then it can be used for post-operative recovery for specific surgeries. So after specific surgeries, it can help facilitate drainage or improve comfort depending on where the surgical site is. And then it can be used for airway management for conscious clients to help maintain an open airway and reduce aspiration risk in clients who are conscious who are nauseated and vomiting. And then we have the lateral recumbent position. So the lateral recumbent position This is a variation of that sideline position where the client's weight is distributed along the side. Here the client lies on one side with the lower hip and knee extended straight and the upper hip and knee bent. Here's a memory trick for you: think lateral equals side and recumbent equals lying down. So it's lying down on your side. Quite literally. You'll want to watch out for these potential issues though: internal rotation, adduction, or lack of support to the shoulders and the hips, lack of foot support, and lack of protection for those pressure points at the outer hip bone, the humerus— so that's the upper arm bone— the collarbone, and the knees. Now the clinical applications for this one are similar to the side-lying position. It's used for pressure redistribution to prevent skin breakdown, particularly for clients who are immobile, and it provides an alternative resting position, shifting the weight from the back. And then we have lateral semi-prone recumbent position, or SIMS. Now this one's interesting. The lateral semi-prone recumbent position— so you might have heard it called SIMS position before— The client lies halfway on their side and abdomen with weight on the outer hip, the humerus, and the collarbone. The lower arm is behind them while the upper arm is in front, and both legs are bent, but the upper leg is bent at a greater angle than the lower leg, with the hip bent as well as the knee. You can think of this as the recovery position. It's like a combination of side lying and prone. Bone. This position is comfortable for many clients and it promotes oral drainage. The clinical applications for Sims position are comfort and sleep. It's considered a very comfortable sleeping position for many clients. It combines the elements of sideline and prone kind of together, so it's pretty comfortable. And oral drainage— the slightly downward angle of the face This can help facilitate drainage of oral secretions, which makes it useful for clients who may have excessive saliva or drooling. Then we have the orthopnic position. Here's a position that the NCLEX absolutely loves to test you on— the orthopnic position. Now, this is one that the NCLEX loves to test you on. So the client sits on the side of their bed over the bedside table that is placed across their lap. They rest their arms on the table. Now, this position allows for maximum chest expansion, and it's particularly beneficial for clients with chronic obstructive pulmonary disease, or COPD. This is a key, key NCLEX point for you. Remember, this position, the orthopneic position, and COPD, they go together. So the clinical applications for this one are severe respiratory distress, particularly like we just said, COPD or asthma could be as well. This is the go-to position for clients experience— experiencing severe shortness of breath, particularly with COPD or asthma exacerbations. Leaning forward in this position allows for maximum chest expansion, and it helps to facilitate the use of accessory breathing muscles. It can also be used for cardiac decompression in severe heart failure when clients are experiencing significant dyspnea due to fluid overload in their lungs. Now we have the Trendelenburg position. So this is where the entire bed is tilted so that the head of the bed is lower than the foot. So think of it like going down a slide backwards, head down. Feet up. This position helps with postural drainage, and it increases venous return back to the heart. So here are some clinical applications for this one. Postural drainage, like we just mentioned. It's used with respiratory therapy to help drain secretions from the lower lobes of the lungs because gravity can help those secretions move towards the larger airways for being expelled or for suctioning. And it can be useful for certain medical procedures surgical procedures, might be used during specific abdominal or pelvic surgeries, and when placing a central venous catheter. And then we have the reverse Trendelenburg position. This is when the entire bed is tilted so that the foot of the bed is lower than the head. It's the opposite of what we just talked about with the Trendelenburg. This one is head up, feet down. So this is the reverse Trendelenburg. So the reverse of head down is head up. So this position promotes gastric emptying and it helps to prevent esophageal reflux. So the main clinical applications for this one that you'll see are that gastric emptying and reflux prevention, because it's used for clients at risk for aspiration due to delayed gastric emptying or gastroesophageal reflux disease, or GERD, because gravity helps to keep all those stomach contents down. In the stomach where it belongs. And then post-operative head or neck surgeries, it can be used to help reduce swelling and promote drainage after certain head and neck surgeries. And then we have a modified Trendelenburg position. This is where the client lies flat on their back with their legs elevated above the level of their heart. Modified means it's different from that regular Trendelenburg. So instead of tilting the whole bed, we just lift the legs up. This position helps to prevent and treat hypovolemia— that's low blood volume— and it can help facilitate venous return back to the heart. So this is a big NCLEX point for you for shock management. Here are the key clinical applications for this one: hypovolemia and shock. This is the most common and effective use of this one. The NCLEX loves, loves to test you on this because by elevating the legs above the level of the heart, promotes that venous return from the lower extremities to the central circulation in the body, helping then to increase the circulating blood volume in situations of hypovolemia, like severe bleeding or dehydration or shock. So this is often a first-line intervention while we're awaiting for fluid resuscitation. It can be used for leg swelling and edema as well. Because it can help reduce the swelling in those lower extremities. All right, so let's bring it all together here. So far we've covered semi-Fowler's position, Fowler's position, high Fowler's, and for respiratory and aspiration concerns, then supine, prone, sideline, and lateral and Sims positions, and orthopneic positions, and exactly when each one is your go-to. Then we wrapped up with Trendelenburg reverse Trendelenburg, and modified Trendelenburg. I know that's a lot, so here's the golden nugget that you're going to want to remember. This is really what's going to tie this all together for you and make it so much easier, okay? Don't miss this: gravity is your guide when it comes to patient positioning, okay? So when you see a positioning question on your nursing school exam or on the NCLEX, ask yourself, okay, What does this patient need gravity to do? Do they need gravity to move fluid away from their lungs, to protect their airway, or maybe to increase their blood return to their heart? The answer to that one question, what do they need gravity to do, that will almost always point you straight to the right position that, that patient needs. Now you know that those tricky fundamentals questions are going to be showing up on all of your nursing school exams, throughout nursing school, my friend, it does not just stop with fundamentals. So it is so, so, so important that you know how to answer NCLEX-style questions correctly, okay? So click on this video right here, and I'm gonna walk you through how to choose the most correct answer on those tricky prioritization questions on your nursing school exams and of course on the And if this video helped you, hit that like button and write "love" in the comments below, because that is just what we do around here. All of that really helps to tell YouTube to show this video to more nursing students who need it, and I am on a mission to help as many nursing students as possible pass nursing school. And don't forget to snag your free nursing school study checklist that I have down in the description box below for you that has all of my best study tips to help you know what to study, actually how to remember what you studied and retain it all and ultimately pass your exams. So just comment "checklist" below and I will send that over to you, or you can click the link in the description box to snag it. And of course, hit that subscribe button and click the notification bell so you never miss a video. And as always, my friend, go become the nurse that God created only you to be, and I will see you over there in that next video.
More from Christina







Pass Your Dose Calc Exam! | Complete Guide for Nursing Students (with PRACTICE PROBLEMS!)