Berkeley Packet Filter - Introduction
Jon Schipp explains Berkeley Packet Filter, the in-kernel system that lets applications select which packets to receive. BPF runs as a register-based virtual machine across Linux, BSD, Windows, and SunOS. Tools like tcpdump, Wireshark, and Snort use libpcap to abstract BPF's filter syntax.
Chapters
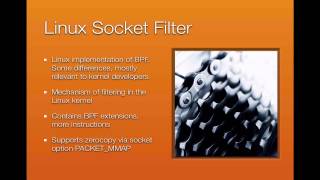
Now we're going to talk about the Berkeley Packet Filter. So what is the Berkeley Packet Filter? Well, first we can divide it up into two components or two main functions. A BPF, or the Berkeley Packet Filter, is a piece of code in the operating system. It's done in the kernel that allows the application to tap packets. The application makes a request to the BPF code saying, hey, I want to receive the raw packets at a lower level. And typically this level's at the device driver layer or the device driver level. The second main function of the BPF code is to provide a filtering language. This allows applications to say, hey, I only want certain packets matching certain criteria. This allows you to be granular in what you allow to pass to the application. The BPF and code in the kernel will filter the rest. Okay, so BPF is implemented as a register-based virtual machine. There's a number of instructions that are interpreted and then converted to lower-level code. And it is, it is supported on a number of kernels, including the Linux kernel and a number of BSD kernels. How does it work? Well, from the application standpoint, a programmer writes BPF instructions. It writes BPF code, okay? And then whenever the developer is ready to create a socket, he does the typical, uh, in our case, we're writing a packet sniff, we write, um, we use the socket system call to create a sockraw socket using the af-packet family. Then what we do is we attach a filter that we created, that is, that set of BPF instructions that's put in a structure. It is then attached to the socket, and this is done through the setsockopt system call. Now, once that happens, the BPF code is inserted into the socket And then after every packet that comes in, the BPF filter is executed on each one. And if the filter is executed on a particular packet and it matches the criteria given when the instructions were specified by the programmer, then the application will allow— or I should say, the BPF filter will allow the packet to pass and make its way to the application. However, if it does not match the filter, then the packet will not reach the application, is thus thrown away or dropped. One other thing to point out here is that outside of determining whether a packet makes it or does not make it to the application, the BPF can be instructed to determine how much of the packet, that is the size of the packet, will make it to the application. So you can return only 64 bytes if you'd like, or a— or the MTU size of 1500 on Ethernet, the standard MTU. So you can do that as well. There are different implementations of the Berkeley Packet Filter code. Originally it was called the BSD Packet Filter and was developed on the BSD operating system. This was prior to FreeBSD and OpenBSD and all those newer ones. A paper was released about this in 1993, so it's been around for a long time. But now you find BPF code in Linux, FreeBSD, OpenBSD, NetBSD, in Windows, on SunOS, etc. So most of the kernels you'll encounter in everyday life will be— will support the BPF code or the Berkeley Packet Filter. On the BSD operating system or the BSD family of operating systems, there are a few different things. One is that these machines or these systems use a pseudo device that is used to access the packets. So if there's like a file descriptor present, and you use your standard read and write system calls to read and write from that /dev/bpf device. So here it's implemented as a device file. Also on the BSD family of systems, there are two buffer modes available. There is the normal one and the zero copy. Zero copy, for example, in FreeBSD is not enabled by default. You actually have to specify a specific kernel setting that enables it and then a system control setting to turn it on. Now once that is available and, and enabled, you can have performance gains from using a shared memory map buffer. However, by default it uses the normal mode. On the Linux side of things, the Linux kernel's implementation of BPF is called the Linux Socket Filter. So there is some differences, and there's actually documentation on that in the filter.txt file in the kernel's documentation tree that you can look at for more information. But this particular file describes how it works and how it differs from the BSD implementation. So one of the things that is different is that on the Linux— or in the Linux kernel, there is a number of BPF extensions. That is, the Linux guys or Linux NetDev developers added a number of new instructions that aren't supported sometimes on the other operating systems. And these instructions are— I can give you a few examples of these instructions, and some of those include maybe the modulus operator or being able to filter upon the CPU. Also, one other big difference between the Linux socket filter implementation of eBPF and the BSD implementation of eBPF is that on Linux, to do the memory map stuff, there's a thing called packet mmap, and that is what we used as a socket option to use a zero-copy memory map buffer. The packet capturing process is actually very inefficient if the zero-copy memory-mapped buffer option is not enabled. So first, your kernel has to support it, and second, the actual application, when it creates the socket, has to apply the packet_mmap option to the socket to enable the zero-copy mode. Without the memory-mapped buffer, or packet_mmap on Linux, it takes one system call per packet. That's a lot of overhead. And also libpcap has to get this timestamp information from each packet, and that requires another system call. So if you're using a libpcap application without packet mmap, then you're not going to have very good performance. Fortunately nowadays though, many of the tools that rely on libpcap have, because of libpcap support for packet mmap, have the zero copy thing enabled or the zero copy functionality enabled by default. And this differs from the BSD implementation of zero copy because while both kernels, the Linux and BSD kernel, whatever, whichever BSD kernel you're talking about, FreeBSD, OpenBSD, etc., you have to compile the kernel with the packet mmap option and many of the, the kernels you'll find online will have that all ready to go. But one difference is that on the BSD implementation, you actually have to make a specific system control setting to enable it in your kernel while the operating system is running. But on Linux, you do not have to do that. The application just has to make the system call with the packet nmap option. There's no other user intervention. So that's up to the programmer in this particular case. Moving along, now we're talking about libpcap, the most ubiquitous and standard, or should say de facto, not standard but de facto library used for packet capture across nearly all operating systems, including Windows. libpcap allows you to do the capturing, the writing to pcap file, the reading from a pcap file, the applying filters, etc. Whenever your program links against it. So the programmer doesn't have to implement these functions and features themselves. They just link against the libpcap library and call the libpcap functions to handle all that stuff for them. The libpcap code was actually in, originally in tcpdump, but they decided to make the two separate so that other applications could use it, and then tcpdump will just link against it to utilize it. One other awesome thing about libpcap is its high-level filtering syntax, so you don't actually have to write manually low-level BPF instructions, which are very tedious and assembler-like. What you can do is you just use one of the many primitives available in the high-level filtering syntax language, such as port 80 and source IP and the IP. So it's a very intuitive way to make filters, and most people know these— this high-level version of the filtering as BPF. They see that, oh, that's BPF, let's just play a BPF. But as we talked about earlier, BPF's much more than that. That's one of the things I want to note here, especially for you to take this home. That is, BPF is not only the code that allows you to apply filters in the kernel, but it is the code that allows you to actually tap the packets at the lower level right above the drive or the device driver layer, right? So it allows you to actually grab the packets and then also apply filters to the sockets for them. So it has two main functions. And we're talking about BPF by itself. BPF instructions, the filtering instructions anyway, are written in a low-level language. So it's not going to be pretty. It's not going to be the nice high-level stuff you see here. It will actually in the future, in future videos in this module, we'll actually write low-level BPF instructions. I want to make it clear that just because you're applying a BPF in the high-level filtering syntax of libpcap does not mean that that is the true BPF. That's libpcap's language, their specific high-level language. There's a lot more to it. And with that, libpcap does not actually implement all the available BPF instructions that are in the Linux kernel, for example. There's a few other ones that are, until now, they were undocumented, but now there's documentation for them, and maybe in the future they'll be implemented in libpcap. So outside of making tools easier to write across operating systems and platforms, if your kernel does not support BPF filtering, then you are in luck because the libpcap library has a userland interpreter meaning that it can do filtering in user space, though the result of this causes a huge inefficiency because packets have to go from the network card to the kernel and then to the application prior to filtering or before they can be filtered. So that's 3 different steps. However, if you, if you, it was filtering in the kernel, As is the case of Linux and the BSD family, packets come from the NIC to the kernel or filtered in the kernel. You don't have to wait for that, those extra instructions to copy to the userland space then filter it, so you save a lot of CPU time. Moving on, nearly every protocol analyzer and sniffer and even some administration tools networking tools utilize libpcap. Libpcap provides portability, which is very beneficial to all of us. The BPF code in general allows us to get the headers, the packet headers and the packet data, and do stuff with them. So your intrusion detection systems like Bro and Snort and Suricata and your general packet sniffers and protocol analyzers like tcpdump, Tshark, Wireshark, etc. These all use the libpcap library. Even some network system administration tools need the low-level access that BPF can provide. An example of one of these is dhclient. It is a DHCP client available for Unix-like operating systems. And the reason it needs this low-level access is DCP works over data that's stored in the Ethernet frames. For example, when a host wants to broadcast for a nearby DHCP server, it sends— or it sets its destination MAC address to all F's. That is, every bit is switched on in that 6-byte field. and it will be carrying a DHCP discover message above an IP. But to actually realize and know that this is intended, or this is a broadcast message intended for discovery of a DHCP server, the application needs to see that framed information. And that's what BPF can provide for tools like this. Now what we're gonna do is we're go to the terminal window real quick, get outta that, switch over. I'm on FreeBSD right now, FreeBSD VM. And we're gonna show you on, on the FreeBSD operating system, you can actually query information about, uh, the BPF device or the BPF code. The statistics are available from the FreeBSD operating system. So let's go ahead and try this. We're gonna issue, tcpdump and listen on em0 and write the packets to /dev/null. I don't want to print anything to the screen, so I'm going to do that. So now we have our tcpdump process listening and we're going to use netstat -B, and here it's actually the B saying, hey, look at the BPF peers. Now you can see all the processes that are using the BPF code. And what do you notice? Well, outside of my tcpdump command that I, that I launched, which will obviously do that, you actually have the DHCP client, and this machine's getting its, uh, IP address via DHCP. So this particular implementation in the FreeBSD operating system allows you to view BPF data. So you can see the packets, or you can see the stats of packets as they were captured by BPF. And you can see other information tied to the programs that were assigned to the BPF code, or just to make a request to the BPF code for the packets that they want to have. And that's really neat. And at this point, we're gonna conclude this video, and we're gonna jump into many more BPF videos to help make this all much more clear.
More from Jon


What No One Knows the Podcast / Vodcast featuring The Tampa Bay Wave and Jon Schipp

Meeting the Exposure Management Challenge: Key Use Cases for Success | @OfficialRapid7 #SolutionSpotlight
Spot Security Control Gaps and Non-Compliant Resources Across Your Attack Surface