Bro - Writing an Analyzer 1
Build a custom Routing Information Protocol analyzer for Bro from scratch using Binpac. The tutorial covers extracting packet formats from the RIP RFC, writing protocol definitions, emitting events, and debugging compilation errors until the analyzer successfully parses a RIPv2 pcap file.
Chapters
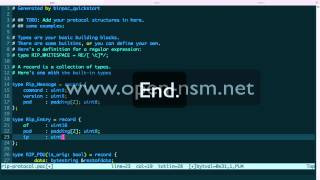
Hey guys, are you ready to get started writing a Bro analyzer? I hope so. There's quite a bit of work involved in this module, but I hope it will be interesting and particularly useful for you. So right now you can see in the screen actually compiling Bro ahead of time. This is because Bro takes actually quite a bit of time to compile. And it's been going for about 10 minutes now, and it will still truck along for a little while longer. So in the meantime, let's go ahead and switch over to my browser window and show you what you need to get started. So we're going to actually go to bro.org, and you're gonna find the install doc, and you're gonna need to use this command right here, this git clone command, to recursively clone Bro source code from GitHub— excuse me, not GitHub— from Bro's official Git repository. And import all its submodules, which will be required to compile it from source. Then next, you're gonna actually run ./configure and make, and that's the point I am over here in this screen. It's making it now, so it's actually building all the object files. So next, what we're gonna need to do is we're gonna need to get familiar with a number of tools that Bro are tools that have been built for Bro to help our process of creating an analyzer. And one of those is Vlad's of the Bro team. Vlad created this binpacks-quickstart project, which actually creates a number of templates for binpack, which allow you to have a number of things you can just quickly edit instead of having to build all the files yourself. So that gives you the baseline configuration you need to quickly add a new analyzer. Then what you'll need to do is you'll need to understand a little bit about Binpack. And you can see from this, from the Bro.org website, that if we go to— you see this URL, actually zoom in just a little bit here— you can see that Binpack is a high-level language for parsing protocols. So before, in Bro, before Binpack was available, you actually had to write pure C++ code to actually generate the protocol parsers. Well, Bimpac makes that much more high-level, and you just have to write the Bimpac code, which is far more easier, and then actually generates the corresponding C++ code that actually Bro will use. So it's just a nice way to make it more high-level and useful. And then finally, what we need to do is we'll need to pick a protocol to use as our analyzer— or excuse me, a protocol to analyze with our analyzer. And in this case, we're going to use a simple protocol called RIP. It's an older protocol, but it's the routing internet protocol that's used in a large number of local networks to route packets, and it's a great one to get started with Bro. So we are going to go ahead and bookmark this page from ietf.org. This is the RFC for the version 2 of RIP. There's a few different editions or drafts, but this is the one that we're going to use. It's 2453. I'm going to zoom in a little bit there so it's easier to see. And we're gonna have to figure out the packet structure and everything else that goes along with writing a protocol parser for a particular protocol. So Bro finished compiling, compiling finally. Let's go back a directory and let's go ahead and grab Vlad's binpack quickstart code. So what we're gonna do is over here we're gonna clone the URL, or you can click this to copy to clipboard, and I'm gonna do git clone that URL. It's gonna pull it down. In just a moment we'll have BIMPack QuickStart. Okay, we have that available. Now to also prepare, let's get a sample packet capture file for RIP. So let's go to version 2, RIPv2 pcap, and you can see there's packetlife.net here, which I've been to before. You can actually grab this RIPv2 pcap file, which is available for free. Copy the link address. We're gonna go ahead and wget that, or wget this one, and pull it down to our workstation. Which we'll use to run through Bro. Okay, got that. Now what we're going to do is we're going to go into— go ahead and increase the font size a little bit. Okay, let's run the start script here. You can see we have an error. We're looking for a module that is required for this piece of software. It's called docops, so we need to find that. Let's do, um, appcache, uh, search. Docopt, and actually python-docopt because it's a Python library. Okay, so now what we can do is we can install it because it is there. python-docopt, and get rid of that, apt-get. Okay, installing that. Let's run the start script again. Open another module, it's called Jinja. Following the same lines, we can look for python-jinja and voilà, there it is. So which to use, Jinja2. We look over here, it's python-jinja2, do 2, and that is installing now. Okey-dokey. So now see if it works. Yes. So a few things it's going to ask us for, or we need to provide the arguments: name, a description, and the path to the Bro source, along with a few optional things for the type of protocol. So now that we have to pass the specific arguments to the Bimpak QuickStart program, we want to make sure that they're right. So While this is a good help, there's also more documentation available online. Let's quickly look at that. So if you go to bro.org, there is a Binpack sample analyzer document. You can tell that the introduction here actually uses, or suggests that you use, Binpack Quickstart. You can see that here they create a protocol sample. It says, hey, this is a sample protocol. This is how they refer to the path of Bro. So they just go back a directory using a relative path., and then the other information. So we're using UDP, we'll be using a UDP program, or excuse me, a UDP protocol, which is what RIP relies upon as a transport, the User Datagram Protocol. Also for the actual files that the Binpack sample generator creates, or the Binpack Quick Start program, is listed here. Each one is here and with a brief description of what it does or what its purpose is. And let's go ahead and take care of this though. We're gonna do one for RIP. RIP, we're gonna say it's the Routing Internet Protocol because that's what it is. Okay, and then what we're gonna do is refer to the Bro source, which is back a directory, my home directory. And then what we're gonna do is specify UDP. It generated the protocol files. So if we go back, what it actually did was it put them in Bro's directory. So we can go to Bro, we can go to— we have two paths actually. So if you go back to the document here, you'll see that it creates a number of files in the analyzer directory and a number of them in the scripts directory for your particular protocol, with the name sample here will be replaced with the protocol name. So let's go ahead and take a look at one of those. We'll begin by starting with Bro, excuse me, we'll go in the Bro directory, we'll go to source, we'll go to analyzer, then we'll need to go to protocols. This is where all the protocols are, all the protocol analyzers. So if you actually familiar, want to get familiar with reading the code of other ones so that you can use, learn how they work, do check those out. rip is ours, so we're in that directory now, and what we can see is there's a a number of files here, and we're gonna mainly work with ripprotocol.pac for, for a binpack file, ripanalyzer.pac, and events.biff. For the scripts directory, I'm gonna go back to my home directory as the path here. We're gonna take a look at /pro/scripts/base protocols, and again you have all the script— the Userland Bro scripts that are used for the particular protocols. And we're gonna use RIP here, and we're gonna list them, and we have 3 files here. And we'll be concerned with all 3 actually when we get to that point. But next up, we need to start working with the analyzer directory. Now let's go to the analyzer directory and Okay, so this is our same— our base— our templates that were created by the BigPack QuickStart program. So we're gonna first go ahead and open up RIP protocol, and this is the most important. Got some whitespace here, let's remove that. You can see that he built some sample types here, like here, that were— that's commented out that tells us, hey, you need to work with this. So at this point, we need to use this file, this protocol file, which is designed to parse the protocol structures of RIP in our case. So that means we need to become familiar with RIP itself through the specification or the RFC, and and then take that structure of the protocol and write the code in this file to parse it. So let's begin by actually going to the RFC page. I still have it open in my browser, and there's a lot of pages here, quite a few. So what we're going to do is we're going to find what's— you don't need to read all this, you just need to find where the typically where the block stuff starts. So I'm gonna go down, just kind of scroll through it here, and wait till you see the, the block diagram or the header diagram of the packet. Here we go right here. This is what you're looking for, and it's typically called message format in the RFC, so you can typically just search for that. And this is what we need. So the RIP packet format, you can see, is And it's actually very simple. There is a one field that is a byte called command here. There is another field called— that is a version that is also a byte. There's a 2-byte field here which is really simple because it says this field must be 0. Then after we have a 20-byte field called the RIP entry. And we're not gonna get into the, you know, the nuts and bolts of this protocol, but we're gonna be able to kind of get it working so we can parse it and actually get some useful information out of it. You can add stuff to it later. And then if you go down a little further, it says that there may be between 1 and 25 RIP entries. So recall that this is a RIP entry, so there could be between 1 and 25 of these pieces built on top of that. And these are actually broken down into another set of blocks here. And you have 2 bytes for the address family identifiers— this one must be 0— IP address and some— a few other things. So there could be between 1 and 25 inclusive RIP entries in a single datagram, a single RIP packet. But let's only concern ourselves with one for now. So we need to get this basic thing rolling right here. So what we're gonna do is we're gonna go back over to our protocol file, our rip-protocol.pak file, and we're gonna begin creating the appropriate record for the protocol structure. So we're gonna use this sample that he's got created here, and we're gonna call it what it's called in the protocol. And that was, if you go back over real quick here, this is the RIP message. We were gonna use this word right here. So I'm gonna say RIP_message. So I'm defining a record that's called RIP message. And then what we're gonna do is we're gonna create these fields, and we need to give them type. So the first one we saw was command, the next one was version. So for the 1-byte fields, it's going to be, you know, there's 8 bits in a byte, so we need to say an unsigned integer of 8 for a single byte here. And then what we're going to do is we're going to create the protocol field. And then what we're going to do is we're going to do the padding. And we can do— let's call it pad. And so these are our user-defined fields right here. These are the names that we're giving them. This is the data types that the fields will be assigned to. And we need to actually do the proper protocol syntax, or proper BIMPAC syntax, is to put semicolons after each declaration. Next, what we'll need to do is, well, for the padding, padding has a specific rule or a specific attribute where you have to assign how much padding, and we're gonna say 2. So pad is the name of the field, and then padding is a specific BIMPAC structure where we can— or a feature where we can say, hey, you want to pad how many bytes? And that is to say that we do not care about those 2 bytes, and that is the must be 0, that are 2 bytes. We don't really care about them, we're just going to pad them. It's going to fill it out for us. Then what we need to do is we need to create, um, another structure that yields to the RIP entry. Could you saw that back over here that the RIP entry is this large block? So we have to find a way to say, hey, point to— this needs to point to this whole thing. So we need to create, create another record, and following the same format, we'll need to just go ahead and copy this. Call it RIP entry. Oops. And start filling that out as well. In this case, there's different fields. So we go back over, we see address family, so I'm just gonna call it AF for short. Then we have this padding again, and then we have a few more fields. Let's go ahead and start filling them out. So AF, and you can put the semicolon anywhere. I'm just, um, Putting them— I like to have it all matched up in a line like this so it's easy to read, for me anyway. That's just my style. However, you could do it differently if you'd like. So, so we got this, and you can see that address family was 2 bytes, that is 16 bits. So we're using this declaration, this of the type here. Instead of uint8, we're using uint16, and then we need to set up the the next variable. Whoops, that's not that one. It is— I forgot already— 2 bytes of padding. So we'll go ahead and just copy that because it'll fit. Then what we'll have is the IP address. Again, go back, a little back and forth between this stuff, and that is 4 bytes here. So guess what? We're going to need a 32-bit integer to store this. So we're going to call this IP32. And then you can see the other fields are also 4 bytes. That's 4 times 8 yielding 32. This one's gonna be called mask. They don't say that in this, but if you look down in more of the details in their extensions, that's what they're referring to. And I'll show you that in just a moment. I know this ahead of time just to save some time here. Okay, so now we have the metric, all those, and those are all 32-bit integers. And just to go ahead and show you that the protocol extensions right here. So this is for the new stuff, RIP-2. You can see that the route, the route entry right here, it has IP address, subnet mask, next hop, and metric, which we just filled out. They don't have to be empty like some of those fields were. And also this one says for the extension that the route tag And earlier it says that it was— it could be 0, or it should be 0, but that's actually the older one. So you see that they use the same header format, there's just differences between the versions. So what we're actually going to do is we're going to actually just update that for the route tag now. Because again, I don't need to have it set to 0, because it could have that useful route tag information, and it will if it's version 2. So what we're going to do is we're going to get rid of this. And just copy that and call it RT for route tag, and then it was a 2-byte, so it's 16-bit integer. Alright, so now at that point we have the basic protocol structure laid out. Now we have to do a lot of logic in the future with it because things are just gonna be stored there temporarily. We need to know what to do with it, and that's what will help tell our analyzer how to handle it. But next we need to do is we need to take a look at this rip pdu structure, and it's a record as well. And we're gonna go ahead and remove this. This is kind of the stuff that's going to be passed to the user land at some point in the future. So we need to actually tell it the important stuff that we want to pass, because you don't have to pass everything and make that available in Bro. But we want to pass— for our demonstration purposes, we want to pass a few fields that can be useful. And then we're going to do the padding, copy that, and then we're going to pass the RIP entry, which we still haven't filled out from here. So how do we actually tell it to, um, point to that data structure? We say, hey, this is going to be the RIP entry, and we refer to it by its name. And then we're gonna say, hey, it's gonna be an array. And then we can actually use a special binpack attribute to say parse until input.length equals 0. And that is because, remember, that this rip— this particular rip entry could be 1 through 25 inclusive in a single RIP packet. So you want to actually parse through these and a number of different ones if they're right, you know, if there's one after another in the packet. So there could be more information. So that's what this says, it just says read until the end essentially. Until there's no more length, which it would be 0. Okay, and now let's scroll down here. One thing you might want to do actually before you do that is just to add this information to your file, go and copy and paste it that way. Let's go ahead and go down here, just kind of— wait, I need to set it up so I can paste it properly. There we go. So this is going to be some just comments that we can actually use so we don't have to go back to this, back and forth between this document. I should have done that before before, so it was easier. But let's just go down again and we'll copy paste that. Go ahead and set the comment characters so we don't get a code violation here. Boom. And then we have these particular, uh, packet structure right inside the protocol file. And now I think we're ready to move on. Syntax— oh no, we're not. You see something here? What are we missing? Well, it turns out that we don't have the semicolons for here, so let's go ahead and add those. I'm just gonna do this in Vim here. I got the semicolons to end the declaration in each one of those now. Great. So I'm gonna quit out of this file, and now we're gonna move along to the next file, which will be our events.biff file. Okay, so now we need to start thinking about what kind of events we want to generate. If you go back to the RFC, we see that there are two specific commands. Remember that command field earlier? It's up here. Well, there's gonna be some values here, right? So what are the commands? You see we have request and we have response. It says a request for the responding system to send all or part of its routing table. And the response is obviously the routing table, table. And there's a few different things here. You can actually— could be unsolicited, which is just a routing update generated by the sender. That is, it is one that has not been requested. But there's also the response that is tied to the request. So this is all in that command field, these two possible values. So given this, we need to think about how we want to generate our RIP events in Bro. So I propose that we do two, two events. And let's go ahead and open up the events.bif file. You know, Bro's— our Vlad script put a sample event in here, but let's, let's just go ahead and get rid of that and do rip_request because it makes sense to have one for the request and one for the response. So now that will be, there'll be two events. Next we need to do is we need to define, or we need to add in this, in the events, the parameters that are going to be passed to it. So we have command, version, and a few other things. Let's start simple and just work with— oops— work with passing the command, and we're going to give it a type to pass to Bro. So we type count, and that is because if we take a look again, the values are 1 or 2, so we can keep it in a small variable that just has numbers, and that's called a count in Bro. And also the version— if we take a look at the version, um, there are two versions of RIP, and it says— let's see here, where's the versioning at? Go ahead and search for version. Version 1. There is a, a field for the versioning which we saw earlier, which is the version right here. However, there's actually more down there if you take a look at that. There's some authentication type stuff that can be be done in here. We're not gonna go that deep into it, but let me go back up to the top here. Sorry for scrolling so much, but let's just say that, you know, the version is a byte field and we have version 1 and we have version 2. So it turns out that they're actually gonna be— I've read it in here somewhere, I don't see where it— oh yeah, well, you can just refer to this as version 1 and 2, but that will be the actual number that's set in those version— in that version field. So it also could be type count. And I'm just going to copy that, it'll be easier than just edit this to say response, response, request, and response. And now we have that. Next, we'll need to work with the actual RIP analyzer file. So now we can actually work with the analyzer file, and this is where a lot of the meat of it is. So let's open that up. And first off, once the protocol is parsed, which we saw in the rip-protocol.pak file, this analyzer.pak file is what actually handles everything in that protocol, references everything from that protocol parse file and actually does something with it. And one of the key things we want to do with it is we want to actually generate an event, right? Because we're all about, you know, Bro is an event-based base language. So this right here, this Bif event, is actually how we generate an event, and then that gets eventually taken over in Scriptland. So the template file that Vlad put together with this Binpack Quickstart script has all this ready to go. We'll need to make a few modifications to it, and you don't need to worry about the quirky syntax here. This is actually everything between— I shouldn't say it's quirky because this, this part is not quick for the B FIMPACK stuff's kind of quirky. But everything between the percent signs is actually C++ code. So that is, if you cannot put a comment in here, a comment character that you're used to in other languages such as the shell, such as bash for example, this is a comment because that will fail because that is not a proper comment character in C++. What you want to do is you want to do— this is one way to do it, so it's for a single line comment. So just be aware that everything between these two points is C++ code. Now, we actually want to generate an event that passes the data structures, or the important parts of the data structures that we created in the RIP protocol file, right? Remember what those were? Those were the command and version in our case. We're gonna start out with those. So we need to edit this a little bit. What we're gonna do is we're gonna change this data, 'cause see, this is the default he put there, and we're just gonna call it message. It's a little bit easier to remember. And then we're gonna say, hey, use that RIP PDU data structure that was defined in the earlier file. So let's go ahead and save this and open up, um, what is it here, rip_protocol.pak. We're gonna open that file up, and that was this one right here. So this is that RIP PDU thing. So this ultimately is what's going to end up getting data from this, ultimately going to get passed to that event function, which will pass the appropriate stuff to userland. So we want to get command inversion right now. That's what we want. So let's go back to the protocol thing. I'm sorry, the protocol thing, the ripanalyzer.pak file, and we want to actually tell it to pass a few things. So what we're gonna do is we're gonna put a comma here to say, hey, we're gonna pass more things. Get rid of that, and this is gonna be the end right here. These have to terminate in a semicolon because that's part of the way statements and declarations work in C++. And we're gonna start referencing what we created up here called message. So that RIP PDU is now referenced by message. The components of it can be used, message can be used to access them. So we're gonna start off using a variable to reference that. So we're gonna do message.command. That is, it's going to reference the dot— the command field inside of message, which we saw again in the previous file. Let's go ahead and actually open both of them at once because it'll be easier to see. So rip protocol Now we have them both up. So the top one is the RIP analyzer and the bottom one is the RIP protocol file. So let's go down here to the PDU. There it is. Dun dun dun. Go ahead and highlight that so you know, um, oops, what I want. So now we want to pass the next part, portion of that, and that is the RIP version field. Okay, and then we make the commas to make it valid syntax. At that point, that's really all we need to do. So let's just finish out the syntax and put the semicolon there. So it's this function, the arguments to the function, say hey, now start passing the actual arguments from our data structure, and we want to pass two of them: message.command, which again refers to command here, and then message.version, which again refers to version here. And then end that statement with the semicolon. And now that should be enough to actually pass that information to userland once the event is generated. Now, this is for one event. You can see that there is this biff generate rip event, but we— remember we edited the, um, other file, the events.biff, to have two events. We remove the default RIP event and change it to RIP response and RIP request. So let's actually go ahead and change— let's go down to the bottom file and let's go ahead and open up events.biff. You see there's those two. So we actually need to refer— use that name appropriately up here. So generate, we're generate the request here, and then if we want to generate the response, we actually have to create another Biff event. So let's go ahead and copy this stuff, this code here. Actually, I only need these. Okay, whoops, I am hitting the wrong keys. Okay, put that over there, and this one's for a rip response, right, as it is specified here. Response. Okay, now there's something else to be wary here. These both are get generated, which is not what we want. So we need to have logic in here to actually say only generate the rip request whenever the packet is a rip request packet, or only generate the rip response packet whenever that one is the rip response. So we can actually do some C++ to actually handle that. So what I'm going to do though is instead of— well, let's just go ahead and actually build this example. So we can do user comments, uh, check for RIP commands, or test for RIP commands. Okay, so what we're going to do is we're going to do an if statement here. If message.command, which remember we're referencing from here, so it's available in this area, this, this clause, or this code block, equals, say, 1 for RIP request. Let's go over here. Yep, it's 1 as a request. Then then execute this, and we also need to actually have a return true statement in here because it's a requirement. And then what we need for the other one is to have the same thing except for the response, it's actually 2. So what that actually does is it will— hold on one second— one more— it will test the number in the command field, and if it's 2, it'll generate RIP response. Because remember, if the value of the command field is 2, then that means it is a RIP response message. We're just testing for that number. If it is equal to that, then launch this version of the BIFF event, right? Okay, so we have those two things. This is a little bit ugly. People in the— might— if they're looking at the code, they might not know what 1 or 2 actually means. So what we're actually going to do is we're going to further— just kind of before we even start compiling it, we're going to make it a little bit easy and we're going to use a few things to reference it. So let's go ahead and save this, go down to the bottom here, and we're going to open up our rip protocol file. And what we're going to do next is we are going to try to add enumeration or definitions that we can reference. Give me just a second here. Okay, so let's go down. Yep, I'm already here. So let's go ahead and add a new definition of enum. And all these things that I'm referring to, all these data types, are— you probably, if you've never done work with BIMPack, then you won't know them. But this guide you can follow to actually kind of get some of the information from them. I'm trying to explain it the best I can while I'm doing this live, but Let's take a look at enum and see if that matches here. Mm, nope, there's no good definition of enum it seems. Let's go to type. You can see there's all these different types here. Mm, data match for a particular type, record, so specifying record there. It looks like this documentation particularly doesn't have the enum type set in here, but that's okay. So what we're actually— this basically acts like a define in C. It's a way to reference some text that, like in C, the C preprocessor will actually replace the value of the text with the value it refers to. And in this case, we're gonna set a few up, and it's just best done with a demonstration. So I'm going to go ahead and put that there. We're going to put the ending clause here and let's go ahead and build out these requests. So we're going to give it a human-readable name that we know, and that is RIP request. And then we're going to do the other one for RIP response. Makes it real simple. And that is too. So now we can just reference these things. And next we want to do the version as well. So go ahead and copy this. And we're gonna go ahead and do rip-v1, and we're gonna do rip-v2, that's version 2. So now we have these, and now we don't have to reference the 1 and 2 in our, our conditions. We can just actually use the names here because they're more human-readable. So So now we can do if message equals RIP request, and for this one, if message equals RIP response, and if that is true, then this event will get generated, and then once it's generated, the function will return true and it'll exit. So now go ahead and save that and save that. What we need to do next is try to compile it and see if it compiles. So I'm going to go ahead and exit, exit that one. And so we're not really going to do anything, just going to have it if it compiles, but Then we can actually start working in the userland code. So let's run make. Okay, so we have a syntax error at rip-protocol.pak file on line 27, and let's go ahead and go to, go to that here. Source analyzer-protocol-rip, rip-protocol.pak. And you can go ahead and say, hey, put us at line 27 here. Ah! And I see the issue right here. Didn't notice that earlier, but that does not need a declaration after for the type, and we had two semicolons, so that would have been a syntax error anyway. So now let's build again, see if it passes. It does not, so we have another issue on line 43. So let's do 43. And again, the same thing I did. So let's go ahead and remove that. And let's do one more time. We might have another one, actually. This might not be the last time. Uh, rip command is redefined. Binpack 22. So let's see what that's all about. Ah, I did it twice. So this is good that I'm doing this live, so you will actually be able to see, um, common things you'll run into. So that's ripversion.
Okay, now we have another error. Let's see here, on rip_analyzer.pak file on line 24, we have a data type undeclared, or a reference to a variable named data or a structure named data that is undeclared. So I need to look at this to find more information about it. So let's go ahead and clear the screen here, and we're going to need to go into Vim. Source analyzer protocols, and then we'll go to RIP and rip-analyzer.pack. Okay, now that we're editing the rip-analyzer.pack file, let's go ahead and search for the word data that was in the error message. You can see it down there. So let's change this to this, and that's the way we can refer to this particular RIP message in this flow of this context. And you can see that context is something special. It's a macro, actually. So let's go to our binpack readme file and type in context. And we can see that this macro refers to the Analyzer class context, which gets generated from Analyzer name, blah blah blah. Using this macro, users can gain access to the flow object and analyzer objects. We want to actually use this to refer to the context that we're in. So just, it's just another way to reference, hey, get this information from what we are currently, what's currently available, our current context. So now let's go back here and quit. Since we made that change, let's go ahead and write it and let's run make again to try to build Bro once more. Ooh, we got a bunch this time. And so let's just kind of scroll up here. Okay, see, I can see already that there's some stuff about proper syntax. So let's start there. And, ah, pointing right here, you can see this little arrow tries to tell you a little information about where exactly it's expecting certain things. And in this Biff event, looks like we actually might have an extra parenthesis or one that's not in the right spot. So we're gonna go ahead and open up again the RIP analyzer file, go to the end of the line, and actually, as we look at that, we can see that this is actually not right.
So let's go ahead and match.
Yes, that does not need to be there.
We need to remove this because everything below these two are still part of that function. Call.
So we actually have an extra parenthesis. So this doesn't end here. This is the parenthesis that's supposed to match with this one above. See, back and forth here. So that explains why. And this line would actually have it too because we copied it earlier. So let's go do that. And again, we start from, um, here. We can see back and forth, those are the ones that should be referencing each other. So because these are actually arguments that we passed to the function. Alright, now let's do make one more time. Hopefully, I mean, I do mean hopefully, we'll actually have it built. You'll encounter a lot of these problems as you learn to program and get more familiar with all these things.
Aha!
We did pass it, and now we're actually linking bro so that it is now full. It's It's been built and linked. Now we can execute it. So at this point we can actually run Bro, the one in the source directory. It's actually in source/build, I believe. Nope, uh, ./build/bro. Nope, build/source. Yeah, build/source/bro. Here it is right here. This is the actual Bro you can execute for with your changes. Now there is a script in here that you can run to actually go ahead and source certain information for you. So let's go to source build, and based on your shell, we're going to use the bash born-again/born-again-shell thing to set the path for us that we source. That'll actually just read in that script and set the environment variables for our environment. So we just type Bro -h, we actually have this version of Bro that is being referenced in this directory. We can test that by using which Bro. You can see that now that if we type bro in, it's going to use the Bro that we just built. Great. Okay, so now let's do one more thing before we move on to the script layer section. Let's go ahead and edit rip_analyzer.pak file again, because what we're going to do this time is we want to actually test whether if a rip packet is seen, that the analyzer is called and does something.
In this case, we're just going to have to do something simple like print.
Print a statement. We're going to say, hey, we are in RIP request. I'm putting a newline character there. Okay, now we'll do this for the RIP response. So in this case, response. All right, in this case, so if RIP— if this returns true, if message command is RIP response, then this will get executed. If it's a request, then this will get executed letting us know which clause, or based on what packets have seen, which one of these statements will get executed. So go ahead and save that. We'll compile Bro again. Linking. Almost done. And we'll go back a directory. Remember, we have that RIP version 2 cap file, pcap file. So let's actually, uh, read it in first to tcpdump.cap. You can see that it's full of RIP responses. We don't see actually any requests in this one. So now let's actually see if Bro was able to detect these things with our new analyzer. So we're going to do bro-r, and then we're going to read in that pcap file. And yes, this is great news. We actually got it to parse the protocol, and when the function was called for the BIF event, to actually test it and see that they are all RIP responses. It worked as expected. This is great. Uh, this is awesome. So now we actually have a working analyzer. So you can see that every time it tested for the RIP response packet, it generated this printf message. That we put in there to test. All right, now we can move on to the script layer and do more useful things like logging our newly found or newly created data. Thank you.
More from Jon


What No One Knows the Podcast / Vodcast featuring The Tampa Bay Wave and Jon Schipp

Meeting the Exposure Management Challenge: Key Use Cases for Success | @OfficialRapid7 #SolutionSpotlight
Spot Security Control Gaps and Non-Compliant Resources Across Your Attack Surface