ContainNSM - Jon Schipp
Jon Schipp launches ContainNSM, a Docker-based project that packages NSM tools like Bro, Suricata, and tcpdump in containers so newcomers can quickly test and compare versions. He walks through Docker basics, shows how to pull and run containers, and explains how to add new tool versions by updating a Dockerfile and pushing to Docker Hub.
Chapters
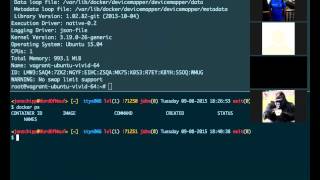
Now, right? Yep. All right, awesome. Okay everyone, this is the Open Network Security Monitoring Group meeting, and this today will be our first project meeting where we'll begin to discuss a project that you can all get involved with for our group. So there are no group updates so far, and just to recap a little bit, take a look at the top portion of the screen, we do have a mailing list. I recommend you join that for the latest information. If you're on Facebook, check out the Facebook group. If you're a GitHub user, this is mainly how you can contribute to the groups. You can give us your GitHub account name and we can actually add you to our GitHub organization, which allow you to access and write to some repositories. And then based on, you know, as we build a trust relationship with you, you'll be able to access more and more things. We also have a YouTube channel with probably over 40-something videos, including talks from industry experts and academic researchers, as well as the online course that we're putting together. In addition, we have a Vimeo page as well, and that mostly just includes at this point the— excuse me— the talks from last year. We also have Slack and IRC. So I'm actually in IRC right now, you can see. So if anybody Once they get in touch with me in there, I'll check it here and there. Also, our main method of communication for chat is to use Slack. So if you're interested in getting on our Slack team, just send me an email at admin@open-nsm.net and we'll get you on there. Okay, let's begin with the meeting sections. So the networking news— this is a section where we talk about a few news items that happen in in computer security, defense, networking, etc. And a few months ago there was BroCon, which was held at MIT, and it is a conference for the Bro network security monitoring platform, which is developed half here at the NCSA, which is right across the little valley over there, and also the other half is at the International Computer Science Institute in Berkeley, California. So we were lucky enough to have some of the Bro team here on campus. And Bro is an excellent network security monitoring platform that has its own scripting layer where you can actually write scripts to do things with packets. It understands events, and events are generated based on packets that come across the wire. It's a really cool program. So the videos that were released are available on YouTube now. You can check them out there. I actually have a— I gave a presentation at that conference as well, and you can find mine up there. Also this week, actually today specifically, Bro 2.4.1 was released. So you can go to the link there for more information. And this is essentially a bug fix release. There isn't really any new features or anything. It's just a number of bugs that were, that were found, a lot because of Justin Azoff's fuzzing practice with AFL fuzz. So that's been interesting. Moving along, the conference corner. This is a section we talk about upcoming conference or conference-related news. ArchCon is actually this week. Wayland and I went last year and we had a good time. This year I kind of actually forgot about it and just realized it a few days ago, so didn't have time to make it. But it's a good conference, it has an NSM focus as well. So moving along, this one's for Wayland. He is actually seeking out a UIUC security analyst, and you want to talk about it for a moment? So if you're interested, just drop me an email. And this is for the campus network. Cool. Very cool. So yeah, if you're a student and you're interested in that, or even a young professional, do check that out. Sounds like a good opportunity. In the next section, we have the Tool Trade. So we're going to scroll on down here, and this is where we talk about new tools that come out. And I think Waylon posted this one in the chat the other day, which is basically a command line tool for SSL labs from Qualys. To allow you to work with their API. And if you don't know, SSL Labs is a service that Qualys provides, allows you to scan all kinds of certificate-based SSL services, provides various ratings on the cryptography used, the ciphers, etc., the strength, any bugs that could be found in the implementation running on that service. So it's a really cool program, and they now have a command line tool where you can actually just use it from the command line and ask it for certain things for a basic— for a website. So you can be like, oh, I want to get this— I want to get the certificate information and enumerate it for company.com. So this allows you to do some enumeration on different SSL implementations on the web. Going back, so also this, this one came up today in the chat at work, and, um, this is a tool called sshmuxd. And this is, well, in the defense, a lot of us will use jump hosts to get between different secure networks or secure machines, and this Tool right here basically allows an easier way to jump from an SSH server to boxes on an internal network or wherever you really want to put them. You can firewall it off if you'd like, but you can take a look here. It's written in Go, but essentially if you just take a look at the examples here, you can SSH into the example of the bastion host, you could say, or the jump host. And when you get in, it gives you a menu base. You can press 0, 1, or 2 in this case, and you'll get connected to that server. It'll actually pass you into that next server. So it's like an easy way to proxy between multiple systems. And it has a few other features it can do, like the TCP forwarding over the socket, etc. So it has that stuff in it. So do read the documentation if you are interested in playing with that. We do not have anything for the paper period, which is where we talk about the academic papers that are related to NSM and other professional white papers that come about. And we do not have anything for signature selection this week. And we're going to get right into the container NSM talk. And this is our— one of the projects that we have that's ongoing, and I'm leading this particular project. I built 100+ images so far already, and I'm looking for contributors to help me out. And it's really fun, and actually, it's a— for all the projects that we'll have, it'll be the lowest entry, uh, barrier entry. So if you're pretty new to this stuff, it's a great way to get your hands-on experience with it. And learn how to build software from source, specifically NSM tools, learn about the different tools, and also learn about this cool new, um, pretty much a framework now for deploying, or platform for deploying different services called Docker. So we will jump right into that. And also, if anybody is remote, please do send information. If you have questions or comments, you send it in chat. I do see that someone cannot hear. I do want to respond here. One moment. Normally I have my helper Shane today. He is out sick. Okay, so Hitesh, thank you for the— and Sean, thank you for the responses. Okay, so it seems to be coming through on my end. All right, all right, let's jump right into it. Okay, so in the email I sent you today— well, I guess before we even do that, we'll talk about a little bit about Docker. So we're going to go to docker.com, have this open right now. And Docker is a way to create containers of applications. So there's been a trend now, and mostly because of Docker, that's pushing for this containerization of apps. And the idea is that instead of having to do virtual machines where you actually have to translate this instructions for different very various pieces of hardware, we can do something at a little higher level called OS virtualization, or some people call it lightweight process virtualization. And essentially allows you to share the same kernel as the operating system, and then you run applications. So using the same libraries that the kernel would use, the same libc, etc. And in these packaged up applications, they're very efficient because you don't have to do those low-level machine instruction translations between different architectures. So if you talk to the same kernel, you get the same response quickly, right? As almost as if you're on the host system running your program. It's about the same speed, very similar. There's very little overhead. And this has been in the Linux kernel for a long time. And I want to mention that this is a Linux-specific tool that is Docker— the Docker Engine is what they call it now, used to be just Docker— it only runs on the Linux kernel. You can get the client because it actually uses a client-to-server architecture where the actual Docker server runs and does the actual creation of the containers. But the reason only works on Linux is because they're using what's available, the container system used in the Linux kernel. So like, I don't know, about 7, 8, 9 years ago, the Linux kernel came out. There were some patches and commits from Google and a number of other companies to create what's called namespaces and cgroups. These namespaces and cgroups are the building blocks of the containers. So a namespace is a way to assign some res— some system resource to give it some identity and keep it separate from other system resources. The simplest way to view this is you're running top or any, any command line program or any program at all, and you assign it to another namespace. So if top is running in namespace 1 and all your other programs are running in another namespace, they will not be able to see each other because they're isolated. It provides some sort of process isolation, and you can do more than just process isolation. You can do isolation of mount points, volumes, portions of the operating system like network stacks, etc. So you can have a network stack that's in this window with its own IP address, or in this— I'm not in this window, but in this namespace that is different from the network stack in this namespace over here. And these two will never know that they exist. The IP address will not— unless you set up routing, etc., they will not know or be able to reach the stuff in the other namespace. So that's kind of the idea of namespace, just resource isolation. So what that means for us is we think of it as a glorified sandbox. We can just kind of keep things securely in their own little container, and that's the idea. So the other thing that came about was control groups. The Linux kernel has this feature called control groups. This is actually a way to provide some sort of management and control on the processes running in these namespaces. An example of this would be to limit the number of CPUs allocated to the processes in this namespace. And it actually doesn't have to be in the namespace, really. You can just create a process, like, oh, if you're just on Linux, you don't have any of these container tools installed, you can actually, if you have, as long as you have the cgroups package installed and your kernel supports it, you can assign, you can run a bunch of processes and then put them in a cgroup, and then whatever the cgroup settings are to bind constraints on those processes, they will be applied. For example, you can limit the amount of CPU that is available. You can limit the amount of memory. An example would be, if you want to package up MySQL or HTTPD, you know, some important form Apache or their web service, stick them all in a container, right? To be its own namespace, and then apply constraints on it. That way you can run multiple of these application services in a single machine without using virtualization. And that tends to increase efficiency and CPU time, or save CPU time, excuse me. So with these, with these two things together, these cgroups and these namespaces, we have what is called containers. Now we're getting to the Docker stuff. So the implementation, the software that is used to create these things, is at least now to make it really easy, is fairly new. And that's where Docker came in. It made this really easy. Before, you actually had to like write a shell script and basically echo various values to, to procfs and sysfs, the pseudo file systems that interact with the kernel and the hardware, to actually be able to create these things. So then came along LXC, which you may have heard of. That's the Linux Containers Project, and that is a number of developers. I think it's led by a guy from— some guy from Ubuntu that actually working on that project. And that one's not as easy to use as Docker, but it's intended to be a little bit different. Docker tends to try to keep you in this little— this box here where you depend on all its tools. But a lot of people are going to Docker because this box tends to have a lot of stuff that you need inside it. It has deployment tools, it has building tools, it has packaging tools, it has all this stuff. It has tools to get the stats from all the containers. It's easily deployed on the internet. It has a repository system, so just like on GitHub, you can actually store these containers up in the cloud and you can pull them down when you need it. So it provides this whole platform essentially to make this stuff very easy to use. And hence, because of this and its ease of use and keep the barrier low, we are using Docker. So hopefully that kind of gives you an idea of what the container— what this whole container thing is. And you can— if there's a Google trend, it's actually from like 2003 to like now, it just keeps rising. It's a linear growth. There's a lot of— there's a lot of people interested, and many companies now are deploying these or allowing you to deploy on their infrastructure. For example, Amazon has their own container service. Google has their own container service called the Google Container Engine. And you can actually, if you want to run your own applications, you can pay Google X amount of money and they'll run them in a container for you. You don't have to build a VM, right? And they end up being a little bit cheaper because they can save resources as well. All right, so go ahead and close out of that part. So now we're going to go to, see here, my shell here. Okay, so increase the size. This stuff, um, a little bit more. If you can't see it, let me know and I can increase it further. Okay, so I— in the email I sent out for this meeting to get started, there was a few ways to do this. If you're already on a Linux, like a new Linux system, you don't really need Vagrant or VirtualBox or Boot2Docker. Those tools were designed for people that do not have Linux running natively so they can still interact with Docker. And remember I said the Docker engine only runs on a Linux kernel. I mean, the, the server port, the part that creates the actual containers, does the meat of the work, can only run on a Linux kernel because it's using Linux-specific facilities. So in that case, the Docker client actually has been ported to other operating systems. You can get it on Windows, I think, now because they actually had Docker had a partnership with Windows recently, and OS X, etc. So, and you can actually, I know, as Tim, for example, it's actually in Brew or MacPorts. So you can actually pull it down that way. And all it does, it talks by an API, an HTTP-based API. So anything that can do that, you can write your own little tools to talk to the Docker engine on some Linux server you want to. If you would be like, oh, I'm a command line, oh, I wanna create a Docker container, you know, I send the request out over HTTP, and the server gets it and spins up the container for you. So, just be aware of that. So, the tools, I have both of them here in the email. We'll walk through them so you can kind of follow along if you'd like and you're not running Linux natively. So first off, the repository for our project is unfortunately not called containnsm. As Waylon pointed out, that is kind of— it can be confusing. And I originally wanted this just to be a repository strictly defined to Dockerfiles only. So I might leave it that way, I might change in the future, but that's not the point of today. We're just pointing that out. It's just called Dockerfiles. So let's go back to our browser here. If you go to github.com open-nsm and Dockerfiles. And I can paste this into the chat for anybody that wants to see it. There, there, boom. Okay, this is the repository for our stuff, and every image that I built has a file that corresponds in this particular directory. So if you'd like to contribute, all you have to do really is be able to create these, these text files that are Dockerfiles. And tell Docker to build them. And then once they work, you can send a commit or a patch to us and we'll actually incorporate it. So do send us emails with patches, or if you'd like, we can get you direct access to our GitHub stuff. So you can see right now, so far I've worked with Argo, Bro, Debian, Suricata, TCPdump, tshark, nsmd, a bunch of them. So now, in this directory though, I try to make it easy for those that do not have— are not able to run Docker natively, created a Vagrantfile for you. So you can just go here. And if you have Vagrant installed as well as VirtualBox, all you have to do is enter this directory. So cd after you clone the repo into this Dockerfiles directory and type vagrant up, and you will have Docker installed as well as a mount point on the virtual machine for the Dockerfiles repo. So it's already put in the machine and you can actually start begin working. So I actually did that, and I'll go and just go show you the— let's go make that full screen there. So we're gonna go up to the top. So starting fresh, I went, I copied, I went to, you know, I cloned the repo to, well, I call it nsm-dockerfiles, 'cause I actually have a number of repos that are already called Dockerfiles. So I went in the directory and I typed Vagrant up, and look what it did. It actually started bringing up a virtual machine. It set port forwarding available so I can connect to it via SSH. What it then did after that, it checked for guest additions, it mounted some shared folders, and you can see that it actually mounted that repos NSM Dockerfiles right into my /dockerfiles directory on the host— I'm sorry, in the guest— so I can access it from the virtual machine. And then run a shell script that I provide. And that pretty much just goes ahead and pulls the latest Docker version from the Docker Hub or the Docker Git repository— excuse me, the Docker Hub package repository. In this case, this VM is running Ubuntu. It's 15.04, I think. Vervid, I think it is, and pulls it down, installs. You can see this looks— you might recognize some of this, you know, app-get. So it's installing Docker 1.7.1, which is the latest, installing cgroups for you, and voilà, it's done. So at this point, all I really have to do is type vagrant ssh because it set the port forwarding for us. In just a moment, I'm actually going to be inside this virtual machine. Yep, now I'm in there. If you take a look here, I'm in the Ubuntu Vivid. It's called Vivid. Ubuntu Vivid. I'm in that machine right now. I can sudo, and at this point, you type docker ps, and you can see there's nothing there because I don't have anything going on right now. But Docker is running. If you want to get more information on your Docker installation, you can type docker info. If you are running Linux natively and you want to install Docker on an Ubuntu system, you can do apt-get install docker. I believe that will actually pull it from the Ubuntu packages, but they're a little bit out of date, so I don't recommend doing that. What I recommend you do is follow my lead here and just go to docker.com, and then we're going to go to the— see here, open source, I think it might be— no, um, projects. Actually, it'd be faster if they change the website a lot. Docker download, a lot faster. And specifically, remember, this is called Docker Engine. They changed the name because now they provide many different tools. So we're going to go ahead and click for our version of Linux, our distribution, and I'm particularly interested in Debian and Ubuntu. So let's go ahead, because Ubuntu is most popular, we'll go ahead and click on that for everybody. And basically just come down here and run and follow the directions essentially is what it comes down to. And they provide this nice little shell script. It's really, if you have an up-to-date version of Ubuntu or Debian, you can just, you can just run that script right there and it will go ahead and install it on your system. That's essentially what that Vagrantfile does as well. Okay, so now let's go back here to the shell and we're going to minimize that and we'll go down to the next window and maximize this one. So this is me on OS X. I'm going to clear— well, it's a mess. But Boot2Docker is a tool that you can actually download from Docker's website. This is for people on OS X. I think there's one for Windows as well. So if you're running Windows or you're running OS X, you can use Boot2Docker, which actually is just a packaged-up virtual machine along with VirtualBox, along with Docker Client and some other things ready to go. And you install it, and then it actually gives you Docker available from the command line. So on my host system, I can do which docker. Question from the Slack channel. Yes. The NSM Docker sandbox prompts for login credentials upon boot. Login credentials upon boot. That's strange. Um. Password. No, the key, they have public keys for Vagrant to do it. Can you, is it like, can you post the output to the chat maybe? Oh, is it your question? Yeah. Okay, um, give me one second. I'm going to finish this up and then I'll come to you if you don't mind. Or if someone wants to help them while I'm talking, I'm trying to get all this done in a decent time. We got a little bit to go yet, but I will help you, don't worry. So for the boot to Docker setup, and I'll just, just to go ahead and go through the entire demonstration, we'll just go to boot to Docker. So I'll just type that in. Let's And it is a project from Docker. So you can download it here at boot2docker.io. And like I said, you can get it for Windows or OS X. I downloaded the package, installed it. And then after I'm done installing it, I can type which docker— I already did that. And you can see that I have an installation of Docker ready to go. And this is running natively on my Mac. And that is because it's the Docker client. There's nothing fancy about it. It's written in Go. So you don't really need to— you basically have to talk to the Docker engine on the server part to actually create the container. So I can't create containers natively on OS X, but if I run the client on OS X, I have a VM ready to go with Docker installed, the Docker server portion, then they can communicate. And the cool thing about this tool, it does it automatically. So we're going to go ahead and start it up. So we're going to boot to Docker. So I'm going to go ahead and shut mine down. I really just wanted to show you the output earlier, but I guess I'll give it to you anyway. And in a moment, this machine should be shut down. Okay, it is. We look at the help real quick. We can type boot2docker help. Go up to the top here, you got a number of tools. So if you download this right off the bat and you haven't used it before, use this command first, init. This actually creates a new boot2docker VM. Okay, if you don't have the image to create the VM needs to create then you can use this download option. So that might actually be the first one. I can't remember the order. It's been a while. So this will actually download an ISO image of Ubuntu Docker, and then in it will actually start making a virtual machine out of that ISO image, get you ready to go. And then after that, all you need to do is turn the virtual machine on and connect. And to do that, you type docker— you can do up, start, or boot. Uh, doing— keeping the same convention as Vagrant, I'm just going to type up. And you can see it's waiting for the VM and Docker daemon to start. So what this is actually doing is it's going to turn on the virtual machine, and it's going to run the Docker daemon inside the virtual machine. That way my tools on the host can communicate, that is my Docker client running on OS X can begin to talk to that. Okay, look, it says it started. Take a look right there. At this point, it says that I have my environment variable set up correctly. So the way this works is that the Docker client will read in some environment variables to tell it to— where the hell is this virtual machine? Like, that might be a question. So the environment variables you set will be read whenever the Docker tools run, and they will be taken into account, and whatever they point to, they will contact. So if we scroll to the top a little bit, um, you can see in my previous configuration— give me one moment. Actually, that might be— looks like I don't have it actually up here. Well, we can print it anyway because there is an option for that. It might be— yes, so the shell init option will actually print those environment variables. So if you do this for the first time, you're first creating your VM, it'll actually print those out for you. But I've already created this VM, so it's going to actually— all I need to do is type that in, I'll give you the environment variables. So shell init, and voilà. All you need to do is copy and paste these 3 variables. I'll go ahead and do that now. Ctrl+C or Command+C on OS X, and then Command+V to paste it all in there. They're all pasted now, you can see. And at this point, if I type docker ps, it communicated with the server and it responded back. As you can see, the ps actually lists the containers that are running. We don't have any running. I can type docker info and actually get the info from the server. There you go. See the Docker server tells you the file system it's using, the execution driver, the kernel version, blah blah blah blah, and the operating system is a customized version of Linux called Ubuntu Docker. Awesome. So now we're communicating with the Docker server running in the virtual machine from our host, our workstation. Okay, so at this point we can begin working on some things. So now what we're going to do is we're going to talk about the layout of the repositories. And this will hopefully give you some insight into how this all works. So I'm going to go to— let's go to this terminal window. Sorry for all the terminal windows. So I'm going to go ahead and, uh, increase the font size here. Okay, so now we have it here. And what we got going on here is that Vagrantfile we saw earlier, a little bit of a README, and The way I designed this, every single tool has a clean structure, and all it is is directory for the tool with the name of the directory. Then underneath that is the version. Let me go ahead and just demonstrate that. So we use the tree tool and we'll say Bro, and you can see here that we have Bro is the sub— the top directory, then 1.5 version is the next, to all the way up at 2.4. You notice that each and every single one of these subdirectories that are the version numbers, there is the Dockerfile. The Dockerfile tells Docker how to build this particular container. And let's take a look at one of these. So let's go to the one for Bro 2.4. Okay, and here it is, and it's fairly simple. If you look at it, you can tell a lot of it's just the normal Linux commands that you would use in everyday such as installing packages and changing directories and pulling stuff down. So, so off to the top, we'll go through this. So just to, just to go iterate a little bit, or to go backtrack a little bit, um, to create Docker images, all you really need to do is have a text file, just a standard text file that has Docker instructions. It's fairly simple. So you'll come to know the instructions over time as you play with them, and it's not too bad because there's actually not that many. I think there's less than 20, so it's not a big deal. You can actually learn them all fairly quickly. Quickly. So the top, the very top instruction here outside of the comments is the FROM instruction. This tells Docker that when it reads in this text file, when it reads that first instruction on line 4, FROM, to go ahead and pull in the OpenNSM Debian image. So what this actually means is Docker has to know what this OpenNSM Debian image is. I've already created these things for you. They're already up on the internet. You can actually pull them down. So I'm actually using Debian. We're going to use Debian for all these projects. And if this project grows so large that people are requesting, um, different Linux distributions for these tools, we can provide that as well. But for now, all the tools are based on Debian because it's very small and tight-knit. It has a very, uh, large, uh, number of packages to make things installing easier. Okay, so we go down. This is the maintainer, and I just— I created these, so I'm saying I'm maintaining it. And this is just your tag. If you're the author, you put your author name there so people know who to talk to whenever they need to make changes and stuff or edit or have trouble with it. And the next down on line 8 is a label. This is something that's fairly new, and I just started using this. It actually allows you to— whenever— this isn't really too important, but for organization, when you have so many images, by typing that docker ps command and there's like 30, 40, 50, 100 images, You don't want to have to go through all those and find the one you want. So with labels, you can actually filter on the key in the label. So I can filter on the organization or filter on the program. So I can tell Docker to filter on Bro and only print me the running Bro images. So that's kind of nice. Next, down on line 12, we have an environment variable. It's just like in any language where you have variables. You're saying the variable name is BERT_USER in this case. It is the second argument. And the third argument is the value that it'll be set, the variable will be set to. And in this case, it's called opennsn. So I'm assigning a username called opennsn. So when everybody logs into, which we'll see later, when anybody logs into the container, um, they'll actually be running as user opennsn. That'll be your username. Below, I use another, on line 14, a program called Bro. So I set a variable for Bro. So I can just refer to the probe, that variable, in the future. That way I can keep this template across all my different, to all my different builds. Going along further, we just, more things. If you set the extension of the file, the version number for that, a prefix, this will actually be used whenever you're building it. So you're going to pass it to configure and make, and this will actually tell the, the target where to put the installation. And we're going to follow the the convention of putting everything that we want to install that we'll be using for this container inside /ops and then the program name. Then we set the path because when we launch the container, we want the user to be able to have that program in the path so they can just type the program name, it will work right away. So, so what that means is actually all these things will— all these environment variables will actually be available whenever you run the container. They're not just for building it, they will be shell variables that you can access whenever you're inside the container. Then, we're going down to line 25. And this is where we use the run instruction. The run instruction is a very simple instruction. It'll be the most important instruction that you actually use. And then, it just runs a command on the file system, right? It just runs a Linux command. And in this case, we're— we start off building our container by updating the package list. We use apt-get update. The -qq option, if you're not familiar with that, is just to do quiet output so it doesn't print so much information the screen. Then we, in the next line, number 26, we just install the packages we need. So for to build Bro, we actually need a number of packages, dependencies. We need CMake, we need Make, we need GCC, G++, or just a bunch of, just a bunch of build tools, flex, bison, etc. So I packaged everything in here. And a lot of these tools, we want to make it so we keep them as small as possible. So if there are packages that we don't need, and there could be in some of these, then we can actually remove them, rebuild them, and make them smaller. So when you're— if you contribute to this project, take care to know exactly the dependencies that you need, and then just remove them if there's things you find that are not necessary. Keep the images small. Next, what we'll do is we'll go into the compilation and installation section. So after we installed all the dependencies, we are going to use this user instruction. Now remember that variable we put up there that was called virtuser? Well, here's where it gets replaced. It says, hey, virtuser opens NSM is now user. What that actually means is after this instruction is executed, we run in the context of this user. So now we are opening NSM whenever the next commands below are executed until we hit another user command, for example. So one below that is work directory. So instead of doing run cd and then the directory name, you can just use the work directory instruction to say hey, for every command that follows this instruction, be in that directory. So from here on, we will actually be— after this next, we'll be at /home/opennsf, because again, WORK_USER is a variable that gets replaced with the value of opennsf. So that means that we're gonna be— whenever the wget is ran to actually download the Bro source code, the user will be in /home/opennsf, essentially. Kind of keep it tight. And then after that, on line 32, So we have the source now downloaded because of line 31. We're in line 32 now, and now we're going to go ahead and enter the source directory. So we're going to set the current working directory to /home/opennsmbro-version. If you look at the environment variables above on line 18, we have version 2.4, and then we have prog as Bro. So those are replaced, and you're now in that directory. And then what do you do next? Well, now you need to start the configure process. You generate the Makefile You need to build the package. So in this case, on line 33, we run configure. We specify the --prefix to say, hey, this is the point we're going to install Bro. This is where Bro should end up being on the file system. And that prefix is set— if you look above again, it's a variable to /opt/bro. Going down one further, we are now becoming context root. And why do we need context root here? Well, To install packages on the file system where the file system requires root permissions to write, such as in /opt, /etc, /usr/bin, et cetera, you will need root. You can build the packages or build the software locally as a normal user, but you can't install it into privileged— or directories that require write permissions from privileged users. So to actually install the software to the proper location on the system, we actually need to become root. So now we're in context root. And guess what? We run make install, and then we use some commands to set permissions. So a little caveat here. One thing that kind of sucks is that the backends for Bro are different, and a popular one is called AUFS. It's a copy-on-write file system, and it does not support capabilities, the Linux kernel file system capabilities that you can use to delegate specific permissions to a particular binary. So to make this, our Docker image, work across all these backends that people might have, whether it's Btrfs, whether it's Device Mapper, whether it's AUFS, we have to find a way that all these things are supported with one commonality that is traditional in Unix, is setuid, right? It works just about everywhere. So in these containers, that's fine. So this will allow us to run our Bro or any of these tools with setuid's ID bit set so that they will run as the permissions of the owner of that file. So that means we don't have to have login as root and then run. So you can just run Docker, Docker, then the run, and then the image you want to run directly from the command line without having to change through. Because remember, the user that you become on the system is opennsm in every one of these. That's the, that's just the template we're following to keep it standardized, keep it uniform. And then at the very end, we have cleanup, which just removes the source directory. And then we have the environment variable at the very bottom, which again says, hey, after this is the last thing ran, so user, whenever you run the container, you automatically become OpenNSM there, and you'll automatically be placed in the work directory of the OpenNSM user. So /home/opennsm when you launch the container. So hopefully that makes sense. If you have any questions, do ask me right now. Sorry, I made that like a command. My bad. Well, just ask me whenever if you'd like. So we're going to back up. So now that you saw the directory structure, very simple, what we're going to then go into is the Debian. So the Debian directory, and this is where all those images are built from, right? Because you remember that FROM instruction says, hey, first pull down this image, then apply all the stuff on top of it. So the base Debian image looks like this. We'll go ahead and look it up. Jessie. Jessie is the latest one for Debian. It's a little bit simpler. So again, we're actually pulling it from Debian's official Docker repository called Debian, and they tag it with Jessie. So this is the particular version of Debian. Then we go down to instruction number 8. We set an environment variable, again, the user opennsm. And if we go down further to instruction 11, we start installing the tools that we wanna have across all our images. And what are some tools that you would wanna have for everybody? Well, not everybody uses the same text editor, right? There's a little religious war between vi-based editors and Emacs, for example. So we want to install all of them to make everybody happy. So you don't just have to log in and pick your own or install your own manually. It's a pain in the butt. This whole project, which I think I glossed over when I went in the beginning, but the goal of this project is to make everybody— to make it easier for people to try out different NSM tools directly from their system and also to perform research against different versions of the tools. Maybe you can find performance regressions between two different versions, for example, so, or vulnerabilities, and see where the, where the issue is and where it isn't. As well as just, just again, the, the main one though is making it very easy for people to try out these tools for this group and for everybody in the world. This is a public and a free open source project. The other things we install are common tools that you might want to have whenever you're doing these comparisons and stuff, like debugging tools. You want to have lsof You want to have htop, dstat, sysstat, iotop, strace, ltrace, etc., so we can actually trace and profile some of these tools. And then we go down further. Earlier we saw that in the, in the Docker image it actually used that opennsm user. Well, to actually have to be able to become that user, you actually have to have the user created in the first place. So this is where this stems from. We just run commands as adduser, we disable the password, and it's going to be opennsf. So that creates the user first. Then below, we actually have the default password set. So if the user wants to log in and wants to become root, they can do that. You can see by default we actually have the root password is opennsm. Keep it really simple. And the virt— or the opennsm password is just open— is the username opennsm with the password opennsm. Because again, virtuser is replaced with an environment variable with opennsm. And then we add The final thing in this is we add the OpenNSM user to the sudo group so they can use sudo. All right, and that concludes the Dockerfiles. So now we're going to start using the tools. Let's go ahead and start. I'm going to begin by using them on my both systems here. So, um, my boot2docker system, type docker ps, and you can see docker ps shows you the running processes. So these would be the Docker containers running. There's nothing there. Docker images. Go ahead and make this full screen. Docker images shows that there is one image available, OpenNSM-Debian. That's the one we showed you earlier. So now what we're going to do is we're going to type docker pull, and we're going to say I want OpenNSM slash, um, let's do tcpdump. Nope. So actually, okay, I should actually backtrack and say that all the ones I'm pulling now, when you type docker pull is actually pulling it from a repository. All these are available on hub.docker.com. And if we go back to the browser, this is the website right here. So any of these that you click on, we'll go to TCPdump, for example, you can refer to the name. So our group name slash the repository name. And if we go to the tags, we tag— we do tag versions. So now you have open it, you have TCPdump version here through here, a little out of order. That's how many versions I was able to build so far. So you can, you can, then you can ask for any of these versions. So if going back, if I want an older one such as 3.9.1, I can actually pull that down. If you want the latest one, you don't, you don't say, you don't actually say which version, you just leave it open nsm/tcpdump and it'll pull the latest one down by default. It does that because how it works with that is there's a tag actually called latest and just points to the most current one. Okay, so a little bit more about this. The way this repository is set up is if you make a commit, it is linked to Docker Hub using automated builds. So if I change something, it will actually rebuild it and push it up to the Docker Hub website. So if we add a new user, for example, or install a new package, Docker Hub will detect it through some API call from GitHub. They have a way to synchronize between the two. It will actually start building a new image and it will automatically be up and ready to go. So at this point, you can see that it pulled down the image at each layer. Each one of these is a hash for a particular layer of their file system, because you just copy and write. So now I can say docker ps, and again, nothing's running. I can do docker images, and remember, we just pulled down an image. So we have opensm-tcpdump-3.9.1. So I can do docker run -it if I want to actually get an interactive terminal. And give it the image and say 3.9.0.1, and I want to get bash, I'm actually now in that container and tcpdump is installed right here. Look at that. We're actually now listening on the— in the container with 4 packets right there ready to go. Look at that. So it's kind of nice. So you see easy how easy that was. All you have to do is someone else builds a container, all you have to do is pull it down and run it. You don't actually have to go in the container though. We can just— since we have it in the path, we can just do tcpdump -a n and i, we'll do eth0. Imagine eth0 is there. And look, I'm already running sniffing in that VM with that version of tcpdump, right? I can do for a bunch of them. So in this, so what we're gonna do now is, do I have a good for loop for this? I've created a, well, you didn't see that. That's funny. So let's go back. Now we'll go back to the actual other, not the boot2docker VM, but the, the Vagrant VM, and we'll do the same thing. So just to show you that you can use these tools, well, all these tools in different ways, so in the same way, I'm sorry, they both provide the same service. Again, docker images shows the images that you have, docker ps shows the running containers. So if a container is running, the output would be in ps. So let's go ahead and pull out some more. Let's pull down open-nsm/bro, and that will give us the latest version of Bro. And in the meantime, well, that's— we're gonna back out and what we're gonna do is— oops, didn't mean to do that. Oh, uh, latest. Oh no, apparently I'm missing the latest tag on Bro, so let's try a different one. Let's try opennsm— uh, just get the latest tcpdump and see if I have the latest tag set to that one. Yep, got it there. So now it's pulling that and it's downloading that version of tcpdump. So it's going back here. Let's go to another window. Oops, actually close out of that one. So let's go ahead and download all a bunch of images. So what we're going to do is we're going to do docker pull -i in, we'll do, um, I don't know, 2.4, we'll do 2.3, 2.2. Hopefully don't have any errors. Um, docker pull Let's just make sure that works. Echo i. Done. Yep. So what we'll do is we'll do docker pull opennsam/bro and the tag here, i, and then that will start pulling down those 3 particular versions of the images. So now we're between the— we're pulling out an image in boot2docker and we're also doing it in Vagrant. And just to show you how you do each one, it's practically the same thing once you're in the VM. Are you working with the Docker tool. Any questions now? I want to take a break. Yes, what's up? To pull it down? So I did— you can do docker pull and then the organization name and then slash the repo name. So in this case, just so you can see it with the website, it is— going back a page— One more page. The organization name is OpenNSM, okay? And you can see right here, and then the repo is Bro. So docker pull opennsm/bro. And what I did was I pulled down in a loop for different versions. So what I typed out was— I guess I can just show you that here. Um, go back up. I did this. This is just a little for loop to say, uh, for foreach version, i is replaced with those, those version numbers to pull down each one. You don't have to do that if you want. You can do it by hand. It's just a quick way to do it real quick. So I'll let those download, and then we'll be able to run between different versions. I can show you that. Um, so you had— you need, uh, yeah, great. Are you, um Are you using the Vagrant or are you using the boot2docker? Okay, so in Vagrant, it should already be running. All you have to do is type docker space info and see if it has anything. No, it says I can't run, I can't access TLS. Okay, then do status space docker, and that will check if the init script is running. It's possible that the conf— that it actually— well, no, because you do have the tool. I did tell you this. Okay, what, um, are you using the Vagrantfile that we used? Yeah, that's weird. Let me, uh, hold on one second. Let that download here. Let you guys to cut up and I'm gonna go home. Okay, so that's interesting. Um. So, I'm— Okay, so the reason this is orange, uh, we need to root. So, yeah. Okay, so I think what happened— well, it looks like the script kind of ran. Do you have the terminal window that shows like when it ran? Figure it out somewhere. Okay, okay. So maybe I have to build and start over. I actually don't know enough about this. Well, it doesn't actually— it's actually Docker, so it doesn't appear. Okay, so, um, also, yeah, you go, you go. So the reason that didn't work is— so what I did was— This is the one, not another. There we go. Okay, so, um, I'm back over here now. And now we have— we can see that we have a bunch of these images on this that I downloaded. So we type docker images. You can see all the 3 versions of Bro are tagged and available. So if I want to do docker run again -i— well, let's go ahead and use one more in the background so you can see how the whole thing works with the daemon and the docker ps. So if I do docker run -d docker-openasm-bro, give it the tag number that you want to run. So basically, when you pass this to the docker run command, what it does is it grabs the image, it tells the image what to run, and then it creates a container from that image. It will say, hey, just run top. It's not that exciting, but now it gave us the hash. Now if we type docker ps, that— I don't know why that executed. Um, one second. That should have stayed. Nope, I think I need to— oh, for top you probably need to allocate a terminal. That's probably why. Let's see if that did it. Yes. Okay, so I didn't allocate terminals. Top, top died because it didn't have a terminal. You can see we actually have that Bro OpenNSM Bro image running with the command top. And the command that you pass as an argument to the image, it ends up being the first process inside that image. So it acts as the init process, but it really doesn't because it won't reap dead children. It won't properly handle failures and waiting. Um, so that's really not a concern for us though because it doesn't actually run as a service. But if we do this again, we actually want to run Bro this time. We should be able just to do bro -i eth0. And it's now running Bro in the background in this particular image. And we can actually go back inside the image. So if an image is already running, to enter it you can use the docker exec command. And we just give it -h for help, and this gives you some information. It wants the container and then the command to execute. So we're going to actually say, because we want a shell, we want to allocate a tty. We also want to make it interactive, so the stdout and stdin is— our stdin is actually allocated to this so that you can talk to it, you can actually type in there. We're going to grab the container ID and then we'll say give us bash, right? And you can already see that Bro wrote out packetfilter.log. There really isn't any traffic, so Bro's not really doing anything, but it already wrote out one log file. Just let it go, you know what I mean? So this way you can run multiple versions of Bro in a loop. For example, you download all those, you want to do for i in each one of those, you could have that many versions of Bro running. Let's just go ahead and try to do that. For i in— oh, I hear some echo, so someone's got their mic on, I believe. Okay, looks like they may have muted it just in time. For i in— and we'll do, we'll do the same thing, um, grab the last one here, and we'll just do, um, this, and we'll say run Bro at the tag, and then we'll say bro-i And actually, just before we even do that, let's just run them all in a loop just to print the version number for Bro. I think it's -v. Is that right, Vlad? Is it -v or -version? I can't remember. Don't remember. Okay. Yep, --version. Okay. And here you can actually see that I'm looping through each image. I'm creating a container of each image where each image, all it does is just print the Bro version. So now if we want to, we can run Bro and all the Um, we can have it run just recording traffic -i eth0, and it's the -d will actually send it to the background. Now we have 3 containers running, all doing Bro things. So Bro is running in each one of these. So if you want to see like the log differences between each one of these, you can go and check them out, right? And there are other things you can do, like you can mount each one of these containers to a file system so it's actually written on the host. With the --volumes command, etc. So hopefully some of you are interested in this, in this particular project. If you are, it's easy to contribute. Like, just get this— all you need is the access to the GitHub repository, you can begin working. So now, just to show you how you would do that, we're going to go ahead and work on and build the new image right now. So Bro 2.4.1 came out today, and we should be able to create a brand new image from that. So let's do this. All right, so what I'm going to do is I'm going to go ahead and now go directly to my Vagrant VM. And remember, I could do it in boot2docker, I could do it— thanks for coming— or I could do it in Vagrant. We can go to— how are we doing on time, by the way? Okay, so I'll wrap this up here in the next 15 minutes. We can go to Vagrant directory because again, that's mount— I'm sorry, well, it could be either Vagrant or Dockerfiles because in my, in my actual Vigor config, it says, hey, sync the directory from my repo. So it's just going to be in there. So I'm just going to /dockerfile so it's easy to remember, and we're going to go to the Bro directory, and we're going to go ahead and create a new directory called 2.4.1. So this is the process you would use if you had to create a new version of a tool. I'm going to copy the version from 2.4 Dockerfile on the 2.4.1, right? Let's go in the directory 2.4.1, and now we have this Dockerfile. In this case, since Bro probably hasn't changed much since this is a bug fix release, it should be fairly simple. All I have to do is update a few variables. Um, we're going to go ahead— those at the top I really didn't have to change, but I like to keep everything consistent, so I just changed it to 2.4.1 so it represents what's in the file. And then see this version, all we really have to do is add .1, and I think that's all we have to do to build a new image of Bro. Now if a project, if a piece of software in the new version require new packages, right, new dependencies or libraries change then you have to go and edit that and make those changes. But Bro is, I think, the most part the same, just a bug fix release again. Then all we have to do is build this new image. So all we have to do is type docker build -t, and we'll give it a name, and we're going to say build it as— thanks for coming— 2.4.1. So again, we give it the organization name opennsm slash the repository name, which we're We're doing a tool per repository, so it'd be the same name of the tool, and then the version that we're going to build, so that when it builds, it actually just— that's the name that you see when you type Docker image. It just gives it a unique name that we can use and identify. So at this point, what we're going to do is we're going to pass it the Dockerfile, and to do that, you can just use the dot. If the Dockerfile is in the local directory that you're in, the dot refers to the current directory, so you just pass a dot, and then Docker will actually just look in for a Dockerfile right in that particular directory. And then here we go. Actually, I'm going to go ahead and do full screen before I do this. At this point, we are building. Remember, see, it shows you step by step. Instruction 0, which was the from, so make sure it's got the latest OpenNSM Debian image, right? It pulls that down from the Docker Hub because remember, we're actually using that as our base image. So this is it right here. And we have 3 different versions because some of the software is older. So we have Jesse, Squeeze, and Wheezy. Available. If you don't specify the version as the tag, then it's going to go to the latest version because I have the latest tag, and that is Debian, um, Squeeze, I believe. I always forget the Debian version names. But so it's pulling down the OpenNSM Debian image, and then it's going to execute the next instruction in the file. If you guys remember what the next instruction was, it was just my maintainer of this, the guy that built it, right, the author of it. It's going to skip over, and it's going to go down to the next few. It'll set all the environment variables, and it'll eventually start executing those run instructions. And this process will take a little bit. So for labels, I probably, um, docker ps. So those labels that we saw earlier, we can actually take a look at the output here. You can do -filter, and you can do, uh, I think it's label equals organization. Equals— it's kind of ugly— OpenNSM. I think that will actually just print the, um— nope, I apparently messed that up. Label organization equals OpenNSM. Do we not need this part? I don't think that's right. I think you actually do need that. Nope, apparently I'm wrong. Okay, so what we do here is that actually printed— it's not— it's less ugly than I thought. Okay, so this printed all the the images I have here that have the organization label applied for OpenNSM. If I want to print the other label, remember we actually have these in the repository. If we go back here, you can see that, for example, Bro 2.4 Dockerfile, we have a label program equals Bro. So if you have all these hundreds of images installed, we can actually just filter on that one. And to do that, let's just go back and type filter prog or prog, prog equals, and then oops, let's go ahead and get rid of all that. prog equals Bro, and that'll print all the stuff, all the images that are Bro related, right? So if we had TCPdump, it would print all those, but we don't have any. Oh, actually, apparently that didn't work as well as I thought. Let's go to help. I forget, I haven't, I just started using labels in Docker, so. Go ahead and swap through this. Docker labels. So be a good time, get your chance to do something while that's actually, um, building the newest image. Okay, so we already applied the labels. docker ps --filter label equals— so I did have the original thing right. I don't know why that— what I did wrong exactly, but so it's late. It is ugly. Uh, label equals key equals value is the way they do that. So, um, Docker— so essentially I just need to do label equals, and if everything is right, then that should work. Doesn't print anything because we don't have any TCP/IP here, but let's try Bro. If I print Bro— nope. So, um, let's switch over. Apparently I'm doing something wrong. I've done this before, it does work. I just gotta make sure I got the right filter. Um, oh, it's program. I'm an idiot. Okay, so it's program, but that didn't work either. Strange. Program equals— Thanks for coming. At this point, I'm actually unclear as to what the problem is. I wish I had my history saved because I've done this a few times. Program equals— label equals program. And if I do label equals organization, open NSM, it does return, or at least it— well, let's try that. Yeah, it doesn't return. So strange. Let me try it, and maybe there's a version difference between the boot2docker one and the one I have in the VM. I'll try that next. But going back to the task at hand, okay, so what did it do? So it actually pulled down the image, the OpenNSM Debian image, and then, you know, it runs through every instruction as a step. Labels here, label here, set all the environment variables. You can see user is OpenNSM, containers or program is Bro, etc., etc. And we finally get down to the important stuff is where we actually start installing the packages. So essentially all it's doing is just running those instructions that you put in the file here, and it is now building all the dependencies or installing all the dependencies for Bro. And after that, it's going to pull down Bro 2.4.1. It's going to compile Bro 2.4.1, and then it's going to install it. And after that exits, we'll have a brand new image ready to go, um, for Bro 2.4.1. Now we have to, for anybody else to be able to use it, we actually have to put it online, right? We want to put it on Docker Hub. So if you're interested, or you, you develop trust with us and you start working on these things and you look like you have the temp, the design down, the basic structure down, then I'll give you access to our Docker Hub account. And from there you can actually deploy these yourself. So anybody can just put, push a new one up. We talk about Docker pull to pull it down, to push it up To put it on the repository, it's just docker push and then the— and then opennsm slash the name and then colon the tag, and that's it. So in this case, once this is done, it will be docker push opennsm/bro:2.4.1 because we're building— we want to tag it as that version so it's easy to— you can just use a name to refer to that particular version. Here we're getting— they can see it actually progressed. We're actually downloading the source code. Of Bro. There's the tarball right there. It's going to unpack it and then we're going to build it. And Bro takes a long time to build, so, um, we'll just leave this running. Does anybody have any questions? Is anybody interested in working on this project at all? Does that sound interesting to anybody? Cool. Anybody remote, uh, interested in working on this project? Oh, Jason said it's --filter. Well, I think they do the shorthand form too, but I'll try that. Uh, thanks for the input. Let's give that a shot. Filter and change it to something we know. Oops, that's not what we know. Nope, same thing. Strange. Okay, so actually now while that's doing stuff, we'll just do a few more Docker commands. So we have all these running sys things and we're going to go ahead and just stop them all. Actually, let's don't stop them all. Let's do something else. Let's actually get the status, some status from the system while the tools are running. So Bro is running on each, 3 of these, 3 versions of Bro are running in containers. So we want to actually get the logs available on each directory in each container. So we can do is we can do a for i in docker ps -q will only print the hashes of unique IDs for each container. So you can actually use this to get the— get to exec. So for in, we'll do here everything in here. Well, that'll be enumerated as a list. We can do docker exec, and we'll say i because that will be replaced with the hash. We'll go in that side, that container, and execute some command. And the command we want to execute is ls *. Well, actually, I don't know if the shell will be able to handle it. Let's see what happens. Okay, because now let's do that because that will eval— the shell will actually evaluate that as what the current, um, the current shell will actually glob that. So anyways, in this case, look at what we did. We, for each of those, we actually printed what was available in the containers. And we can actually make it a little bit nicer and just do I or echo I and then do -n maybe a little bit and do this. And now we've got the hash Well, actually, it doesn't look too pretty. Let's do it like— you know, I don't want to play around with this too much. But anyway, so now we've got the hash and the files that are in that and the next hash. So you can see for this particular container, the conn.log is available and packetfilter.log. In this container, we have conn.log as well and packetfilter, and they'll be the same because all of them are sniffing the same traffic we all started at the same time. So that's just kind of a quick way you can actually go through and do stuff on these systems. So we can also do uptime if you want to check some stats, the load in each one of these containers. You can see they're all the same, stuff like that. And to build on this, to stop a container, you can do docker ps or docker stop, and you can give it the container ID. We want to stop this one running top, so I'll go ahead and type stop. If you want to stop them all, again, just use some of the features on your shell to get things done quickly. And we can do for i in again docker ps -q, and that'll print all the container IDs, the unique ones. And then we're going to docker stop, and then we can do i, and that will stop them all. Oops, syntax error. For i in ps -q do— forgot the do. Okay, now it's going to loop through there and stop each one. Now if we want to get rid of those containers because they still take up space, though not very much because copy-on-write, we docker rm. And now they are completely gone. If you do -a, which shows you the last running containers, you can see some are there but not all of them. There we go. And, um, that's the ones— some of those lists were the ones we did earlier. Whoops. If you want to remove an image, you can hear docker images. You can do docker rmi, and then you can say I want to remove opennsm/tcpdump 3.9 —1, and then actually remove that from— because, okay, so some containers already use it. You'll actually encounter this, um, so we need to force it or go ahead and remove the other container that's using it. We'll go ahead and force it and see if that'll allow us to work. Yep, so now we do the container, and you notice that we delete it, it gives you a hash for everything because it actually deletes every layer of the file system. Remember, it's copy-on-write, so everything, every hash here is considered a portion of the file system. And tends to correspond to the actual number of instructions inside the Dockerfile. So Bro is building, and we're almost— we're getting there, 31%. And at this point, any more questions? Hopefully you guys found this valuable. And when we're done, we'll be able to push that image up, and I'll commit to the repo as long as this ends up building it correctly. As long as there's these, you know, the exit code or it doesn't look like there's any errors in the VM or in the container, we'll push it up and be available on Docker Hub. So anybody, if you want to, like for example, if you want to do just some more trickery while we're waiting, repo Dockerfiles again. Oops, repos nsam-docker, that's what I call on my system. It is though Dockerfiles. We can actually go through these directories and just iterate that way. So if you watch, well, if you want to try this, watch this. We want all the tcpdump ones, right? So there's a lot there. Let's go inside tcpdump. Let's get rid of that slash. So what we can do is— I forget what the option is that gets rid of that slash. Is it, um, by itself? Nah, it's just F because I have an alias, I think, set up for it. Yes, I do. So, oh yeah, so we can do ls and then, uh, Yes. Okay, so get rid of the slash. So I have an alias, you can do the back— you can escape it, and then that tells the shell not to use the ls -f. So if we want to do all these, for i in this— and really that's not the good way to do it though, because we— all the directories are already numbered, we should just enumerate the directory. So this, right? That's the better way to do this in Bash. So all we have to do is replace this with docker pull and then opennsm/tcpdump, and then again -i. Now I will say that all the tcpdump ones, and almost another repo, is not every single one works. I haven't been able to figure them all out yet, especially the older versions are hard to build, but all the newer stuff tends to work. Like some of the 3s will work, but not like 3.5, 3.6, which requires old packages that don't really exist anymore. And that's why I had to build those other Debian base images of, of like Wheezy and Jesse. But in this case, we'll actually pull down 30-something versions of tcpdump. So, well, I messed up that. Let's click that. Whoops, come on. How many? How many? All right, there we go. Docker, do docker pull opennsim/tcpdump -i. Um, what's the error? Not found. Oh yeah, because those aren't actually available. So let's do a normal, let's just do a modern one. So we want to do, um, 3. or let's do all 4s. Everything matching 4. That'll work. So it's going to match all the tcpdump from here down. It's going to pull all the, the major version 4 releases, and it's going to pull them all down. You'll have those. You can try each one out. So anyways, that concludes the talk. Um, I'll let this build over time, and hopefully it'll be done, and I'll put it online. If everything is successful, I'll post it to the mailing list, and I'll put it on Twitter. Hopefully this is useful to you, and I hope, and I really look forward to contributions. We'd like to have this done for almost any NSM tool available and for almost every major release, and if we can, minor releases. That'd be really cool to have an archive for just about anybody wanting to try out these different tools. So like I said, it's an easy project to get involved with. All right, uh, thank you guys. I'm going to go ahead and wrap up here, and I'll post this video online as long as the recording was successful, and I do hope it will be. And, um, that's all. Thank you. Yes. Yes, and essentially, uh, what we're doing is we're following the, um, one second. Okay, so, um, yes, I think you missed some of the stuff, but we were going through the template. Um, basically we're just copying the template. This is the other Dockerfiles I have. I tried to make it as clean and clear as I could for each line that it just shows you that we're using Some of the conventions that you're talking about would be the user that ends up being in the container is OpenNSM user. We create a user for that. It's already done in the base image, so the last instruction in each Dockerfile is that user. And just to go back real quick— Yeah, it's just— Oops. So I got a bunch of stupid stuff in there. Okay, so the very top here, um, I'm sorry, at the, uh, here, user. Yeah, so, uh, we built, we build the, we build all the tools as a local user. We install them as root. This is just an example of the convention. So here you become root because you have to install the tools, right, to write to those privileged directories. When you're done, here's one of the conventions that we do is we want to make sure that whenever you run the container, by default you are the owner. OpenEdge 7 user. That should be your user ID every time you actually get into the container. You also want to make sure the work directory is the home directory of the OpenEdge 7 user. The other thing that's important is since we— since there's different Docker backends like AUFS for the filesystem, device map, or btrfs, etc., AUFS doesn't support capabilities. It's a more secure way of allowing the processes to bind to an interface. But, um, AFS is popular and doesn't support it, so we can't have it. I don't think it's a good idea to have it so it's not compatible for everybody else that does not— that has AUFS that doesn't use something else. Because AUFS file system does not allow you to do capabilities. That means that you can— a binary can be ran with a small set of permissions that can be used, for example, just to open the interface and listen on it. So instead, we use the old traditional Unix mechanism, which is to set the set user ID bit on the binary. So that anybody across all the file systems can run the tools as the OpenNSM user, not needing to become the root. And that makes things easy. You can do like the for loops, for i in number of containers, run those containers and have them listed on the interface, for example. You couldn't do that without some hacky stuff with bash -c, then become this user and, and, and then execute this command. So instead, we just have it, those those files are set user ID, so anybody can— any user on the system can run as root. Sorry. What about like the dependencies? Like, are we just going to try to install anything just to make it work? So what we want to do is, no, we want to get the minimum dependencies required. So, um, and if you see something that's, you know, that maybe that Maybe we don't need make and cmake, for example. We don't need both of these, then we can remove one. Then we'll rebuild the whole thing. It's automated. It's connected to Docker Hub. So if a commit is made, Docker Hub will see it because it's linked to GitHub, see that the commit— I'll get the commit and start building this thing over automatically, build the package on Docker Hub. So you don't actually have to do anything. As long as you commit, Docker will go ahead and build it. Uh, you don't have to go to your machine. Of course you test on your machine first, right? You Docker build on your machine and then you commit it once it works, and then Once it's pushed to the repository, there is a link between the GitHub account and our Docker Hub account. There's a feature called automated builds. Once something has changed, Docker will go ahead and run through the whole thing again and build it. And that's what allows you— that build, automated build, allows you to do the Docker pull, and then anybody in this room can pull this down. So, just to show you real quick, and then I apologize for those that want to get some food here, but this is a good question. We'll do, run a bunch of these. Let's do Bro 2.4.1, our Docker, and then we'll do tcpdump, and then we'll do some version, I don't know, 4.7.4, and then we'll do Tshark for, or what, no, 1. Wow, so many versions of Tshark. We'll do this. Okay, so now we have them all up at once. And you can see here that pretty much all the differences are between these files. Let me go down to each one. Uh, what number is that? Line 11. Okay, nope, go down further. Okay, is that the user is the same. We all become OpenNSM. You notice that the program changes. I try to make it so that your basic templates, all you have to do is really to some extent just change some of the variables to the version numbers. So this will install Bro 2.4 because down at the bottom, uh, Bro's website has it nicely so that, you know, you can just download the prog is replaced with the Bro because it's a variable, the version is replaced by 2.4, and extension is replaced with tar.gz. So it works across all those, but not everything is easy. For example, um, tcpdump has to have two different versions because I actually— well, I compile it with, uh, the version of libpcap that corresponds with the tcpdump release. They actually said they actually, when they create new ones, they They release them both at the same time because they maintain both the libpcap library and the tcpcap library. So I create a T_VERSION variable for tcpcap and a libpcap_VERSION variable. And then in this case, tcpcap actually has to— I have to go ahead and install, compile and install libpcap first, and then after that I go compile install tcpcap. That's just a strange case. You don't always have to do that. But now if we go down to Tshark, again, program is set to Wireshark in this case because— not Tshark because The tshark package, our binary, is actually included in the Wireshark source code. So you actually have to tell Wireshark just to build without Wireshark and only build. So you say disable Wireshark and then it just builds the tshark and then plus the other tools. And it gets kind of tricky sometimes, but that's essentially all it is. Every once in a while I might have to solve the tool, but basically just follow the guideline of the variables and their dependencies. And that should get you everything you pretty much need. And we do a little cleanup to remove the source package at the end for each one, but that's about it. Um, keeps it, keeps it sane. If you work on older versions, then you just do from, like, Debian Jesse, and it'll actually use the older version of Debian Jesse to actually pull it in. So hopefully that makes sense. Does that answer your question? Yeah. Okay. Okay, oh, um, we're getting there. All right, so I'm going to go ahead and turn this off and we'll post the rest of the stuff online. All right, thank you guys very much. How do I stop? There we go.
More from Jon


What No One Knows the Podcast / Vodcast featuring The Tampa Bay Wave and Jon Schipp

Meeting the Exposure Management Challenge: Key Use Cases for Success | @OfficialRapid7 #SolutionSpotlight
Spot Security Control Gaps and Non-Compliant Resources Across Your Attack Surface