OpenNSM (Network Scout - Shawn Jordan)
Shawn Jordan presents NetworkScout, a distributed IDS built on $127 Raspberry Pi hardware that alerts on port scans and SSH attacks in under a minute. The system uses Dave Kennedy's Artillery, a MySQL database, and automated setup scripts. Two law firms are piloting it, with interest from Dell and Syracuse University.
Chapters
Alright, well, hello everyone. This is the weekly meeting of the Open Network Security Monitoring Group at the University of Illinois at Urbana-Champaign. Let's get started. We'll move right into the meeting notes here. So group updates, a few things. We have 3 sponsors now. Doug Burks of Security Onion Solutions is now a Tier 1 sponsor, a very gracious generous donation. So if you are interested in Security Onion and commercial support for that NSM-based Linux distribution, please check out Security Onion Solutions. Doug also provides Security Onion training, and there's gonna be another one coming up. I think the actual close for that one is Thursday. So do check out their website, and if you're interested, do book a a visit to that. Second up, we have a Tier 2 sponsor from Chris Sanders. He has— he runs the Rural Technology Fund, and he also has written a really good network security monitoring book called Applied Network Security Monitoring, which we talked about in the past. So do support his Rural Technology Fund, which helps to allocate money for people that are interested in technology and in rural areas. Finally, we have a Tier 3 sponsor from Ryan Stillions of Vigilant Technology Solutions. Vigilant is a company that does managed NSM solutions for small businesses. If you'd like to have your logs monitored, events and all that stuff handled by someone else because your staff— you don't have staff to support it, do check out Vigilant. That's what they specialize in. Also, we have a GoFundMe campaign that each of these contributed to. So if you would like to have your own, if you would like to donate to the group to help sponsor us, whether it's an individual donation or as a corporation, do check that out and go to gofundme.com/opennsm. Next up, we're going to go into the meeting sections. For the news items. So let's scroll down here. And one item we have up today is this tool called MASTIV. It's a static code analyzer for malware. And it's written by the guys at CoreLogic, and they just came out with a web user interface for it. So you can check it out here. We'll quickly open it up as a brief demo. So you can see there's a few samples up here we can take a look at. So they're different from the last time we looked, so people are using this. Let's try Independence.exe. And from here we can see a number of things we can click on to further drill down. Let's take a look at the portable executable info because this is a Windows binary. And you can see the various sections of the binary, such as the text section. Also the imports. So this is the import table that is present in Windows binaries that actually are used to say, hey, we need to rely on a particular dynamic linkable library, DLLs in the case of Windows, let's load that. So we can actually drill in that. Also, it actually gives you strings and a bunch of other things you can actually take a look at there and see if there's anything interesting that stands out in plain text. And that may be of use to figure out what this particular program or this particular binary tries to accomplish. Next up we have Snort++, which is the name for the new rewrite of Snort, which is currently in alpha still, I believe. So Snort adds— the new version actually adds these inspection events. So what they're trying to do is they're trying to go to a more event-based setup where you can actually, you know, you have your package, you have your decode, you have your preprocessors, and then you have various actions after that. Well, with the new, with this new setup, we actually break it down. You can see that you can apply various things during particular portions of this flow for the packets through the preprocessors, etc. And the result is it gives you something a little bit like Bro. In that you can see this example they give you at the bottom. You can use a key, HTTP_ROD_URI, and that will attach a particular— that will actually generate an event, and then you put it in the data log variable. And what actually ends up happening is that is assigned as a logging stream. So then you can actually, in this way, generate or log various URIs. So this is simply a URI logger. So this is a new feature, and the design will make it much easier to actually build plugins and additions and, you know, help bring out the capabilities of Snort more with this new design. One second here, I'm gonna close the door. Alright, so in the next section we have there was a commit to OpenBSD that a developer made that adds message authentication codes to ping. So in the payload, which is really interesting. It's one of those things you never really think about and it kind of makes sense. So to keep track in ICMP for pings, the ICMP type A code 0, I believe it is, I'll just go ahead and open up the header here in a browser. And we can see that you have types and codes. So the first byte is the type, and for ICMP, 8, the value 8 for echo, and code, and that will be 0 for echo reply. And whenever you're sending out pings, you actually need to know how to match up the responses with these from the initial echo request, right? You get the echo, ICMP echo reply needs to match. And how they do that in ISVMP is with a sequence number. So the generated sequence number that must match when the request is sent out, it's a number that's generated, it's put in the payload, and then whenever the response comes back, if the numbers are the same, that's how Ping knows that they— actually, the Ping application knows that they got the right response for that particular ICMP echo request packet. What they're doing here is they're actually adding cryptographic data to, in this case, a message authentication code, which will allow you to kind of prove that it really is. Because in some cases, someone could maybe inject, say, you know, you're worried about particular organizations such as, well, I'm gonna use NSA for example, where they have high-level capabilities, very powerful. And they're able to interact with various important points in the routing infrastructure on the internet. Well, in this case, maybe they want to inject the sequence number they saw and they were able to respond before the echo reply came back, and they can actually show— and then the actual timing would be different. It might not be practical, but this just kind of shows you a use case for this. So what this means is that using the cryptographic function, that it's much easier to prove that the response is to match what was sent out. So that's kind of the basis for it. If you're interested to check out the link which has the patch, you can actually view the code if you're interested in further detail. Moving on. And sorry, I am jumping all over the room now. We actually have a— I'm the only one in here at this point. Shane's sick and it's winding down for finals. Also, we're trying out a new microphone in the room. So it's in the center, and my computer on the cable is not really long enough to reach the center of the room where the mic is. So I have to go back and forth between my laptop and the microphone. So if you do notice any issues with my voice, do tell me. If you can't hear it very— hopefully it picks it up pretty well, even when I'm on the other side of the room. That's what I'm looking for. So do give me feedback on my voice if you could in the chat and tell me whether it's good or not. Next, we have conference quarters. So ThoughtCon's coming up. So this is related to where we are located in central Illinois, because that's in Chicago, 2 hours north. So do check out ThoughtCon. I know a few of the students are going and some of the faculty. Also B-Side Chicago will be coming up May 16th. And one that's not mentioned there that I'll mention because I'm interested, and you guys may be too, is Hamvention, the world's largest ham radio conference or convention. It's held in, around Columbus, it's a little town outside of it, and that is that same weekend, that it's 15th through 17th, I believe. So if you're interested in ham radio, I'm actually a licensed technician, I haven't used it in a while, I got it a few years ago, but it's really good. They have a huge flea market, multiple miles, so if you're actually interested in electronics, just any electronics in general, from audio to video to creating your own radio station to computers and servers, people just have pallets and pallets of stuff. Like there's switches, I remember one year they had like 3 or 4 pallets of Cisco switches and routers. They're all pretty old, but you can get them for like $20 apiece and just something to play around with. Will support things like VLANs and such, so it might be just good for a home lab. So do check that out. It's actually kind of where I get some of the NSM, or the, for our Linux user group and OpenNSM, it's where I get some of the equipment. That we actually use for our services. We get it pretty cheap there. So moving on, Opportunity Outpost is where we have job opportunities. And Vigilant, the company that sponsored us, actually has two openings right now on their team. So if you're interested in being a hunt team analyst or a senior analyst on the hunt team, do check out those links for details. We're working with various NSM technologies in categorizing and escalating events. And further information is within the job description. Now we're gonna get down to Tool Trade. Tool Trade is where we talk about a new tool or how to use a particular tool each week. We have something. And Sniffly 2.0 is a tool that Shane Rogers created for one of his classes. He's a chair of OpenNSM with me. Unfortunately, he's not here today. He is out sick, so we're actually going to hold this off to next weekend. I'm sorry, until next Monday, and he'll cover that. But without further ado, this ends this particular series, and now we're going to get into the talk. For the talk today, we have Sean. Sean developed the tool along with a few other people at Marshall University called NetworkScout, which we'll talk about. And he's given a number of talks on this at various conferences including DerbyCon, AIDE 2015, and HackerCon 5. So, Sean, ready to take it over?
Yep. Let me—
let me go ahead and stop screen sharing and then you'll be able to click that green button there. It looks good here.
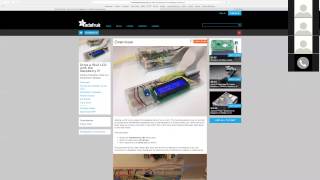
Alrighty. Hi everyone, my name is Jon Jordan, co-creator of Network Scout. First off, thanks for having me. It's always fun to come talk about something you've kind of built, and it's kind of like your baby. So thanks for the opportunity. If you have any questions after the talk or during the talk, you can ping us at NetworkScout. It's synced to my phone, so I get all the tweets from NetworkScout, so I'll be able to reply really quick. A little bit about me, I'm graduating with a degree in digital forensics and information assurance from Marshall University in Huntington, West Virginia. And yeah, that's essentially it. I do home inspections on the side. I'm a pretty typical guy, I guess. So the other co-creator is Aidan. He wasn't able to be on the talk today, but You can also message him on Twitter @RagingAsian18. So, and we have to give a shout out to our professor, Bill Gardner. He's the one who really pushed us to do this project. Without him, this probably would have never happened. And he had the idea and we just took it and ran with it. So he's really the I guess the founder of Network Scout, and then we just did it. So we have to give out our special thanks for people who funded us because it would just be rude not to give them credit. So there's the Marshall University Foundation, the College of Science, the Dow Chemical Company, and the state of West Virginia gave us some money to build this thing. So Now we're to the goods, the intro. So why build it in the first place? And we, you know, like I said, Bill was really the guy, and he was sitting at, I think it was DerbyCon 3, and they were having a conversation about, you know, all the exterior defenses, your firewalls, your IDSs, and everything on the outside, but there's really not a lot on the inside. Nothing really monitoring if you've been compromised through social engineering, things like that. And if there was, it was really expensive. So, you know, right after that, he proposed the idea to build it. And I mean, that's where it started. So there was the, the need of something to watch the inside. And something that wasn't a couple thousand to $10,000 and something that wasn't super difficult to use. And we took that and we ran. You know, what does it do? Well, it's a distributed IDS honeypot. So you can launch a lot, like, you know, several clients we call them NetworkScout clients on various subnets and have them report back to you. You know, if you're a large corporate corporation, you can have one in accounting, you can have one in sales, and if someone breaks in and tries to pivot, this thing would catch them. And we like to compare NetworkScout to the tsunami warning system. You throw a bunch of these, you know, buoys or clients out in your network, and hopefully it gets triggered if something's going on that shouldn't be going on and reports back to a central location before, you know, you face a compromise or something like that. And this is kind of like the makeup, and really this is just an additional layer of defense. This isn't like endgame, we solved the blue team problem, life is happy. No, this, this is just another thing, another cheap way to protect yourself and your network. Now we're going to talk about like parts, the parts, and we got a lot of our ideas from Hackers for Charity. They're a really great nonprofit They have a Raspberry Pi setup called Rugged Pi. They use it in Uganda where conditions are kind of rough and it's waterproof, dustproof, modular, easy to build, and that's where we really, you know, we got the design from. And the required tools, we wanted to make this simple, not require a lot of things. All you have to do is have a soldering iron, a drill, a hammer, a plexiglass cutting tool, which you can get at Home Depot for like $3. Um, that's about it. I mean, there's not a lot of need for anything else. And then here's the pieces. Everything you can get on Amazon. Some things we did get off Radio Shack and Home Depot. The pass-throughs are actually used in electrical boxes. They seal wires going into electrical boxes. Like I said, I'm a home inspector, so I write these things up all the time. They kind of solve the problem of sealing that hole and keeping dust and water out. The fear of Radio Shack going bankrupt, we're probably going to have to update this and find some other ways to get the breadboard and the standoff screws. I'll have to look for an Amazon link that's not super expensive. So if you ever do build one of these, the pins we get on Amazon, it takes like 2 to 3 weeks to get them in because they ship out of Hong Kong. So kind of, if you're gonna buy anything first, start with that. And this is what it looks like when it's fully built. This is a B+. We have an LCD screen, a shutdown button, and then we have like a power management board. The LCD screen requires, I think, 3 positive and 4 ground wires, so we were able to just build a little breadboard to handle that. And hopefully if I switch this window, it'll come with me. Let's see, I have a picture. Can you guys see the Raspberry Pi on? Yeah. Okay, so this, this is it on. It prints out— we use Dave Kennedy's Artillery as our IDS and honeypot client, and then we built the, you know, the reporting interface that reports it back centrally. So this is a client Pi, and it says, "Hey, Artillery is still running," and the IP address, because we ran into issues with the IP address. If you try to scan for your honeypots on a network, especially if you're a large corporate network, you know, you don't want to go and do a network scan. Then also, Artillery kind of picks that up. And, you know, you're recording threats as yourself, and just to eliminate confusion, kind of make it easier on everybody, we just print that out on the screen. And each client only costs $127.74. You can actually build 2 for roughly $210. Because there's a lot of leftover parts you don't have to order. So our goal is to get it under $100, $150, and we were able to do that. So if you're a company, you can build like 10 of these for $1,000 almost. That was a kind of the goal is to keep it cost efficient. And we do have a how-to guide available on GitHub, and I'll actually take you there. Let's see. So here's our NetworkScout page on GitHub. It's networkscout/ns. There's a slide coming up with the address a little bit larger. Tells you how to install it. But if you come over here to the wiki page, you can actually see a parts list, a guide. Let's see if I can go back. There we go. And this takes— yeah, so this will actually walk you through with pictures how to build it, how to drill the holes. That's the pass-throughs, what those look like, how we cut the plexiglass, you know, soldering the power board and all that stuff, and then what it looks like done, and then how to install it. So that's all available on GitHub. We also have the LCD wiring. It was already provided through Adafruit, so instead of having to, you know, tell everybody how to rewire this, we just post a link here the wiring schematics right there. So that's there and ready and available. You just don't have to do any of the software stuff because we actually built a setup script that installs everything for you. And then we also keep images up on GitHub so you can download the ISO image straight from GitHub and Install it straight to the disk, plug it in, you should— Network Scout should be ready to go. The only thing you'd have to change is the configuration file to point to your server, the IP address of your server.
Hey, Sean? Yeah? How about how long does it take to build? How long does it take you guys to build one unit? Once you have all the parts.
Once you have all the parts, you can build one. Your first one's probably gonna take 3 to 4 hours. And then after that, you kind of get into a groove. You could build one in 2 hours, I think, or less. I mean, if you have everything laid out, you know, you just really, it's soldering and then drilling a couple holes and cutting plexiglass, and none of that's, you know, super time intensive. So I think it would be safe to say like 90 minutes, you know, one person could build one. Your first one takes longer, and plexiglass— I'll kind of tell on myself a little bit. The first time we cut plexiglass, you know, we were trying to be You know, we're kind of lazy, so we're like, we'll use a Dremel. And when we start cutting plexiglass, and that's a horrible idea because the Dremel gets really hot and the plastic starts to melt, and it like starts— we were on a ping pong table and it starts melting into the ping pong table, and it was just a bad experience. And you get like fumes everywhere. That's why you can at Home Depot, you can get this really cheap glass cutting tool, and it's $3, I think, and all you have to do is get a ruler and cut a straight line and then snap it. It's really easy to do once you have it. The biggest problem with the timetable is getting those pins in. Like I said, it takes like 3 weeks to get them in, so Let's see, LCD instructions. And then we're also doing a training at DerbyCon. Nameless plug, I guess. We'll be there building one over a 2-day period. So, and we'll also be at the conference. So if you're at DerbyCon, hopefully you will be, come hang out with us. Then we go into the software side here. Like I said, we use TrustedSec's Artillery. They really made things a lot easier on us because we didn't have to build, you know, we didn't have to reinvent the wheel. It was already there. There's the GitHub. I'll leave that up there for a second. So the program layout, we have some files. We have our setup script, the server script, we have a client script, then we also have 3 other, the LCD controller, which that all that does is control the LCD. You can actually, it has its own init.d scripts, so you can do like service lcd-controller restart if you have any issues with your screen. You can stop it if you just don't want to use it. Same thing with the shutdown button. It has its own script and it runs in its own init.d, so if for some reason your button's not working, you have access to the machine, you can run it and test it. And then also we have that configuration file, and right now there's only one thing in there, and that's the IP address. And what that IP address is, is it points the clients to the server. And then you have some folders. There's a website folder that houses the website. We have some source code, some stuff we use in the startup, in the installation. And then there's also some other stuff that we put in a stuff folder. We have a MySQL table creation script. In the stuff folder, which is really handy. Like I said, we wanted to make this super simple, so we created a setup script, and once you run that, if you do like website or if you do a server Pi, the website gets put in the right place, the tables get created. I mean, it's all one button, and I think you have to create a password for your MySQL service, and that's it. So we try to keep it as easy as possible. Well, I thought I hid the code, but well, actually we can go look at it. Apparently that's not the one I edited, or iCloud didn't work, so go back to So the server scripts—
very easy.
Can you increase the font size?
Yeah, let's do that. Is that better, or do you need more?
I'll go just a little bit more, please. Looks good right there.
Yep, we'll back it up. Thank you. No problem. So what we do here is we create a server It opens up, it has a— uses socket, and it can listen up to 4 connections at once. You can change that number, we haven't played around with it too much. And then we send 2,024-bit packets. This is all like Python standard code, so we just kind of went with what they had, and it seems to work for us. All the communications are on port 514. If you were to run into any issues, you can change that to any port you want to use that's not being used for something else. And then what this does, let's see, this is— it opens up the file received information, creates that, writes the data and then it sends back a message, "Your message has been received." So this will take all the Network Scout information it's getting from the servers and write it to a file and close it. And then if the file is larger than 1, which is just the, if it's not empty, it will pass. So it's not gonna be writing anything else. It will open up and read the lines and inject the message into a database called NetworkScout. And then we do some, some cleanup of the code here. And that's where, right there's the injection into the MySQL database. And then we commit it to the database. And if there's an error, it rolls back and it will try again. And then we just close the connection here. And then, let's see, let's make sure all the data gets written. If not, it will— or if it has an error, it will pass and not write the data. Else, it'll clean out the log file or the received information file. So if we have an error, it will pass on the data, leave it in there. So when it goes back up and tries to go through network, the server script again, it will say, well, the file is still larger than 1, let's try to write it again. And then, you know, it'll keep trying until it succeeds, and then it'll clean the file. So there's some Doctor Who references. And then the website looks like this. I actually, let's see, I'll send a ping out to this here from my iPhone, do a port scan, and we'll see it actually work. Just give me just one second.
If you could zoom on that too when you get a chance, that'd be great.
Yeah, sorry.
Oh, no problem.
There we go.
Yeah.
So I'll refresh the page here. Well, give me one second. I have to turn it off to SSH and, uh, let me make sure. Okay, I might have had Artillery off. So yeah, there we go. Well, didn't sacrifice enough goats to the demo gods, I guess. But it worked last night. It'll print the IP address of the attacker, so if you're on incident response, this will kind of give you an idea who's It will do port scans, it will do if someone tries to brute force SSH or brute force FTP. It also monitors the certain directories inside the Pi, so if any changes happen, it will actually say, hey, you know, we had a change in one of your directories, you know, your Pi might be compromised. So all these messages come back and we actually need to put the IP address of the Pi. Or no, sorry, the attacker's right here. So the attacker IP address will show up here in the message and this is the Pi. So, you know, you know that in your system if it's, if someone's doing a port scan, you know from what machine and you can, you know, pull that off or put it on a virtual LAN with itself and see what they try to do. You know, it depends on what your end goal is. And then I'll put a timestamp and what happened. Let's see, I tried to brute force a couple times SSH. Also, you know, part of the Also, oh, there we go. Well, we might be able to get it now. And also, when it first boots up, it'll send a message about some basic security configurations, root logins, stuff like that. So it'll kind of remind you, hey, this isn't very safe.
We'll get that. Are you guys taking that data and putting it into an intelligence feed or exporting it in some way? I know you could use MySQL queries for it, but I didn't know if you guys had a way to write it to a CSV file, or you can just pull it down from the web interface or something.
Not yet. There's still a lot of— it still has a lot of growth. In fact, now that I'm about to graduate, I'm thinking about going through the code and cleaning it up a little bit and maybe, you know, making, adding some features. The big thing with like adding it to an intelligence feed or something is usually you should, where this is an internal monitoring, you usually get some like local IP addresses. So you're like 192.168s and your 10.0s. Because it's meant for the inside. So your external IP addresses, unless they're getting through your firewall, which usually they're going to be using social engineering, get access, you know, into a computer already on your network and then pivoting it. And that's what we're trying to catch, is that pivot.
Ah, I see. Internal. Okay.
Yeah. You know, if we were to build an intelligence feed or something like that, it could very well, you know, block your sales team's computer from the network or something, and that wouldn't be good. We did talk with some people about adding it to like a firewall or something, or Or maybe, I mean, there's a lot of things you could run with it. If you know it's compromised, it'd be cool if we could integrate some kind of system where we could push to a Cisco system and say, "Hey, put this on a virtual LAN," maybe with a button or something. I don't even know if that's possible, but it'd be really cool because then you could monitor and kind of control things right from the web interface. There's also some security updates we want to do on the website, some minor housekeeping stuff here, maybe change the timestamps to something a little bit better. But it's still got a lot of growing to do, I guess, as an open-source platform. We'll go through this code. Oh, and the— we can just go through the— this is where it reads. This is the client side. So we read the server address, check the— make sure NetworkScout's installed, and then it'll check the log file very similar to like the server's received. And if the log file is less than 10, it'll submit it to the server, or tries to send it to the server. And then if not, same thing, it won't erase it until it successfully sends it, and then it'll write the blank. Let's see, and it waits. So this is updating every minute, and you can change that based on, you know, just that one variable. And that might be something we put in the config file later on. But right now, you know, if you have a threat and it picks up on a network, a client, it will ping back to the server in less than a minute. So that's a pretty good response time, and we could even put that down, you know, 30 seconds, 10 seconds. So we want to make, you know, kind of give it enough time where you're not sending a bunch of stuff to the server and pretty much DoSing your own server. And then this is just the connection we like to put in there because it's just a simple script to connect to a server. And if you want to, you know, if you ever do an open source project and, you know, need to pull some code connecting to a server right there, it's really simple. Just whatever you want to send, do the file open, change that log path, And you can send whatever you want. Go over some challenges. Python was a big challenge for us because neither one of us were really good at it. And I hadn't even touched Python until I started NetworkScout. So one of the late ways I learned how to code in Python was to look at Artillery and kind of dissect it. And then, you kind of figured out the syntax and what different things did, and then I was able to run with it. So, it was pretty neat. And if any of my coding is really horrible, you can blame Dave Kennedy, I guess, because he essentially taught me how to code in Python. So, the IP address we already talked about. We also had an issue with shutdown. So when you launch Artillery, SSH gets blocked. So if you're trying to SSH into your Pi to shut it down for maintenance or if you need to fix something on the Pi, you're not going to be able to. So we installed a button. It was like a— I think it's like 5 lines of code. And whenever you push the button, it senses the voltage change, shuts down the Pi. So it was a really, you know, kind of elegant and simple solution, making sure you don't break your SD card. Another thing is when we started with Artillery, we didn't have the logging function available. It said it was there, but then if you tried to use it, it would crash Artillery. So this kind of inspired some creativity. What we ended up doing is there is a line in Artillery called "warn the good guys," and it creates like a message. So what I did is I grabbed the IP address, created my own log inside Artillery, so it creates its own directory for a log and then creates a logs.txt file, and then it'll add things to the log as they come in. From Artillery, and then I took this function on the left— or no, sorry, function— yeah, function on the left. It goes through Artillery, looks for, you know, that warn the good guys, and injects our code into Artillery to where it will write the function for us. So when you install a client, actually downloads Artillery— or well, it tells you to download Artillery Then our setup script scans through Artillery, finds the warn, the good guys, and injects the ns_log_warning script. So we're actually creating our own logs because that function wasn't working when we started using Artillery. And they might have fixed it. They've actually— I was looking at Artillery last night, and they've really cleaned up the code. So it might work now. We might not need it anymore. It was one of those things we spent a week trying to figure out how to do it, and eventually through a lot of Googling and a lot of tears, we were able to modify Dave's code to get— or TrustedSec's code— to get the log files to write, and then we could use Network Scout to send the log files over. Let's see, and then we ran into We had to find a way to set up the server, and that's another thing. Apparently LAMP's not the safest or most secure way to install a server on a Pi, so we're pondering if we should change to something else. But for now it works, and you're not storing anything financially viable on a Pi hopefully, or any anything dangerous, but eventually we do want to move it over to something maybe a little bit more updated. That's what we use today. Like I said, the setup was really hard. How can we make it easier? And Jess Bore actually wrote on GitHub a script to install LAMP automatically, so you don't even have to, you know, download it yourself. And with this script, we were able to completely automate almost the whole server setup, you know, with the exception of, like I said, setting up your MySQL password. So it made things really smooth. And this is what it kind of looks like. When you launch the setup, you have 4 options. You can uninstall Artillery, do the server or the client. And then you can exit. And then it will install. This is the client. It installs Network Scout, moves it to its own file in the /var folder under the root. It updates the GPIO, which is your pins used for the LCD screen, the shutdown. So we make sure that that library is up to date. Then you can see here we modify Artillery. We open the source code and put in our logging function right into the bottom of the source code or their core.py where they pull all their functions. Then we go through and inject the calls to the function. Then we create all our directories, our files, and all that stuff. Then we ran into some issues with the init.d scripts to start, and I spent a day and it was so frustrating. Then I came back in the morning and I realized it was just permissions on the files. So sometimes when you're coding, you get really stressed out and you come back the next morning and you realize it was just some simple little thing that you just didn't see the next day. But what this does, it lets you, you know, reboot the system. So if you're working, you know, if you adjust a configuration file in the server or the client, you can just service nsclient restart and it'll restart the program with the new configs. And that's the changing the permissions. And then it was a similar thing for the server. I'm not going to go through all this, but it just installs LAMP, puts the, you know, moves all the AutoFruit library into the Python library, and then moves your website over. And then we execute the MySQL creator .py function, which installs all those MySQL database type things when you use it with your website. So we're able to— you don't even have to touch MySQL. It'll do all that for you, and then it'll tell you the website. And then this just uninstalls it, removes everything, and purges MySQL and LAMP and all that. Let's see. So this is what a setup looks like. You just download it from GitHub on your Raspberry Pi, and then that's what the options look like. So like I said, we try to keep it really simple. You set up one server, then you can set up as many clients as you want depending on how much you want to, or how many you want to throw out and watch your network, or to monitor your network. Then this is on every client, you have to point the config file to the server. You just nano or vi or any of those text editors in your console, /var/networkscout/config. This is what it looks like, and you just change that IP address. Again, we tried to keep it really simple. Nothing too complicated. And then this is the attack. Let's skip through. I did a port scan with my Mac. And then you can actually pick how many ports you want open for it to emulate. One of the things we might— I thought about doing is kind of like a list of ports and then randomize your PIs so they don't all look the same. So you might have one with, you know, your common services and then some other random ones and then kind of like shuffling it. So if you have a network with, you know, 10 clients on it, Network Scout clients, they all aren't identical just to kind of blend in a little bit better. And then the future, like I said, we have some touch-ups to do, some security stuff. You know, we're looking at the different servers. One of the big things I want to do is to run on Debian and some other things. Like I said, when we, when we built this, we didn't have a lot of Python experience, so like the directories are kind of set in concrete. I need to change that to where, you know, install the server on a Debian build virtualized and And then you can have the Raspberry Pi talk back and reduce the cost even more. And somebody asked about doing it on Windows, so that might be in the future too. But there's a lot of things that we can do with it. Another thing is, you know, we put it on GitHub. It's open source. We're kind of hoping people will take it and run with it and do things we didn't even think of. We had some people come and want to make it kind of closed source and use it for network monitoring, and we were just like, you know, that's not why we built it. So we got a grant for it, so we didn't know how that would all work out. But let's see, any questions? Anything I can show you guys?
I'm going to go ahead and say that if anybody has a question and that they are remote, you can unmute your microphone, ask the question, and then mute your microphone again. So I'll start with a question. Do you know if anybody is going to be taking this project up after you're graduated? Or is it just going to be kind of you in your free time later?
Well, Bill wants to do some more things. He's had some ideas and he might branch it or he might take it. No. Oh, there's Bill.
No, it's Sean's project. He— this was originally my idea that I never had the time to execute it. So Sean and Aiden were the two people who took it and actually did something with it. And it's too far along for me to step back in and say, "Okay guys, now that you've done all the hard work." And really it's Sean and Aidan's project at this time. Of course it's open source, we want people to contribute. I might contribute to it, but I seriously doubt that I'll be doing anything more than that.
Okay. So Sean, got another question. Is this deployed anywhere that you know of, like maybe one of your sponsors such as DAO?
You know, when we went, I don't know for sure, but I know we have it deployed in two places.
Oh, you do?
Okay. Yeah, I have it. I gave it— I've been deploying it for my work my free time during the summertime. I've actually rolled these out in two law firms. They're limited, they're in testing still, and it's still limited. We probably need to update those this summer, but yeah, I sort of secretly started deploying these things to see if we could break them.
Sorry, and when we did research, we had some Dell or Dell representatives kind of like looking at all the projects and stuff. And I talked to one guy and he was like, he thought it was the best. I mean, he was really excited about it. So I don't know if he took it and did anything, but I mean, his level of excitement was kind of off the charts. So maybe he did, or maybe they're looking at using it. I really don't know. And then we also, when we presented at DerbyCon, the University of Syracuse was going to take it and play around with it in one of their virtual labs or something. So I think people are using it, but we just don't know, don't really keep track, and no one's really asking questions yet. So maybe it's all— but maybe it's working, so maybe there's no issues or anything.
Cool. Well, anyways, if anyone else has any questions and they don't want to unmute their mic, also add it to the chat and I can read them. So if you do have questions, do speak up. Have you done any performance testing on this at all? I don't— I've never used a Raspberry Pi. I don't know, like, you know, how many connections it can handle or activate or anything. I'm just curious if you guys done any, like, real-world, like, SSH brute-force tests. I mean, I'm sure it'd be fine for moving things.
The thing about doing it with network— with Raspberry Pi is you should never see traffic on this. If you do, you've got an issue. Right, right. And yes, you know, while we've done testing in my own lab, and it's also said deploying to places and testing, and we tested with what just basically bans you if you're trying to brute force. And Sean was talking about it will— some of you have issues with SSH, you have to remember to set up whitelisting on. That's some things we need to look at automating is whitelisting. You need to whitelist every computer you're going to manage the Raspberry Pi network with. For the, you know, the whole idea is this thing's distributed. You put on each physical or each VLAN in your network, and then just that's there and listens. But typically you shouldn't have to run gigs and gigs through this thing because it's not ever— it's sort of like what I think I don't know if you used the example of the tsunami warning, but if you actually see something, you've got a problem. So it's sort of like, think of it as a smoke detector. Yeah, there are false positives, but you know, it may be a fire, maybe somebody burned some popcorn.
Right, right. I guess my question was just more of like a general platform one. But yeah, you're right. I can see how for you, you wouldn't really need to worry about performance like that.
On the other side of this— and sorry, just a funny— just for a second, we actually were looking at applying for a cyber, cyber infrastructure grant to build network scouts that would monitor networks, high-speed, like, internet 2 networks. Of course, we would have to abandon Raspberry Pis if we did that, but we didn't get the grant, and therefore it's on the shelf right now.
Plus, we haven't really hit, you know, where the Pi, the Raspberry Pi 2 just came out. Haven't really had an opportunity to play with it, but it's like, it's got some horsepower to it for $35. You know, 900 MHz quad-core processor, runs Windows 10. So, you know, and for the same price as a B+, that should be ample, but we haven't done any actual like tests on the Raspberry Pis themselves to kind of conclude the question.
Hopefully you don't have any more questions, we can wrap it up. So do speak now or forever hold your peace. And you'll be doing Raspberry— or you'll be doing Network Scout training at DerbyCon, is that correct?
Yes, we will be there. Our training's Wednesday and Thursday, so we'll be there Tuesday night till Sunday.
So yeah, if anybody wants training in a professional setting, do check out DerbyCon and sign up for their session, and they can teach you, they can instruct you on building and applying this, this tool.
You get to build your own Network Scout and take it home with you.
Yep, it's very cool, very cool. Yeah, this is a very neat tool. I'm glad you guys came out with this. This is definitely inspired, I think, others to look at small form factor devices to, you know, apply NSM concepts to them so they can be, you know, put throughout small networks and such, or even large networks, of course. So I do definitely, definitely a thumbs up for you guys for this. Implementing this.
Well, we also realize not everyone has a lot of money. There's somebody who spent 20 years as a network administrator and network defender. I can attest for the fact that a lot of people don't have a lot of money. So that was really what the target was, is for those people.
Perfect, perfect. All right, well, we're going to wrap up here. I want to thank you for coming out, Sean. And everybody do check out the GitHub link that's in his notes and also on our meeting notes that were in the email. And thanks for joining the call, Bill. And no problem. Next week, I believe— oh, no problem, no problem at all. Next week will be the last OpenNSM meeting for this semester. We will have Adam, who is leading the malware team, the malware analysis team at Malwarebytes. He'll be talking about patching malware and binaries with various tools such as IDA and I imagine OlyDebug, etc. So do check that out. Also, if you're interested in sponsoring us, go to gofundme.com/opennsm. Check out the website, we have a lot of things in store for next semester. Over the summer, I'll be working on the website, planning research, and getting our laboratory up— our Gennady cluster specifically— up and running. So until then, take care, and we'll see you guys next time. Thank you.
More from Jon


What No One Knows the Podcast / Vodcast featuring The Tampa Bay Wave and Jon Schipp

Meeting the Exposure Management Challenge: Key Use Cases for Success | @OfficialRapid7 #SolutionSpotlight
Spot Security Control Gaps and Non-Compliant Resources Across Your Attack Surface