Jon Schipp shows how to install pfRing, a kernel module that speeds up packet capture by bypassing parts of the Linux network stack. He compiles the module and tcpdump, then demonstrates the difference: stock tcpdump drops hundreds of packets while pfRing-patched tcpdump drops zero on the same traffic.
Chapters
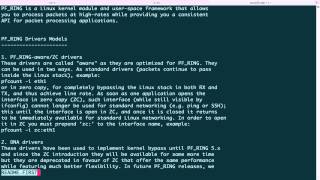
Alright, today we're talking about how to improve tcpdump performance with a tool called pfRing. pfRing is a kernel-based socket mechanism that delivers faster performance. So we're at the pfRing homepage here. You can see that it is a kernel-based packet capturing and sampling method, also supports libpcap. So any tools that use that will also work with it, and it has ability to specify many filters outside of EPF. Here's a diagram here, the 4 different types of PFR. We have the vanilla one, which we're looking at now, standard NIC to a ring buffer and then to the application, and then you have the higher speed one that was— is for special supported cards where you can do direct from the NIC to the application. So who needs it? Anybody that's looking to handle many packets per second, including a gigabit line rate, and even 10 gigabit line rate. Let's move to the download section now. So now we'll go down to the source code download. We're going to compile it from source for the latest version. Then go to the pfRing folder, and next we're going to copy the link for that tarball. Then we'll wget it, and then we'll specify an output file to make it shorter. Okay, so just to recap, pfRing is a— ends up compiling to a module that you insert in the kernel that bypasses some of the normal network stack functions and allows you to do high-performance capturing. So it— because it can skip a lot of processing such as the ip and tcp modules in the kernel, this allows the packet to go from hitting the NIC to the ring buffer and then to the application directly, which yields very good performance over what's stock. So now we're going to untar it and then enter the directory. Next, we're going to look at the README.first file, which tells us how to continue if we don't know what to do next. We're going to drop down to the compilation section, and there is already a command that we can use on Ubuntu to actually install the necessary dependencies. So I'm going to go ahead and do that because I'm running Ubuntu. And to save output and time, I went ahead and installed everything prior to running that command. Next, we're going to compile it from source. We'll issue the make command. This is gonna go in there and compile the pfRing module and any of its dependencies. The— there are special— a number of special things in here while this is compiling that I should mention about. So we have the vanilla pfRing, which we're concerned about today because I'm on a VM and I don't have the necessary supported hardware on my machine to take advantage of the zero-copy or direct NIC access. Function, and that essentially allows the network card to pick up the packets and send them directly to the application, bypassing even more stuff like such as the, the ring buffer in the kernel. So this is how you, this is how you yield the best performance with pf_ring, but the requirement is that certain applications— excuse me, a certain network card has to have support for these direct NIC access. Features. So in this case, pfRing has a number of drivers already built in for popular network cards that are 10 gigabit and 1 gigabit. And if you take— if you're taking advantage of these, like here's one right now. If you look at the bottom, you see that DNA-IGB, that's a particular driver. And then next will be ixgbe, and there'll be E1000E. So actually compiling those drivers for those network cards to take advantage of the direct NIC access, which is what the D— capital DNA acronym stands for, which is one of the highest performin— performing features of pfRing. But again, we'll be using the vanilla stuff, so while it is compiling that, we're not gonna actually need that. The next thing you have to do is you actually have to— once it's done compiling, you have to build your applications to support pfRing, so you have to include the pfRing libraries. So now we're going to open up the README.first again and do the installation. You can see that just— we have to do some make install commands for various directories to actually install the libraries and the kernel— or in the kernel module to the appropriate place in the directory structure. Okay, we installed that one, the kernel module. And you can see at the bottom it says depmod and the NERC kernel. We actually inserted it too. So now what we're going to do is we're going to the userland section and then run that, that command right there so that we are able to install the necessary libraries for the userland. Okay, we did that as well. So now for the demonstration part. So we're going to the userland directory, which contains a number of tools already that can be taken advantage of with pfRing. You got libpcap, tcpdump, snort, and a few others. Of course, this is a video on tcpdump performance, so we're going to compile the tcpdump version in here. You can see the make target all has everything listed after in those directories, in that directory. So that's how we can compile all those things. We're going to go ahead and do that for ease of use. You can play around with all those other tools that it comes with then too. So what it's doing is that pfRing bundled up a version of tcpdump that's already compatible with pfRing, and you just need to compile it. These things are all stored in the /usr/land directory, so if you want to take advantage of the high-performance tcpdump program because of its pfRing support, then you just have to compile it and install it and then utilize that one. And in this demonstration, we'll be testing this one with the vanilla stock a TCP dump included in our system in just a moment. Okay, so testing pfRing, it says that you need to make sure that the pfRing kernel module is loaded so you can run the insmod command. But first, let's actually run lsmod and see if it's already loaded. And we'll need to— whoops— we'll need a grep for the pfRing, and then you can see that it is loaded. It's one of my loaded modules right now, so I don't need to insert it. Next, we're going to run the vanilla tcpdump, which is included on my Ubuntu distribution. And let's run it for 5 seconds— or 3 seconds, excuse me, 3 sounds better. Okay, you can see that I lost 496 packets. They were dropped by the kernel. Now what I'm going to do is we're going to use the pfRing version of tcpdump and do the same thing. Zero packets dropped by kernel, so that's already better. And let's do it one, once more for each just to see if that was out of the ordinary. Okay, 752 packets dropped now from the vanilla version, and now the pfRing version. Zero packets dropped by kernel. Awesome.