Walk through creating an invoice in QuickBooks Online, sending it to a customer, and recording their payment. The video covers selecting a customer and product, saving and sending the invoice, then receiving payment via cash, check, or credit card through QuickBooks Payments.
Chapters
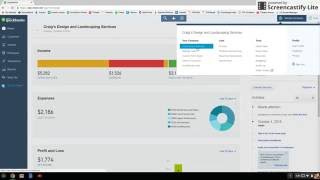
So today we are going to learn how to create an invoice and receive a payment using QuickBooks Online. This particular video is going to show you how to create an invoice for when you're not using estimates within QuickBooks Online. So if you are using an outside software such as PEP to complete your estimates, then this video is for you. Now the first thing that we're going to do is set the option for deposits. So if you want an invoice to show the deposit that your customer has made, we're going to go to the top right corner to the gear icon, select Account and Settings. Go to the left side and choose Sales. Choose the section Sales Form Content. The last option is Deposit. Select Deposit. Make sure it says on and then hit Save. From there, you can choose Done at the bottom right corner, and that setting has been saved. So now when we go to create our invoice, we can show the deposit that our customer made. Now to create that invoice, we're going to go to the left navigation bar and select Transactions and then Sales, and this will bring us to our sales transactions or our Sales Center. From here, we're going to go to the top right corner where it says New Transaction and select Invoice. It does take a moment to load, so I'll A little bit of patience comes in handy here. And from here, it's gonna, we're gonna go to choose a customer. So today we are going to create an invoice for Diego and it will actually load Diego's information in here, which is very helpful. We're going to select product service and we are charging Diego for our painting service today. And we're charging Diego for our Residential Interior Painting. That cost $2,600. Over here, we're going to type in our amount. So, and then you can just click away and you can see that we have now put in the invoice our painting service, our job code in the description, and the amount the painting service cost. As you can see down here at the bottom, deposit. Diego did put $500 down, so we're going to enter in our deposit, and it now reflects in the balance due. From here, you want to go to the bottom right and select Save and Send, and it will actually show you what the invoice looks like to Diego. And you can actually download the invoice or print the invoice if you want to keep a copy on hand. And from there you choose Send and Close. And because this is a fake company, it's gonna say that we can't send emails from the sample company, but you will get a much more positive message when you send your email. From here, we wanna receive a payment because when we send an invoice, we always want to get paid for the work that we do. And we're going to choose the invoice, the same invoice we just created, and under the action column, select receive payment. That was easy. Now up at the top where it says payment method, you can actually select from a dropdown menu a variety of different payment methods. Now, especially if you choose cash or check, so let's say Diego pays us with cash, you want to make sure that it's deposited to Undeposited Funds because although you were paid the cash, it's not in the bank yet, and this will help prevent double entries. Now, if you have QuickBooks Payments set up, you can actually process a credit card payment from here, which will be really, really nice. So you can hit enter credit card details and enter in all of Diego's information there. But in our imaginary situation, Diego paid us with a check. It's an undeposited fund. Again, make sure that we don't double entry because that check's not at the bank yet. And Diego is paying us the full amount of $2,100. So down here at the bottom, we're ready to go. You just select Save and Close. And there we go. We received that payment and it's gonna bring us back to our sales center. If you wanna double check what you just did, you can see up here, it is in date order that we just created an invoice for Diego and that Diego just paid that invoice. And what's great is that under the status column, it actually shows you that this invoice is paid. Just in case you're not doing a back-to-back invoice payment. That typically doesn't happen, so it will tell you the status. So we just learned how to create an invoice for when we're not using estimates within QuickBooks Online, and we just learned how to receive a payment with a variety of different funds in QuickBooks Online as well.