Build a Smart New Year's Resolution Tracker with Sigma
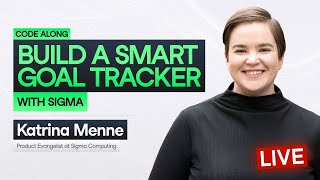
Katrina Many walks through building a resolution tracker in Sigma, Sigma's cloud BI platform. You'll create input tables for goals and daily logs, add AI-generated inspirational quotes, and build charts to track progress. The session covers publishing, collaboration, and how Sigma compares to Power BI and Tableau.
Chapters
Sam.
Hello, everyone and welcome to today's session. My name is Rhys and I'll be moderator today. We're going to kick off in a couple of minutes at the top of the hour, but for the moment we're just waiting so everyone has a chance to join. If you haven't done so already, make sure that you register for today's session. That means we can send you the recording and the resources after the fact, if you haven't already as well. If you want to join in today, you will need to sign up to Sigma. So there is a link to do so on both the landing page in the resources document and I will also send a link to do so now. So, yeah, it'll be Sigma workout Wednesday and that's where you can sign up to join in today.
Brilliant.
We are going to be answering your questions throughout the session or at the end of the session. So make sure that you let us know your questions at any point throughout the session and we'll get to those at the end. So make sure you stick around for that and for anything else, please do check out the resources document that's also linked in the video description on YouTube. For anyone watching on LinkedIn, we will repost it over there very shortly. We would recommend also watching on YouTube. You can click the links in the chat on YouTube and yeah, it's a little bit more difficult on LinkedIn where you have to copy and paste over. So, yeah, if you are watching on LinkedIn, we'd recommend watching on YouTube as well. Just head over to Datacamp on YouTube and you'll see us live. Brilliant. And yeah, for anyone else that's just joined us, welcome. We are going to get started at the top of the hour. We're just waiting for everyone to join and then we will get going. Make sure you register for today for today's session so that we can send you the recording and make sure that you sign up as well. If you're looking to participate in today's session as well, the links to do so are in the chat.
Foreign.
That's just joined. Thank you for joining. My name is Rhys and I'll be your moderator today. We're going to kick off today's session in just under a minute or so. We're just waiting for the last few people to join and then we will get started. If you haven't have, if you haven't done so already, make sure you register for today's session. You can use the QR code that's on screen now. There's also A link in the chat as well. You can also head over to datacamp.com forward/webinars where you'll find this session as well as all of our future sessions as well. Now, to participate in today's code along, you are going to have to do a little bit of setup. There is a link to do so in the chat and also in the resources document as well. You can also find it on the registration page for this event as well. So you'll need to sign up to Sigma's workout Wednesday to get started if you still want to do so. You have time if you start it now, you should be able to participate with us. So yeah, check out those links for anything else. We have put together the resources document for you that's got everything in terms of links that we've got for Sigma and later stuff as well. We are also going to be answering your questions today, so let us know if you have any questions in the chat and we'll be covering those at the end. Brilliant. I think that's everything from me. So now I'll hand you over to your host for today's session, Richie. Richie, please take it away.
Hi there, Data Scamps and Data Champs, this is Richie. Happy New Year, everyone. Great to have you back.
Back.
I've got very excited about all the sessions we've got coming up over the next few months. Please do register for those if you hadn't already. We've got certainly all of January and quite a lot of February available to register for. Now, before we begin, please do let us know what your New Year's resolutions are. Make use of the chat, tell us what you're planning to do this year. I have to say, as it was coming to you, yeah, I was like, you know what, I should take it running this year. And then I immediately hurt my right knee. So I was like, okay, that's a cursed idea. So not gonna do that. But yeah, do let us know what your plans are for this year. So with that, let's kick things off as it's the new year, it is a great time to set new goals either for your career or for your life. But in order to know if you've succeeded in these goals, you need to track your progress. So today we're gonna build a goal tracking app and in order to do this, we're gonna be using Sigma. So Sigma is one of the hottest next generation BI tools and the idea is that rather than being stuck with dashboards, you get to build interactive data applications. So a lot more exciting and yeah, we're going to see how to do that. So showing us how, how to do this is Katrina Many. She's a product evangelist at Sigma. So going straight to the source. Welcome, Katrina. Great to have you here.
Hello. Thanks for having me.
Wonderful. So Katrina's got a decade of experience in data analytics and she's a, a Sigma expert. So as a product evangelist, she does exactly what she's doing today, which is teach people how to use Sigma and build a community around Sigma users and data analysts. So she spends all the time just teaching people. And previously, Katrina was a tech lead at Import Digital. She's also been a senior analytics consultant at PH Data. So with that, I'm gonna leave you to it, Katrina, Please take it away.
All right, thanks for that. If we could pop up my screen, Just want to say hello and welcome. Thanks for joining today. I'm going to take a little bit of a second to talk about Sigma if you've never heard about it before, and then we'll hop right into the build. So as said in the intro, if you would like to build along, we do have a free resource for you to sign up and to build along. If you are a current Sigma customer, welcome. You can do this in your environment if you have the permissions to write input tables as well as use AI things, or you can just take a second watch along with those. And again, we are going to be building a lot of things today, so don't feel like you have to keep track of everything. There will be a recording, we've got folks putting formulas in the chat and all that stuff. So if you have any questions, feel free to pop that in there and follow along as we build. So if you've never heard of Sigma or if you're unsure, this is your first exposure. Again, welcome. Sigma is the only unified intelligence and AI platform out there. So yes, we have that traditional BI experience. We've got space spreadsheet, like analytics, we've got reports and dashboards. We also have embedded Apple or, excuse me, embedded analytics. But what we're going to be talking about today is really the future of what we believe analytics is going to be, which is AI applications. As mentioned in my intro, I spent a lot of time building various reports, various dashboards for folks. And as I was building out those reports, I always wanted to ask my end users, what decision are you going to make off of this? What action are you trying to influence? That's really where applications come in. We want to analytics. You know, you're looking at the Spreadsheets, you're looking at the reports to help make a decision. But then you would always go to a different platform to record or to, you know, make that, actually execute that decision. And so now we can do that all in one central platform. In addition to, you know, the analytics, we can also start to use applications to make our own analytics. And that's what we're going to be doing today, where the thing that we're making is going to be the thing that we're going to be analyzing. On top of that, in addition to that, we have all of the standard or all the things that you would expect from an AI organization. So we've got opportunities to talk to our data, to ask questions about our data. With an AI powered assistant, we have opportunities to build with AI as well. And if you're unfamiliar again with Sigma, we are a cloud platform first or cloud native platform, which means that because we're built on top of cloud warehouses like Snowflake and Databricks and a bunch of other ones that you see down at the bottom, we're going to inherit all of the security and governance that you would expect. And in a normal analytics process, as well as being able to use the LLMs and the AI agents that those folks or those organizations are creating. So at the end of the day you're going to get a full suite of power, whether you're looking for analytics or taking action on top of those analytics and being AI assisted. There we go. So here is an example of some ideas of things that you can build with AI in Sigma. So today we are going to be talking about a fun example, but at the end of the day we do have opportunities or needs in our day to day organizations. And so anything from FP&A to sales, operations, marketing or data, there's all different ways that we can use AI as well as applications I'll be looking at today to really empower your organization. So just kind of keep this in mind for some ideas and we'll talk about some of those things as you're thinking about, you know, how can I use a goal tracker in my day to day life as an analyst or as someone that's interested in data. So let's hop into Sigma itself. I'm going to start off by showing you the end result so we can understand what we're working towards. This is the goal tracker build or goal tracker application that we're going to be looking to build. We've got up at the top, we've got an AI generated quote or An AI inspiration. I don't know about you, but sometimes I just need someone else to tell me or give me a little bit of bump, a little bit of inspiration. We're going to be adding this to capture or have AI tell us something, either an encouragement or a quote for the day. In addition to that, we've got our daily log submissions and our new goal submissions. So we're going to be able to create new goals, new categories to help keep them organized, as well as have a daily tracker to this. And once we have that information inputted or written back to our warehouse, we're going to do some analytics on top of that. So we're going to build a quick visualization as well as looking at some traditional analytics, you know, looking at how, how am I progressing towards my goal overall versus am I just meeting it? Yes, no, and all those sorts of things. So again, this is the end result that we're going to be building towards. Let's hop into Sigma itself. So if you aren't already there, please go to the home page. This is where you'll be starting out today. If you're unfamiliar with Sigma, this is the homepage or kind of the landing page of Sigma. What you see in here is probably going to be different. Obviously I've got some things that I've been tinkering around with, but on the left side you're going to see the home documents, workspaces. That's kind of all just the general navigation as well as some handy links for, you know, what's going to be shared with you, recents, favorites and trash. So kind of self explanatory. And then down below there's going to be the data source that we're going to be using. So if you would like to again use your personal one or user organization one, feel free to do that. But we're going to stay in the Sigma sample database for this example, which is a free database that you can go tinker and play around with. So let's start building. Actually let's start and create something new. So I'm going to go over into this top left corner and I'm going to click Create New. Here are the options and here are some things that you can create in Sigma. They're all going to be kind of based on what you're looking to do with data. We've got a workbook which is where we'll be looking today or spending most of our time. But just keep in mind that in the back of your pocket that Sigma also does have the ability to create data models which are going to be reusable assets, curated assets. Thinking about creating some joins and unions for folks to make it easy for them to use. Reports are pixel perfect reporting, so think about exporting a PDF or report. See some really cool ones that are like contracts or what is it called? It's like a mailing label. There we go. And then we also have data sets which are a precursor to data models. Then you also have this ability to just kind of like tinker around and export data if you're not quite sure what to do. But since we are building an application, we're going to start in a workbook. So again, create new and then click on Workbook and we'll be taken to a brand new workbook. This is going to be an empty space for us to work in. And this is the landing page. Again, this is kind of the main backend of a workbook. So the first thing that we're going to do is actually save this workbook on the backend, Sigma's auto saving all of these things. But I just find it easier if we start off by saving it. So I'm going to name mine Goal Tracker Build and then feel free to put your name or don't put your name or just whatever you would like to do. I'm just going to do Katrina because that is my name. Going to click Save. Doesn't matter where you put it. For now, I would just keep it in my documents. Now we have our workbook saved, let's take a second to look at this navigation as well and then we'll hop into some of the actions of it. Down here in the bottom, we've got the added element. This is the thing, or this is where we can find all of the components or the Lego pieces or the building blocks of the application that we're going to build today. Then over on the right, in general, this is going to be the configuration panel or the settings panel or the thing that will interact with that element on. Then again, down here on the bottom, we've got a traditional application space where we're going to have lots of pages and tabs for having different windows or views into an application, as well as just an overview giving you a hey, what'? In this workbook, what's happening? And then down here is one of my favorite things about Sigma is the lineage. We're not going to spend a lot of time in this today, but just keep in mind, if you want to take a second after the end of this build and Check out how the lineage works within Sigma. It really helps you understand how your data is flowing from one thing to the next. So with that, let's start by adding our first element. So we have two elements down here that are kind of data oriented. Of course, we've got charts that you can make an argument that that is also a data oriented ELE element. But we've got a data and we've got an input element here. So a little bit of the difference here is that a data element is going to be something that is kind of sourced from your warehouse. So you can think about this as like, oh, I need to do a report on my HR analytics. That's where you would go to get that information. But one of the really unique and I think powerful things about Sigma is that we have something called an input table. This is like if a spreadsheet lived inside of your workflow so that you can input information, you can type it in, you can use actions to automatically these things and all of that information gets written back to your warehouse. And again, that's really where the application sense of our unified intelligence platform comes in, where we are able to combine a data source that exists outside of an input table. So again, those HR analytics or your sales plus an input table, we're not going to be doing that today. But again, just keep that in mind in the back of your head that you can do this. We are going to start with a blank or an an empty input table. This means that there's going to be no data sources. It's kind of a, you know, an open field. But again, if we wanted to link, that would be pulling something from a data source. Or you can upload a CSV as well. So again, if you're following along in the add an element bar in the bottom, click on input and then click on empty. And I'm just going to click and drag it up here. You can, if you just click it adds and, you know, kind of move it around there. And now the first thing that we need to do is add a connection or select a connection. This is basically Sigma saying, where do you want to write this data? Again, we're going to be using this Sigma sample database. If you're in the Workout Wednesday environment, it should be the only one that you have access to. But just keep in mind, that's where it's going to be. We'll click create. And now we have this blank input table or this open canvas that we can put in some new information. I'm going to start by creating our goal, our overarching goal list. And then we'll work on the daily one. So this is going to be our goal list. So I'm just going to double click in here again. You can click and delete and we'll just call this goal list. All right, now that we have this in here, don't worry about this. I'll come back to this later. But we've got our columns and we've got some rows in here. So let's start to fill out or kind of create these spaces that we're then going to populate with our, our goal form. So first I'm going to call this category. This is going to be the like grouping or category of the the goal that we have. Then I'm going to click this plus sign to add a new column. We're going to add the column of goal name. So this is a text field. We'll add a couple of these other ones in a second. So we'll add a new one. We'll click text or excuse me, to double click to rename it and then click goal name. Now in addition to adding a column over here, I could also add a column over here. Two ways to do the same thing. So just kind of, you know, follow your heart on what you would like to do for there. But this next column that we're going to add is going to be a number. This is the goal amount. This is the thing that we're actually tracking. So if you remember in our goal tracker build, we've got some, some analytics around, you know, hey, I want to read it, read a new book or I want to get eight hours of sleep a day. So that, what is the number? What is the thing that we're going to be tracking? So again back in our build we're going to click number and this one we'll just call goal amount. Next we've got a. When we're thinking again, when we're thinking about these goals, we kind of have two different types or categories or ideas around these goals where you can have something that is a daily thing. So I want to get eight hours of sleep a day. Or we could have, I want to read a new book where I'm going to track the number of pages that I've read in there. And that's something that's cumulative. So we have this opportunity to say, you know, is this kind of a one time thing or is this a cumulative thing? Do I want to like make progress towards it? I don't really, I guess I don't really care how many hours in a month I sleep. I just want to make sure I'm getting the same, you know, getting eight hours at night. That's going to be much better for my health. So with that, we're going to add, add a true, false or a checkbox or a boolean field. So again, click the plus sign and then checkbox. And then we're just going to call this cumulative question mark and we'll add enter and we'll add that one. And then I'm just going to expand it so we can make it easier to see. And then the last thing we're going to add is a column for AI Help. This is going to be a text field because we're going to ask AI to help us create a plan or give us some advice on how to keep or how to stick to those goals. So we'll add a text field again and we'll just label this AI Help. Now, if you are renaming these columns, like, feel free to do that, you know, kind of what makes sense to you. But again, keep in mind that the formulas that I'm going to be using are attached to these column names. So you'll have to adjust on your own. But if you want to rename it, feel free to do that as well. So now we have the table. We've got the list of things or kind of the fields that we want to populate in a space for them to list. Now we need to move on to the, the form or the input that we're going to populate. So again, I've got over here, I want to make a new goal. We need to create this thing. So I'm going to come back here, I'm just going to move this up again. So we've got plenty of space in here. Feel free to move it around or not. So when we're thinking about adding new information to our, to our input table, we need to have a spot that captures that information. And in, in Sigma, those are called controls or control elements, and they are found in that control section of the add an element bar. As you can see, we've got a lot of different control types. I'll take a second to talk about these and then we'll hop into the build part of it. Some of these control elements are more traditional analytics, I would say, if you think about a date filter or a slider or range slider for saying, hey, this is the amount or the area that I want to look at as well as we've got Some things like a legend or a hierarchy, which are about how you interact with data within Sigma. For this one, we're going to be primarily using these ones that say input. Those are going to be something where an end user can type information into it. So in, again, in that Atom element bar, click on controls and then we're going to click on this text input again, I'm going to click and drag, but you can click and then just drag it to wherever you want it. So in here we've got our control, our first list control, our first text control element. So if you take nothing or I guess I hope you take multiple things away from the session. But one of the things that I really hope you take away from the session is that naming is very important or helping yourself by renaming control IDs and a lot of other things will just make your life easier as a builder. So strongly recommend always renaming these control elements. So on the back end, this is how Sigma references that. So again, it's going to kind of act like a placeholder or parameter or a field that we can then call and reference in formulas or in other actions that we're going to be adding today. So over on that right side in that control control element, and again, if for whatever reason you clicked out of it and you're in this thing, just click on that element again in that new control and then we're going to rename this Control ID to new category and then ce. So again, this is my personal preference of a naming convention. I always want to help myself in the future, know what I'm actually referencing, know what I'm looking at. So in the way that I'm thinking about this is that this is the new category. This is something new, as opposed to the daily tracker that we'll add later. What field is this? What are we. What are we trying to capture from the end user? Well, it's a category. What, you know, kind of field or what kind of goal do you want to have? And then CE just means control element. I've seen a lot of folks use like selector or input or some sort of action verb to again help them reference that this is the input, as opposed to the data source or the column itself of the category. This will become more apparent later. But again, feel free to put what you want in here, but know that the column or the formulas that we'll be adding in here are going to reference this amount. And you do have to have it. You know, it's a spell, it has to be exactly so you can See that when I renamed my control ID over here, it also changed the title of this. I don't know about you, but this is not a super intuitive thing. I think that we can make this a little bit better. So I'm just going to come over here to this title and I'm going to double click in here to give it a new name or give it a new title, which is what is the goal category. We'll do a question mark and then I'm just going to click Enter or return. So again, you can see that we changed the title of this, but the control ID did not change. All right, we're gonna be adding a few more control elements in here, so we'll go through them one by one to make sure that we've got a control element kind of matching up with all of the things that we want to input in here. So next I'm going to add a control element of a text item. Again, a text item. This is going to be the goal, like the name of the goal. So again, new goal ce, we'll rename this to be what is the goal? Question mark. Next we're going to pull in a number controller, a number input. This is very similar, just a different data type. So again, this is going to go into that goal amount. So new goal number ce and then we'll rename this one to what is the number? Next we're going to add a control element for a checkbox. This is going to indicate whether or not this goal is cumulative. Um, so again, we'll do new goal ce and then we'll rename this to be Is this a cumulative goal? Now that we have the spaces or the things that folks could interact with in order to input, we need to have a button or some action spot to have an action so that folks can click submit when they fill out this form. Instead of in the control element, we're going to go to ui. This is again, as you can see, it's got a lot of UI elements or things that you would want to add to your application. But we're going to choose button. Again, I'm just going to click and drag this one out here. You can see that it's got this hover. It's got this. Hey, you should. You should click me. And we're going to come over here to the text on this side and we're going to call it Create new goal. Again, it's an action. It's indicating that we're going to submit something to me. Feel free to play around with coloring if you would like. We're not going to spend a lot of time on that in here, but the last thing I'm going to do is to pop all of these things into a container. A container is basically just a sectioning or kind of saying, you know, hey, all these things are related. You can do a lot of visual design things in containers, but for now we're just going to use them for our purpose. Again, you can come to layout and then click on container and pull that in. But a handy way is to just click and drag and select all of the things that you want in a container and then click on this to create container. Or you can use the hotkey as well. You can see that everything popped into this grouping of the white background. Then again, always recommend renaming things to make it easier on yourself. In the future we're going to come up here to where it says container one, double click that and we'll say the add a new goal category form. These are all things that are going to be on the back end. So, you know, I recommend making them a little bit wordy. But you know, you can, you can add it to whatever you like. It would be. And now that we've got this category or this form, we still want to give it a title so that the end user can kind of see what is happening in here. What's this form is actually for. So again, we're going to go to the UI element and we're going to add this text field. This is basically just a blank text element you can type anything in. So again, click and drag and put that in here so I can hard code things. Or we can use dynamic calculations which we'll do in a second. And so this can just be add a new category or something like that. What Again, whatever you would like in here. And then feel free to play around with the formatting. You've got some formattings up here. Oops. Just need to highlight and do that. But again, not a big deal. Kind of whatever your heart desires here. So now that we've got this first form, we've got our category, we've got our goal, we've got our number, and then we've got this option for the cumulative goal, which is all of these four columns. And we need to add the AI HELP one. So this is where we're going to start to look into Sigma's abilities to use AI. There's a lot of different things that you can do in Sigma with AI. And so we've got some Resources, some very specific things about how you can use or how you can reference AI in Sigma. So folks in the back, please post those things, those resources in there. We're going to go a little bit quick on these things, but if you would like to explore these more, if you want to find out more information or see like kind of of the full breadth of the things that you can do, highly recommend checking out these resources. It's everything from just kind of a general overview of like what is AI, what is AI query in Sigma, as well as some of the practical tactical how to's in there. So in short, using AI in Sigma is kind of two different components. So as we said at the beginning, Sigma is built on top of the cloud warehouse. And so at the end of the day Sigma is just kind of passing that information back to your warehouse to ask at different questions. You know, what are my total sales for the day? That's a question that you can use the UI of Sigma to then ask your warehouse and then the warehouse kind of answers that question, sends it back to Sigma. So Sigma is always like a window into your warehouse and so we're able to use that ability to reference or to access the AI capabilities of the underlying warehouse. So what we're going to do today is we're going to ask Sigma to help us with a couple things. We're going to look at two different examples. We'll start with a very simple one and then we'll go into a little bit more of a complex one. So again we, the first one that we're going to look at is this AI generated quote. So we want to ask our warehouse to say, hey, can you just give me a quote, give me something to help me stick with my, with my goal. And the way that we're going to do that is through what we call a pass through function. We pull up the documentation for this one. Again, this is something that we can pop in the chat if it hasn't already. But basically what we're going to do is use this call text or call variant to basically say, hey Snowflake, can you help us answer this question? Or can you use this thing to help you use it or follow a prompt? So for this example we are going to use Snowflake. Just want to call out that this is compatible with a lot of different warehouses. So just if you don't have Snowflake, don't worry, this is just an example. But we're going to be referencing the function of AI complete to basically ask ChatGPT a question. So let's go back into our, into our build to see how we would do that. Since this is just a text element or just a quote that we want up at the top, we're going to use that same text element that we had here for the category. So I'm going to go UI text, we'll pull that in. And if you can see here, we've got the option of, yes, we could hard code things to type in, or we can press equal to add dynamic values and reference a formula. So this is actually our first use of a formula in this build so far. We'll look at more traditional applications of formulas a little bit later. But this is the formula bar in Sigma. It should be very familiar if you've ever written anything in a spreadsheet before. But basically this is just the way that we can reference different things in Sigma. So I'm going to use the Sigma formula of, you can see as I'm typing this in Sigma, saying, hey, you're looking for this thing, right? And I'm going to click on it. And again, just to explain what's happening here, is that we're going to ask Snowflake to say, hey, you know that function that you have that's called AI Complete? We want you to run that. And here's the information, here's the puzzle pieces, here are the prompts or the arguments that you need in order to run that or to do that thing. So, oh, sorry, I forgot to mention, we're using call text because we want to return a text. That's what we want Snowflake to give us. At the end of the day, we also have an option to do variants and numbers and all those sorts of things depending on what type of formula we want to use. So again, call text. That's the Sigma thing. We're going to say, hey, Snowflake, you know that function that you have called AI Complete? That's what we want you to run. So we're putting this in quotations to say this is the name of the formula, and then based on the instructions or based on the syntax that is available from Snowflake, we can see that in addition to the complete, we also need to include a model, so the LLM that we want to run, and then the prompt or any parameters or any pieces of that puzzle that we want to use. So this, we're just going to follow the documentation that is in here, here. And again. Oops, let me start over since I left that one again, this is something that we. There's plenty of documentation on this, so just kind of follow along for now. But we'll do call text again and we'll do AI complete and then what is the LLM that we want to run? So again, what Snowflake had said, for the documentation, we're going to use OpenAI GPT 5.1. So again, this is the name of the LLM. You can use a different one if you want. Feel free to look at the documentation and choose this. But I like this one. It just makes sense to me. And then we need to give it that prompt, we need to give it that instruction or, you know, hey, what are we trying to ask ChatGPT to do for us? So we're going to do a comma and then we're going to ask it to provide a 2 to 3. Whoops, sorry, I'm looking at the provide a short inspirational quote or something to inspire me with my New Year's goals. So then we just pop that in a quotation and then add that parentheses at the end to complete the formula. So again, what's happening here is that we're basically. If you were to open ChatGPT and say provide a short inspirational quote or something to inspire me. Whoops, let me spell that correctly. Inspire. Inspire me with a New Year's goal. So this is something we're going to ask Snowflake to run. ChatGPT to provide this. I like to really click the check mark on here that just solidifies in there as opposed to clicking Enter, and then we'll give it a second to load. So you can see that on the back end, Sigma is running that, or it's going out to the, to the warehouse and asking Snowflake to run, run this. And there we go. We've got a new quote in here that's giving us some inspiration. Every time that we are using this prompt, Sigma will go out to Snowflake and ask it a new question. So if we want to come in tomorrow and then have everything refresh, it'll automatically refresh and go out to Snowflake and ask a new question. We can also come here and then just refresh this real quick just to again, just demonstrate that these are going to be live queries against your warehouse to get new information or new insights or follow up with your data. All right, so so far we've got this quote to help us inspire, and now we're going to basically apply that same principle of say, hey, hey, chatgpt, can you do this for me? Well, we're going to use some of the puzzle pieces that we have in our data so that we can combine the power of AI with the information that we have in here. We want to have AI help us make a plan or to give us some insights or some ideas to help us keep with our goal. We want to combine the puzzle piece of this query plus the goal that we have in here. We've got that idea where we want to put this in for in we're going to run this thing. But how do we get Sigma to capture the information and put it into this input table? Well, we have something in Sigma called actions. We're going to come back down here to this button. If you remember we were talking about, hey, I'm going to click on this and it's going to submit something. Now we're going to create those actions in order for it to be written to the Warehouse. I'm going to click on my button and then I'm going to go over to my configuration panel and I'm going to click on action. And now we can add some actions or something to execute when we are creating this action. Just a real quick. Action sequences are kind of groups of actions. You can make them cascading. You can run multiple things at the same time depending what you want to do. We're just going to keep everything in the same action sequence boxes. Our actions are going to be very simple what we're going to do. Since we already have an action sequence box in here, for whatever reason it delete, it got deleted. You can always click here to add a new one. But within this action sequence box, when someone clicks on this button, what do we want to happen? We want to add an action in here. And what action do we want to do? Well, we've got a lot of different options in here, kind of depending on what you're looking to do with your application. You've got really simple things like opening up a modal which is kind of a new screen for you to put in information at least kind of like a pop up window. All the way up to super complex things like running a store procedure or generating information for an iframe event. And that's like kind of for embedding. In this example, we're going to be using the input table actions which we want to do an insert a row. This is going to be, we're adding a new goal as opposed to updating or deleting that row. So updating would be like, hey, I want to overwrite this information and then deleting is obviously remove it. A thing to keep in mind with input tables is that on the back end you are always able to access information that's happening in here. So if you have any issues with, you know, or have any concerns about governance or auditing, don't worry. All that information is still available in Snowflake because that's where our input table is written to. But to come back to this, build what we're going to do again, if you haven't already, click plus to add a new action and then we're going to scroll down to input table and then click on insert row. So I'm just going to move this up here so we can see it a little bit better. So what are we trying to do? Let's figure out this configuration panel. So we've got insert row. Where do we want to insert this row into? We only have one input table in our data source. So Sigma is like, yep, you probably want this one. And yes, that is the one that we want. And then don't worry about this part, we'll come back to that in a little bit. But then we need to tell Sigma where are the values that we want to source this information from. Again, we don't have a lot of puzzle pieces in our work, so Sigma's done a really good job of kind of guessing at what it thinks that we want to source this information from. Always recommend double checking this just in case. Just in case something is named similarly or Sigma doesn't know because it is still a platform at the end of the day. But what's happening here is basically we're saying, hey, Sigma, you know the categories column. We want you to look at that control or that control element and look at which control element? Well, the one that's called what is the goal category. Again, we're going to look at a goal or excuse me for the goal name. We're going to look at the control of what is the goal, and so on and so forth. Once we come down to this AI help one, we don't have an input for that one. And Sigma offers the ability, of course, we've got a static value here where you can just hard code something. We also have the control that we looked at, but we also have a formula. And I think that this is one of the most powerful aspects of Sigma applications is that we can pull in various information that we don't need from the end user or we don't want to ask the end user, but there's plenty of information that we can still pull in here. So with this we're going to add that. We're going to add that AI help in here. And so we're going to pull in a very same formula. So again, just click on there and we'll do call text for this one. And again we'll do AI complete. And again OpenAI GPT 5.1. And this time we're going to ask it to provide a two to three sentence action plan of ideas to help me execute this goal. So we're going to add a quotation. Oops, sorry, I forgot the quotation at the beginning. So that's the prompt. And then we're going to do an ampersand or an. And to basically concatenate the information that we're going to send to Snowflake. Snowflake. And what information do we want to send? Well, we want to send whatever the end user puts into that. What is that goal? So we're going to do a bracket to pull up the references to those control elements. And then which control element do we want to pull in? Well, it's the name of the new goal. So again, this should be the formula that you have in here where we're going out to ChatGPT to basically say, hey, can you help me come up with some ideas for this specific thing? Again, this is the start of how we start to reference data within Sigma and AI. I'm going to click the green check mark there and we'll close this. So now we have this action that is configured and ready to go. So let's test it out by adding a category of or adding a new goal of health. We're going to drink eight glasses of water and then what's the number for that goal? Well, it's eight and then eight. Is this a cumulative goal? I'm going to say, I guess we could say yes or no. Kind of depends on how you want to think about this one. I think for me it would be something where I want to track the goals or track the number of classes I create. But we're going to click Create Goal and then Sigma will create that action and it's going to write it in here. So again, you can see how we're creating this form and then populating the information in here, here. And then I'm just going to click on this and we'll see, we'll see the suggestions that ChatGPT has in here. For this example, if you could please add this goal and then the other goal of what I say for reading the book, we'll do happiness, I think it's happen makes me happy to read a book. So I'll read a new book book. For this one we're just going to say January. You know, I want to read a new book every month. And so we'll kind of add a new one each month. And then what's the goal number for this one? Again, this is something where I want to track the pages. And so I'm going to say let's say we have a book that's 480 pages long and we can, you know, kind of go from there. Or again, you could just do, do one. But we're going to create this goal and then again Sigma is going out to, to Snowflake to ask for some advice on how to fill in this information. So we've got that in here and you'll see that Sigma has these three blank rows in here. That was when we first created the input table, just to kind of say, hey, this is, you know, information that you can add in here. You can always click and manually add some things in here. So we can delete these since we don't need this information. But if you just click on the one and then shift and then right click and delete, that's how you can delete rows. They can manually add one here, here. So so far we've got a spot to write information and then a form to capture that information as well as our AI generated quote. I'm going to move on to the daily tracker next so that we can add a daily, daily tracking and kind of go from there. So I'm just going to move these things around just to make it a little bit easier to see things on the screen again. Feel free to do this or don't. It's kind of up to you. What we're going to do is basically we repeat the same process but at a different level of granularity. This time we're going to have an input table again, a blank input table. So I'm just going to pop that in there. This is going to be for a daily tracker, we'll select a connection again that Sigma sample database. And for this new input table, we're going to call this daily log. For this one we're again going to add a lot of the same calculations or the same thing things and we'll, we'll go through it and kind of add that information. So we'll do category. We've got our name number for daily progress. For this time I'm going to add a text field for notes. So maybe we want to say I really like this book or it was really easy to drink this water. You know, just kind of information that is helpful for tracking those things. We're going to add a date column type. So this is going to be what day did we put this information in? And then last we've got that same checkbox of cumulative for true false. So now we've got again the space that we want to put information into. And then we need to go through and create our form. So in sigma, one of the easy things that you can do is to copy and paste or just duplicate a lot of these things. So if you would like, you can do that for these. I like some of the different designs that kind of wanted to show off some of the other areas. And so I'm going to go through and create a segmented control. This is again just a different control type or a different parameter. It's like visually different. That's pretty much it. So for this one we're just going to type in these manual list manual options. For now, just for the sake of demonstration, I'm just going to type that in there and then we'll do health. You can source it from here. So again, if we wanted to source it from our goal list, we could do that and then have it automatically update. That can be really helpful. But for now we're just going to, for the sake of time, we're going to just do this one. I'm going to rename this one to daily log category ce. So again, a different control element name just to show the daily log for this category and then we'll add a goal selector. This time I do need to source it from my table. I do need to have it be goals that I've added for information I put in here. So my favorite way to do this is to go up to the goal name. We'll click filter and you can see that it adds a filter in here, here. And then I'm going to click this three dot menu and then convert to page control. So this just means that I can now interact with it. When I click on something in here, it is also then going to filter that down. For this example, it kind of doesn't really matter if we filter in here, but for now we'll just keep it. If you want to remove the filter, you can do remove it there. One thing I do say, or one thing that we definitely do need is to to remove the allow multiple selections because we only want to log one goal at a time. We've got some other configurations here, so feel free to change that if you would like, but it's kind of up to you. And then for the control id, we're going to call this Daily Log goal ce. So again, the Daily log versus the name of the goal. All right, and then next we're going to add a number input. This is again, like, what's the progress that we're making towards this one? So I'm just going to call this daily progress amount C, E. So, man, did I read five pages? Did I read 500 pages? That's kind of that idea. And then we're going to pull in a different control element or different element. This time we're going to use the text area. This is going to be for notes. Again, you can see it's a little bit. It's just a little bit larger. There's more space, space that you can add for information as opposed to the individual text or the individual text elements. So this is going to be Daily Log notes ce. And then again, we'll need a submit button. So the UI and then submit. You can kind of just call this whatever you would like. Submit Daily log. Right. And then again, I'm going to pop all these things into a container and then rename that container to the. The Daily Log form. Something makes sense there. All right. Once we have in all of the information that we are, all the fields that we want in here, we need to again add an action so that Sigma knows to write that information into this Daily log versus the goal list, or just kind of like to not do anything with it. So again, we're going to click on this submit button, we're going to go to action and add a new action. This one. Or a handy trick is that if you know the name of your action, you can just type it in and Sigma will filter down to that one. So we're going to insert a row and again, I'm just gonna move this up here so we can see it. So you'll notice that Sigma kind of guessed that we wanted to have an action go to that same table. We do not. This one is a different one. So just make sure that when you're inserting the row instead of goals list, you've got Daily Log. And then again, we're going to make sure that all of our control elements are, are the ones that we want as opposed to the ones for the new category. So we've got our Daily Log category. We've got. So here's an example of one where Sigma Metagas and it wasn't quite what we wanted. And so for this one we want the gold name. Daily progress is the amount. Yep, that's the right one. And then the notes is the daily log. Notes. Notes. And then for this one we've got, we don't have a control element for the dates. If there was going to be time, I was going to show you how to do that, but I think we're going to run out of time for this one. So for right now we're just going to pop in a formula to again capture information that we aren't going to ask our end user. So we'll do formula of today. So very simple, very straightforward, just what's today's date? And we'll pop that in there. So again, if we pop, if we come in tomorrow and enter this information, it's going to say, say tomorrow's date. And then we've got this cumulative one where we're want, we want to know whether or not to like add up this goal as we're tracking. So again, is this like progressing towards something or is it just an individual goal? So for this one we don't have this information and I don't know about you, but I don't always want to be filling out this information every time I would write a new log. So what we're going to do is we're actually going to look up this information. We're going to reference a different data element in this formula to again capture that information in here. So we're going to put our formula in here. So again, similar to what we did here, where we're going to look at a calculation, click on here and we're going to use the, use the, the calculation of lookup. This is one of my favorite formulas in Sigma. It basically is like a Vlookup or an xlookup, if you're familiar with that from Excel, where we're going to run reference a different piece of information. So to fill out this formula, what are we going to do? We're basically going to say what's the end result? What is the thing that we want for this? We're going to do a bracket to basically say, hey, we want to reference something in Sigma. Where is the information that I know or that I want to find? Well, it's in the goal list element, the goal list input table. And then what are the columns that are available there? Well, we want to find this cumulative one. So this is the end result that we want to reference. And then how do we know if we find the right one, there's multiple inputs in that input table. So how do we know? Well, it's going to be the one that is in the goal selector, the thing that the individual we have selected. So again I'm doing brackets to reference the control elements. And then we want the daily log goal ce. So again the control element that is the daily log and the name of the goal and then where or you know, okay, we've got the goal identified in the data source. How do we know which one is the right one or what to look for in that match? Well, again, in that goal list table, we're going to look for the one that says goal name. So again we'll pop this formula in the chat. But what are we looking for? We're looking for whether or not it's cumulative and then we're looking for how do we know what the match is. It's the one that we've selected as the goal that we want to log towards. And then we're going to look for that goal name in that data source to make sure that we're pulling in the right cumulative. So again, click the check mark and then let's test it out. So we've got our happiness in here. We're going to do read a new book. What is our daily progress? Let's just say we read 40 pages today and if you want to put it's a cool book, something, something in there for the log and we'll submit our daily log. All right, and there we go. You can see that we've captured that same information from our control elements as well as pulled in information that wasn't asked of from our end users. So again, what's today's date as well as if something is cumulative. All right, I think I'm going to try and run through the last analytics real quick and then we'll save the last few minutes for questions. But again, make sure that you delete these rows that we've got in here. Did want to make sure that we're showing the analytics side of things. So if you haven't already, please make sure that you do input something for the happiness log in here and then again just for the demonstration so we can show the analytics. I'm going to manually copy and paste this information just so again we can show different logs and I'm going to edit some of these days in here and you know, we'll just say I read this and again I'm just going to click, double click in here and Change some of these, these values. And then I want to just add a health one in here. For the, the water, let's say we drink 8 ounces just for some, some difference in here. So feel free to do that or just follow along at this point. So I've got my information in here and now we want to start to do some analytics. We want to start to build out some of these charts. So when we're looking at this information, we've got our individual row values, but we want to make sure that we're aggregating up to a different level. If they are cumulative, we're just kind of understanding what's our overall progress towards, towards this goal. So in Sigma, I'm going to create a child element, which basically just means it's sourced from something else. And I'm going to click here and I'm going to click table because we want to copy or basically copy that information. And then in here I can start to do a lot of different analytics that you again would expect from a traditional BI platform. I'm going to go over to Properties and we're going to create a grouping or group by statement. If you're familiar with SQL, where I'm going to say for each category and for each gold name, what is my progress? You can see that we are kind of. It looks a little bit visually different in here. We've got an opportunity to kind of expand and collapse. All of that information is still there on the back end, but we're just going to look at it or kind of format it differently. This is similar to a pivot table, but not quite exactly. We've got pivot tables in a different section. Once I'm in here, I want to again then have my cumulative progress or have my goals kind of add up to something so I can visualize the individual progress as well as the cumulative progress across there. So the first thing I'm going to do is sort my days by ascending, just to make sure that I've got them in the order that I want as opposed to not the correct order or not a cumulative order. And then I'm going to add a new column. So again, I can come here to add a new column or I can come to the table itself to add a new column. And then here's that formula bar that we saw earlier with the text element again. This time it's just saying, you know, hey, for this element, for this, we're going to basically say, hey, Sigma, if our goal is cumulative, we want to have you do a Cumulative sum for this. So we're gonna say if. And then actually I'm just gonna click on my cumulative column. So again I can just say, hey, if this is true or if this value is checked, then give me the cumulative sum of what category? Well, it's my daily, daily progress. It's going to be that one. All right, Then we'll click green or enter and we can see that we're getting kind of a running sum or running total of this and we'll call this our progress, something like that. So now that we have the calculation set up, we want to create a visualization off of that. So again I'm going to create a child element. We'll come to chart. And for this one I'm actually going to change this chart type to a combo because I want to show a bar chart and a line or an area chart, I guess up to you for the individual progress as well as the cumulative progress. So I'm going to click this downward facing arrow for the chart type and click combo. And then I'm just going to start to click and drag my information in here for. For how I want to build this. So for my X axis I want my day because it's going to be by the day. And then for the Y axis I want my daily progress, which is this one. And I want my overarching progress or my cumulative progress. So you can see that we've got a chart. But this is actually combining all of the progress for all of the goals, which is not going to be helpful. It's not super accurate. So we're going to trellis or we're going to split out the visualization by. By our goal name. So click on the trellis and then we'll go goal name. And then I'm going to do columns again. If you want to do something else, feel free to to do that. But you can see now that we have our progress or our logs for our drinking water as well as our daily progress for our reading a book and progress across the board. I'm going to skip the formatting for right now just since we're running time. Sorry about that. But we can follow up with that if we want some more information. But for now, just keep in mind that you do have some formatting options in here to make it look prettier and to deal with some different of the axes things. So now I have my. There we go. So now I have my two forms for adding a new goal as well as a daily tracking of my goal and some analytics to help me do some daily progression and a visual visualization for this. I like these building blocks. I think I'm ready to go for Lisa's first iteration. You can always come back and make things prettier or edit things around. So I've got this information, but I don't really want my end user or I don't want to look at my input tables all the time. And so what I'm going to do is just click and drag to select both of these and then click this down or this three dot menu and I'm going to move it to a new page. We'll call this page my data page and we'll just double click to rename it and then I'm going to click this downward facing arrow and then we'll hide this page. So again, when the end user comes and looks at this, they won't see this backend data because this information so far we've been building in a workbook that is in edit mode or draft or excuse me, in draft mode. We're just kind of starting to build it. We haven't actually published anything. We haven't committed to anything. We want to commit to something in order to say, hey, to we need you go to this thing, it's going to be this completed view. Sigma differentiates the way that you can write to information and input tables. And so we need to make sure that the spot or the, the format that the workbook is in that someone's going to be using this workbook matches the input table edit mode. So what we're going to do is in the input table edit mode or data entry permissions, we're going to change it to be editable in publish version. For now, both of these are going to be the same. Just know that you can create different permissions based on account types. So we're going to do that and then you'll notice that it's not going to take effect until we click Publish. We'll go, we'll go back to our page one, we'll just kind of rearrange some of these things again. Feel free to kind of follow along or just, you know, do this or kind of move it to wherever your heart desires to make it look pretty and we'll put that in there again. We could do other containers and lots of other things, but for the sake of time we'll just go with this and we'll click Publish. So now this is telling Sigma that yep, this is what we want. We're ready to go and Then we'll go click this downward facing arrow and go to the publish mode. So now this is, you can see that we don't have that hidden data tab and this is where we could start to fill out this information and actually use this on an ongoing basis. All right, I know I went way over on time, I'm sorry about that. But said hopefully this helps you get to a complete progress for this and I can hang out longer and answer any questions in the chat.
All right, super. Thank you, Katrina. I very much enjoyed that. Actually, a lot of it felt familiar. So back in my sort of our days, I used to create a lot of these sort of little applications using Shiny and that was very fun, but it required so much sort of technical knowledge to make it work. That was so easy. Like the hardest part was typing Inspire correctly. So I love that. That was very straightforward. So a couple of questions for you. I think if I was going to build something like this, I would want to separate the input section with the output. Is there a way to have multiple pages in these?
Yeah. So let's hop into this completed one just so I can show you what we were maybe going to get to if I had time. So one of the things that Sigma has has is called a tabbed container. I really love this one. It's basically like tabs in a browser where you can have these buttons to navigate those things. So you can have something that is available to the end user but still hidden. Again, when we go to this publish mode, I can click on, hey, do I have my daily log or do I want to add a new goal? We've got that option again, we've got the multiple tabs in here. I don't have any in here. Then the last thing that is always an option option as well is something called a modal where if you click on it, it like opens up this window. So again like a pop up window and you could have your form in there and do that sort of thing. So again, lots of different options depending on kind of where you want your end user to, to interact with. I think input tape or excuse me, I think modals and like the popover menus are really great ways to say you might need this, but maybe not all the time versus like the daily submit one that you'd want to have access to all the time.
Okay, that sounds cool. So there are quite a few options there. The thing is, I guess if you're building something substantial, you might want to collaborate with your teammates. Is there a way for multiple people to work on building one of these things?
Yes. Yeah, great question again. One of my. I think it's like a really early thing or it's very subtle, but it is so powerful that you can have multiple editors in the same workbook at the same time. So if I'm in edit mode and I want to share this with someone, I could type in your email and we could collaborate in here. You'll see, like, my name pops up in here. And so you could see, you know, whoever you shared it with and whoever is working in there can see that you also have different options to kind of save or to create like versions or iterations of something to kind of say, hey, before I click publish and share this with the world, can you just check it out and make sure it's exactly what you want? You have that option as well through version versions in Sigma.
Okay, nice. All right, I guess maybe for inspiration, what's the fanciest or most sophisticated one of these Sigma applications that you've seen?
Yeah, I think there's a lot of different options within Sigma. When I think about the fanciest ones, I think about fancy in the sense of solving really complex problems. We have headcount planning, financial reconciliation. I, I have built one that is like a health care app to help folks get assigned to the right clinical resources and it's using or clinical trials. Excuse me. And so it's like really powerful in the sense that it's like solving a unique problem that a platform maybe didn't exist for. Again, we've got lots of solutions for existing platforms like financial reconciliation, but I think that the, like, the fanciest things are also going to be the ones that are very beautiful or very just like, as you said, simple but intuitive. And they just make sense for end users. I think some of those are the ones that come to mind.
Okay, all right, so it sounds like it can solve some fairly sophisticated business problems there. One more before we finish, because mistakes always happen. I feel like analytics teams are always having to roll back mistakes. Is there some sort of version control built into this?
Yeah. So again, those versions that I mentioned before, they will allow you to, to say, hey, here's the version that we're editing and here's the published version. You can assign different access to those. So you could say, like, hey, my end business users can only see the version of this workbook that is like tagged as ready to go or kind of whatever you want to name that tag. So you've got that option for version control. Again, we just also released or last quarter released tenants. So you can have different data even attached to those different things. So again, there's a lot of different options depending on if you want to go like, hey, this is just a very simple. I just need to like check it real quick all the way up to. I have hundreds of thousands of users across multiple companies and I need to make sure that they're getting the right versions with the right data and all those sorts of things. So any, anything in between, we've got options for that.
Okay, nice. All right, so if you make mistakes, it's okay, you can roll things back. Yes, we do have one question from the audience. Before we get to that, I just want to say next week we've got five webinars so. So plenty of stuff to sign up for. We're going full on that. Use the QR code for future events to register. A question from Mike is saying basically how does Sigma compare to things like Power bi, tableau and if you know a bit of SQL, can you pair it?
Yeah, so a couple, couple things that I'll say is there's lots of really great resources on the comparisons between, between those two things. I personally come from a really heavy tableau background and for me the things that really made a difference are going to be this input table. That's really like the big difference where I can start to, as I said in the beginning, I can start to capture the insights and the information and the actions that I want to execute within the same platform. I don't have to go somewhere else to say I looked at my analytics and I said these are the three people that we want to send this marketing campaign to. Let me go out to this other system and then send like make sure that they're corrected in here. It's like you do it all within one system, within one platform because you can do all of that through input tables, the automations of actions, you know, and really using APIs to get information in and out of Sigma. There's a lot of capabilities you can do. I think also it's some of the other things that I think of when I think of a comparison are going to be built in pivot tables. I spent a very long time, I'm hacking my way to pivot tables in other platforms, but in Sigma is just built in and it's super easy and it's very intuitive. One of the reasons why I fell in love with Sigma or joined Sigma is that it's finding the Sigma is all about finding like the elegant and the simple and the intuitive solution to something that exists for everyone on like a day to day problem, but also providing, you know, a space that anyone can do it so you don't. As you said, this is a familiar interface but you were hampered before from a technical interface. I don't have to know something super fancy. I can be a business user and create something, but I also have those capabilities. We do have the ability to write custom SQL call different various things within your warehouse. Again, anything from a very small and simple all the way up to a super powerful and copy complex. And we want to enable anyone to be able to build with it.
Okay, yeah, I like the idea that basically anyone can build stuff. So it enables that sort of self service analytics style things where the business people solve their own problems they don't have.
Yeah, sorry, I forgot one more thing. With us being built on top of the cloud warehouse, you can access any amount of data that basically your warehouse can load. So I've personally worked on tables that have like billions of records in them. And so again it's something where it's like, it's fast and it's easy to use.
All right, super. And if you want to learn more then check out the resources document linked in the chat. So there is a link from there to the Data Camp course on getting started with Sigma. So with that we are well past time. So just to say thank you again, Katrina, that was a fantastic session, a great way to kick off the air. Thank you to everyone in the audience who showed up today. Again, I hope to see you all next week. Five sessions come to all of them.
More from Richie

#359 My Best Friend is AI with Valerie Tiberius, Professor of Philosophy at University of Minnesota







How AI Agents Will Work While You Sleep | Ruslan Salakhutdinov, Professor at Carnegie Mellon

#358 How AI Agents Will Work While You Sleep | Ruslan Salakhutdinov, Professor at Carnegie Mellon

