Let's Make Chicken Parm for Dinner Tonight!
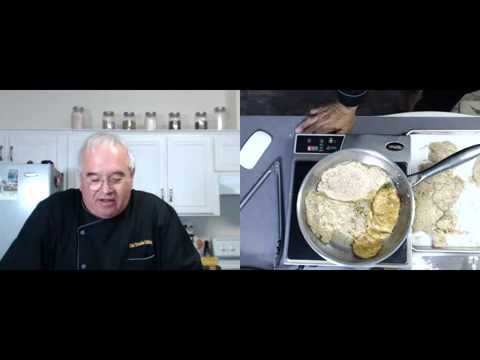
Dennis Littley shows how to batch-cook chicken Parmesan for the freezer. He butterflies and pounds chicken breasts, sets up a breading station with one wet hand and one dry, pan-fries in olive oil on an induction cooktop, then freezes the cutlets in Ziploc bags with wax paper between them.
Chapters
All right, we are recording. And whenever I make chicken parm, I never just make enough for the one dinner because it's really a batch, you know. It's just as easy to make a batch of it and freeze some of it as it is to make a couple pieces. Once you start breading, you know, the pain in the neck is getting all the breading ready and getting that started. So once I set up my breading station, I like to do enough for at least 3 meals so I can go in the freezer on days when I'm tired and I don't have time and pull out some spaghetti sauce, some marinara sauce, and some chicken parm and have an easy dinner. And it's a lot better than going out for it. You go out these days for chicken parm and it can cost up to $15, $16 for something as simple as that. And it costs a lot less than that to make it at home. And you're gonna have a better product for the most part. All right, so let's get started. We are recording and I'm making chicken parm. And I'm going to start— let's move this over. I'm going to show you how I prep the chicken before we get too involved. So this is a boneless chicken breast and it's just coming right out of the package. And I've already prepped the other ones, but it's a little too thick to make for chicken parm. So what I'll do at this point is I'll find— I'll take my knife and I'll see where it's getting thick, which is right about here. And I'll split the breast very carefully. That's butterflying it. All right. I get to that point where I might cut myself. I'll put it down. And now I have two nice equal pieces. All right. Now, these by themselves are really okay to use. And if you're making them at home, you might want to look for thin sliced chicken breasts because then you don't have to do anything to them except take them out of the package and bread them. But for this, I am going to pound these out just a little bit. And I'm just going to do 2 of them to show you how it's done. And I'm going to mute my microphone for briefly because it's going to be pretty loud. All right, so I should be back. Hopefully that, that muted okay. And there's the chicken breast pounded out a little bit. So now they're even thinner. So because when they cook, they're going to pull back together and they're going to get a little bit thicker. So this way it's going to take less time to cook, it's going to fill the plate a little bit big more, so it's going to look bigger. So that's always a big help. So this is a meat hammer. Uh, they smell like— sell a lot smaller ones, but this is one that I've had for, well, probably about 20 years, 25 years. So it's kind of like a something I carry around everywhere I go. I couldn't find my rolling pin, but I did find my meat hammer. All right, so now we're going to get started, and the first thing we're going to do is set up a breading station. Let's move this chicken over with my other, and I'm going to set up a breading station, and it's going to be pretty simple, but it's going to be breadcrumbs, and these are just regular seasoned breadcrumbs. Got some flour, and I've got some egg wash. And the egg wash is going to be 2 eggs and some milk, and I'm just going to whip it up. You can use eggs and water, you can use straight milk. I kind of like using the two combined. So it's just egg— eggs and milk, make a little egg wash so the chicken has something to adhere to. All right, so this is what really makes this easier is that we're doing this in batches. All right, so I'm going to add a little salt and some black pepper to the flour. I'm going to season that up and all mixed in because that's what's going to get on the chicken first. And then we're going to start to bread. Very simply, we're going to start with the chicken. Chicken's going to go in the flour. This is not set up optimally for breading. It is a little easier if it's just all in a row, but because we want to get everything in the camera, we're going to do it this way. What you want to do is you want to try and keep one hand wet and one hand dry. That's not always easy to do, and that's why I do it by the sink. Because I can just rinse them off as it goes. You know, it's a nice— in theory, it's very nice. In practicality, it doesn't always work out. Hey, Peggy! So here I'm breading the chicken breast, and here's the first one done. So as always, anybody has any questions or anybody like to come in, I have some seats open and we can talk. While I am breading. Make another nice batch of these, and then I can, like I said, I can freeze them. I can have chicken parm for dinner anytime I don't feel like cooking, or if I want to make a chicken parm sandwich, or if I want to do something else with it. It's simple enough to do. You can top these with just about anything you want. You're not limited to marinara sauce. This one's kind of falling apart here, so I have to put that one back together. But the whole problem or issue with anything you're making when you parm is— yeah, coated hands. Well, you're still going to end up with coated hands, but this is one way to kind of avoid it somewhat. One in, one out. But you know, sooner or later they both go in and That's when I just go to the sink, which I'm standing next to anyway, and rinse them off. But this is the same like if you were doing eggplant parm, pretty much the same way. You want to get everything prepped. This one's going to be in pieces, which is fine. I can always use the pieces for smaller ones. Sometimes when you pound them, they do kind of explode. So you can put them back together. There is a method. I didn't want to cover that right now. It doesn't always work anyway. All right, but that's still fine. Still going to taste good. Now that we got some hand in there in the second one, so we're gonna have to rinse pretty soon. We're just gonna bread them all up. Like I said, this is probably the most boring part, but It's a nice way to knock out— and you know, if you got kids, you can have them all help here and get their hands in everything and make a project out of it. And you know, you can even make more if you buy those big family packs of chicken. This is organic, but if you go to the big box stores and you get those family packs of chicken, you can knock out a bunch of these, have them in your freezer. Them in Ziploc bags, and you can have really a nice dinner and make a special evening out of what would have been, you know, not potluck. Maybe now rinse them. Now, now we're getting a little, little icky. So that wasn't too bad. I got pretty far. All right. And you can see I bought these 3 packs of organic chicken at Costco the other day when I was there. So, and to me, chicken parm is really like a comfort food too. You really enjoy eating it. And, you know, we do go out sometimes and get it, and I hate getting it out just because of the cost. Freeze them. What is the best method for heating them? Well, back, right back in the oven. And we're, and actually, made as a parm, we're going to freeze these just as cutlets. All right, so I'm going to sauté these, and after I sauté them, then they're going to go, uh, they would go in the freezer if I wasn't using them right away, and I'd let them freeze solid, and then I would put them in Ziploc bags and put them in the freezer. And then when I go to bring them out, I just let them thaw, or if they don't have time to thaw, that's okay too. And put them on a pan with some marinara sauce, some cheese, put them in the oven, and in about 20 minutes, 25 minutes, I've got chicken parm. Hey Nazim, good to see you. And you can use gluten-free bread crumbs. I have done those. They don't adhere quite as well, and I found a way around that. The ones I bought kind of almost slid off, which is crazy to say, but pretty much it did. But I found they fried up nicely, but then as they set, the breading kind of comes off. So what I did was actually sauce them and then hit the cheese in a broiler just as I put it up. And it's that time in the oven that really does them in. So that's really all you have to watch out for. All right. So that is that. Let's get rid of that. We're done. 2 pieces of chicken left, but that was all the breadcrumbs I had in the house. So we're going to let that go. All right, so now we're gonna start cooking. All right, let's move the camera over. Which breadcrumbs you're using? It's, uh, I'm just using a seasoned breadcrumb. It was, I think, Progresso or the store brand. It's, it's not a, it's not a big deal on what you use, just, but I use seasoned. They do make some nice seasoned, like I said, some gluten-free gluten-free breadcrumbs, and I have used them. I think Four Seas makes one that was pretty much the best that I tried, and gluten-free. The only problem is with the gluten-free, when they go in the oven with the sauce and the cheese, like I'm going to show you how to set them up, it kind of— you kind of lose the breading. So I found a way out of that is to fry them up and then to put it on and if you're using gluten-free, and the sauce it, cheese it, and then put it under the broiler so it doesn't spend a lot of time sauced. Or you could just cheese it and then put the sauce on top of it. So there's always a way around it to make it eat better. All right, so we're going to get the pan hot and then we're going to fry up some chicken parm. Set them over here. We have some place to put them. All right, pan is getting hot. Let's put some oil in. And this is really the only other pain when you're doing these, is you're going to start to, uh, gather crumbs in the pan, and you have to clean that pan off every now and then to keep it from getting ugly, because otherwise the chicken parmesan start to get kind of ugly. They don't look as pretty. You know, it is about, you know, looking at what you're eating. You know, you eat with your eyes. So thanks, Michael. Gotta go to work. All right, well, thank you very much. I always appreciate you stopping by. All right, so let's start these up. You can always take a little piece and try it in there to see if it's ready. Yeah, close. All right, so let's put this in. And normally when I'm not doing induction, I do have a bigger pan that I do this on the stove in, and I can get 3 or 4 in there depending on how big they are. But we're using induction, so I wanted to show you how to do it. I've got this on about halfway. We're just going to cook through some batch. If anybody wants to come in, you know, I have a seat open. Come on in and we can chat while I'm cooking these chicken parms and ask your questions. You have any other questions about what we're doing or anything in particular, feel free. I figured while I was making dinner tonight, I would, uh, you know, make, uh, put it on live. So I just, I had the camera and everything set up, just left it up over lunch when we made our turkey noodle soup today and an apple cranberry crumble. They just want to give it some time, and we won't cook them all up in front of the camera. But you know, not use the— nice thing about the squeeze bottle is if I notice it's a little light on oil, I can just come around it and add a little bit more in. That way I'm not overkilling with the oil. I cook them by time and how they look, both. All right, they're, they're almost going to cook fully, and the first ones always take the longest. Um, the first ones you put in when the pan's really just heating up and the oil's heating up, they take the longest to get some color on. After that, it's a little quicker, and I don't mind if they don't fully cook through at that point because they're going to go in the oven and finish anyway. So it's not like it's a big deal. They're still going to cook, and I'm going to chill them down fast enough that it's not going to matter. You want to get a little color in them. You have to learn to be patient. And as always, there's always hotter parts of the pan than other parts, so you want to give it some time to cook. But you want to make them look pretty even though you're covering them up with sauce. And you're putting cheese on them, you still want them to look nice and pretty. I just want to get a nice— all— now this piece didn't cook, so I'm going to have to try and turn that back over a little here or there because I don't want to have any unbreaded pieces. And of course, if your floor is not real even, you'll also— the oil will run kind of a different way. All right, let's do that. We're still okay. We can get a little bit more out of this pan, but it's starting to cloud up. Oh, I'm telling you, yeah, it's a lovely smell. And I do fry with olive oil. People say, oh, you're not supposed you're not supposed to fry with olive oil. It doesn't work. It's not a high enough heat on it. But you know, I've been frying with olive oil. I never have any problems. I'm not cooking anything super high heat. If I was doing fried chicken or fried shrimp and I wanted to be more of a deep fat, then I would use corn oil. But this is fine for pan sautéing, for pan frying like this. You do want to, if your floor is uneven, kind of like mine is a little bit, You do want to let the oil run down so it gets wet, so when it cooks it does brown properly. And it's not, you know, while you want the pan to be hot, like I've got this on 5, which is halfway. On a stovetop, I would do a medium-high. I, I don't want it— I want to get it hot, but then I don't want it to— I don't want to just push the heck out of it, keeping it real hot, because then you start to burn, and that's not really where we want to go with it. You get some color and it's going to finish cooking, uh, when you put it in the oven with the sauce, or if you just put them in plain as cutlets. And these make wonderful sandwiches too, like this. Get a paper towel while I'm waiting. We started Christmas decorating, so this is one that we put up. This was something that my girls had given me at school. Every year they gave me a Santa or something, and that was one year where they actually had it made up. All right, so here we're going to take this out, and now what I'm going to do is I'm going to get some paper towels. Hopefully before that burns. And I'm just going to come over to the sink, and I have a metal bowl in my sink that I'm putting this used oil into to let it cool so I can come back with a clean frying pan. It's still hot. Get some more oil. Listen to it sing when I put that oil in there. Alright, and back to work. And then I've got this on paper draining. You can use paper towels. I actually have some restaurant wax paper that I use to separate things within the freezer, but just normal wax paper would work well too. So we got a couple more to cook. I might as well do them all while we're here, and then I will show you how to finish them. So you're seeing how easy this was, all right? We started at 4 o'clock, and it's really— we're going to have them all done easily by 4:30. And now I've got all these extra meals that I'll have in my freezer. And again, you know, it's If you don't have one once a week, that's great. If it's every other week, that's great. But it's still— it's in there. Like I said, you come home, you're tired. Whenever I make marinara sauce, I always freeze it. I always make enough. And I always— like, we usually have meat with it, and I'll always set aside one with no meat in it so I can use specifically for Parm. And another time, you know, depending on how industrious I feel, you know, I have made chicken and eggplant in the same day and froze them. An eggplant is wonderful to have, and you can use that with a lot of other dishes too. I like to put slices of fried eggplant with chicken, with like a sautéed or grilled chicken. And you can even use it by itself, make stacks of it if you don't want to just do plain eggplant parm. Freeze them in meal quantities. Well, actually what I do is I put them in and I let them freeze solid. And then I put them in the Ziploc bags with paper in between them. Or if I can't, if I don't have room to get everything in my freezer— this is a small freezer now— then I'll put them in that wax paper in between each piece and just freeze them and take them out as I need them. But you could easily do it in meals, portions, you know, depending upon— I always do them that way because at least it's got school the next day and I want to save center with some. I'll make 3 instead of 2. We have visitors over, I can pull more out, but generally it's just the 2 of us. Eggplant is wonderful. It took me a long time to start eating it too, and I don't know why, but it did. Yeah, so this is like, again, an easy way to build up some of your inventory inventory in your freezer for when you don't have time to cook. You know, I have meat sauce in there, I have chili in there, and chili is pretty much— I'm the only one that eats that, so that lasts a while. But when you don't have time to cook, if you don't feel like ordering out or you just don't want to spend that much money, you can pull something out because it is expensive to eat out these days. And this, all this chicken, I think the pack of chicken was $18, and it was organic, so it was more expensive for all this. And, and that's basically what I would pay for one dinner out. Sometimes chicken farms run anywhere from— we can get them $12.95 sometimes, but usually they're around $14, $15, $16.95. So one pack of chicken is basically costing what one dinner out would be. And then you add in the cheese and the sauce, well, you know, so two 2 chicken parm dinners is pretty much paying for everything that you're going to have. And if they fall apart, you know, it's okay because you're going to sauce and cheese them and no one is ever going to see. More oil. Should be the last batch. Great. And I will show you the secret setting them up, because the one problem I have when I get chicken parm out is that there's usually not enough sauce on it and there's usually not enough cheese. For some reason, people seem to think that if they stack them on top of each other and they give you a nice healthy portion— I, I've never been upset about how little it's been. But usually they stack the pieces of chicken on top of each other and only sauce the top and cheese the top. Well, hell, that's the most important part of it if you're ordering chicken parm, is the sauce and the cheese. Anybody wants to come in, come on in. I have seats available. We can chat a little while I'm finishing this up. I'm not too far from being done. Like I said, this whole pack of chicken, the marinara sauce, the cheese— I always try to buy cheese when it's on sale. You know, you have to be smart about what you buy. And you really have some inexpensive restaurant-style meals that you can make at home in very little time. Breading station is a little messy, and that's why I always try to batch do it when I do do it. Do you freeze your cheese? I do not, but you can. I, I don't put anything on them when they go in the freezer. They're just chicken cutlets, but you can freeze cheese. I have had bags of cheese at work that were starting— like when we had to go off for, you know, 2 weeks or something, I would put them in the freezer if I thought I was going to lose them. And changes a little bit of the consistency, but it's fine. Cheese does freeze. Most dairy is okay. That's because it's not all water. The only times you really run into problems freezing is when the majority of the product is water. Nice color here. And you know, the other thing is most of the times when you get chicken parm out, they are throwing them in a deep fryer. So that's why they all would look so perfect and so, you know, cook so nicely. But I prefer mine to have some color and character and, and sauté them. Yeah, we're almost done. I'm going to take some pieces that we've drained already to make for dinner tonight. This is actually a nice control heat, which is one of the things I really like about induction, is that you don't have have it getting hot and cool and hot and cool like a regular electric oven does, stovetop. And if you turn it to the heat that works for you, it pretty much stays there. All right, and you can tell the chicken is almost cooked all the way through here. So you really don't have much to do except really defrost and reheat. Let me get my sink, clean this off, little water in there, put it on the stove. Let's get busy. Okay, there's the marinara that I took out of the freezer earlier. And very simply, what I'm going to do is I'm going to put a little bit of marinara under it. I'm going to take— I'm going to take these pieces and get rid of these pieces first. So let's build us a chicken parm. We have the technology. $6 million chicken parm. That way, when I freeze it, I'm freezing more of the whole pieces and it'll be easier on me And I take them out, and this is pretty much cooked. Oh my God, that's good. You know, you think I wouldn't be surprised how good stuff was, but okay. Now sauce over, sauce under, sauce over. Okay, cheese. And you can use sliced or you can use shredded. You can use provolone if you like, or you can use mozzarella, or you can use both. All right, so I don't skimp on cheese. You might tell I love cheese. Now, if you really— I don't have any, but if you really want to make it look special Chop— get some chopped parsley, fresh parsley, put it on the cheese before you put it in the oven. And when the cheese melts, it'll have all these pretty little green speckles from the parsley on it. So it looks really pretty. And that is chicken parm. And I have a good 1, 2, 3, 4, 5, 6, 7— 7— looks like 7 pieces more. And I have 2 that I didn't cook. So we'll make something else out of them. So that's 3 more meals and 1 takeout. So Lisa can take it to lunch one day and we still have 3 more meals. Or if someone comes over, it's only 2 meals, but— and counting this one, so that's 4 dinners out, $30 apiece, $120 for probably about $25 total. Ta-da! Baking time, 15 to 20 minutes. Well, these are hot. And they're almost cooked. So 15 to 20 minutes is fine. If they're frozen, 20, 25 minutes. All right, so just give them a little extra time. And, and I usually do cook them from a frozen state. If I come home or if I decide we're going to have chicken parm, I, I get them out, I defrost, I put the sauce in this pan, get it defrosted, sauce them, put it in the oven, get some spaghetti water ready. By the time the spaghetti water is ready boiling and the the pasta is done, 11 minutes cooking, it's done. And 350, Peggy, usually is what I cook, what I heat everything else up on. 350 is the normal temperature. 400 is if you really have to push it to cook it, but 350 is fine. So that's it, and that's chicken parm for dinner tonight and for the freezer. So thanks for coming. I appreciate that. And next week, We will be here— uh, what day is today? Today is Wednesday. Okay, I lost track of time. Next Tuesday, I'll be showing you how to make my favorite saltine toffee, which we also call Christmas Crack. And then Wednesday, I'll actually be out at Seminole Pride Noble Juices out at their farm in Winter Haven, so I may be doing something from live live from out there next Wednesday. So thanks for coming, and I'll see you soon around the kitchen table.