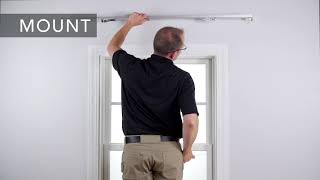
How to install roll pleat draperies from start to finish. Covers measuring, drilling brackets, attaching the rod, adjusting tension and cord, snapping the drapery to carriers, and dressing the pleats. Let them hang for 1-2 weeks before steaming.
Chapters
In this video, we'll show you how to mount roll pleat draperies using a roll pleat rod, step by step. First, take a look at the installation guide that was included with your draperies and hardware. Make sure that you have all the parts and all of the tools you'll need. Start by confirming the width and length of your drapery. Laying the drapery on a flat surface, remove the top paper bands only, leaving the bottom of the draperies banded. This will make it easier to hang the draperies. Once you have confirmed the width, draw and stack back. Measure out from each edge of the window or molding accordingly and place a mark based on the desired length. Determine where the top of your rod will be and place a mark 1 inch above it for the bracket placement. Do this on both sides of the window. Now place the outside edge of the bracket on the width mark and the top of the bracket just below the length mark and mark the screw holes of the bracket. If necessary, line up the top edge of the support bracket and mark the holes for the support brackets. Now drill the holes for the screw with a 1/16 inch drill bit and screw the brackets securely into place. Hook the front edge of the rod under the lip on the bracket and roll the opposite edge back flat on the bracket. Turn the discs on the rod to secure the back edge of the rod to the brackets. The final step in the hardware installation is to attach the tension pulley to the wall, adjust the cords to the proper length or attach the batons to the master carriers. Follow the instructions that came with the hardware to complete this step. Prior to hanging your drapery on the rod, take the pendants that came with your hardware and snap them onto the top of the drapery. Do not place the pendants on the first two snaps of the leading edge as they will be attached to the rod's master carriers. Now you are ready to install your drapery. Start off by snapping the first two snaps on the leading edge of the drapery to the master carrier. Now begin inserting the pendants into the swivel carriers. The swivel carriers are pre strung inside the track and each has a slot that will fit a pendant. If you have a return on your drapery, the last two snaps on the panel will snap into the return. Any extra swivel carriers should be on the outside edges of the rod. Once all the pendants have been attached to the rod, gently pull the fabric between the master carrier and the first swivel carrier to the front of the rod. The fabric between the first and second swivel carrier goes towards the back of the rod. Continue across the width of the drapery, leaving the fabric between the carriers to the front and back of the rod. Slowly open the drapery. Remove the banding at the bottom of the drapery. It's important that you dress each pleat to assure that the lining fabric and the drapery fabric are aligned from top to bottom. At the hem of the drapery, gently separate the lining from the drapery and allow the natural hang of both the drapery and lining to align to one another. Next, gently dress the fullness of the drapery at each barrel, starting at the top and ending at the bottom of the drapery. That's it, you're done. Don't be disappointed if your draperies don't look perfect as soon as they're hung. It will take at least a week or two for them to hang out and and fall naturally into graceful barrels. If your draperies have some light wrinkling, you can watch our Dressing A Drapery video for tips on steaming and ironing. If you had any trouble following these steps or need to know how to care for and clean your new draperies, check your installation guide or visit our website.