Bali Blinds | Installing and Dressing Tailored Roman Shades Outside Mount
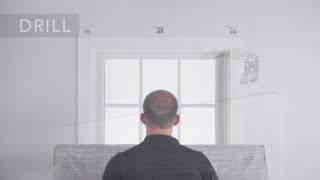
How to install Bali tailored Roman shades as an outside mount. Mark and drill for brackets, snap the shade into the mounting plate, adjust returns and lift hardware, then test the pleating. Steam or iron from the back to avoid water marks on the fabric.
Chapters
Tailored Roman shades are beautiful and easy to install. In this video, we'll show you how to mount yours outside the window, step by step. First, take a look at the installation guide that was included with your shade. Make sure you have all of the parts and all of the tools you'll need. If you're installing into anything other than wood, get the appropriate screws and anchors. Second, place the shade where you want to mount it. Make sure it's level, and then carefully mark the wall where the center of the mounting plates are located. Set the shade aside and center the bracket on the marks and mark the screw locations. Now drill the holes for the screws with a 1:16 drill bit and screw the bracket securely into place. Now you are ready to mount your shade. Place the front edge of the mounting plate into the front lip of the bracket and then raise the opposite side until it snaps into place. Adjust your shade returns, making sure they are straight and flush with the wall. To install the cord cleat or continuous loop lift, check your installation guide. Raise and lower your shade a few times to make sure the fabric is pleating smoothly. If necessary, smooth the fabric at the folds and leave the shade in the raised position, allowing the folds to form a memory. If your shade has some light wrinkles, follow the ironing and steaming setting on the fabric label found at the bottom hem of the shade. Always steam or iron your shade from the back. This will help prevent any damage or marking that might occur if you were to apply an iron or steam to the face of the fabric. When steaming a shade, do not let the head of the steamer touch the fabric. Keep a distance of at least 1/2 inch to 1 inch from the back of the fabric. This will help prevent water marks from forming on the shade. That's it, you're done. If you had any trouble following these steps or need to know how to care for and clean your new shade, check your installation guide or go to our website.
More from Ergun

Bali | How to Install a Layered Shade with Continuous-Loop Lift (Outside Mount)

Beyond Aesthetics How Artisan Drapery Saves Energy | Best Buy Window Treatment #shorts

5 Reasons Why Plantation Shutters Are Perfect for Florida Homes | Best Buy Window Treatment #shorts

Bali | How to Install Solar & Roller Shades w/ EasyTouch Lift & Flat Valance (Inside Mount)

Bali | How to Install Solar & Roller Shades w/ EasyTouch Lift & Flat Valance (Outside Mount)


Bali | How to Install Solar & Roller Shades w/ EasyTouch Lift & Contour Valance (Outside Mount)
Smart Choices: Motorized Roller Shades by Graber | Best Buy Window Treatment #shortsvideo

Woven Wood Shades & Graber App for Easy Comfort in Florida Home | Best Buy Window Treatment #shorts
5 Reasons Why You Should Choose Wood Blinds for Your Windows | Best Buy Window Treatment #shorts