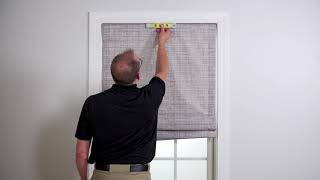
Instructional YouTube video (Bali Blinds) that explains how to release a cordless shade stuck in the down position, how to adjust the tension to change raising/lowering speed, and how to troubleshoot and correct an unleveled shade. Key procedures: locate the tension-adjustment wheel (bracket marked +/-; right side for back controls, left for front controls), turn the wheel a quarter turn toward + to increase tension and test, inspect brackets and cords for obstructions or caught cords on rings, use tie-off clips and retie the cord to level the lowest side, and trim excess cord about 1 inch above the knot after confirming operation.
Chapters
This video will show you how you can release a shade that is locked in the down position, how to adjust the tension of a shade, and how to troubleshoot an unleveled shade. If your shade is locked in the down position and won't raise, follow these easy instructions. Find the bracket that is holding the tension adjustment wheel. This bracket is marked with a plus and minus to show the direction to turn to increase and decrease the tension. If your shade has back controls, the adjustment wheel will be on the right side. When facing the front of the shade, hold the tube and turn the wheel one quarter of a turn towards the increased direction. Gently pull on the ring at the bottom of the shade. It should now raise and lower normally. If the shade still does not raise, raise, repeat. If your controls are on the front of the shade, the adjustment wheel will be on the left side of the shade. Hold the tube and turn the wheel one quarter of a turn towards the increase direction. If the shade still does not raise, repeat. If you would like to make the shade raise faster or slower, use the tension adjustment wheel to increase or decrease the tension. If your shade has back controls, the adjustment wheel will be located on the right side of the shade. For a front controlled shade, the adjustment wheel will be on the left. The bracket which holds the side of the tube with the tension adjustment wheel is marked with a plus and a minus to show increasing and decreasing the tension. Hold the tube and turn the wheel a quarter of a turn in either direction to achieve the tension you prefer. Confirm both the window and shade are level. If the shade is not level, adjust the brackets to make it level. Raise and lower the shade. If the shade is still hanging unevenly, confirm there are no obstructions interfering with the shade. Review the back of the shade to confirm no cords are caught on the rings. The cords should be straight when lowered. If cords are caught on the rings, unhook the cords from the ring. Raise and lower the shade. If the shade is still hanging unevenly, locate the cord. Tie off clips. Look for these on the section of the cordless tube that corresponds to the part of the shade that is hanging the lowest. Pull the knotted cord until the lowest part of the shade is level with the rest of the shade. Tie a new knot here. Do not cut the extra cord off until the shade has been operated a few times in order to confirm its level and the new knot is holding. Test the operation of the shade. If the shade is still uneven, recheck all cords and repeat the previous steps. Once the shade is hanging level, trim the extra cord about 1 inch above the knot. Test the operation of the shade. When raising or lowering the shade, always use the pull ring located on the back side. Pulling on the bottom hem could damage the shade. Sam.