How to debug Axolotl (for fine tuning LLMs)
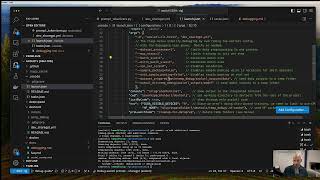
Hamel Husain shows how to debug Axolotl in VS Code by configuring launch.json to run a training job with reduced concurrency (batch size 1, maxsteps 1) and routing caches to a temp folder. He walks through setting breakpoints, watching variables, and stepping into tokenization functions to trace exactly what happens when you fine-tune an LLM.
Chapters
Hi, I want to talk to you about how you can set up VS Code to debug Axolotl. And specifically, what I'm trying to do is I'm trying to debug a situation where I have this type ShareGPT, and I want to debug how this format gets tokenized and how this prompt gets assembled. And specifically, the— I, I happen to know that when I specify type share GPT, the code ends up somewhere in here in this tokenized prompt. And I want to begin to step through it. And specifically, I'm gonna set a breakpoint right here. And just to step back a little bit to give you more background, I wasn't using VS Code before to debug Axolotl. and it was driving me insane. Um, I was just setting breakpoints manually with pdb.set_trace, but there's a lot of footguns and it's just a lot nicer, I find, to use an IDE. And maybe some of you will agree, and I think it will improve the developer experience and just, uh, make a lot of people's life easier if you're able to easily use VS Code for debugging. So the thing I want to be able to do is to set a breakpoint and, and be able to debug interactively. Now, as you know, Axolotl is a CLI-based utility, like you invoke it from the command line. So how— it is Python-based. So how can we debug Axolotl interactively and avoid a lot of footguns Um, even though it's a CLI-based, uh, project. And the answer is, uh, you have to configure, uh, your VS Code environment carefully. And so, um, you may or may not be familiar with VS Code debugging, but there's two files, or there's actually one file that's really key that helps you set up debugging, and that's called launch.json. So in the root of the Axolotl repo, there'll be a— there's a.vscode directory at the root of the repo. And inside that directory, you'll see a launch.json file. And this launch.json file actually is a configuration for a specific debugging run that you might want to use. And that is what we are going to use to be able to enable the situation where I want to put a breakpoint right here. And the reason this helps is because there's actually a fair amount of setup that you'll want to do before you're able to debug effectively. There's a lot of different ways to get tripped up. And I just want to say, like, this video accompanies this debugging guide. So there's a debugging guide that talks about all the stuff that I'm going to say. So if you prefer to read the debugging guide, go to the docs folder and read debugging.md. But I'm going to kind of walk you through it in a little bit more interactive way here. So, so what we have is this launch.json file. And basically, I want to mimic what I would do as a user. And really what I want to do is, I want to run this config file, but I want to run it in the debugger. And there's a lot of ways to debug. Like one way you could debug is run the unit tests and debug that way. But a lot of times I wanna debug from an end user's perspective. I wanna get a config file that someone's using or that I'm trying to use and kind of see like what is happening. And so this is kind of useful for that. And so what I'm doing here is, so this is, there's a lot of boilerplate involved. I must warn you with VS Code, But thankfully, we have provided this boilerplate and you can edit it. So you have somewhere to start from. So what you'll have here is these different debugging configurations. So this is— you run Axolotl with Accelerate. So that's what this is about. So then This are— these are flags that you pass in. So we're going to debug a training run. We could do some kind of data preprocessing only, but I'm going to just do train just to show how it works. This is the file, the dev/share/gpt.yaml. Now you might be wondering, where does this command run from? And so what we're doing here in the VS Code is actually we're changing the working directory to the workspace, which is the root of the project, and then the dev tools folder. So the dev tools folder, we actually have one, and the dev tools folder will have this devsharegpt file in the repo. So you can use it as an example. So after this runs, before this script runs, so we run training on against this YAML file. And again, this YAML file is just a normal Axolotl config. And what I've done here is I have SharedGPT, which is what I want to debug, and I have to make sure that the data is also SharedGPT. So this data is on Hugging Face Hub, and I know it's SharedGPT. Now the rest of the, these flags, they're basically essential to help you debug and to simplify debugging. So what you want to do is, number one, you want to reduce concurrency. You don't— you want to eliminate, you know, as much of the parallel processing that you can, because that can be really complicated to debug if you don't need it. In this case, we don't need it. So that's why you said you can set these flags, and these flags will override whatever is in the config, which is useful because these flags are common— are common flags that you might want to use in all your configs. But just be mindful of what these flags are in case you want to change them. So in this case, we set the dataset processes to 1, so we can eliminate concurrency from the data preprocessing. max_steps, that's just— makes it such that there's only one training step. So training can conclude really fast. I set the batch size to 1, and I do that defensively by setting both of these variables to 1. Also turn off validation just so things can go faster. So I set the validation set size to 0. When your data is small, which I, I recommend that you use a small dataset where possible when you're debugging, you will often have to set sample packing to false. And similarly, it's useful to make sure eval_samplepacking is false. And then lastly, you want to make sure that caching doesn't get in your way. So Axolotl caches a lot of stuff, and then the underlying Hugging Face trainer that Axolotl uses caches a lot of stuff too. And you want to make sure that you invalidate those caches. I drove myself crazy when I tried to debug this, and I couldn't hit this code path. And I found out, for example, that there's a Hugging Face cache. And that's why this wasn't being run. So you just have to be really careful of that. Thankfully, we've baked that in here and handled this in this launch.json. Basically, what we're doing is we're dumping the, the pre— the prepared dataset into this temp debug folder. And this temp debug axlotl outputs folder. And then we're sending the model also to this temp debug axlotl outputs folder. And then what we're doing as well is we're setting the HF_HOME environment variable to this same temp debug folder, uh, dot in inside this hf_cache. And the reason we're sending all of these outputs and assets and caches to this one folder is so that we can manage it and then we can delete this cache in these various folders before Axolotl runs, because Axolotl caches certain things in this prepared path. Like if it sees that the data is already there, it will use that and you won't actually hit the code path. And similarly, certain things will be cached inside the dataset cache inside this, inside hfhome. And so there's some other things here. Just my code, that just makes sure that only Axolotl code is stepped through. So when you're stepping into things or stepping over things with the debugger, which we'll show in a, in a minute, that just makes sure that you only go through Axolotl code. Otherwise, you'll go through all the dependencies as well. It can get kind of lost. So it's useful to toggle this on or off depending on what you're trying to do. Sometimes you do want to step through the dependencies. And then finally, you might wonder, you might wonder, okay, there's all these caches, there's all these like, there's this temp directory, all this stuff gets written. And we delete those, we delete certain things for this specific situation where we want to invalidate this cache, the data kind of caches for, for this prompt tokenizer to run correctly. For this tokenized prompt. So we can hit this breakpoint. And so that's exactly what we're doing here in this pre-launch task. So there's a pre-launch task. Unfortunately, VS Code, uh, forces you to do this in a different file. So we have this cleanup for data prep task. And just to give you an example of how this looks, this is also a lot of boilerplate, but what we're doing here And it's— it don't— there's no reason to get scared of this. Is we are making sure that first of all, we're in the right folder. So, um, so what we do is, sorry, we make sure we're in the workspace folder inside DevTools, and then we delete the folders we want to delete. So in one case, we're deleting this axolotl outputs folder. In another case, deleting this cache, and specifically the datasets cache. And because you can only send one task to a launch job, there's something called this composite job, which in this just combines both of these different tasks. And this is how you do it. And so you have this cleanup for data prep. And really, this is a lot of ceremony for just running two rm -rf commands. Realize that, but this is how it's done. And that is exactly what's happening here. So that's a lot of stuff. Let's go ahead and run the debugger. So how you run the debugger, you go over here to the debug thing on the left-hand side. In here you'll see all the different debugging configurations. We only have one in our launch.json. We only have this, this one. You only have one configuration. So go ahead and I'll push the run button. And you'll see Axolotl get started. And when it hits the point of, of getting to the data, it's going to drop me in directly here. So it works as expected. And you can go to this debug console and you can start interactively debugging. So for example, I can see different variables. You know, I can even see what's inside. I can see what's inside this variable. And, you know, I can even watch variables. I can go over here and watch variables. This call stack is, is very helpful to see how you got to this code. And there's a lot of other things you can get into. You can turn on and off breakpoints. You can do lots of different things. VS Code debugging is a really deep subject. This is not a VS Code debugging tutorial, This is just to help you get started. And you can navigate the debugging, or you can, you can sort of operate the debugger by using these buttons at the top. Now I recommend that you learn the hotkeys if possible, but you can do things like step over, which is going to the next line of code. You can even step into code. So for example, if I want to step into this tokenize thing, I could step into that, but I'm not going to. And you can, you can, you know, do things as they make sense. So for example, what if I want to step into this parseTokenizeToResult? I can do that. You can see I just stepped into that code. So that's just a high-level overview of how to set up VS Code for debugging We have, again, we have the.vscode directory with the launch.json, a task.json. We have this devtools directory with this one configuration file that I used for this example. And then finally, there's this debugging.md, which goes over everything that I just did in this video. I hope that helps. Thank you.