Video lecture and demonstration (presented by Larry Lautenberg) explaining and demonstrating finger thoracostomy as a preferred intermediate decompression technique for tension pneumothorax and massive hemothorax. The speaker contrasts it with traditional needle decompression (noting second-intercostal-space approaches are often ineffective), describes landmarks and a ‘‘zone of safety,’’ lists a prehospital kit (sterile prep, sterile gloves, scalpel, long curved (Kelly/tele) clamp, three-way chest dress), and demonstrates making a lateral chest incision above the nipple (males) or inframammary fold (females), dissecting to the rib, penetrating the pleura with a clamp, and inserting a finger to the metacarpal to decompress and then seal the chest.
Questions this video answers
Larry Lautenberg — trauma critical care surgeon at St. Mary's Medical Center; interim chairman and program director of the surgical residency at Florida Atlantic University.
YouTube video titled 'Finger Thoracostomy' uploaded by Peter Antevy on September 8, 2023.
At or above the nipple line in adult males; at or above the inframammary fold in adult females.
Inserted widely up to the metacarpal on the hand.
Chapters
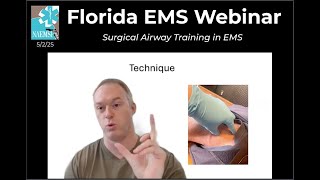
Hello there. This is Larry Lautenberg. I'm one of the trauma critical care surgeons at St. Mary's Medical Center. I'm also the interim chairman and program director of the surgical residency at Florida Atlantic University. I'm talking to you today about finger thoracostomy and we're going to also demonstrate a proper finger thoracostomy. Acute decompensation from trauma is one of the things in which we as pre hospital providers and hospital providers can make a huge difference in outcome. And one of the acute decompensations is that of tension pneumothorax and or massive and tension hemothorax. Traditionally, we've treated tension pneumothorax with what we call needle decompression where a short needle was placed in adults in the second intercostal space. This has been found over the last 15 to 20 years to be generally ineffective because of the thickness of the chest wall, morbid obesity and the difficulty in obtaining appropriate catheters. In addition to that, placing it in the second intercostal space anteriorly has not been able to decompress tension pneumothorax laterally or massive hemothorax. Therefore, phtls and ATLS has made a change in the location of where a needle should be placed for needle decompression. It is now placed in the fifth intercostal space in the anterior axillary line, which is identical to the area where a tube thoracostomy, also known as a chest tube, is placed. However, an intermediate step has been designed over the years and is now popular and required in the 10th edition of American of the Advanced Trauma Life Support Course. And this will filter over into the pre hospital Trauma life support course as well. This is finger thoracostomy and this is simply where an area along the lateral chest wall is quickly sterilized. Gloves are placed and a scalpel is used to make a skin incision at or above the nipple line in adult males and at or above the inframammary fold in adult females. Skin subcutaneous tissue chest wall muscles are dissect in size down to the rib on top of the rib in the superior portion of the rib. A Kelly clamp is then placed over the top of the rib and penetrates the pleura and the chest wall is opened. A finger is inserted widely all the way up to the metacarpal on the hand and a large opening is made in the chest. This decompresses almost 100% of all tension pneumothoraxes and also decompresses a massive hemothorax. This is a technique which is being popularized here at Palm Beach County Fire Rescue. Currently we have been using this technique on trauma codes and only on trauma codes with the hope that after quality improvement and observation and continuous use that we could filter this towards patients who are an extremist with these tension pneumothorax, massive hemothoraxes and intervene before they reach code status. We are also looking for some of these trauma codes to have return of spontaneous circulation after these procedures are done. It should be mentioned that any of these procedures need to be done after the airway, breathing and circulation have been started. They can be done simultaneously if there are enough personnel. However, we need to pay particular attention towards making sure that all of the other things that we know about with phtls and atls are performed. There is a kit that has been created that by fire rescue which includes a sterile prep, sterile gloves, a scalpel, a tele clamp which is a long curved clamp like this and a three way chest dress. This kit is available in all of the rescue vehicles and in both airships. Using this kit we are able to do an adequate finger Thor costume. Let's go ahead and demonstrate exactly how this is done and talk a little bit about some of the anatomy. I'm going to walk around to the other side of the patient. It is essential that the ipsilateral arm be placed well above the shoulder and be moved out of the way so the entire chest area could be visualized. Now the landmarks that we want to use are the clavicle superiorly, the sternal notch down to the sternum to the costal margin. Our number one landmark in the male is the nipple. We want to make sure that we don't make a skin incision any lower than the nipple because we know that in deep inspiration, the diaphragm could come all the way up to the nipple and intra abdominal organs could be injured as the finger thoracostomy is done. However, the chance of injury is so small because because we're actually placing our finger inside the chest to confirm that we are in the chest. The other thing that I wanted to mention is there's an affectionately called zone of safety located on the chest wall. And simply if the arm is elevated up and the chest is exposed like this, you can take your hand and place it just under the axilla along the nipple and and anywhere in this area right here in this triangle is a safe zone. In addition to that, the skin subcue and muscles are the thinnest in this area on the chest wall. And it makes it quite easy for us to perform the procedure. As we'll prep our area in our zone of safety, the next thing we're going to do. Arm is up. Quickly palpate the ribbon where we want to go just opposite the nipple. Here's the rib.
Make our skin incision and it's a generous skin incision right over the rib guard.
Put our finger in, feel our pleura right over the top of the rib. Take our Kelly clamp over the top of the rib and penetrate the pleura. We should hear and feel the give back just like that. Once we penetrate the pleura, we open the clamp and we draw it open. We then take our index finger on our dominant hand, put it right in the chest, all the way to the metacarpal and feel the lung. Immediately we pull our finger out. Air will rush out, blood will drain out, and then we'll take our chest seal and we'll seal the chest.
I think this procedure is something that ultimately is going to save lives. It is certainly part and parcel now of chest trauma. It has been approved by the American College of Surgeons Advanced Trauma Life Support. It will filter to pre hospital trauma life support. And it is something that we can all do quite easily. And we are looking to the future where we move this from trauma codes to trauma patients and extremists.