Whole Blood
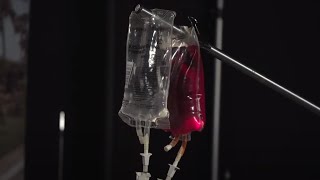
Peter Antevy from Palm Beach County Fire Rescue shows how to administer O-positive whole blood in the field using the LifeFlow infuser and Q and Flow warmer. A 500 ml unit delivers in 2 to 3 minutes after warming to 38°C, with a saline flush after to prevent waste.
Questions this video answers
2 to 8 degrees Celsius
Approximately 38 degrees Celsius (about 100.4 °F)
10 ml per squeeze
About 2–3 minutes per ~500 ml unit
Roughly 500 ml
Chapters
Hello. Today I want to introduce to you a very exciting enhancement to our EMS delivery and that is going to be the implementation of our whole blood very, very soon. Palm Beach County Fire Rescue is going to be carrying O positive whole blood on the EMS captain vehicles as well as the trauma hawks. And I want to take a few moments today to introduce to you some of the equipment that you're going to see out in the field and and how it's used. As I had mentioned, the EMS captains and trauma hawk will be carrying this whole blood. It will be stored in a temperature controlled cooler at 2 to 8 degrees Celsius. A couple of things that we're going to need to address prior to administering the whole blood is how to rapidly infuse it and also how to warm the blood prior to administering it to the patient. And that's what we're going to talk about today. The two components to this, in addition to the blood itself is going to be the Life flow rapid fluid infuser. This is specifically designed for blood products and it has Y tubing that I'll introduce and show you guys exactly how to set this up in just a few moments. The other component to this is going to be our Q and flow fluid warmer. Again, this is also designed for blood products and will warm the blood to approximately 38 degrees Celsius, which is about 100.4 degrees Fahrenheit in just a matter of seconds. So let's get into it and talk about it. So I have one that's open here. We're going to go ahead and utilize the Life flow.
Rapid infusing set.
Something that you'll notice different to IV tubing is that this has a Y port. When we were infusing blood we need to also attach a 250 ML bag or larger of normal saline to help prime the line as well as to flush the line at the completion of the blood transfusion. There also is a series of filters here specifically designed for blood and we'll get into that and how to remove all the air from that here in a moment. The tubing itself is relatively standard. It's about a little bit larger than our typical IV start kits in 15 drop and 60 drop sets. And it comes down to a built in 10ml syringe that comes pre assembled from the factory already fixed. There's really nothing for you to do with this other than load it into the handle. The handle itself is where all the magic happens. Inside the life flow handle, the syringe will Be loaded and it will deliver in a manual squeeze of the handle, which I'll demonstrate here in just a minute. 10mls per squeeze of fluid, whether that be saline or blood. The importance of this is in a hospital setting, blood transfusions do not happen at that rate. We're going to be able to deliver the blood, an entire unit of blood in about two to three minutes. That is unheard of in a hospital setting and really something that's going to enhance our patient survival. At the distal end of this tubing you're going to notice a pressure reducing chamber. This is designed to prevent us from harming our patient by injecting or infiltrating a line or potentially blowing a smaller IV.
That you might have. The life flow infusion set and blood can be administered through any IV size 22 gauge and larger, as well as an I O site without any issues at all. The other component to this is going to be our warmer. Our Q and flow warmer is a non disposable unit. This is going to be carried on the EMS captains and trauma hawk. However, it does come with single patient use disposable units. That is where the warming mechanism is. Consider this disposable warming unit as an extension to your IV tubing. Inside of here is roughly 7ft of coiled surgical steel and through its electrical components is designed to gradually but quickly heat the fluids to 38 degrees Celsius or that 100 degree Fahrenheit temperature that is then safe and beneficial for our trauma patients. So let's get to it and actually perform the process. Like I said before, we're going to have our blood bag which is roughly 500ml. It comes from the blood bank. Obviously it would have additional markings on here to indicate to you that it is O positive whole blood. And it would also be near freezing at about 40 degrees Fahrenheit when it comes out of the cooler. The other aspect that I discussed is going to be our normal saline bag, a minimum of 250ml bag. If we have a larger bag, we can use that. However, we're not going to be infusing a lot of normal saline.
Just with our traditional IVs. We're going to open up our life flow set and we're going to spike each one of those bags with one port. Each port is independent of each other. It does not matter which.
Side of the life flow infusion set gets blood or which side gets saline. They can be interchanged. So both of these bags would get spiked. Just as we would normally do in a regular setting. Then we need to come down and prime our tubing. So if you look here, it looks like a standard drip chamber, only with an extra filter up top here. It is important that we remove as much of the air as possible from this drip chamber up to the little white line above the filter. We do that just by simply opening up your saline bag.
Here. Remember, we want to prime our line with normal saline, not with whole blood. And we're going to squeeze the chamber no different than we normally would do with a regular drip chamber. The only difference is that we would want to.
Completely fill the chamber with fluid. In a typical IV drip chamber, we would leave a little bit so that we could calculate our drip sets. However, we don't need to do that with blood administration. As you can see here, I've filled the drip chamber all the way up to the white line above the filter and.
The air precluding mechanism inside of this chamber, the little blue ball has risen to the top. That blue ball will become important at the completion of the administration. After we're done priming our chamber, we need to attach our 10ml syringe into the handle of the life flow system. So this canopy opens up, the lifflo comes out of the package. As I had said, in ready to use condition, it is very important that this gets loaded in one direction with the numbers of the syringe facing up. You'll notice that it's specifically designed to fit directly into that chamber. The numbers of the syringe are facing us. Therefore we know it's been loaded correctly. We go ahead and close the chamber prior to flushing the system. We also want to attach our Q and flow disposable unit and also prime that the disposable unit has a long end and a short end. It is designed to be attached to the short end first through a standard luer lock. So I'm going to go ahead and do that now.
And now our system is ready to prime. Now, as I said before, the Q and flow itself has about 7ft of coiled tubing and.
Roughly 19ml of fluid. Therefore, knowing that it takes 10mls per squeeze, we're going to anticipate several squeezes of the handle and just to prime our set all the way through to the Q and flow. Flow. I'm going to go ahead and do that. Now. When we first prime our tubing, one of the teaching points is that the gun or the handle be facing upright. Remember, air goes up and in this direction. You'll be able to see the syringe begin to start filling with the saline that we have primed.
One of the unique features of the life flow set is that it automatically will refill the syringe as long as there is fluid to pull from the bag. And now you can see that I have completely cleared my line of air. As it's just saline coming through, there's no air bubbles. Now it is safe to connect to the patient without any fear of injecting air into their system. However, before we do so, we need to activate our fluid warmer and plug it into the heating unit. To do that, there's an on and off switch on the back of the hue and flow warmer. We simply turn it on and it will initialize. It takes less than five seconds to initialize, and it will give us a message that it is ready to go, that the system is ready. From there, the only thing that is needed to do is to attach the cable of the fluid warmer to the backside of the.
Disposable unit.
It will initialize the system and tell you that it is ready to go.
And now we are ready to deliver warm fluid to our patient. We have already primed our line of saline. Now to switch over to blood, we would turn off the saline.
And turn on our bloodline.
It's important that only one of these bags is opened at a time, otherwise it will back flow into each other. So therefore, to prevent that, close off the saline first and then open up your bloodline. And now we're ready to begin infusing. You'll notice the blood will fill the drip chamber.
And as we continue to squeeze, it travels through the tubing.
Through the warmer.
And now the color change in the tubing is now red, indicating that we are beginning to infuse blood to this patient. And it's important to note the time that that changes for documentation purposes. So, as you can see now, with very little effort, I am injecting.
10Mls of heated.
Whole blood to this patient. We would continue doing this until the patient's hemodynamic state returns or we've maxed out on our fluid dosages.
And you can see it does not take very long to begin to drain down.
The blood bag.
So let's assume that we've delivered.
Our dosage of blood to the patient and we're going to stop transfusing blood prior to disconnecting the tubing from the patient. We still have some blood in our line. It's important that we flush that through. So we would close off our blood bag or if it were empty, it would indicate so it would be empty and we would turn on our saline bag. Now that we've turned on our saline bag, we will notice that the blood will flow through the saline, will flush the remainder, whole blood that's in the system, in the IV line, into the patient so that very little or none is wasted. Remember, these trauma patients are relying on as much blood volume that we can give them. We don't want to waste any of the blood volume by leaving it in the line. And now we've switched back over, we've thoroughly flushed our line, we can disconnect our tubing from our patient. So when you finished infusing a unit of blood, you're going to notice that once the bag is empty, because there is no air in the system, a vacuum is going to be drawn into your drawing drip chamber and you'll start to see that textbook hourglass shape. If you experience that it is okay. That is what the system is designed to do to prevent air from reaching past the drip chamber. The simple solution there would be to either open up your second line or if blood needed to be repeated, we could switch out the bag and open up the blood bag to reintroduce a second unit of blood into the IV line without introducing any air. In this case, we're going to be completed with our bag. We need to flush our line with our remaining normal saline. So we would close the blood bag to prevent any backflow of blood into, or any backflow of saline into the blood bag and, and open up our saline. By doing that, you notice the drip chamber resume its normal shape and fill with fluid that is by design to prevent air from entering the life flow system.
So this has been a quick introduction to the equipment used for the implementation of our whole blood program.
As many of you know, we will be conducting a pilot program this summer with our trauma center, St. Mary's and Delray. That pilot program will be a controlled, very small group to include EMS 23 and the Tomahawk helicopters. During this time, we'll be reviewing all of the data related to every case where blood is administered. And it's our hope that we'll be able to prove that this is a very beneficial, life saving procedure. Based on the outcome of the data that we receive from our trauma centers, a decision will be made on whether or not we expand the program to more units. Thank you so much for your time and have a great day.
More from Peter


Melissa Olen MSN, FPN-C, CCRN: Sudden Cardiac Arrest Training in Schools (Project ADAM) 4/25/25



Pediatric Hospital Readiness: How Teamwork & CPR Metrics Drive Better Outcomes
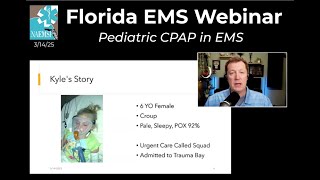
Chelsea Kadish, MD & Kyle Goodknight, EMT-P, RT: Pediatric CPAP in EMS (3/14/25)