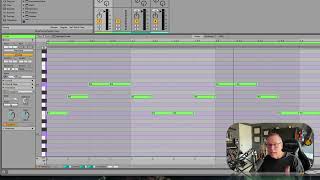
In this segment of the free Ableton Live 12 music‑production class, J. Anthony Allen walks viewers through the core controls of the Arpeggiator device. He begins by demonstrating the Rate setting, explaining how it determines the rhythmic subdivision (e.g., 16th‑note) of each generated note, and the Gate control, which sets the note’s duration as a percentage of that subdivision. Allen then tackles the more complex Steps and Distance parameters, which have no official manual. He shows that Steps dictate how many extra notes are added beyond the original chord tones, while Distance defines the interval (including negative values) of those added notes. By toggling key‑lock, the added notes stay diatonically appropriate. He experiments with varying Steps from 0 to 10, adjusting Distance to create dense, “crazy” arpeggios, and demonstrates randomization and negative distances for lower‑range notes. The segment ends with a brief transition to the next Arpeggiator mode, “Connect.” The tutorial is instructional, hands‑on, and emphasizes practical sound‑design possibilities within Ableton’s arpeggiator.
Chapters
It alright, so I'm going to undo that because I want to walk you through some of these settings. Okay. Let's do these two first because they're the easiest rate. What is each individual note going to be? A 16th note is what I have it set to here. I can make it longer or shorter, right? Cool. Not a 12th note. Let's go back to 16th note. And then gate is gonna be the length of the note. Basically 100% is going to fill the whole duration of the 16th note. I can make it shorter if I just want short notes or I can make them longer if I want longer notes. Okay. But I'm gonna set that right to 100%. Okay. Now, steps and distance. This actually I had to like really work on this for like a while to really understand what's going on with Steps and distance because there's no manual yet. So here's what it is. Steps. This is both. These two buttons are going to add notes to the chord. They're going to transpose and add things. Okay. So if I take steps down to zero, we're going to add no notes. Okay. It's just going to be the notes that I put in F, A and C. Okay. It's F, A, C, F A, C all the way up and down. Okay. So the number shown here is how many notes are not in the chord. How many notes do I want to add to it? Do I want Ableton to add? So I have zero right now let's say one. Okay. I have one note. So now there's going to be one note somewhere that's not in the chord that it added. And it's going to be this E it added up at the top. Neat. So how is it deciding what note that is? It's with this distance thing. So this is determining the interval of the chord tones or of the notes that it's going to add. Now again, it's going to stay in the key if I ask it to, which I have done by turning this on. So now I can add all kinds of extra notes. I can say make 10 extra notes. Crank this up. Let's take this up to something so we can see all of them. See, now it's adding all kinds of extra notes. And this actually makes kind of kind of a cool effect. Right. Let's change our pattern. Let's make maybe less. Okay. So we went from that just an F major chord, just three notes to this crazy thing. We can tune it a little bit more. And we get back up to zero note. Okay, let's go random. Oh, and with this distance, you can go negative, and it'll add lower notes. Cool. So it's all over the place. So that is what our new supercharged transform arpeggiate option does. Cool. All right, so let's look at another one. Let's look at Connect.