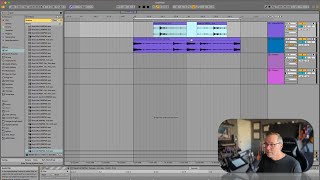
J. Anthony Allen shows how to consolidate drum loops in Ableton Live 12, export them, then layer the original and edited versions together. He removes overlapping kick transients with Command-E to clean up the low end, then adjusts volume to create an echo effect. Keeping the clips separate lets you switch between them for different beat densities.
Chapters
Okay, so I'm going to do two things. The first thing I'm going to do is consolidate this, which is going to turn it back into one loop. Okay, so command. So I'm going to select what I want. Command J. All right, now we have our loop. What I could do now is export this and give it a name like my loop. Right. And add this to my arsenal of loop of loops that I've made, drum loops that I've made. And that's cool, I can do that. But what I the second kind of trick I want to do is I'm going to take the original loop back in. Okay, now I'm going to play these at the same time. I'm going to combine these together and layer them. The only thing I'm going to do that's different is let's solo this one. And, and where that kick hits, I'm going to cut it out. Okay, I think that's a kick. This might be a kick too. Let's see. Okay, I'm going to cut out that kick. Okay, I'm going to cut out this kick and cut out this kick. Okay, now so let me explain what I'm doing here. So this is our loop that we just made. This is the original loop. And I'm going to layer this. I'm going to play them both at the same time. But if they both have that big kick sound, it's just going to be too much kick. So I'm going to get rid of that kick and now I'm going to play them both at the same time and see what I have. Okay, I'm going to turn the original one down quite a bit so that it feels like an echo. Kind of like it. Okay, so now let's consolidate this top one. But I need to consolidate this as a full two measure loop. So this isn't going to do it. Okay. I want this to be a full two measure loop so that I, I can easily move it around and play with it. So if I just do this, it's going to be this, I don't know, eight beats or so. But that's not what I want. I need this whole two bar loop. So I'm going to highlight this whole two bars and now I'm going to hit command J. And now it is a full two bar loop so I can play these at the same time. Okay. Now you might say to yourself, could I, could I consolidate these two things together? You can't do that. Consolidating only works for on a single track. I could export these as one thing or render them, or record them onto a new track and make a single clip, that is the two of them together. However, I don't want to do that right now because if I'm making a track or something, I might want the ability to do something like this, like have. Have this one come in and out. So I kind of want to keep them separate so that I can play around with the density of the beat, it being more dense when they're both in and less dense when just one of them's in. I might even want just this beat by itself. Right? So now I have the possibility of three beats. This one solo, this one solo, and then the two of them together. Okay, they're a bit. They're subtly different, especially these two, but still, they're giving me more material to work with. So experiment with this. This is a technique that I use a lot. It's just kind of a fun way to get some new ideas going. So like I said, this method of cutting them up using command E on the transients is one way to do it. There is another way to do a similar thing, and let's learn that now.