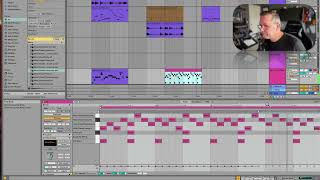
In this tutorial, the presenter demonstrates how to build a simple drum pattern and a custom Drum Rack in Ableton Live. He creates a two‑bar MIDI clip, places a kick on every downbeat (four‑on‑the‑floor), adds a snare on the second beat, and layers numerous hi‑hat hits for rhythmic texture, experimenting with syncopation. After hearing the loop, he shows how to copy individual drum hits (kick, snare, hi‑hats) from the original clip and paste them into a newly created Drum Rack by dragging them onto the rack’s grid. He emphasizes that any sample can be added this way, and notes that more advanced Drum Rack techniques and sound‑design concepts will be covered in a later part of the series. The lesson concludes with encouragement to experiment with the Drum Rack to create cool drum patterns.
Chapters
Okay, let's take all of these and just move them down. Sure. Okay. Oh, looks like I missed some. There we go. So these notes aren't sounding because we haven't put a sample there yet. So I'm just gonna move them down to where we have samples. Okay, now let's hear it. Okay, that's a mess. Let's quantize that command. U. That didn't help. So we might have to make our own for this. So let's make a new MIDI clip. Let's take it out to be two bars long. Okay. And let's do. Let's put our kicks on our downbeats. Let's just do like a four on the floor kind of thing here. That means, like, a kick on every downbeat. Let's do our snare here. We'll just do kind of a. Almost a techno thing here. And then I'm just going to kind of randomly do a whole bunch of these hi hats because I like little ticky sounds happening all over the place. Okay. I'm just gonna copy this, do it again there. Maybe adjust it like that. Like that. Okay, let's hear that. Okay, well, that's not bad. I kind of accidentally made some weird syncopation with one of these hi hats. Which is cool. I like it. Okay, so making a drum rack from scratch is super easy. You can drag whatever you want on it. Watch this. We could even go back up to our original drum clip and say, I want to add this snare drum. I'm going to copy that and paste it out here. Let's hear that. Make sure I got it. Yeah, I want that snare, so. Okay, cool. So I just copied it and pasted it out here. Now let's go down to that drum rack so I can see this grid. Now I'm just gonna grab this beat and plop it right there. Not this beat, but that snare hit. And now I have it in my drum rack. So you can take anything from anywhere and put it inside that drum rack. Now, you can get even more complicated with drum rack by adding more things to this. But let's leave it there for now. We're gonna go deeper into the drum rack once we get into instruments and sound design in, I think, part five of this series of classes. So hold on to that. But now you know everything you need to know about the drum rack in order to start making really cool drum patterns. So play around with it. Have some fun.