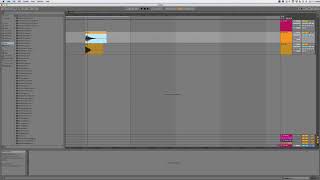
J. Anthony Allen shows how to build a drum beat by placing kick, snare, and hi-hat samples on separate tracks and snapping them to the grid. Misalignment by even a few pixels makes the beat sound sloppy, so he zooms in to lock every hit exactly on the grid line.
Chapters
Okay, next we need to talk about how to actually put this stuff together. Okay. Just like the mechanical stuff of it. And there's kind of one thing that I see people doing wrong with this all the time that I just want to point out. So here I am in the timeline. I'm going to zoom in. We're going to talk about how to read this timeline in just a minute. All these numbers up here. So don't worry about that for now. What I care about is really just this first number where it says 1, 1, 1.2, 1.3, 1.42. Okay, so that means between 1 and 2 is showing me one bar. Okay. So I'm going to loop one bar. You don't have to do that. Don't worry. I just want to do that to set this up. Okay, now I'm going to start us off with just three samples. So I have three samples here. And I'm going to give you these same three samples in the next lecture. So if you don't have any audio samples, that's fine. In the next lecture, you can download these. So I have a kick, a snare, and a hi hat, the three most basic things that we need. So I'm going to throw my kick on this track. And these are just audio samples. Now I'm going to make three separate tracks. And this is a good habit. Whoops. This is a good habit to get into keeping your sounds separate. So I need three audio tracks. And whatever software you're working in, just make three audio tracks. The reason I'm making three is because I'm using three different sounds. And it's just good habit to keep them separate on separate tracks. Makes it a lot easier to mix later. Okay, so here I have my kick, my snare, and my hi hat. So if I listen to those. Neat. Okay. Nothing amazing in these sounds. They're just kind of generic starter sounds that I grabbed for us to use. Okay, so when you're moving around these sounds, we can drag them anywhere within the beat that we want. We can duplicate them. Usually a quick way to duplicate is option, click and drag. That will leave the original one and put a new one in another spot. You can also just edit, copy, put your cursor somewhere, edit, paste, just copy and paste. And if you know the key commands for that, that's fine too. Okay, so I'm just gonna do this, that, and let's do this to make a very generic beat. Okay, There we go. Now, the thing that I see people doing wrong all the time is when you're placing samples on the grid. You see how mine kind of jumps to each spot on the grid. It's jumping by 16th note, which we'll talk about in a second. What's important is that if yours is not jumping like that, if yours is just sliding, let me turn that off and get mine to just slide without any of that jumping. Okay? So now I'm not sliding at all, or I am sliding. I'm not snapping at all. The thing is called snap to grid. Before, I had snap to grid on, and now I don't. Okay? So when I'm working in this way, where it's just sliding, this is a dangerous game, okay? Because if your. Your hits are just a hair off from the line, it can be bad. So be sure that you're dead on this line. So I want this snare to be on this 1.4. So I'm gonna get it there, and that looks pretty good, right? But now I'm gonna zoom in, and I see I'm not actually on it. So if you're not on a grid, you have to make sure that you are exactly on this line. Whichever line you want your hit to be on, just get right on it. And you might have to zoom way in. Being exactly on that grid is important when you're making beats. Now, that being said, later on in the course, when we're talking about kind of humanizing this and making it feel more natural, we might go off the grid quite a bit, right? But for now, make sure that you're just really on these lines. Just like, really tight on those lines. See how these ones are exactly on it. Make sure that you are exactly on those lines. Wherever you want your beat to be, be dead on it. And zoom right in there. Make sure you're on it. I see people doing stuff like this all the time where they're just not exactly on that grid, and it just. Everything falls apart just really fast. See? Let me just pull everything off just a hair. See, it sounds like someone's had too much to drink and they're trying to play the drums, right? That's not what we want. We want this to be super tight. So what I'm gonna do is I'm gonna turn snap to grid back on, and I'm going to tighten this up. Make sure everything is exactly on the grid right where I want it, and then everything sounds good. Okay? It's boring because I've made a very boring beat. But that's okay because it's tight. Everything is exactly where it needs to be. So that's how we work with audio on the grid. We just drop our samples right where we want them, keep them on separate tracks. So you've got kick, snare and hi hat. And make sure you're right on the grid. That's the basics of it. Okay, Now, I'm going to give you these three samples in the next lecture, so you can grab those if you want. We'll talk more about finding samples in just a bit, but for now, these will at least get you started if you don't have anything to work with. And you're welcome to use these for whatever you want. Okay, so next lecture, download links for these samples and then we'll talk about working on the MIDI grid.