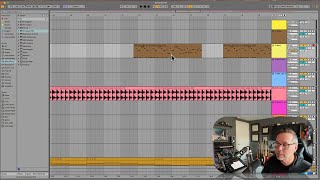
In this segment of the free Ableton Live 12 music production class, presenter J. Anthony Allen guides viewers through the Arrangement view timeline. He demonstrates how to hide and resize panels by dragging the gray divider, distinguishes between MIDI and audio tracks (explaining that MIDI tracks require an instrument while audio tracks need a clip), and shows how to move, highlight, and split clips using mouse actions and keyboard shortcuts (Cmd+Z to undo, Cmd+E to split). Allen explains how to minimize or resize tracks, configure MIDI inputs, channels, and monitor settings, and route track output to the master. He also covers the mini mixer’s volume control and shares a tip for resetting any parameter to its default value by selecting it and pressing the Delete key. The tutorial is instructional, focusing on practical navigation and workflow tips within Ableton Live’s Arrangement view.
Chapters
All right, now let's make our way around the Arrangement view sequencer window, our main timeline. Okay, so first I'm going to hide a few things. You can easily hide stuff by if you put your mouse over, like, one of these dark gray lines like that, you get this icon that kind of looks like a kind of arrow going up and down at the same time. If I click and drag here, I can make that area bigger or smaller. So I'm just going to smush it all the way to the bottom, and then it's going to go away. I can do that on the browser too, if I really wanted to, but I usually keep the browser open. Okay, but now I can see a whole bunch of my arrangement view timeline. So for each track. Okay, let's take a look at this track. So this is a MIDI track. We have audio tracks and MIDI tracks. This is an audio track. This is a MIDI track. The main difference is just that. A MIDI track, I need to put an instrument on it for it to make sound. And an audio track, I need an audio file to go on it as a clip. So I can see that there's MIDI information on this track. Can you see these little dots that says this is a MIDI clip. And down here you see this waveform that says this is an audio clip. Okay, so back to my track here, so I can see my timeline. I can click and drag on stuff to move it around. Now you want to click and drag on the header of the clip. That's this top part. Okay. If you click and drag on the lower part, you're going to highlight something. And then if you click and drag on it, you're going to move just that part part of it. Okay, I'm going to hit command Z to undo that. Okay, but if you want to move the whole clip, you can move things around this way. If you want to split the clip, then we're going to put our cursor somewhere, and command E is going to split it into multiple clips. This works on audio clips and MIDI clips. I'm going to undo that. Okay, now over here, we can use this little triangle to minimize this track. If we just don't need to see it very much can do that. You can also kind of just grab the bottom of it and make it nice and big, or nice and small, if you want. Here is our ins and outs. So this is a MIDI clip. So it's looking for MIDI information. So this is showing me all my possible MIDI things. These are MIDI devices connected to my computer. Okay. I'VE got some keyboards. A this Fishman thing is a MIDI guitar, push C board is another keyboard, all kinds of stuff. Usually you just want to leave that to all ins. That means any MIDI thing I play here, it's going to record as MIDI information. There's not a whole lot of reason to say just listen to this one thing or this other thing. In most cases, same thing with the channel. We're just going to leave it on all channels all the time. Our in, auto and off. This is our monitor settings. This means what are we going to hear while we're recording? Okay, we're going to talk more about this when we get into the recording section. For now, just leave it on auto and then this is our output. Where is the sound from this track going? In this case, we just want to send it to main. That's going to send it to our master track, which is all the way at the bottom down here. Okay. Everything should really be set to main, unless you're doing some other kind of routing or something. Over here we have kind of our mini mixer. Okay, this blue line that says zero, this is our volume. Okay. We can click and drag, pull it down up. Here's a fun little tip if you ever want to take something back to its default in live. This is true all over live, not just for this volume, but let's say we did, we adjusted this. And then say, yeah, I don't like it. Let's take it back to our default. Just click on it once to make sure it's activated and then press the delete key and it'll go back to its default. Super handy.