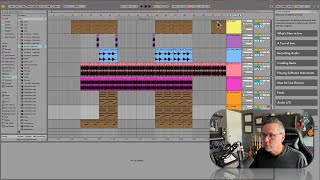
In this segment of the "Free Ableton Live 12 Music Production Class," J. Anthony Allen walks viewers through a high‑level tour of Ableton Live’s Arrangement View, highlighting the main interface regions and their purposes. He identifies the central canvas where tracks are arranged, the track‑specific controls (in/out points, mini‑mixer), the global browser, the lower Clip and Device views, and the top transport bar. Allen explains that clips—any audio or MIDI snippet—appear in the timeline and can be inspected in the Clip view, while tracks can be audio or MIDI. He notes that switching between Arrangement and Session Views only changes the central area, leaving surrounding panels unchanged. He demonstrates basic navigation: placing the cursor (teal line), using the space bar to play, observing the moving playhead, bar numbers, and time display. The segment sets the foundation for deeper exploration of Ableton’s workflow.
Chapters
Okay, so now that we know this Session view, Arrangement View thing, let's just take like a big picture view of both Session View and Arrangement view. Okay, so first let's do Arrangement View. So I've loaded up here a little track that I'm working on. So what I want you to see here is the kind of different rectangles that are around the screen. We've got this big area here in Arrangement View, that's kind of the canvas. Right? Then we've got, each track has some options. Over here we've got our ins and outs. We've got kind of a mini little mixer here. We can get a bigger mixer on the screen if we want, but it's hidden at the moment. Over here we've got what's called our browser. Down here we have two things actually. We have our Clip view and our device view. So that means that if I click on any clip we're going to see it down here. Now remember, a clip is any kind of audio or MIDI information, any nugget of sound making thing. Okay, so here's an audio track, that means there's sound in it. And here's MIDI track. Okay? These are all clips, okay? Anything you can put on the timeline here is going to be a clip. It's a very broad word that Ableton uses. Okay, so we can see that down here. Now if I click over here we can see the instrument that's on that track. Let's go up here. There we go. So here's the instrument. Now don't worry about what all this stuff does. We're going to get into all of it. We got plenty of time, don't worry. I just want you to understand the different kind of boxes where things live. For now over here I have a little lessons thing. I usually keep this hidden but I want it to be open just for now until I get a chance to walk us through these lessons, which I'll do shortly. And then up here at the top we have what's called the transport bar. This is our play stop, tempo, metronome, things like that. So what's important to note here is that when we go back and forth between Session View and Arrangement View, only this area here changes, okay? Everything else stays the same. Right? All of these outlying areas don't change. Okay? So keep that in mind. So in the session view we can click somewhere to put our cursor. That's this kind of teal looking line. And then if I press the space bar it's going to start playing. Cool, right I've got different sounds on different tracks. So each one of these we call a track. They have different clips on them. Now, there's a lot more here, but I just want to do big picture stuff. So I'm going to zoom in just a little bit and then hit play. And you can see the playhead, which is that teal line kind of scrolling as it plays the sound. You'll notice that at the top we see bar numbers 24, 25, 26, 27. And at the bottom we see time. Okay, so this is 1 minute in 105, 110. Co. Sam.