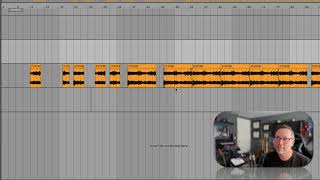
In this segment of the "Free Ableton Live 12 Music Production Class" tutorial, J. Anthony Allen demonstrates practical clip editing workflows in Ableton Live. He shows how to use two‑finger zoom for precise selection, copy and paste audio clips, and duplicate clips via the Option‑drag method or Command‑D. He explains moving clips with or without highlighting, deactivating (muting) clips using the 0 key, and reactivating them. The tutorial covers splitting clips with Command‑E, managing the grid—including turning it off, using the adaptive grid, and adjusting its resolution—to place clips freely or on finer subdivisions. Finally, he introduces built‑in clip fade controls. The instruction is step‑by‑step, emphasizing shortcuts that speed up drum programming and general arrangement tasks.
Chapters
If you want to select a finer amount, I'm going to use my two finger zoom and just get in there. Now I can get little tiny pieces and paste it in. I can paste it into a different track as long as it's an audio track and that'll be just fine. Like I said before, if you click, if you highlight something and then grab the header and move it, you're going to move just that. But if you don't highlight anything and just click the header, you'll move the whole thing. Okay. Another kind of copy trick that I use all the time, like probably my most used key command is take something, highlight it, and then I'm going to hold down option and click and drag and that's going to duplicate it. Okay, So I can just press command D to duplicate something and I can do that all day long. Right. But I can also option, click and drag. That's going to leave the original where it was and give me a new one where I want it. So that option, click and drag is really handy. I use that especially on like drum programming where I've got like a snare sample and I'm going to put it all these different places. Option, click and drag is a great tool. So if you forget any of these things, go up to edit and you can pretty much find all of them. Cut, copy, paste, duplicate. You can delete a clip just with the delete key. Deactivating a clip is something you can do and you might want to do this from time to time. Just click on a clip and then press the zero. That'll leave it there, but we're not going to hear anything. It's like muting just that clip, which is a handy trick when you're trying out a few different things. I can press 0 again to unmute it or to reactivate it. Okay, so just the standard normal cut, copy, paste things. If you want to split a clip, just put your cursor where you want to do that and then command E. Remember you can zoom in farther to get more into that. And you may notice that we're kind of bound to the grid here. I can't move things in between the grid. You can always zoom in more and more and more to get a finer and finer grid. But if you just don't want the grid at all, you can always just control click and go down here and just turn the grid off. Now there's no grid. We can put things anywhere we want. Okay, this is a dangerous thing to do, but you can do it if you want. I'm going to go back to using adaptive grid and medium. So adaptive grid means that the grid resolution is going to change based on where I'm zoomed in. Actually, I want it a little narrower than that. There we go. Okay. So it's going to kind of keep moving with me, like we've been doing. Okay. Some very basic things. Now let's talk about kind of what's built into a clip in terms of fades and things like that.