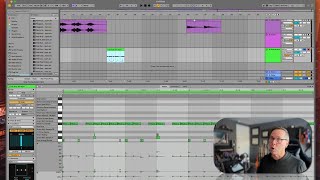
In this segment of J. Anthony Allen's Ableton Live 12 music production class, the instructor introduces the concept of locking down a track using the freeze and flatten functions. He explains why a producer might need to do this—primarily to reduce CPU load when the computer is running hot or to prepare a session for sharing with collaborators. The tutorial details the technical effect of freezing (rendering a track to a temporary audio file while keeping the original MIDI, instruments, and effects hidden and reversible) and flattening (permanently converting the track to an audio file, discarding the original data). Allen demonstrates the right‑click workflow, shows the visual cue of a frozen track turning blue, and clarifies that flattening is irreversible. He also notes that other DAWs use terms like “render in place” or “print,” but in Ableton Live the terminology is “freeze” and “flatten.” The segment emphasizes practical benefits: freeing CPU resources and creating a stable, shareable version of a track.
Chapters
Okay, one more thing that's an important concept in Live that we just haven't touched on. That is sometimes we want the ability to lock down a track and say, this track is the way it is. Now, there's a whole bunch of reasons for doing that, but the two most important ones are you are either sharing this track, like sending this whole session to someone else, and I'll talk more about that in just a second, or your computer is just running too hot. Like, if you look up here, we see this 1%, right? That 1% is telling us how hard our processor is working. We can click on it and get a little bit more info. But if that's getting up pretty high and your computer starting to go slow, then you might want to do this trick. And what this trick is is called freezing and flattening. What it's going to do is it's basically going to render a MIDI track as an audio file or render an audio file without all its effects. So in other words, it's going to. It's going to put all the effects into the clip and then turn off the effects so it'll sound the same, but you won't be able to make any adjustments anymore. Okay, so here's how we do it. We just go over to the track control click or right click, freeze track or freeze and flatten track. If you freeze the track, that's going to disable MIDI stuff, effects, instruments, anything. And it's basically going to be a temporary audio file. You can kind of see that it turns blue because it's frozen. And this is like a. There's like a hidden audio file that was just created. The reason you might want to freeze something but not flatten it is you can unfreeze things, I can unfreeze it and wake it up. But if I flatten it, it's going to turn it into an audio file. And I can't go back. Okay? So, I mean, I can. I can kind of undo it right now, but once I get further down the road, I can't go back from that. But it's going to be kind of rendered as an audio file. Now, if I go to my audio file and they have effects and things on them, and my computer is running really slow, so I might want to render those effects onto the track and then turn off those effects. That'll help free up your computer. Okay? So freezing and flattening is just kind of how we do that. Different programs call that different things. They might call it render in place, they might call it print. Like printing. The audio is like a thing. It's a weird term, but it is a term. In live, we call it freezing and flattening.