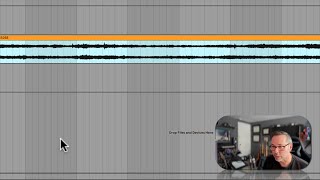
In this tutorial segment, J. Anthony Allen walks viewers through the visual and functional anatomy of an Ableton Live audio clip. He explains that each clip appears as a rectangle with six interactive corners—four on the clip body and two on the header—each offering distinct actions. By hovering over the top‑right header corner, a symbol appears that, when clicked, expands the visible portion of the clip, effectively revealing more of the underlying audio. Allen demonstrates how the loop setting, indicated by a small black tick at the clip’s end, causes the clip to repeat indefinitely, and how disabling loop stops playback at the new endpoint. He shows how to trim, expand, and “smush” the clip without altering its timing or speed, emphasizing that these operations merely adjust a window into the original audio. The segment culminates in a discussion of non‑destructive editing, clarifying that deletions merely hide audio rather than permanently remove it, ensuring the original material remains accessible throughout the session.
Chapters
Okay, now every clip, it is a rectangle, but it's a mysterious rectangle because it has six corners. Okay, we have a corner here where this dot shows up when I put my mouse over it. We have a corner here, we have a corner here, we have a corner here. And we have corner here and here. Okay, the. The header kind of gets its own corners and. And each of those corners can do a special thing. I'm going to delete some stuff around here just to make room. So let's zoom in. First, let's talk about the header corners. Okay. If I put my mouse over the top right header corner, I get this symbol with my mouse. That means that if I click and open it, what's going to happen is I'm gonna reveal more of that clip. Okay. So I can keep going. And I'm gonna get more and more and more, and it's going to keep going forever because loop is turned on for this clip. That means that when I hit the end of the clip, it's gonna keep going. Now, you can tell I hit the end because there's a little black tick right there. See that little tiny mark right there? That means that's the end and we're starting over. If I do this, I turn off loop. Okay. Now I can drag it out to the end and then it stops. Okay, that's the end of my clip. Okay, so what this means is that if I did something like this, let's copy just this little bit on the inside. Let's delete that. Okay, so now I have just that little bit from the inside. I don't really have just that little bit from the inside. I can always get more of the original clip back by going to the header and pulling open the clip. And I can do that on both sides. Okay, so now I'm back to the full original clip. I can smush it down by doing that. And all I'm doing, I'm not changing the time or the speed or anything like that. I'm just kind of opening up or closing a window into the clip. So if I want just this bar, I could just smush down to there and smoosh down to there if I wanted. Okay. But Ableton and most every modern audio program uses a system of editing called non destructive editing. That means that if I was to go through here and I was going to like delete part of this clip, I didn't really delete it. I just hid it from live because we don't want it right now. If I want it back it's always there. Okay, so nothing ever really gets deleted from your session?