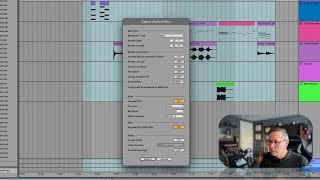
In this tutorial, J. Anthony Allen walks viewers through the complete process of exporting a finished Ableton Live 12 project. He begins by explaining the two primary export formats—high‑quality WAV/AIF for mastering or distribution, and compressed MP3 for quick sharing—then demonstrates how to select the desired region using the loop brace. After confirming that no tracks are soloed, he opens the File → Export → Audio/Video dialog, selects the main mix, and reviews key rendering options such as start/end points, normalization, and sample rate (matching the project’s 48 kHz). Allen shows how to enable both PCM (full‑quality) and MP3 outputs simultaneously, sets a 16‑bit depth, and recommends a POW‑R1 dithering setting to reduce quantization artifacts. He briefly mentions the optional video export feature, noting its relevance only when a video track is present. Finally, he executes the export, resulting in both WAV and MP3 files ready for sharing, uploading, or mastering.
Chapters
Okay, so we've made a track. We're happy with our track. It's super cool. Let's export it as a WAV file or an MP3 file or whatever we want in order to send it to our friends or upload to the Internet. So if you're not sure what type of file you want, we basically have two options. Full quality, big deal audio file, that would be a WAV file or an AIF file, or small compressed file that would be an MP3 file. Those are really our two options to export if you want to post this on social media, or email it to someone or something like that. You want an MP3 file. If you want to upload it to Spotify or Apple, or more importantly, send it to a mastering engineer to master that track, then you want a WAV file. Luckily, we can make both at once. So in order to do this, first thing we're going to do is select the region that is our track. Now, most of the time that's going to be beginning until the end of your track, right? Right. So you select the region. Sometimes it's easier to put your loop brace over the region. So this is, let's say this is the beginning and this is the end. Now, we're not going to loop it, but what we can do with the loop brace, it's just a handy way to select everything within an area. Okay, so this is what I want to select. This is my track. It doesn't need to start at the beginning of a session, although that's usually easier to deal with. Okay, make sure nothing's soloed. Make sure everything is. When I hit play, we're going to hear everything that we want to hear. Okay, once we have that all set, we're going to go to file export, audio, video. Okay, so rendered track, what are we listening to? And rendering main. The main track. That's this one down here. That's everything that we can hear. So that's almost always what you want. Here's our start and end points. Rendering options. You can do these things if you need to. If this is a rough mix, you may select normalize. That'll make the whole thing a little louder. But if you've really worked on your mix, you want to turn that off, probably. Sampling rate should be the same as what you're working at. So you can see up here, this is 48.0 kilohertz. So sample rate here should be 48,000 kilohertz. Should be the same. Okay, now I have three export options here. PCM is that full quality big deal audio file we talked about. So encode pcm. If you turn this off, then it's not going to make that full quality audio file and it's just going to make an MP3. That's fine. You can do that. If I do this, it's going to make both. So I'm going to set wave bit depth 16 is fine. Dither options. You can either leave this at none or if you want to be fancy, you can do POW minus R1. That's what I always do. This just helps suppress any kind of glitchy things that might happen. We can talk more about dithering in the recording section, but don't worry about it too much for now. Okay, MP3, I can have it make an MP3 or not. And video, I can have it make a video or not. Now in this case, it's not letting me make a video because there's no video in this thing. It doesn't have anything to put in video. But you can import a video file into live. If you're doing like a film soundtrack or something like that, that is a handy way to do it. And then you can export a video. But there's no video here, so we're going to leave that off. Okay, then we say export. It's going to ask us where to put it and it's going to make those two files for us and there you have it.