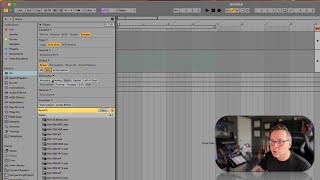
In this tutorial, J. Anthony Allen demonstrates how to efficiently locate snare sounds in Ableton Live 12’s library browser. He starts by showing why a search for “snare” returns nothing when the user is inside a specific collection (UVI) and switches to the “All” collection to see the full library. He then walks through using the filter panel to narrow results by type (sample), mode (one‑shot vs loop), category (ambient/FX), tag (snare), articulation (rim vs hit), and source (acoustic, analog, digital). After applying these filters, he previews the results, selects a suitable sample, and explains how to edit a sample’s tags via the edit button, adding or correcting tags such as “clap.” Finally, he shows how to save the filtered view as a live search (e.g., “rim clicks”), which automatically updates when new content matching the criteria is added to the library. The tutorial emphasizes the workflow of drilling down with filters, customizing tags, and creating persistent live searches to streamline sample browsing.
Chapters
Okay, let's talk about searching. So let's search for a snare. Snare drum sound. Okay, so I'm going to type in my search bar here and say snare. Okay. Nothing comes up. Why? Because I'm in uvi. I'm in this collection right now. So I'm going to go back to all. This is the best use case for that library item. All this just shows you all of everything which is otherwise useless unless you're searching. So when I go here now, I can drill down a little bit deeper. I find a bunch of stuff, right? Like this is snare stuff, right? This is not useful to me. This is a very, very, very long list. So if you don't see these filters here, open up this little tab right here's filters. So now I can say, well, what kind of snare am I looking for? Am I looking for a sample or a preset or a groove or a device? Let's say sample. Okay, that narrows it down a lot. Do I want a loop or a one shot? A one shot is a term that we use for a snare sound that's just crack just one. Just that a loop is, you know, know, going to be a pattern or something. So let's do a one shot. It's asking me if I want it in the ambient and FX category. No, I don't think so. Snare tag. Yes. Don't want it to be a hit RIM or an articulation. Let's do a rim. Acoustic, analog, digital, let's say acoustic. Okay, that's enough to get me just a whole bunch of good stuff. Snare, RIM sounds. So let's listen. Perfect. That was all of them. This last one, maybe not so rimmy. Okay, so now I've got, I don't know, maybe 20 here to choose from. That's way better than that giant list. So you want to use these filters and tags. Now you can edit these filters and tags by going to this edit button here. And you can tag things certain ways and you can see things about this particular sample, what it's been tagged as. So it's tagged as hit. And you could say, oh, this is actually a clap and add that to it if you wanted. But also what's really cool is you can save this search. So if I said here is a live search for all my RIM clicks, I could hit this little plus sign here and it's going to put it right here. I'll say rim clicks and return. Okay, now this little button here in my library is a live search so if I installed some packs or a new library or anything, and it had a bunch of new RIM sounds in, it going to show up here automatically, right? This list is going to grow as I do that. So that can be really handy. I'm going to control click and say, remove this. So that's browser tags. We can search and click, all search for kick. And then we've got these tags we can use to help us drill down better and sift through the things we don't want much faster. Cool. All right.