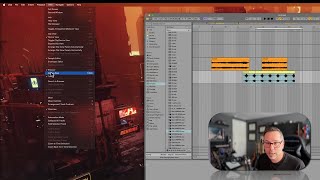
In this instructional segment, J. Anthony Allen explains automation in a digital audio workstation, defining it as changing a parameter over time. He demonstrates how to enter automation mode (pressing A or via View > Automation), discusses the conflict with the computer MIDI keyboard, and describes visual cues such as dotted versus solid lines and red/pink corner dots that indicate automated parameters. Using a cat‑meow sample, he shows how to automate volume to create a fade and how to automate panning to move sound left‑right, illustrating the process of placing automation points and drawing lines. The tutorial emphasizes practical steps, visual feedback, and the importance of automation for creating dynamic music.
Chapters
So next, let's talk about automation. Something very important if you're going to be making reasonable music. And what is automation? Automation is changing a parameter over time. Very simple. So the way we do automation, and this is the same in every DAW I've ever worked with, is we make two points and then we draw a line. So let's say I want to change the volume of my cat meowing over time. I could draw in a fade this way, right? But that only lets me go so far, right? It only lets me go this far because it can't stretch over a loop in this way that I'm doing it. So let's say I want it to fade in all the way to be nothing here and full volume here. Okay. For that I need to go into automation mode. So there's two ways to get to automation mode. The first is just press the key A. No modifier, just a. Now, that may not work for you if you have this button turned on. This is our computer MIDI keyboard. This means you can treat your letter keyboard like a music keyboard. That's cool. But you can't have that on and use this automation key command. So if you have that on, you can either turn it off or you can just go up to view and automation mode right here and select that. Okay, so now we're in automation mode. So we see these, these kind of pink lines going across our computer. So I'm going to go click on what I want to automate. That's the volume, which is right here. And it gives me a dotted line. Dotted line means there's no automation. That's cool. So I'm going to click on a spot on that dotted line where I want to automate. And then I'm going to click on another one and I'm going to draw, pull this down. Now what this is going to do is it's going to change my volume over time. So if I start right here and I hit play, let's turn our looping off. So I hit play with the spacebar. It's going to get louder and louder. Okay. And you can see my volume right here climbing. See, look over here. Okay, that's my volume. You can also see that there's this new kind of red pink sort of dot right here. Whenever you see those little dots in the corner of a parameter, that means it's been automated. There is automation information that has been created for that track. In other words, it's going to change on its own. How about panning? Let's do panning so in order to switch over to panning, all I need to do is click on it. I click on panning and now I've got another dotted line. That dotted line is there because there's no automation. So it's dotted. It will become solid as soon as I put some automation on it. So it's right in the middle for center. Let's make a dot. Let's make another dot. Move that up. There's another dot. Move that down. Another dot. Oops. Move that up. Down. This is how you make someone seasick if you do this nice and fast, which this isn't, because I don't want you to be seasick. Okay, now our panning is moving around. So now our panning is going to move around. It's going to sound like it's going from left to right. It's also still going to be faded in because our volume is still automated. Okay, so we have two automated parameters on this track. Okay. Really wishing I would have picked a better sample for this example, but whatever, we'll roll with it.