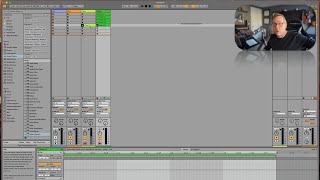
In this tutorial segment, J. Anthony Allen walks through the fundamentals of recording in Ableton Live’s Session View. He explains the visual cues of clip slots—circles indicating an armed track ready to record and squares for stop—demonstrates how to arm a guitar track, start and stop recordings, and create multiple clips without stopping. He then shows how to unarm tracks for playback, adjust clip start points, and tidy the session. The lesson covers multi‑track recording by command‑clicking multiple slots, the role of monitor settings for instrument inputs (e.g., guitars), and the importance of global clip launch quantization, which forces new clips to start on the next bar. Allen highlights how setting the launch quantization to one bar enables synchronized recording of multiple tracks, while noting that setting it to “none” would start recording immediately. He concludes that Session View recording mirrors Arrangement View but can be more efficient for continuous, button‑driven workflows.
Chapters
Okay, let's do tracking and multi tracking in Session View. So when it comes to recording, Session View works a little bit differently. So you'll notice that in our clip slot grid, we have a little square next to all of our slots. Square means stop. Just like up here. Stop. Okay, now I don't need to stop anything at the moment, but you'll notice that my guitar track only has circles and that's because it's armed to record. And it is all set up to record my guitar because that's what we were just doing with this track. So if I click one of these circles, it's going to start recording. And then I'll hit stop. Okay. It's as easy as that. I just recorded this. If I double click on this clip, you can see there's that strum. Okay, so I could record more. I could record another thing. Sure. And another thing, and another thing. I don't even have to stop one. I can keep going all day long. Okay, cool. Right, so I've got all these clips now. Let's unarm that and we can launch them. Okay. We can obviously tidy them up if we want. We can say, you know, start right there or so we can tell this one to start up there. Can do all kinds of funny stuff with them. We'll get into that more when we start talking about really kind of producing with stuff. But. But recording in Session View is actually really, really easy. Multi track recording works the same. We can record there. I can command, click, and record here. Also, just keep in mind your monitor settings are up here. And you may have asked yourself earlier and I didn't address it, but does the monitoring matter on my guitar? Not really. I could leave it on. I'm not going to create feedback because it's not a microphone. So I could leave it on if I wanted to and hear things through my speaker as I'm playing. That would be fine. Anyway, so mind your monitor settings. Once I'm all set up here, I'm just gonna hit record on both of these and then they're gonna start on the next downbeat. This is kind of how Session View works in that there's a global clip launch and it's this button right here. So that means that new clips are only going to launch on a bar. Okay. So if I click record, it's going to wait till the next bar to actually start recording. Even though my metronome is making us do that too. This is what's actually going to do it. So if I wanted to start recording like right away. I can set that to none, but having it set to one bar is actually really good because that gives me time to click both of these before the end of the bar so that they launch at the same time and start recording at the same time. So otherwise, recording in Session View is virtually the same as Arrangement View, and in some ways it's actually easier and more efficient because we could just keep hitting these buttons all day long.