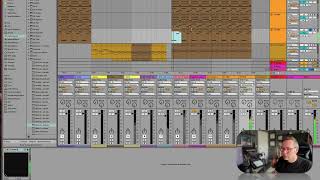
In this segment of the daily Ableton Live 12 production class, J. Anthony Allen walks viewers through a sample Ableton project, highlighting how he built the track layer by layer. He starts by creating a simple MIDI riff by clicking notes into the piano roll and assigning it to the new Meld synth with a subtle echo effect. He then showcases a variety of audio elements sourced from Splice—including a vocal sample and a drum groove—explaining that Splice purchases cover royalty obligations. The tutorial proceeds to demonstrate several synth plugins: the FM8 FM synthesizer for an 80s‑style warm sound, and the Contact (Kontakt) sampler used for both a piano and other instrument patches. A recorded guitar part is introduced, processed through an amp emulator and a delay to achieve a clean, spacious tone. Additional layers such as a clapped percussion track, bongos, and an arpeggiated robotic synth are added to thicken the arrangement. After playing back the composite track, Allen signals a shift toward the next lesson, which will cover precise editing and alignment techniques within Ableton Live.
Chapters
Okay, so what are the elements here? Here we have a MIDI riff. Okay, this is just a MIDI thing. Now with this one, I didn't play this in. I just clicked through to make this. So, you know, you can add notes just by clicking like that. So that's what I did for this. And then the synth it has on it is the new Meld synth. And we'll talk about how to do that. It also has an echo on it, a little delay. Here we have a drum sample. Let's see what it. What this is. So if I solo this, I hit the S here and then listen. Oh, no. This is that vocal sample I found. I think I got this on Splice. Anything you get on Splice, if you buy it on Splice and then you can use it. Royalty are all covered. This is probably just this little drum groove. Cool. Here's another synth thing. Here's another percussion layer. And then some of the synth I added. And I think I did play this one in. Yeah, this is just a chord progression. And you can see the synth I'm using here. This is actually a plugin called Contact. We'll talk about Contact soon. Here's another sound. This is another. Oh, this is FM8 synth. This is a plugin. If I open it, you can see what it is. This is a kind of FM synthesizer emulator. It sounds like this big warm synth. And moving down, this looks like another FM8. Use FM8. Give that real kind of 80s sound that I'm really into right now. And then here's maybe another fm. No, this is another Contact instrument, just a piano. And then down here, this, I believe, is just a guitar track that I played in. Okay, so that's me. I'm running through this guitar rig amp emulator to give it kind of a nice clean sound. I recorded this the same way I just showed you. I just sat here and played it, actually. I think I stood when I played it, but. And then there's a little delay on it also. Little clap on the next track. What is this? Arpeggiated synth, kind of adding a little robotic sound. And then bongos thicken it up. So all of that put together sounds like this. Oops, Unsolo that. You want to hear. Basically the same thing, but with less context, with less going on. So different layers of things happening. But yeah, so it's just a little peek into a track. We'll look at another track, I think, at the end of this class, and it'll be fun. Okay, now let's move on and let's talk about editing. Like, how do we get things lined up just perfect, perfectly? And what kind of editing can we do in live? It's a lot.