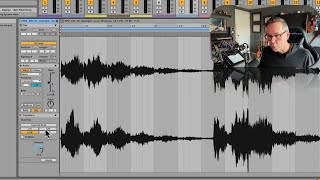
In this segment of the free Ableton Live 12 music production class, instructor J. Anthony Allen demonstrates how the Clip View operates consistently in both Session and Arrangement views. He shows how to open a clip, resize the Clip View, and use its basic controls—volume, pitch, reverse, looping, time signature, position, and quantization. He explains how to hide and reveal the Clip View, and how the Clip View shares space with the Device View, which can be toggled with Shift+Tab. Using an audio clip and a MIDI clip as examples, he illustrates switching between Clip and Device Views, displaying both simultaneously, and briefly introduces creating new clips. The tutorial is instructional, focusing on practical UI navigation and workflow tips for music production in Ableton Live.
Chapters
Okay, so whether or not you're in Session View or Arrangement View, the Clip view works the same. So I'm going to take any clip. Let's take this one. I'm going to double click on it. And now the Clip view pops open. Okay. Now I can drag the gray line right here. Click and drag to make it nice and big if I want. So in Clip View, it's kind of like putting a clip under a microscope, right? Right. We're like now like zooming in, focusing on that clip. So we have some controls for this clip. We have a bunch of things we can do to it. Just looking at some of the more simple ones, we can boost the volume or cut the volume. This isn't a great way to do that, but it's here. We can change the pitch. So if I want this to go higher, we can do that and do all kinds of funny things with the pitch. We can reverse it so that it goes backwards. I can hit reverse again to make it go back forwards. And we can change like, is it looping the time signature of it, the length of it, the position. Do some quantizing, more on that later. Now, if you want to hide this, we have this little arrow down here. We can click on that and it goes away and we can bring it back right there. Now, this area is shared by the Device View, which again we can get to with Shift Tab. There's no devices on this track, so let's go to one that does have devices like this one. So here's a MIDI clip. I just double clicked on a MIDI clip and made one. I can Shift Tab to go over to my Device View or I can click down here. Okay, here's my Clip view. Here's my Device view. Okay, two of them. And if I want to see them both at the same time, I can just click this little arrow here and it's going to go up, up. Now I have Clip View and Device View all open at the same time. Okay, let's talk about creating clips.