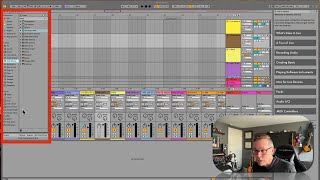
In this segment of the free Ableton Live 12 music production class, instructor J. Anthony Allen walks viewers through the main interface elements of Ableton Live 12, explaining their historical origins, purpose, and how to use them efficiently. He starts with the Transport section, tracing its name back to tape‑machine control boxes, then moves to the Browser, emphasizing its crucial role in saving time. He demonstrates the Device View and Clip View, showing how they can be toggled or displayed simultaneously, and introduces the Help/Info view. Allen also discusses Ableton’s single‑window design philosophy, noting how the mixer can be opened in a separate window on multiple displays and how third‑party plugins may spawn their own windows. The segment sets the stage for deeper exploration of the Info/Help view in upcoming videos, positioning these UI navigation skills as essential for productive workflow in Live.
Chapters
Okay. There's a lot of things that I love about online teaching, I really do, and I really believe in it a lot. But not the least of which is that you can't smell the onions on my breath from these delicious tacos I just ate. But anyway, back to Ableton live 12. So navigating live in this section we're going to talk about all these different areas in more detail. So this top part is called the transport. Now I know I already kind of walked you through these, but I want to do it in a little bit more detail first before we go into a lot of detail. So the transport, this actually kind of comes from an old tiny term, kind of from when we had big tape machines to record on. And there might be over here like a big like reel to reel system. And then you might have a box about this big and that had a big play, stop, record, forward rewind button on it. And it was on a long cable and you could kind of move it around the studio a little bit. And that was called the transport box. So that's where we get this term, the transport. Over here we have the browser. Now the browser isn't the most sexy thing in Live, but understanding your way around it really well will save you so much time, like hundreds of hours. So we are going to spend a lot of time on getting good at navigating the browser. Trust me, you're going to thank me for it. Then at the bottom we have our Device View and our Clip view all in. We can actually see both at once with these toggle buttons down here. So this is showing me my clip and this is showing me my device. So we can see both at once. But if we only have one open, they're going to flip between the last thing we clicked on. Over here we have Help View or Info View and I'm going to show you another Info view that's going to come up in this lower left corner in a minute. Then we also have a few kind of strange things like this little tuning window that I can hide if I want, but that's really it. Ableton is really big on single window. Like they want one window and you can do everything within one window. They don't want a whole bunch of other windows popping up on you. There is a way to open your mixer in a separate window. If you're on like two displays, you can do that by going to view the View menu. And then there are things like plugins that will pop up in a new window, but those are not Ableton things. Those are kind of things that run within Ableton and are separate. We'll talk about those later. For the most part, Ableton runs in one big window. Okay, so let's go into InfoView and help view in the next couple videos because those are going to be super valuable to you right away as we start learning live.