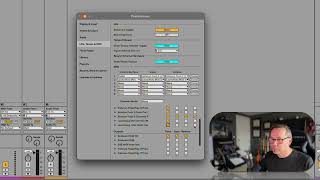
In this segment of the "Free Ableton Live 12 Music Production Class," J. Anthony Allen walks students through the practical steps for configuring a USB MIDI keyboard in Ableton Live 12. He explains that most USB keyboards are auto‑detected, but if not, users should check for required drivers. He then details the four key checkboxes under the MIDI Input settings—Track, Sync, Remote, and MPE—describing what each enables (note playback, tempo control, transport control, and high‑resolution MPE support). Allen advises enabling only the options the keyboard actually supports, noting that the Novation Launchkey only needs Track enabled. He mirrors these settings for the corresponding MIDI Output section to ensure consistent behavior after unplugging and re‑plugging the device. Finally, he highlights Ableton’s tiny MIDI activity indicator light, showing how a quick test (playing notes) confirms that MIDI communication is functioning. The overall message is that proper MIDI setup is straightforward once the correct preferences are set and verified.
Chapters
So once it shows up, and again it should show up automatically. Really any keyboard that's USB should show up automatically. If it doesn't, check to see if there's any drivers or any software that needs to be installed for that keyboard. But most of them won't need anything at this point. Okay, so now we're going to go over to all these little checkboxes. First thing you want to do is make sure the first checkbox under track is, is turned on. Okay, so turn those on. The rest of these you don't have to turn on. What the track setting is going to do is say this can put things into a track. In other words, this thing can play notes. That's what it's allowed to do. If we go to sync, we can say this thing can control the tempo. If we turn on remote, we're going to say this, this thing can control the transport of live. Essentially. Like if your keyboard has a play stop pause button on it, you can turn this on and it'll be able to control live. This keyboard, this novation launch key doesn't have a play stop pause. So I'm just going to leave it off. And mpe. MPE is kind of like a high resolution midi. Some keyboards can do it and some can't. These seaboard ones can do it, so it's turned on. The Ableton Push 3 can do it, so it's turned on. This launch key cannot do it, so it's not turned on. So if your keyboard is capable of it, turn it on. We're going to talk more about MPE in just a few videos. So just kind of hold on to that for a minute. I'll show you what MPE looks like. Okay, now whatever settings you do there, you might as well do the same settings for the outputs. So launch key, turn on track. I probably don't need these other ones. I'm not sure why they're on. And that's it. So now if I unplug this keyboard and then plug it back in later, the same information is going to come back up. And then also remember, I think we talked about this in the first class. We have in the live interface this special little tiny square right up there. That little square has one function and one function only. It's going to light up when it sees any MIDI information at all. So when in doubt, plug in your keyboard, smash your fingers on the keyboard. So there we go. There is that light. Okay, so always just look for that. It's a really quick way to say is MIDI working. Yep, MIDI is working. So that's your setup. It's actually really quite simple.