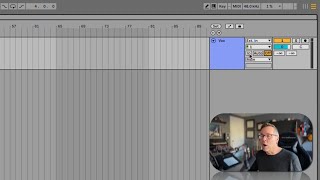
In this segment of the "Free Ableton Live 12 Music Production Class! Delivered Daily" tutorial, J. Anthony Allen walks through Ableton Live’s three input monitor modes—Off, In, and Auto—explaining how each controls the routing of a microphone or other input to the speakers. He demonstrates the "In" mode, showing how it creates feedback by sending the input to the speakers, and warns about the potential ear, speaker, and microphone damage from feedback loops. He then contrasts this with the "Off" mode, which silences the input from the speakers, and notes that using headphones eliminates feedback risk. Finally, he describes the "Auto" mode, which routes the input to the speakers only when the track is armed for recording, preventing feedback during playback. He provides practical advice for home‑studio setups: use headphones when possible, keep monitoring on Auto for most situations, and switch to Off while recording without headphones to avoid feedback.
Chapters
Okay, Monitor modes. So here's what these say. Basically what these are controlling is routing your microphone or whatever your input is that you're recording, routing it through live and to your speakers. Okay, so what we're saying here is, do you want to hear that microphone through the speakers? If I say off, I'm saying, no, I do not want you to play this microphone through those speakers. Okay. If I say in, I'm saying, yes, route that all the way through the speakers. So here I go. Now I'm doing it. Now I'm going to turn it back off. The reason I only did that for a split second was because that's how you make feedback. And feedback can be really bad. It can hurt your ears. It can actually damage your ears. It can damage your speakers, it can damage your microphone. So what feedback is in this case is the speakers are playing what's going through the microphone. So it's. So the speakers make sound, the microphone picks up that sound, the speakers play that sound, the microphone picks it up and it goes in a loop and it gets a little louder every time and it just goes, that's feedback. So if in always makes feedback, why would anyone do that? Well, there's a very good reason. If I put on headphones, it wouldn't do that. It wouldn't make feedback if I put on headphones. And there's a lot of time where you need to hear what you're doing. So if I was singing along with the track, I might want to hear this vocal through my headphones. So if I could do that, that would be great. But since I don't have headphones on, I'm definitely not going to click that in. You can think of this in. In the input monitoring as your headphones button. If you're wearing headphones, turn that on. It'll be great. If you're not wearing headphones, don't turn that on. Now that leaves us with auto. So Auto means that it is. Is going to route our microphone through our speakers when we are recording or when we're armed to record, but it's not going to do it when we're playing back. Like right now, our track is not armed to record, so it's not playing through. If I turned it on, If I armed it to record, now it's playing through and now we're in danger of feeding back. So we're going to stop that for a second. So if I just want to record my voice here in my home studio and I don't want to put on headphones, I'm going to leave this to off, then I'm going to arm it to record. Now, you can see I've got signal here, right? It's coming up, but it's all grayed out. So that tells us that this track is seeing my signal. That's good, but it's grayed out, meaning. Which is telling me that I can't hear it because monitoring is off, but it is going in there and it's not playing through my speakers. So in most studio settings, leaving it on auto all the time is great, but for me, I'm gonna leave it on off while I'm recording for now so that I don't have to put headphones on. So that's what your monitor modes do.