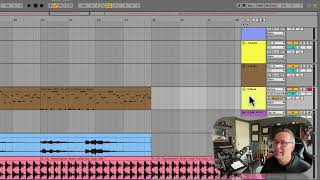
In this segment of J. Anthony Allen's Ableton Live 12 class, the instructor walks through the core track controls and mixer interfaces in both Arrangement and Session views. He explains the track activator (a mute-like button that toggles a track's playback), the solo function, and the record‑arm button, highlighting the distinction between MIDI tracks (which arm to receive MIDI input) and audio tracks (which arm to capture audio input). The tutorial then covers panning, demonstrating how left/right placement is heard in headphones, and introduces the send slots used for routing audio to effects, noting that additional sends can be added. Finally, Allen shows how to expand the compact “mini‑mixer” in Arrangement view into the full mixer, and points out that the same mixer layout appears in Session view, setting up the transition to the next part of the class.
Chapters
Okay, this number five is showing us the number of our track. So five, six, seven. But if it's yellow, that means that track is on, it's active. We call this the Ableton's fancy term for this is the track activator. I kind of hate that term, but whatever. It's the track activator. It's kind of their version of a mute button. Okay. Except it's backwards. So right now it's on. If I click it, it's off. Now we're not going to hear this track. Okay, so the track is active or not active. Okay. So you can see these ones up here. Like this one, track four, I've turned off. And the reason I did that, probably because I was doing something on it that I didn't like and I just turned it off and then eventually probably deleted it. Okay, here we have solo. That means turn everything off except for this track. So we're going to hear only this track. And then here we have arm to record. So this works a little bit different whether you're in an audio track or a MIDI track. But in a MIDI track, it basically means listen to MIDI devices. So I could play any MIDI device and we'll hear it this track. And if I hit the main record button up here, it's going to record onto this track. Okay. In an audio track like this one, if I hit record, this is going to arm this to record audio sound. So I hit this to tell it I want to record onto that track and then I hit this button to start recording. We'll spend more time, a lot more time on how to record with live in a little bit. For now, just know that if you're not hearing your MIDI track, make sure it's armed to record while you're playing something. In here we have our panning. We can move a sound left or right if you're not familiar with panning. Basically, if I go all the way left, you're going to hear this in your left speaker. If you're wearing headphones, you're only going to hear this in the left side. Now, some platforms that I put these classes on throw out panning information, which is kind of annoying, but let's try it. Here's how to know if you're hearing with panning. So I'm going to solo this track. So we're only going to hear this little synth riff. And if you only hear it in your left ear, then it's working, right? And then here's only our right ear. Cool. And then I'm going to put it back. C means center. We're hearing it equally in both ears. This ominous negative infinity is our sends. So we can send things down to. We have two sends by default and they are down here. And B, we can add more sends. We can add as many as we want and we'll get to that in a little bit. For now I'm just going to leave them at zero. Okay, so that's the main setup of our kind of our mini mixer in Arrangement view. If we want to get a full mixer in Arrangement view, we can easily do that by clicking this button down here. Okay, this is going to. And then I'm just going to make it nice and big. Oops. This is going to pull up our full mixer. And now this is the same one we see in Session view. So let's go to Session View and talk about the layout of that.