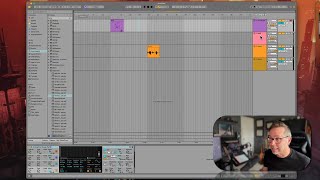
In this tutorial segment, J. Anthony Allen walks viewers through the process of recording MIDI in Ableton Live 12. He explains the distinction between MIDI data (represented as dots) and audio waveforms (lines), emphasizing that MIDI tracks produce sound only when an instrument or preset is loaded. He demonstrates how to arm a MIDI track for recording, which not only designates the destination for recorded notes but also routes incoming MIDI from a keyboard to that track for real‑time monitoring. The instructor clarifies that arming is required for live playback via a MIDI controller, but not for playback of already recorded clips. Finally, he signals a transition to recording multiple takes, setting the stage for more advanced workflow techniques.
Chapters
Okay, so let's record some midi. So in order to record midi, let's go up to a MIDI track. Let's go up to this first one. So this, in a way is simpler, but there's one tricky thing we need to address. Let's separate in our heads recording and hearing for a minute so we can easily record. We're all set up to record. All I need to do is arm this track to record by clicking right there. Okay. It works the same as an audio track. And now up here, I'm going to hit record. Okay. And now it's rolling. I can play some notes on my keyboard and you see them come in. Okay, there they are. Now let's listen to it. Nothing. We're not going to hear any sounds. And the clue to why is right here. You see these dots? Dots means data, lines means audio. Okay, so this is data. These are just a bunch of numbers. If I double click on this, we can see it here. This is saying, play this note, play that note, Play this note, play that note. It doesn't sound like anything. Just a bunch of math. So we need to convert this to sound that we can hear. In order to do that, we need to put an instrument on it. We are not going to hear anything until we put an instrument. So let's put some preset here. Sure. Just going to drag that preset right on there. Now if I listen to it sounds a little bit different. Pretty. So before I put that instrument on, I couldn't hear anything that I was playing in this track. I was just hitting notes. So if you want to listen to a track, it must have an instrument on it, otherwise it's just data. Right. You see that as soon as I put this instrument on here, the data dots turned into an audio signal. Right. Because there's now an audio signal there, not just data dots. Okay, let's look at this MIDI track. It's got data dots, meaning there's not an instrument on this track. Now, if I wanted to play some notes and listen to this track, I need to first put an instrument on it. Sure. Okay. And now if I played that some notes on my computer, I'm still not going to hear this track because it's not armed. Okay. Arming this track means not only does it mean when we record, we're going to record to that track. Arming that track also means that arming this track also tells live that I want my MIDI keyboard to go to that track. Right. Because my MIDI keyboard is technically hooked up to both of these tracks. So it's going to say, what do you want me to play? It's going to play the one that's armed. So now I'm playing this track. If neither of them are armed and I play my keyboard, I get nothing, right? I got an arm one to hear it. So if I want to listen to this track, I do that. If I want this track, I do that. But that's only for recording. If I want to hear them played back, then it doesn't matter. They're always going to play back if something's recorded onto it. Let's do this. Let's record on this. Okay. Now if I play this back, I'm going to hear both. Okay. So I don't need to have anything armed to record just to hear back what what is on the track to hear the MIDI clips play. But if I want to play in using a MIDI keyboard and have it play the sounds on that track, I need to arm it to record just to hear it. Okay, groovy. Let's move on and talk about recording multiple takes.