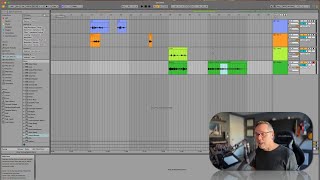
In this segment of the free Ableton Live 12 music production class, J. Anthony Allen demonstrates how to use the punch‑in/punch‑out recording technique in Ableton Live. He first merges multiple clips into a single track using the Command‑J shortcut to create a clean workspace. He then explains the historical concept of "punching in"—recording over a specific section of a take—and shows how to set punch‑in and punch‑out markers by converting a loop bracket into a punch region. By pressing record, Ableton records only within the defined bracket and stops automatically. Allen contrasts this method with the more modern comping workflow, stating that he now prefers comping because it allows selecting the best parts from multiple takes more efficiently, though the punch‑in method remains available. The tutorial is practical, step‑by‑step, and includes a brief live demonstration of recording a single spot.
Chapters
Now I mentioned a minute ago that this is kind of like punching in, if you're familiar with that term. But comping is a little bit different. So let's actually look at how you would punch in. It's pretty easy to do. Here's what I'm going to do. Just for demonstration purposes, I'm going to combine this into one track. Okay? So I'm going to hit, I'm going to highlight it and press command J. What that means is render this as a new clip. Okay? So this is just going to make a new clip. It's going to merge all the different segments together. You don't have to do this. I'm just going to do it to make things clean so I can see. Okay, now let's say right here I screwed up, okay? And I want to punch in the. Now if you don't know what this term means. In the old days we had when you were recording, you could, you might do a take of something and then if you screwed up like one note, you could do a take again. And there was a little controller and you would hit record right when you got to the spot and you hit it again to stop recording. And because sometimes it was just a really short amount of time, people got really kind of tense. So they would kind of punch this machine and they called it punching in and out. So you might do this whole thing again. And then we're only gonna record for this little bit and then we're gonna get out again. So here's how you do it. These are our punch in markers. So what I'm going to do is I'm going to take my loop bracket here and I'm going to put it around what I want. But up here, instead of saying loop, I'm going to say punch in and punch out. I can have it loop also, but I don't need it to. So when I hit record now, it's not going to record through this. It is going to record right here and then it's going to stop recording when we get past it. Okay, so let's do something just completely weird. Okay, here we go. So I'm playing. It's not recording now it's recording. All right, now it's out. Okay, so I just recorded that one spot. I didn't hit anything. I just set up the bracket, told it to punch in and out, and then I hit record right here and it starts recording right on that spot only. Now why would you use this over the comping method? To be honest, I would really only use the comping method at this point. I haven't used this punch in, punch out thing in a while because comping is just so much better. I can just play and then pick my favorite stuff. So there's not a huge need for this anymore. But if this is how you want to do it, then that's totally fine. It's still possible to you. Okay. If we want to hear the ugly thing I just created. Brilliant. Okay, so that's punching in, punching out.