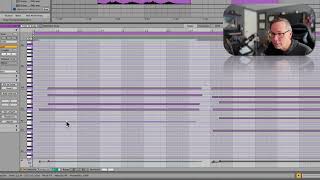
In this segment of the free Ableton Live 12 music production class, instructor J. Anthony Allen walks viewers through the piano roll editor, the primary interface for visual MIDI editing. He demonstrates how to open a MIDI clip, zoom and scroll within the editor, and explains the historical player‑piano analogy that underlies the visual layout. Allen shows how each horizontal line represents a note with a start and end point, and how to adjust note lengths, align chords to specific beats, delete stray notes, and use arrow keys for precise positioning. The most emphasized shortcut is Shift + arrow, which moves selected notes up or down an octave, enabling rapid pitch adjustments. The tutorial concludes with a quick playback of the edited MIDI to confirm the changes.
Chapters
Okay, let's go down here to the piano roll editor. Okay. So to get there, I'm going to go to any MIDI clip and I'm going to double click on it if it's not already open. Okay. If I want to see more of it, I can grab the little dark bar here and click and drag to make it nice and big. Now you can scroll up and scroll down in here just like before. You can put your mouse up here and do the click and drag thing. You can also do it over here on these notes to zoom in that way. Okay, so this is called the piano roll editor. If you've never seen one of these before, this is kind of emulating an old school player piano. If you've ever seen one of those, they were a piano that had that you would pump with your feet and it had air in it. And you would punch out these little holes on this paper that would spin. That's what your feet would pump. And if air could get through the little hole, it played a note. They were called the rolls were called piano rolls, and those pianos were called player pianos. Or sometimes they were called pianolas. Look it up. They're fascinating. You can still find them here and there. So that's kind of what this is modeled after. Now, this model of the piano roll editor is not unique to Ableton. You'll see this in virtually every professional audio tool everywhere, even non professional audio tools. If you want to represent notes, this is just how everyware does it. So each one of these lines is a note. Okay. So it has a start and an end. We can grab the ends and shorten it. We can grab the start and shorten it. So let's tidy up these chords. Let's make them so they all start right on this measure. One beat two line right here. So I'm just going to tuck these in a little bit now in that one, instead of tucking it in, I slid the whole thing over. That's okay. Do that too. Let's make these end right on beat three. So I'm going to drag them right up till the edge there. Okay, looks good. Let's do it with this one too. So I've got these two kind of stray notes here. I'm just going to click on that and press delete and delete. I can select all of these. I can use the arrow keys to move backwards and forwards and I can use shift arrow keys backwards and forwards to extend the length of it or reduce the length of it just going forward and back. Okay, so now just normal arrow keys back. Do that with this one, too, and it's just going to help me get it right on the line quickly. Now, some other things you can do with arrow keys. The most valuable arrow key for me while I'm actually producing music is if you click on a note, you can move it to a different note by going up or down. That's really handy. But to me, the most valuable thing is shift up will flip it up an octave. Okay, so you can say, I like this whole thing, but it's too low. Let's make it an octave higher. Shift up. Okay, still too low. Shift up. Down, down. So you can move things by a whole octave that way. And it's really quite nice. Okay, let's set this to end on beat four. Or, sorry, on measure four. So I'm just going to drag the end of these in. Now if we want to. And we got the stray one over here. I'm just going to delete. Okay, so let's just hear this now.