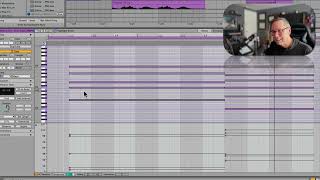
In this segment of the free Ableton Live 12 music production class, J. Anthony Allen walks viewers through the piano roll editor's velocity controls, explaining how each note is represented by a velocity dot that can be individually adjusted. He demonstrates flattening velocities for uniform dynamics, using the randomize function for varied expression, and how the color of notes reflects their velocity level. Allen then introduces the headphone (audition) toggle, showing how it enables real‑time listening to notes as they are moved or added, and discusses when to disable it, such as during bulk transposition with arrow keys. Finally, he previews upcoming videos that will cover new Live 12 features like the Transform and Generate tools and the scale/key‑aware settings, positioning these as extensions of the current workflow.
Chapters
Pretty. Now, if we want to adjust the volume of this volume in terms of MIDI is called velocity. And we've got velocity controls down here. This gives us some control. But the real velocity settings are these dots right here. They're a little hard to see. So I'm going to grab this bar above it and just click and drag to make it nice and big for us right now. Okay. So every note has a corresponding dot. So if I select this one, that's that dot. Select this one, it's that dot. Okay. I can click and drag to move it. Okay. Now, in the simplest way, velocity just means the volume. With the bottom here one being very, very, very quiet and the top 127 being as loud as it can go. Okay. So if I wanted this whole chord to be quiet, I could drag it down here, and you'll see the color kind of change of the note. That's a good indication of the velocity. So this is a little bit darker purple than this. Okay. If I want everything to be louder, I can go up there. And if you've got a situation where, like here, all these notes are slightly different velocity, and you just want to even them out, you can take them all and just smash them to the top and then pull them back down. That makes them flat. But also, if you want to just totally randomize your velocity, you can go down here and just hit randomize. And now they're all random. So this isn't what I'd want to do here, because in this case, that means some notes in this chord are going to be quiet and some notes are going to be loud, which isn't going to be a very good way to do a make a chord. Let's hear it. So, like, different notes are going to stick out. But I do like randomization features. So let's smoosh that all back to the top and then just set it right around there. Okay. One other important thing I want to show you in the piano roll editor before we leave here is this little headphone thing here. Okay. Now what that means is that is just like this one from the browser. Remember, in the browser, what that meant was, was I can audition clips, right? If it's on here, if I turn it on, I can audition notes. So if I move a note around, I can hear it, right? If I add a new note. There, I can hear it. If I turn that off when I make stuff, I won't hear it. So it's probably a good idea to turn that on so that you can hear what you're doing. I almost always have it on while I'm working. There's really no reason I can think of to turn it off. Unless. Well, there is one. Like, if you're doing this, select all and you're going to like transpose this up with the arrow keys. So I'm going to use an arrow key and I'm going to move it up a half step and then again that's not a great sound. You might turn it off to do that. But otherwise. Otherwise keep that on. Okay, so there's a whole bunch more to the piano roll editor and we're going to go into more of those things in the next five or six videos here. A lot of these things are new in Live 12, like the transform and Generate tools, which I love. Super fun. And some of them are just modifications of what we had before and that is true with this scale tool. So let's go and talk about how to use the scale settings and the key aware features of Live.