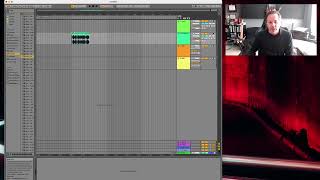
J. Anthony Allen explains how the grid system works in DAWs like Ableton, FL Studio, and Logic. Snap-to-grid keeps beat-based music tight, but should be disabled for ambient work. Always zoom in to verify clips are actually aligned, even when snapping is on.
Chapters
Okay, up next, let's talk about how we organize sound in our DAW application. Now, throughout this whole section, I'm going to be using Ableton Live, but you're welcome to use whatever you want. Everything that we talk about in this section, and actually probably from here on out till the end of the class, unless I specifically point it out, is true. And just about every professional DAW, and even not professional DAW, even like GarageBand, this is probably all still true. So you can use whatever software you want and follow along and you'll be just fine. So we talked about in the last section the kind of four different areas. We're going to focus in here on the timeline and we're going to talk about the grid. Okay. Every program works on kind of a grid system. So let me just throw something in here. I'm just gonna grab a little clip. Let me find like a drum beat. Sure. Throw that onto an audio track. How about right there? Okay. Now you can see that we have these little rectangles here, right? These might look different in the different software, but you can see that I kind of snap to them. I can't get in between those two things, but I actually can. We'll talk about that in just a minute. But when I talk about the grid, this is what we're talking about and it's the way that our software snaps into the grid. So that snap to grid thing means that we're going to stay locked into different spots here. Now this is generally good. If you're making any kind of beat based music, you want to be locked into the grid like that because that's going to keep everything nice and tight and it's going to sound good as long as you start it on downbeats, basically. More on that in a minute. If you're not making beat based music, you don't want to be on a grid. Right. If you're making more abstract music, maybe ambient music, anything like that, you want the freedom to be anywhere you can be. So you would turn off the grid. Now this is going to be different in any program, but for Ableton, I'm going to control. Click anywhere on the grid, get this menu and then go to off. Now you can see those grid lines are still there, but they're dotted lines. And I can just put stuff wherever I want. Right. And I can zoom way in and just really put things where I want. Now look at this. This is one of the biggest problems that people do when they're just getting started out. And that is they think they're on the grid. If they're not snapping to the grid, they might do something like this. Where sure looks like I'm on the grid right there at that 20. Right. But if I zoom way in, I am not on the grid. So that is going to make problems if I'm doing beat based things. So always zoom way into your grid and make sure you're right on it, even if you're not snapping to it. If you want to be on the grid, get right up on there, zoom in as far as you can, make sure you're right on that line. Then when I zoom out, I'm there. Okay, so let's talk about what this grid actually is. So first let's talk about the kind of the horizontal element of the grid, and then we'll talk about the vertical element.