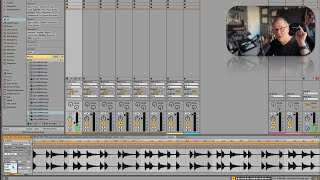
J. Anthony Allen shows how to set up looping clips in Ableton Live's Session View. Learn to enable loop mode, adjust loop length with the loop brace, use launch settings like trigger and toggle, and read the visual pie indicator to cue loops for live performance.
Chapters
Okay, let's talk about setting up one of these clips so that it is exactly how we want it for our imaginary little spinning record. Okay, let's go back to this clip. So I'm just going to stop everything and hit play here. Okay, this is familiar to us. We've already messed with this. Okay, so first let's make sure this loops. So a lot of things by in session view by default will loop. But because, because we pulled this over and it wasn't set up to loop in arrangement view, it's not set up to loop here. So in order to get it to loop, all we have to do is turn on loop down here. Okay, now it's going to loop. I'm going to turn it down a little bit so I can talk over it. So we have some of our same settings here. We have warp settings, you know, pitch volume. This should be familiar to us by now. We also have these launch settings. We can do some special things with how we launch this clip. We can say use our global launch setting. That's what this global thing means here. Legato means that if we launch another clip, it's going to pick up where this one left off. You can adjust the velocity and we can set a different type of launch method. Trigger means we're going to hit it and it's going to start going. Gate means while I'm holding the play button down, it's going to play, but as soon as I let go, it's going to stop playing. Toggle means I'm going to press it once to start it playing and again to stop it playing. And I'm not sure how repeat is different than trigger just with a general loop, but. But. Okay, so what if I wanted this to loop only half as long as. Okay, what if I wanted this to be just a four bar loop? Okay, All I have to do is find my loop brace, which is this, and pull it in to be half as long. Okay. Okay. Now what if I want this to have a little fill. What if I, when I launch this, I. I want it to go ta oom ba boom and then start on the downbeat. Right? Here's what I can do. This little arrow right here, this means where is this going to start from when I launch it? Okay, so 99% of the time we leave that at the beginning. But it doesn't have to be at the beginning. I could put it right here. Let's put it right here. Now I take that back. Let's put it right here. So now when I launch this. We're going to hear beat four and then beat one. Or, sorry, we're going to hear the fourth measure, and then it's going to go back to the first measure, and then it's going to loop throughout the whole thing. Okay. So when I launch it, watch what happens. Right? So that's a way to get a little fill in the beginning of it. Okay, I'm going to move this back to the beginning so I can make my loop as short as I want. Here's just one bar. Sure. Extend it open. One thing you'll notice in Session View is that we have this little pie right here that's just kind of a visual cue to tell us when the beginning of the loop is coming around again. If I make it longer now, you can see it. So when you're performing and you're doing a bunch of stuff on all at once on stage, these little pies are handy to tell you when the ending of the loop is going to come and so that you're ready to do the next thing that you plan on doing. Okay, let's talk about setting up some strange loops, like a loop on beat two. This is a good way to understand how Session View actually works.